

In the traditional darkroom, you could adjust the relative lightness or darkness of parts of an image using processes called dodge and burn. If you were dodging or lightening the image you would expose parts of the image for a shorter length of time to lighten them. If you wanted to darken a portion of the image you would expose it for a longer period of time so that more light would be applied to the photo paper with the result that you would be darker.
The terms dodge and burn continue to be used in software today and Photoshop Elements has a Dodge tool and a Burn tool which are both accessible from a toolbar position which they share with the Sponge tool. The disadvantage of using the Dodge and Burn tools as they are shipped with Photoshop Elements and, indeed Photoshop, is that these fixes are designed to be made to the original image and the cannot be made on a separate layer and then, for example, be blended into the image.
The result is that if you apply a Dodge or Burn fix and later determine that you do not like the result or want to adjust it, it will be difficult to undo the changes that you have made.
In post production, dodging and burning are best applied to a separate layer in the image so that they can be undone, edited or blended at a later date.
Here is a method dodge and burn an image in Photoshop Elements which works the same way in Photoshop. It involves creating a layer on which the dodge and burn process is performed. It also takes advantage of a special characteristic of the Soft Light blend mode. This is a different dodge and burn method to that which Food blogger Danny Jauregui used in his recent post.
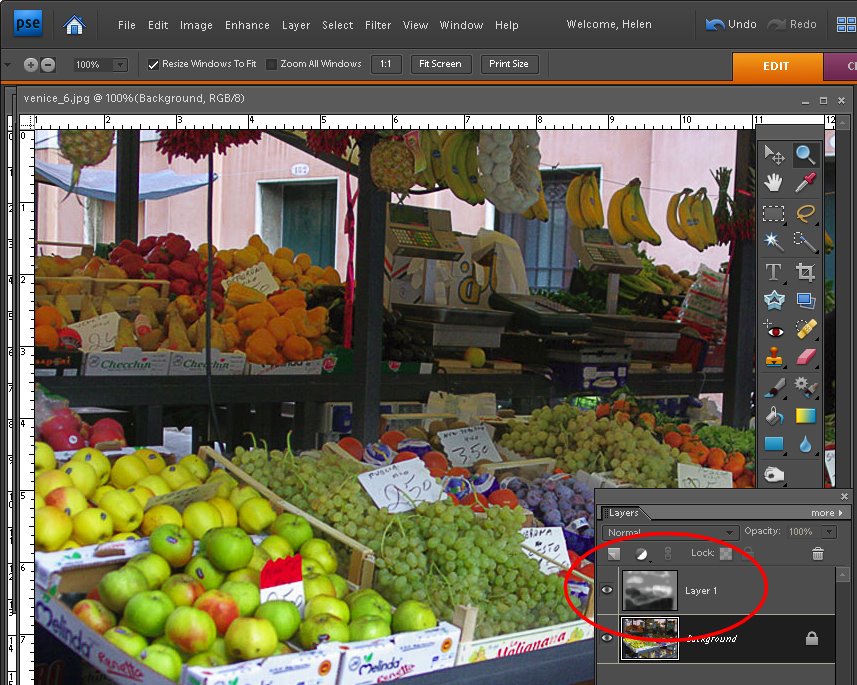
Step 1
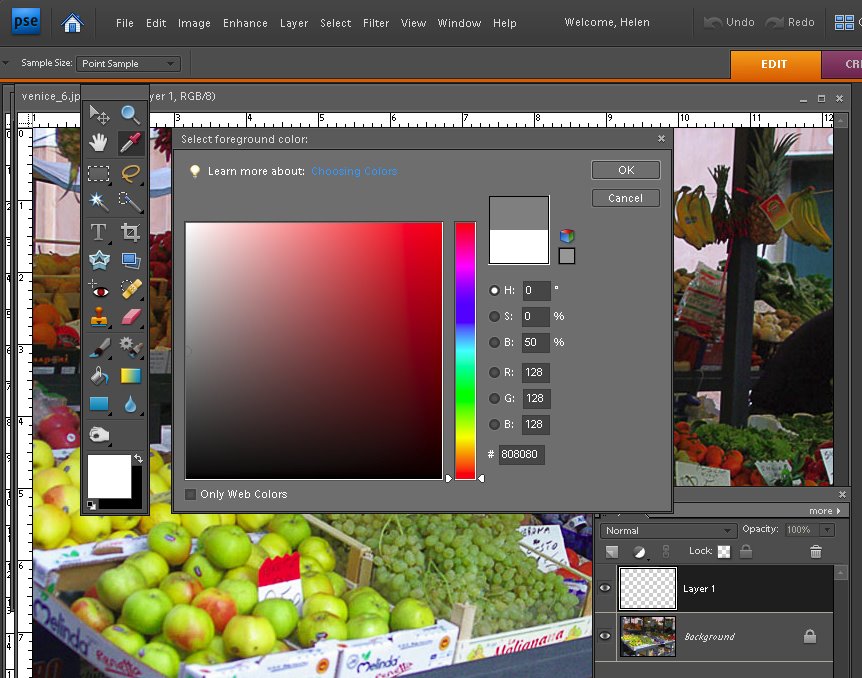
Open your image in Photoshop Elements (or Photoshop) and add a new layer by choosing Layer > New > Layer and click Ok.
Click on the foreground color swatch and set the R, G, and B values each to 128 and click Ok.
Step 2
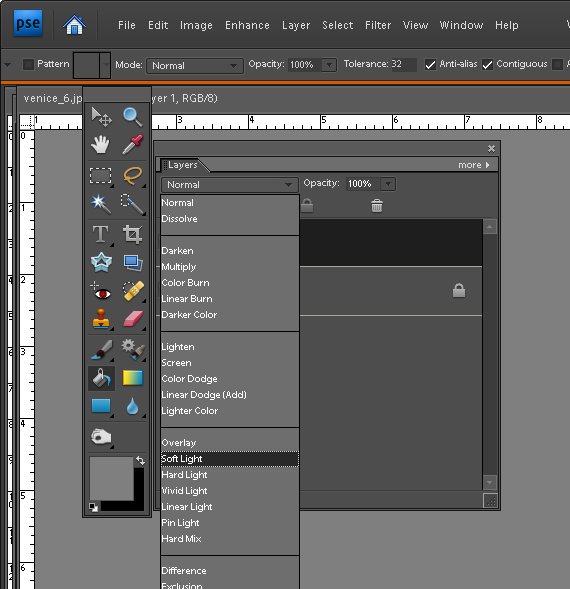
Click the Paint Bucket tool in the tool list and click on the image to fill the layer with the gray color. You can also press Alt + Backspace (Option + Delete on the Mac) to fill the layer with the foreground color.
Step 3
Set the layer’s blend mode to Soft Light. The result will be that you will see your image just as it was when you opened it.
The Soft Light blend mode can be used to lighten or darken an image. If the color on the top layer is darker than neutral grey the image on the layer below is darkened and if it is lighter than neutral grey the layer below is lightened. When you blend with neutral grey, nothing happens. Here we have filled the layer with neutral gray (each of the RGB values are 128) so you see no change to the image.
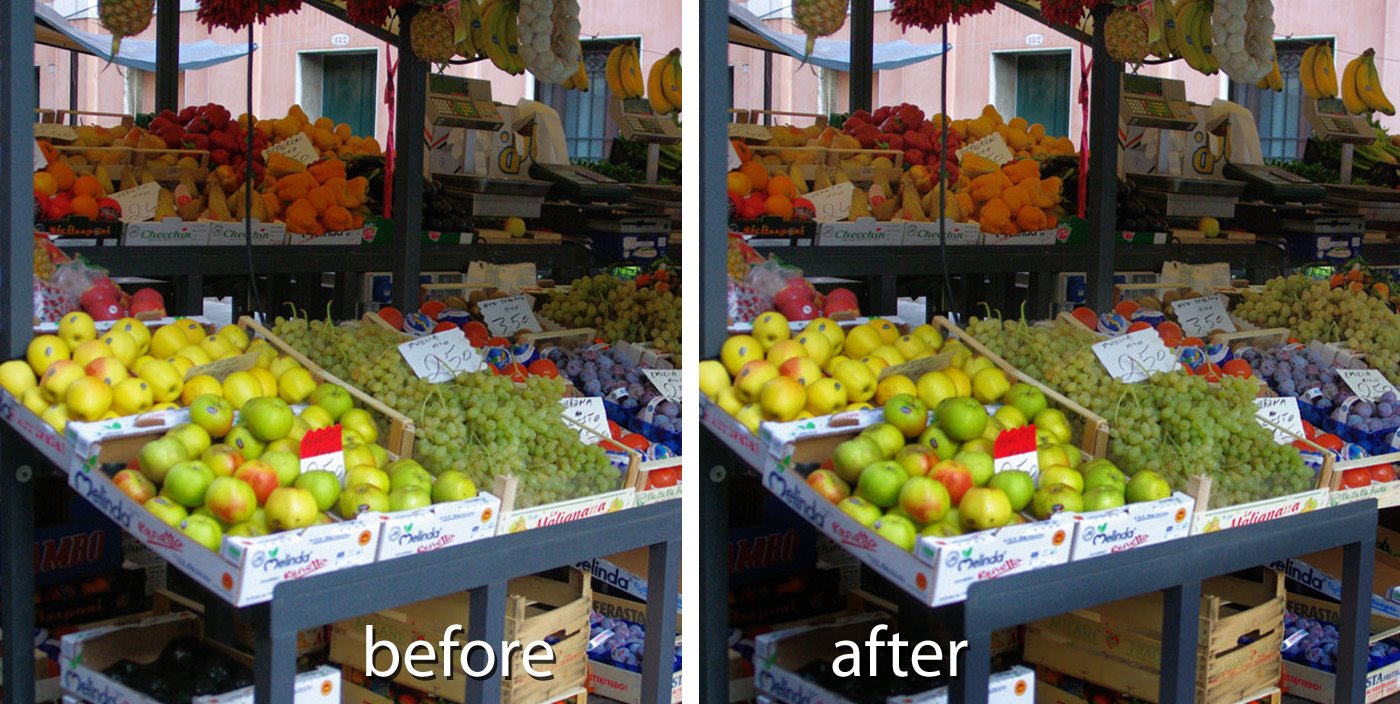
So, if we now paint on this top layer with white the image will be lightened and if we paint with black it will be darkened. This is the equivalent of dodging and burning on the image.
Step 4
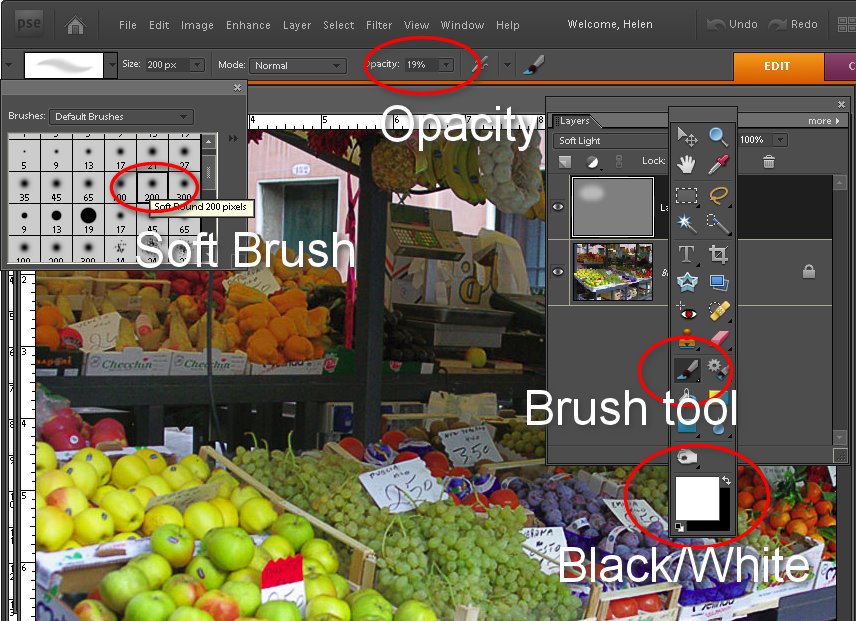
Select the Brush tool and select a circular soft edge brush adjusting its Opacity to around 25 percent. Adjust its size by pressing the [ or ] key on the keyboard. Set the foreground and background colors to white and black by pressing the D key and then the X key. Paint over the image on this top layer in white in those places that you want to lighten the image below.
For those parts of the image that you want to darken, paint over them with black.
If desired you can create one layer for burning and a second one for dodging. This will allow you to alter the opacity of each layer separately so you can subtly adjust the strength of the lightening or darkening applied.
To ensure that the fix remains changeable, save your image in a format that saves the image layers such as .psd.
nice blog – I've put it in my favourits.
I think an even shorter way of creating a neutral grey layer (blendmode 'soft light' indeed works fine) is to click the "new layer" button, when holding the alt-key. in the dialog box, choose soft light and mark the neutral grey box.
I've also been using this technique to dodge in burn in these neutral grey layers; it is indeed a good idea to have two layers at your disposal, one for darkening 'burning) and one for lightening (dodging).
Keep posting stuff like this i really like it