

A few years ago the most complex photographs most of us took were photos of the kids birthdays and our own holidays. These days we’re more likely to be taking photographs that in the past would have been the work of a professional photographer. If you have a website or if you sell in online auctions, you’ll have confronted the issue of photographing things so they look their best and present well when displayed on the web.
When capturing images for the web, some of the work can be done in your image editing software but most of it needs to be done in camera. It’s more efficient and more effective to shoot right to begin with rather than have to fix up problems later on.
Location, location, location
Start by finding a good location to shoot in. For smaller objects you can generally shoot indoors on a clutter free tabletop. A sheet of paper taped to the tabletop and which extends up all the way behind the object will provide you with a seamless background the technical term for which is a sweep. This is exactly what a professional photographer will use only their version will be make of heavy plastic and yours will be paper. You can also use a heavy fabric such as upholstery fabric – provided it isn’t crushed or creased. Hang the paper or fabric or tape it into position and sit the object on it.
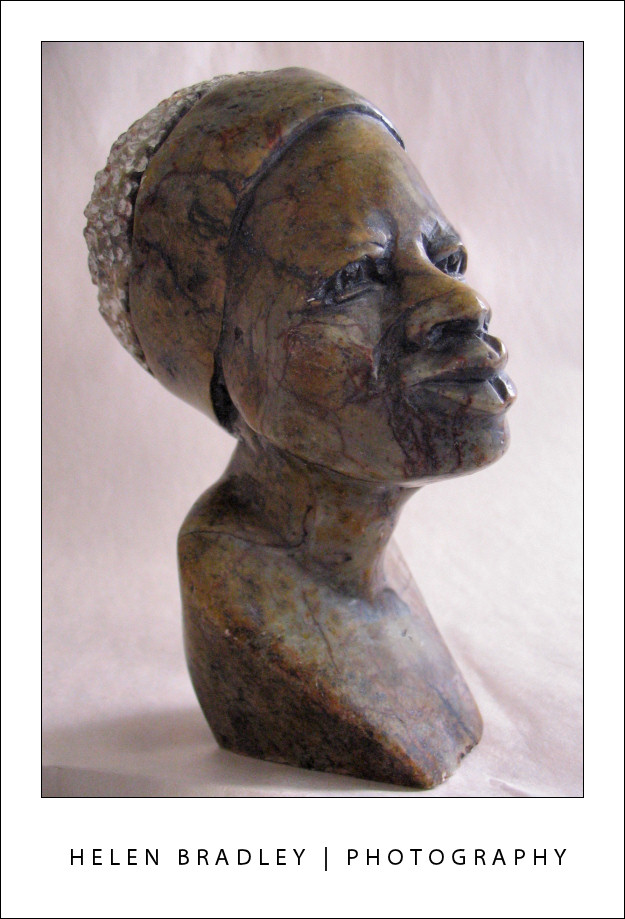
This statue was photographed in a light place indoors with a sweep made from a sheet o paper taped to the wall.
Check in your digital camera’s LCD screen to make sure that your sweep extends to cover the entire area behind the object and in front of it so you can capture and later crop the image without any surrounding area showing.
Where you are photographing small objects such as for online auctions or where the size of the object is important, include a coin or ruler in the photograph. This way the viewer can ascertain the relative size of the object from the visual clue you have provided.
Image size
For shooting web images, you don’t need to shoot large images because the size of images required for most web images is quite small – anything more than around 1,000 x 1,000 in size will be more than you need. You can configure your camera to shoot small images or resize in your software later on.
Use Macro mode
To shoot small objects, switch your camera into Macro mode which is indicated on the camera by a small flower icon. You use macro mode so you can get the camera close to the object and so it can still focus. If you don’t use the macro setting, chances are that the shot will be out of focus as most cameras cannot focus up close if you use any other setting. Make sure to back off the zoom too – most cameras won’t focus in macro mode with the camera zoomed in.
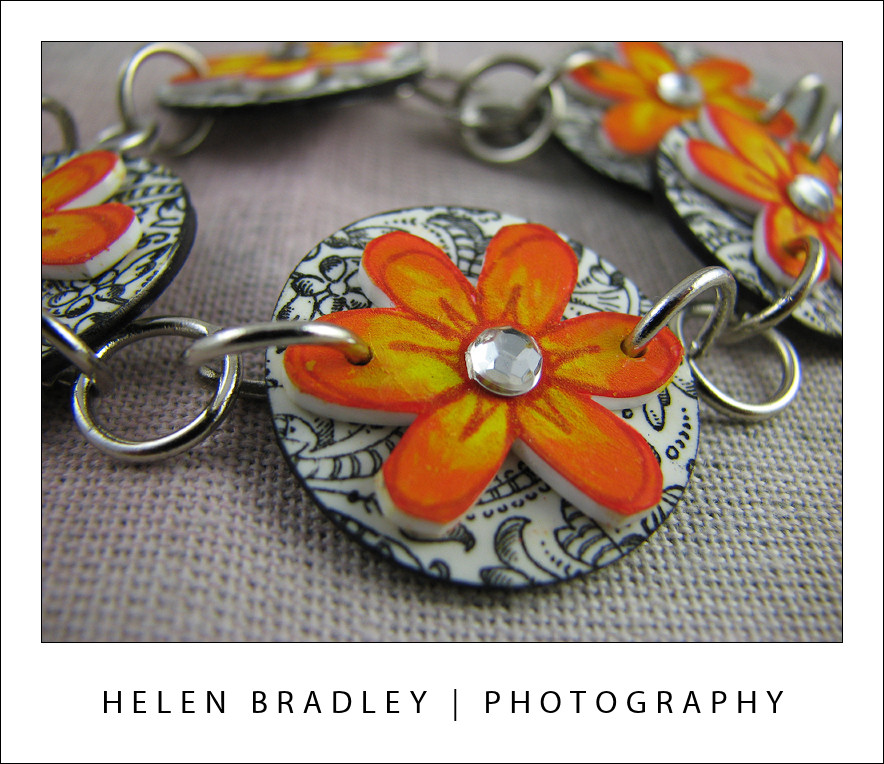
Using the macro feature on your camera give you a nicely focused area with the rest of the image out of focus.
Get in close
Get in close and fill the viewfinder with the object so you capture as much detail as possible. If you’re using standard household lights you will need to adjust the camera’s white balance setting so that the image doesn’t have a colour cast. The light supplied by household globes is coloured and will colour your images if you don’t correct for it and it’s easier to do this when you’re capturing the image rather than later on. Avoid, where possible, using a flash as the image will be blown out – if you have to use a flash, place something over it so the light goes in another direction and not direct onto your object.
Depth of field
One benefit of the macro feature is that generally captures part of the image in focus and the rest nicely out of focus. For this to be successful make sure that the portion of the image in focus is what you most want to show clearly. To see what will be in focus, press the shutter half way down and watch to see what is in focus, if this isn’t correct, move the camera so that the part of the object you are interested in is in the centre of the viewfinder and press the shutter halfway down. The move the camera to recompose the image and finish by pressing the shutter the remainder of the way.
Lightboxes rock!
If you are doing a lot of small object photography, consider purchasing a light box and some special daylight balanced globes. A small collapsible studio like this will make the task of photographing objects a lot easier – the light will be diffused by the light box, you won’t have to adjust for colour and you can photograph anytime day or night. If you don’t have a light box, take the object outside or place it in a well lit area of your house making sure that the area has a neutral background. If you use the macro feature you can still get a good image with a nicely blurred background.
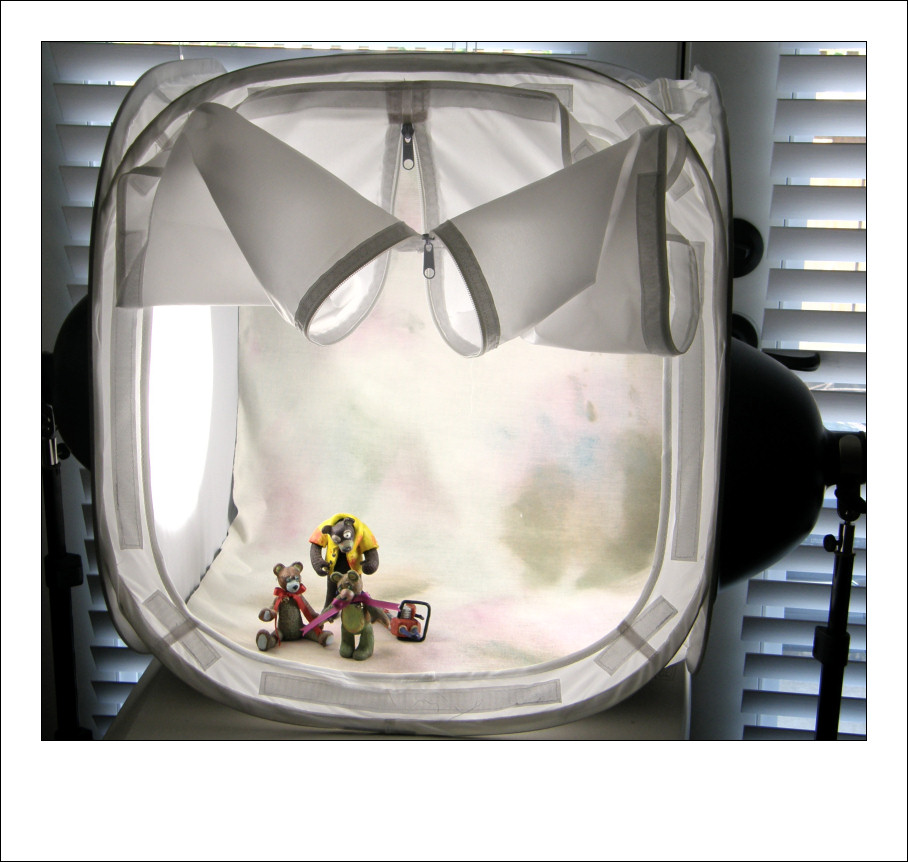
A light box like this is a great way to capture photos of small objects for the web.
While photographing objects for the web is challenging, armed with the right tools and knowledge of the features of your camera that are there to help you, you can get some great results.
Thank you! This is exactly what I was looking for
to help me photograph my rose bead jewelery. Looking forward to reading your other posts. Ruth