

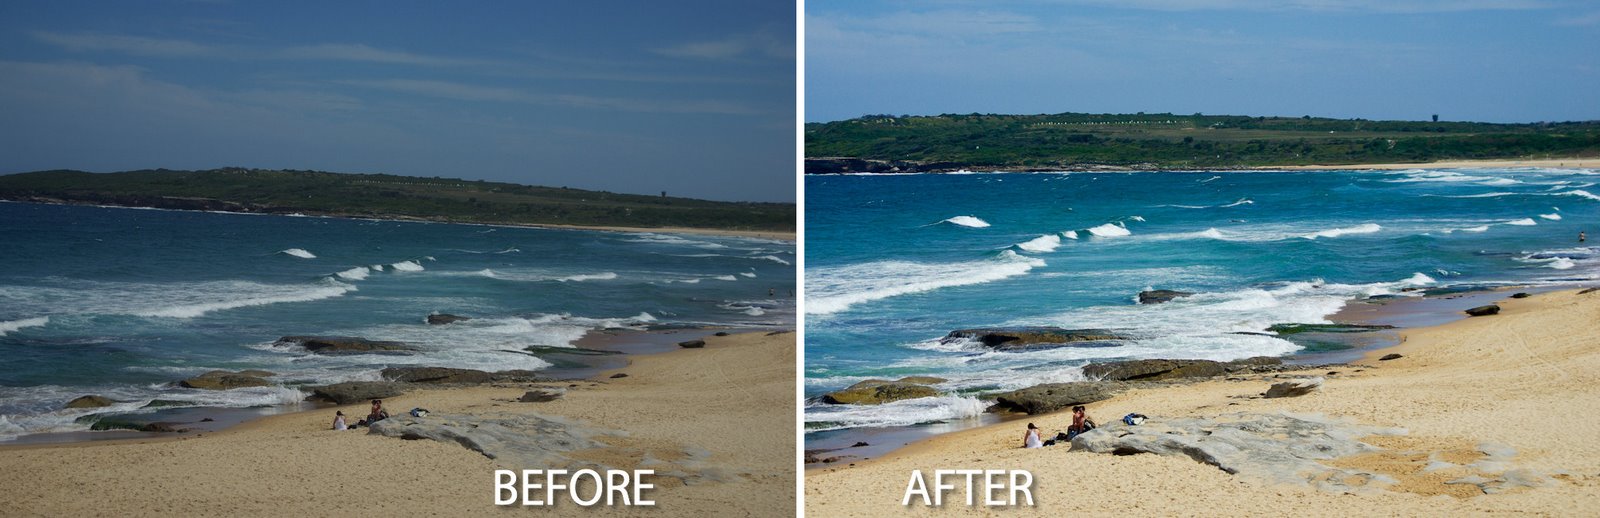
Whether it’s a photograph of mom that you’re sending to her or an image that you’re preparing to print, most photos can use some fixing before they’re ready to be shared or used.
Here’s a quick and easy Lightroom workflow that I apply to most every day images before sending them to family and friends, posting them to Flickr or my blog or printing them for a paper based photography project.
If you’re new to photo editing or to Lightroom, this step by step process should get you on the way to fixing your images.
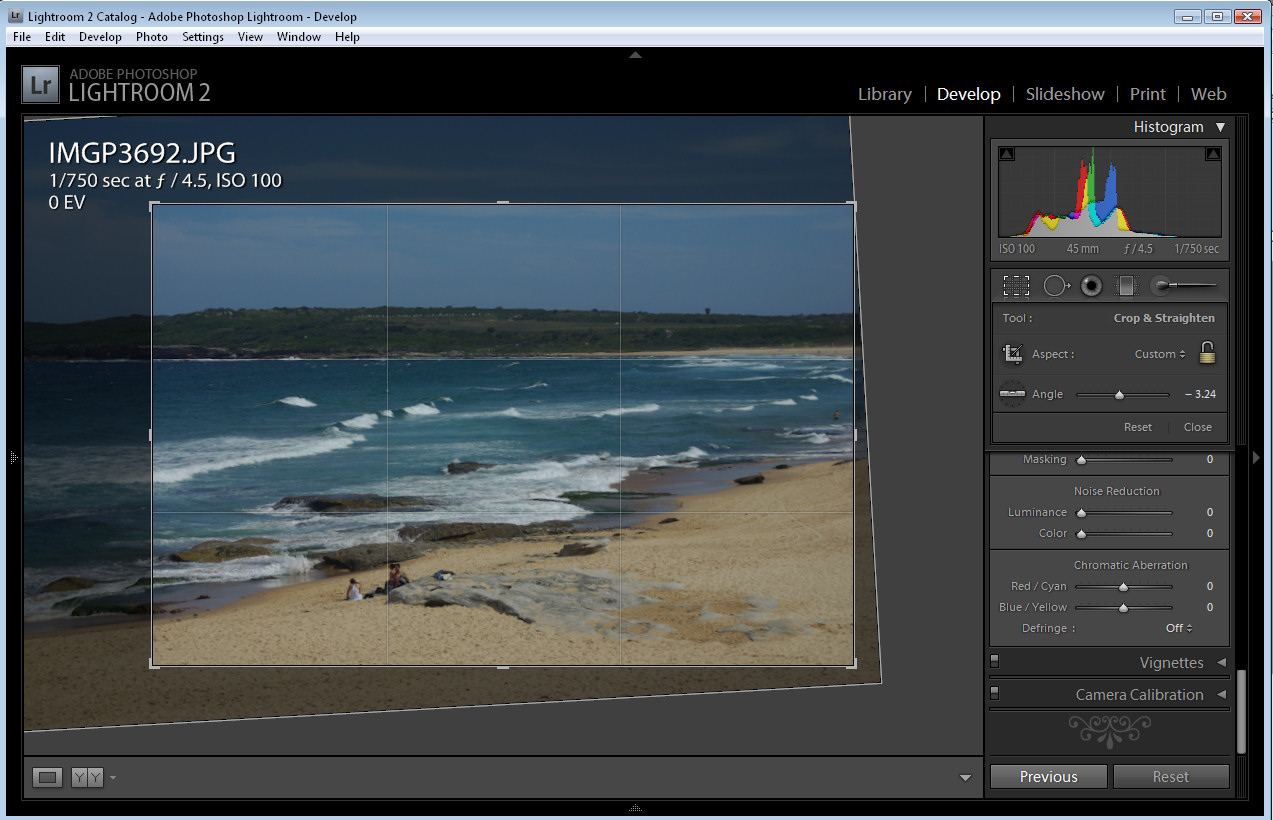
Step 1
The first step to fixing an image is typically to straighten and crop it so that you remove any areas that you don’t want to include in the final image.
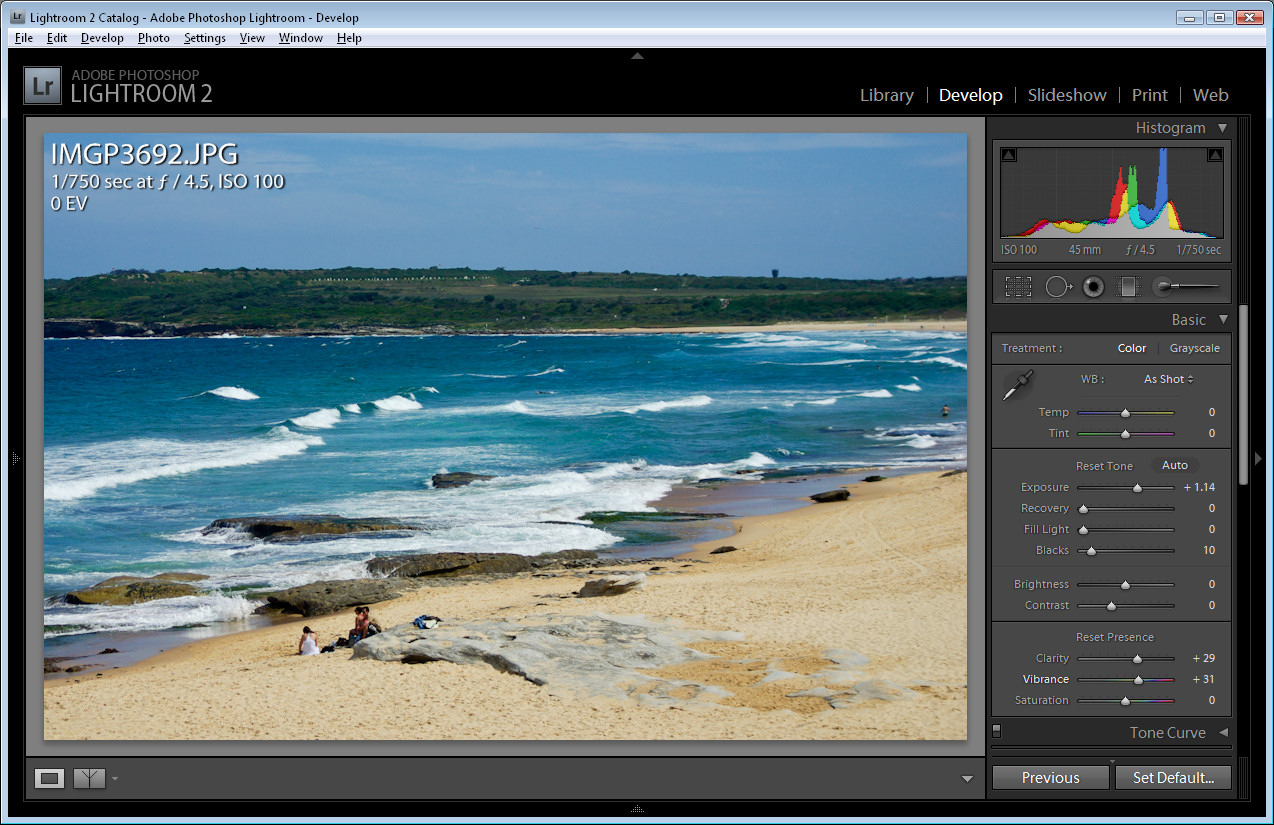
To help you apply the rule of thirds to your crop, in Lightroom the crop grid, by default, shows a ‘rule of thirds’ grid over your photo.
Place an object of interest in the photograph over the intersection between the gridlines or place the horizon or another strong horizontal line along one of the horizontal lines to achieve a pleasing composition.
Here I’ve cropped and sized the image to place the waterline along the top line of the grid.
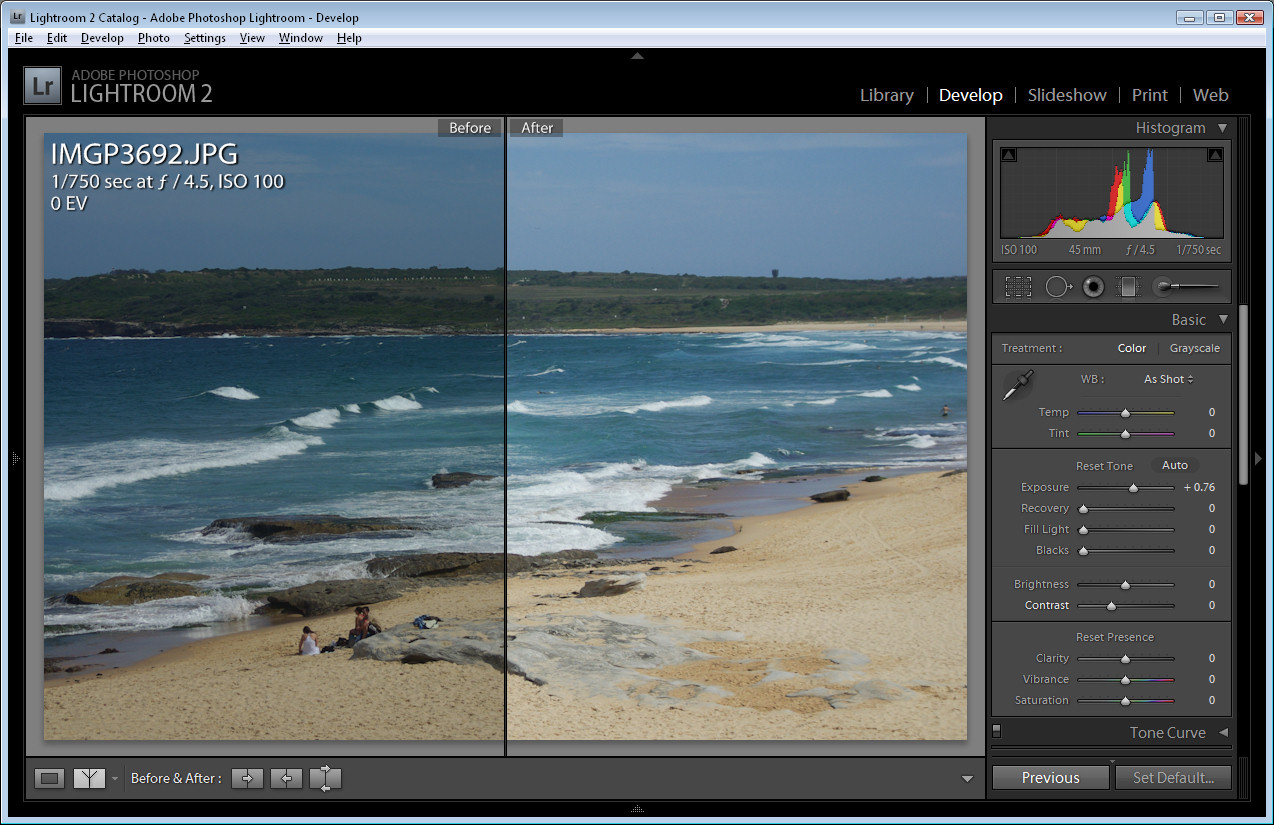
Step 2
Adjust the Exposure by dragging on the Exposure slider. This image is a little underexposed and the histogram falls well short of reaching the far right of the chart area. Increasing the Exposure fixes this.
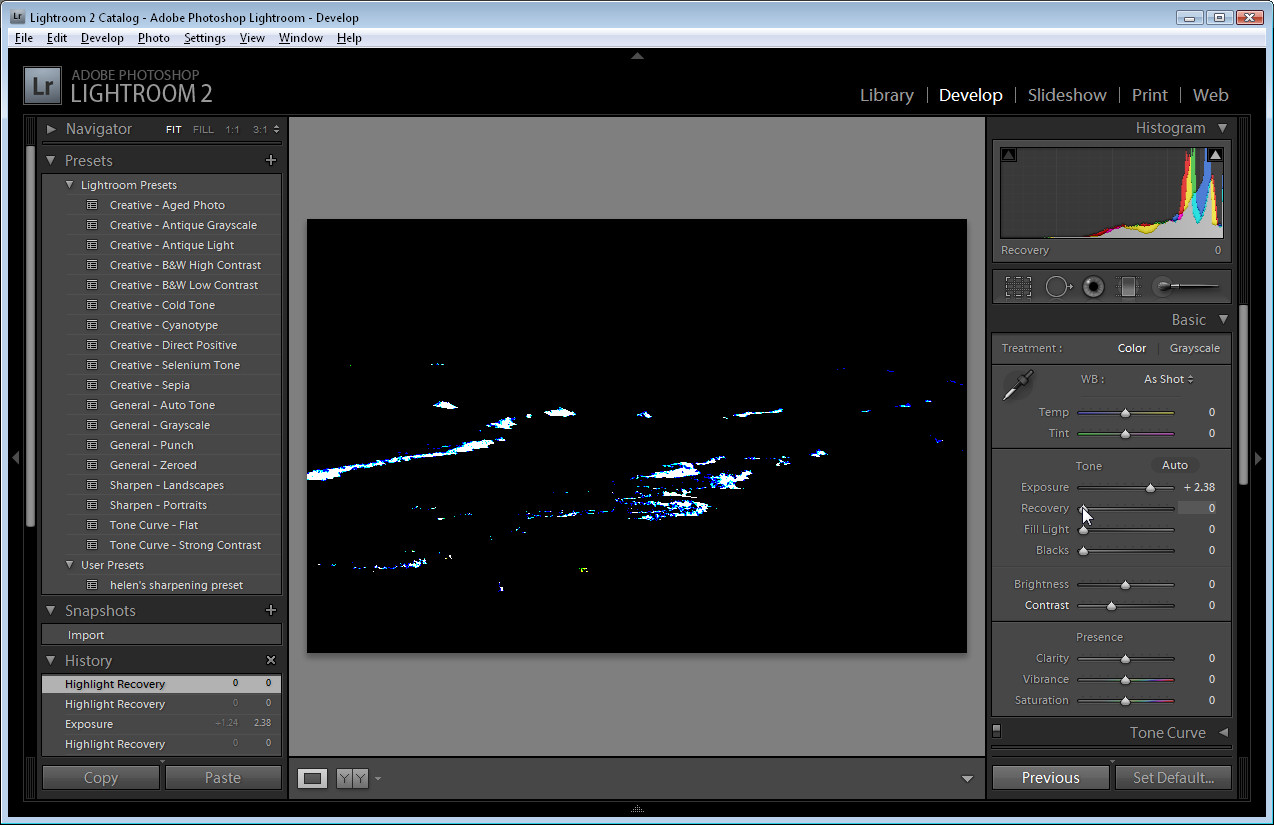
Step 3
To test to see if you need to use the Recovery slider to recover blown highlights, hold the Alt key (Option on the Mac) as you click on the Recovery slider handle. If you see light areas on the image, drag to the right to recover them.
Here I artificially increased the Exposure before doing this to show you what the image will look like if you need to use the Recovery slider. If you see something like this on your image and if it is nicely exposed, drag the Recovery slider to the right to remove/reduce these areas.

Step 4
Hold the Alt key (Option on the Mac) and drag the Black slider to the right until you see the smallest hint of black appearing in the image. You use this slider to ensure that your image has some blacks in it.
By now the histogram should extend to the very left and right of the chart area ensuring that your image has a good tonal range.

Step 5
If you have some areas that are clipped you will see white arrows in the histogram area. You can hold your mouse over these to see the clipped areas on the image. If areas are clipped you will have blown out highlights or plugged shadows which are generally undesirable.
Here I have over adjusted the Black Clipping slider so there are some plugged shadows that you can see colored blue on the image.

Step 6
You can use the White Balance tools to adjust the white balance in the image. Drag the Temp slider to the right to add warmth to the image or to the left to make it colder. Dragging to the right warms the image by adding peach/orange tones to it and dragging to the left cools the image by adding blue tones.
If you’re shooting in RAW or DNG then there will be a range of options available from the White Balance dropdown list.
Here I’ve added a lot of warmth to the image to show what is possible.
Step 7
You can also adjust Brightness and Contrast although I prefer to skip these adjustments and add some Clarity to adjust and sharpen the midtones and some Vibrance to boost the color in the undersatuated areas in the image.
From here I would sharpen the image and it’s ready to go.
In a future post I’ll explain the basics of sharpening in Lightroom.
Post a Comment
Please feel free to add your comment here. Thank you!