

One popular technique that you can apply to your photos is to turn a regular photo into a pencil sketch. Here’s a technique for doing this that uses a process for extracting lines from an image that I’ve posted about before. To see the process explained in detail visit this post: Extracting lines from a photo
http://www.projectwoman.com/2009/02/photoshop-extracting-lines-from-photo.html
Open the image and duplicate the background layer. Remove the saturation from this new duplicate layer by selecting it and choose Image > Adjustments > Hue/Saturation. Drag the Saturation slider to -100 and click Ok.
At this stage if the image appears to be lacking some contrast then adjust it by choosing Image >Adjustments > Levels. Adjust the levels in the image by dragging the sliders under either end of the chart inwards to darken the darks and lighten the lights and adjust the midtone slider to get some good contrast in the image. Click Ok to accept this.
Right click the top layer, choose Duplicate Layer and click Ok. You have now have two identical layers at the top of the layer stack. Select the top most layer and press Ctrl + I to invert this layer so it looks like a photo negative. Set the blend mode of this layer to Color Dodge. This makes the image white or mostly white. With this top layer still selected choose Filter > Blur > Gaussian Blur and adjust the blur radius until the edges of the image appear. Select a value that gives you good edges (ignore that they are too light and focus on the lines and shading), and click Ok.
Click the topmost layer and press Ctrl + Alt + Shift + E to create a flattened version of the image on a new layer but without losing the existing layers in the process. Set the blend mode of this layer to Multiply. Duplicate this top layer two or three times until the image gets darker. When you achieve the result you want, select the topmost layer and press Ctrl + Alt + Shift + E to create a new merged layer, while keeping the layers below too.
You’re now ready to convert this image into a sketch. 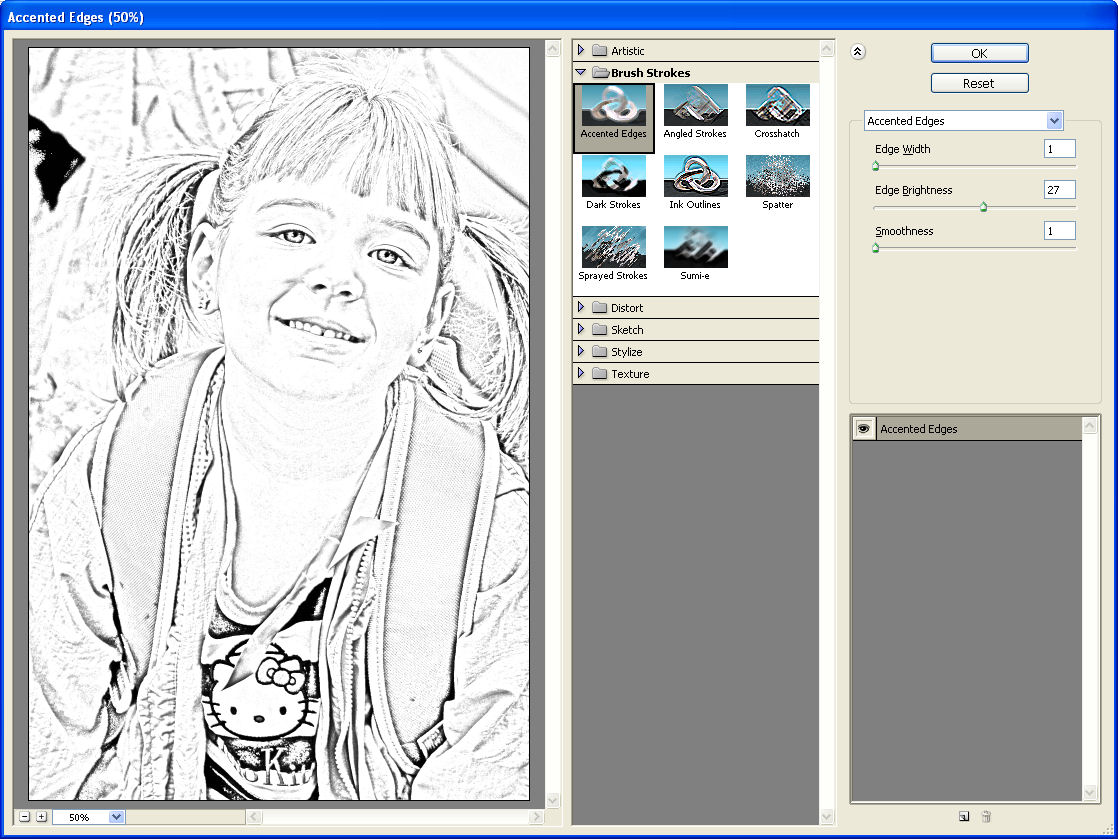 Step 1
Choose Filter > Filter Gallery > Accented Edges. Set Smoothness to 1 and adjust Edge Width to a value of 1 or 2. Set the Edge Brightness to a value that ensures detail and texture in the image but without too much distracting grey shading. Click Ok.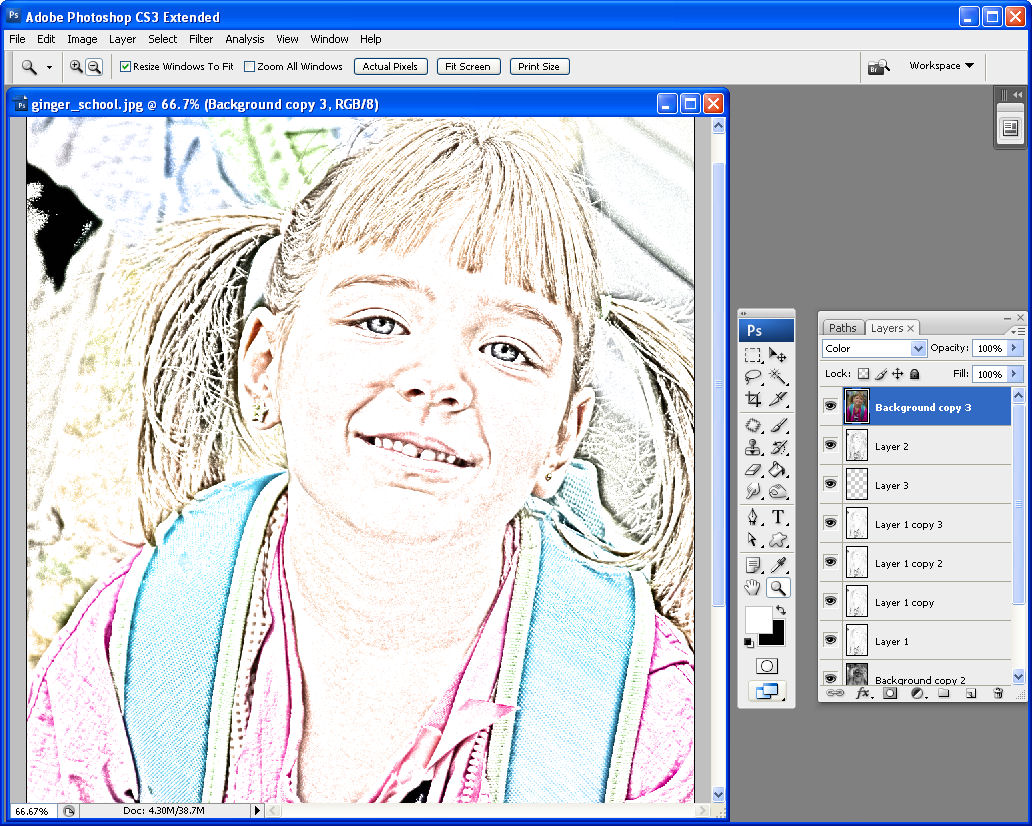 Step 2
Right click on the background layer and choose Duplicate Layer and click Ok. Move this duplicate background layer to the top of the layer palette and set the blend mode to Color. Add a new blank layer below the top two layers and fill it with white. 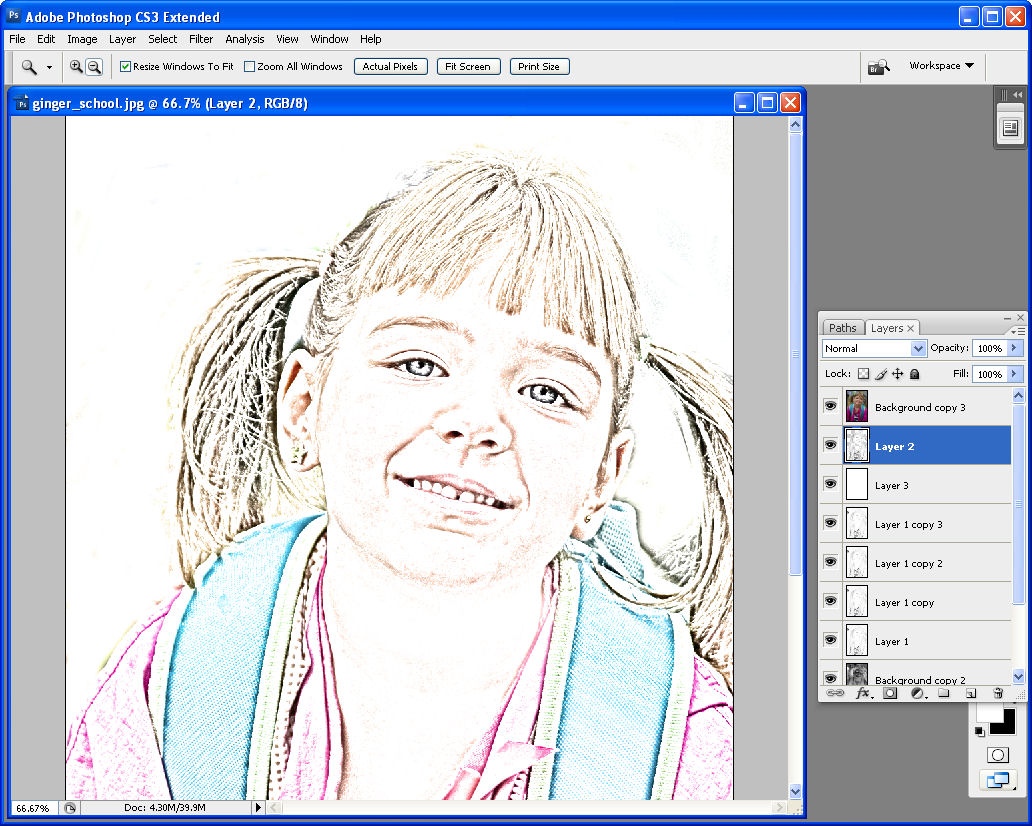 Step 3
Select the Eraser and select a soft brush. Select the second layer down from the top of the layer stack and erase any areas of the image you don’t want to appear. This technique can be used to remove excessive shading and any unwanted background.
Post a Comment
Please feel free to add your comment here. Thank you!