Wednesday, November 13th, 2013

Google Drive Change File Ownership

So you’ve decided of your documents is better of in somebody else’s hands. Maybe you prepared the document for a colleague with the intention of handing it off to them later, or maybe you’re just offloading some of your work. Whatever the case, Google makes transferring ownership of your files extremely simple.

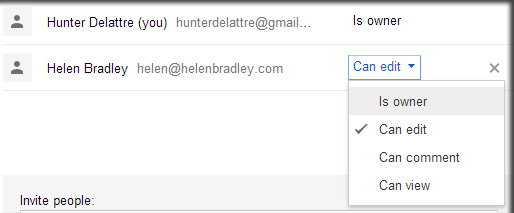
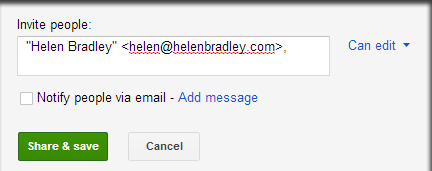
To begin, you must first share the file with its new owner. Either click the blue share button in the top right corner of the document, or select File > Share…. When the share menu appears, enter the new owner’s email address and press Share & Save to share the file with them.

Their address should now be listed in the share menu. Click the can edit box next to their name, select is owner, then click Save Changes. The new owner will be notified by email about the ownership change, and you will still have editing privileges as long as the new owner allows it.

Helen Bradley

Sunday, November 10th, 2013

Delete a brush in Photoshop

Tidy up, rearrange and delete brushes in Photoshop

A reader just contacted me to ask how to delete a brush in Photoshop. It is an interesting question and one worthy of a post I think!

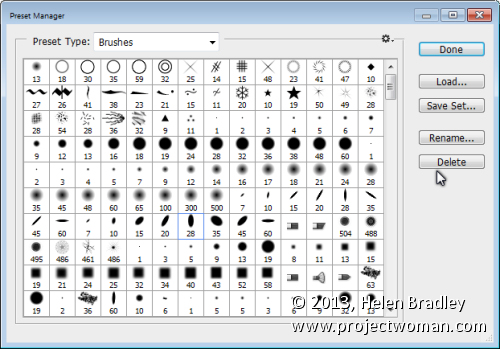
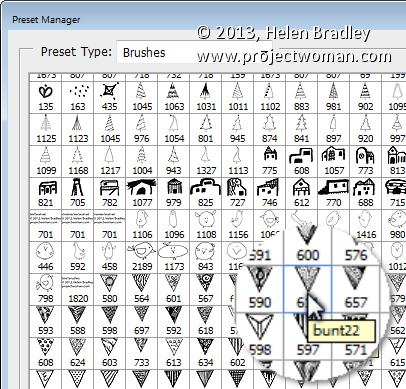
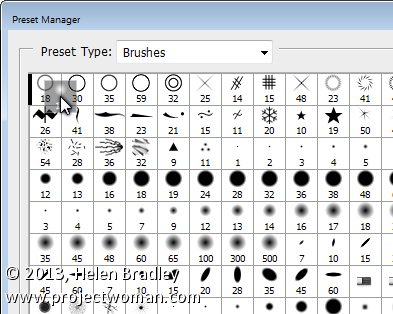
To do this, choose Edit > Presets > Preset Manager to open the Preset Manager dialog. From the Preset Type drop down list choose Brushes to view your brushes. Now you can click a brush to select it – it’s hard to see but it does get a narrow blue line around it. Click Delete to delete it.

Now, something else that is really handy about this dialog is that  you can also move brushes! So drag a brush and you can move it to your chosen place in the panel. So, you can put those brushes you use most often at the top of the Brushes panel where they are nice and handy.


Helen Bradley

Sunday, November 10th, 2013

Google Docs Search the Menus

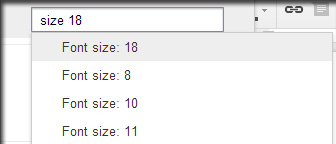
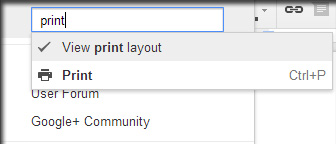
Sometimes you know what you want but you don’t know where to find it. Google Docs’ menus are pretty simple, but the Search the menus tool can make menus entirely obsolete. You can find this search tool under the Help menu, but it can be more easily reached by pressing Alt + /.

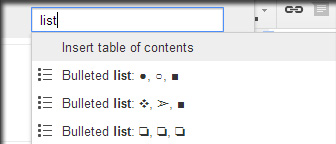
This search tool is extremely powerful. Type anything related to what you want and it’s almost guaranteed to appear, from basic settings to specific font settings. Search “math” and you’ll see the option to insert a new a equation, “double” will yield the double line space setting, “list” will provide many different types of lists you can insert.

Almost every setting can be tweaked from this search menu. Next time you’re lost in the settings menus, just pressing Alt + / and find what you want in seconds.

Helen Bradley

Friday, November 8th, 2013

Depth of Field – how to use it in your photography

Once you  know how to achieve  different depths of field, the question then becomes when would you use this in your photography?

Once you understand how you can achieve different depths of field in your photography – the question then becomes when would you use this knowledge to craft better photos?

Portraits and a shallow depth of field

There are a number of situations where it is a good idea to have a shallow depth of field and one of these is for portrait and pet photography. In this case you will want to remove any distracting background from around your subject. When the background is cluttered or distracting, a shallow depth of field helps you to isolate the subject from the background.

To achieve this effect, you would do one of these things or a combination of them:

1    Use a zoom lens and zoom in to your subject,

2    Get closer to the subject, and

3    Set your camera to use a large aperture, such as f/2.8 – f/3.8.

When you do this, take care to focus carefully on the subject. One disadvantage of working with a very shallow depths of field is that the amount of the area in the image that is in focus is very small so if you don’t get your focus right, your subject will be out of focus. You need to make sure that what you want to see in focus is the area you are focusing on.
Photographing flowers and products

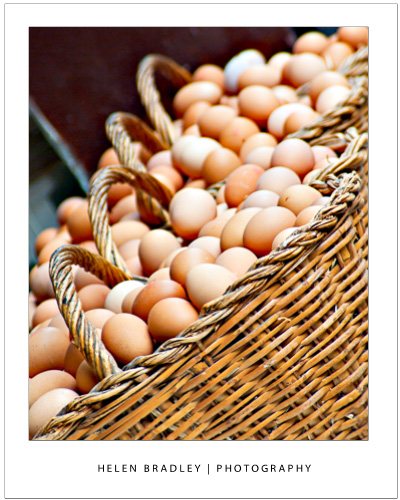
Another situation in which you may want to use a shallow depth of field is when photographing flowers. The closer you get to the flower the more likelihood the background will be attractively blurred.

In product photography, you may also want to get a shallow depth of field and you’ll find that in many cases, the shallower the depth of field, the more attractive the image is. The difference between a shallow depth of field and a deep depth of field can often be the difference between an attractive photograph and one that looks more like a snapshot.
Landscapes benefit from a deep depth of field

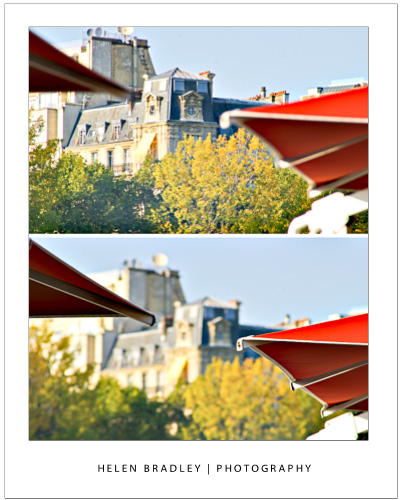
While a shallow depth of field is extremely attractive for portraits and many other types of photographs, when you’re shooting landscapes and cityscapes you will typically want the opposite to be the case and you will want a deep depth of field. For landscape photography, you’ll typically want everything in the image to be in focus.
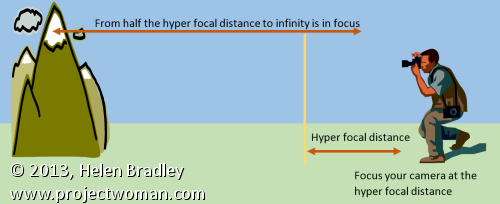
When photographing landscapes photographers often talk about hyper-focal distance. The hyper-focal distance is the point at which you point your camera at to focus the shot so that everything from that point to infinity is in focus and, in addition, an area halfway from the hyper-focal distance to your camera is also in focus. The image shows you how this hyper-focal distance affects the depth of field.
For landscape photography, you’ll typically want to use a small aperture such as f/9 – f/11, a short focal length such as 17mm and be a good distance away from your subject. Calculating the hyper-focal distance then becomes the issue. In many cases, people simply opt to focus the camera at infinity as this typically gives good results without needing technical calculations.

Too much of a good thing

If you’re tempted to increase the depth of field by simply dialing down your aperture to the smallest possible size such as f/35 or so, think again. While it may seem that this will give you a very deep depth of field it can be counterproductive. At very small apertures an effect called diffraction kicks in and this can cause a decrease in quality in your images. Instead you need to find the sweet point at which the smaller aperture gives you a good depth of field but stop short of where it gets so small that light is diffracted decreasing the image quality.

DSLR vs Point and Shoot for controlling Depth of Field

When you’re looking to achieve different effects with different depths of field, you’ll find that a digital SLR will give you much better results than a point and shoot camera. The reason for this has to do with the relative sensor size of the cameras – the larger the sensor size – the more control you’ll have over the depth of field.

Understanding depth of field and how it impacts the images that you take is a key way that you can impact the quality of your images. Choosing the right option for each shooting situation and knowing how to set your camera to achieve the desired result will enhance your photos.


Helen Bradley
Thursday, November 7th, 2013

Convert text to a Microsoft Word table

Quickly turn text into a Microsoft Word table

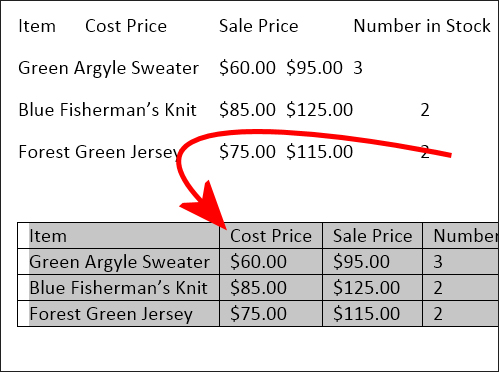
It is possible to convert text from a Word document into a table.

However, to do so requires the text to be correctly laid out – if it is not, it is worth a few minutes work to reformat the text so it can be easily converted to a table.

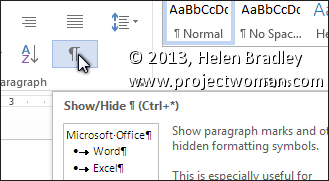
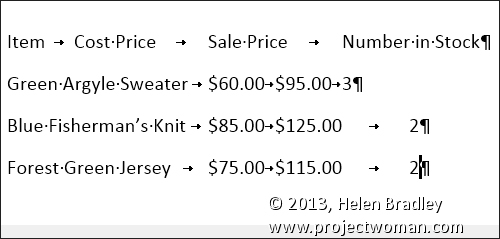
To convert the text each column’s content needs to be separated by a single tab and you need to have a paragraph marker at the end of each line. To check your text is correctly formatted, click the Home tab and click the Show/Hide¶ button to see the tab marks in the document (they are small right pointing arrows).

Make sure there is only one tab marker between each item in the list. If you don’t have data for a particular column add two tab marks to indicate that one column is empty.

Click the Show/Hide¶ button again when you are done.

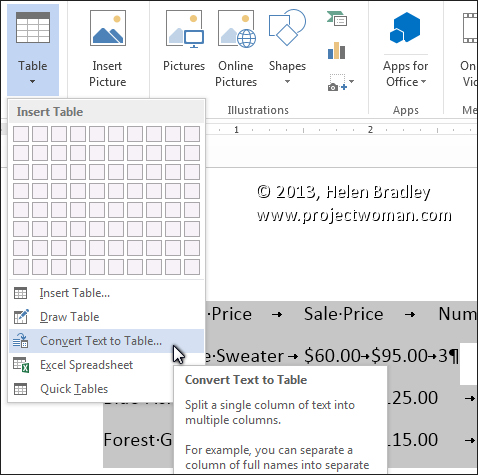
Select the list and choose Insert > Table > Convert Text To Table.

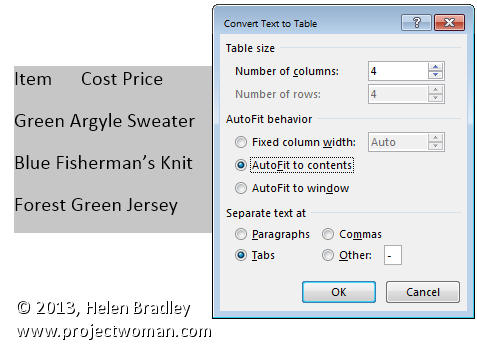
Word should automatically suggest the correct number of columns. From the Separate text at options select Tabs, set the AutoFit behavior to AutoFit to contents if the items are short like ours are and click Ok.

The text will be automatically placed in a new table ready for you to continue to work on it.

Helen Bradley
Friday, November 1st, 2013

Convert Hex to VBA colors

Unbelievable! Hex colors don’t work in VBA without conversion!

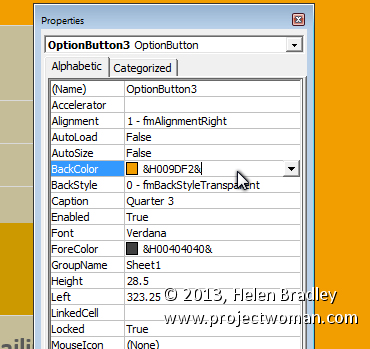
It is totally unbelievable to me but today I wanted to put an ActiveX option button on an Excel worksheet. I could set the BackStyle to transparent so I can see the color in the worksheet through it but every time I clicked the option button it showed up white – and UGLY.

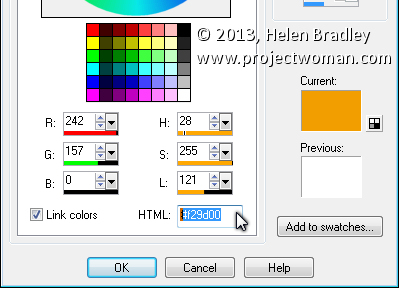
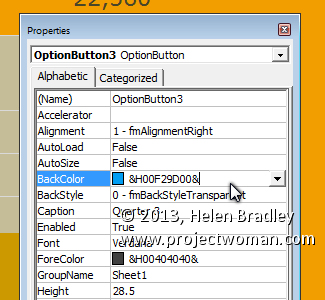
I managed to get the hex color of the worksheet – I got the RGB from Excel then put it in PaintShop Pro to get the hex value. So R242, G157, B 0 became #F29D00 hex.

At this point I was feeling rightly proud of my color conversion skills until I tried to set the  Backcolor property to this value. It WAS BLUE!? not orange… WTF?

Seems like VBA color isn’t the same as Hex colors … it is nearly the same but not quite. You need to switch the R and B values with each other. So my orange #F29D00 becomes #009DF2 for VBA – of course you need to then wrap it in the other little bits so it looks like this: &H009DF2& and all is hunky dory. Paste that into the Properties box and VBA makes it into a nice long integer all by itself – that bit at least is simple.

So now you know how to convert hex colors to VBA colors.

I just have to ask the burning question – WHY? Why isn’t good ol’ RGB good enough for Microsoft – why is it BGR?  And just which programming genius dreamed that one up?


Helen Bradley

Page 2 of 212