CD Inspiration - Police's Synchronicity album cover
I love to browse the CD covers at my local secondhand music store – the cover images are a great resource when I'm looking for new ways to showcase my photos. As an added bonus, when you copy an effect you'll find yourself developing new Photoshop skills along the way.
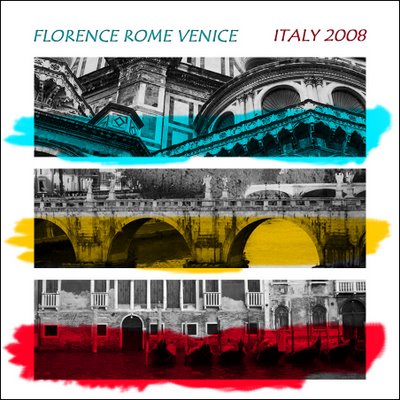
One recent burst of inspiration came from the album Synchronicity by The Police. The album shows three black and white collages stacked down the cover each covered with a splash of paint. Check it out here so you know what we're aiming for:
While my solution does away with the collages – they really deserve a post of their own - it does mimic the basic design philosophy of the CD cover. Here's how to create this effect – the key to getting the project done fast is some smart cropping, some layer alignment tricks and the Multiply blend mode. 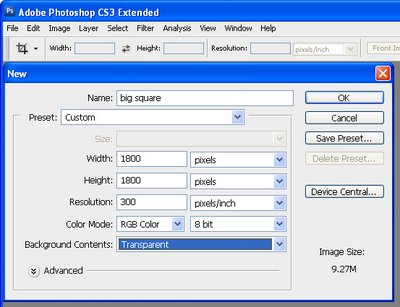
Start by creating a square image the size of the final project. Mine is 1800 pixels x 1800 pixels at 300 pixels per inch in resolution and it has a transparent background.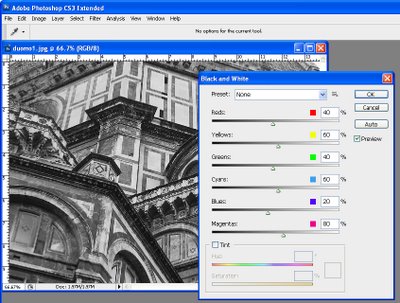
Open the three images to use. You want photos that you can crop to a wide rectangle and which have good detail in the cropped area. Convert your images to grayscale using your favorite tool – I used the Black & White adjustment in Photoshop CS3 – in earlier versions use the Channel Mixer – enable the Monochrome checkbox and adjust the sliders to get a good grayscale.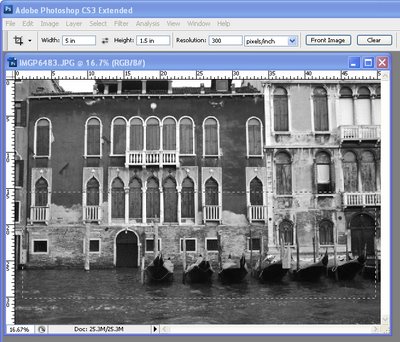
Instead of simply cropping the images to size, we'll adjust the cropped image resolution to match the final image at the same time. To do this, click the Crop tool and set the width to 5 inches, the height to 1.5 inches and the resolution to 300 pixels per inch. Drag a crop rectangle over the area of image to use and double click to crop it. Repeat for the other two images.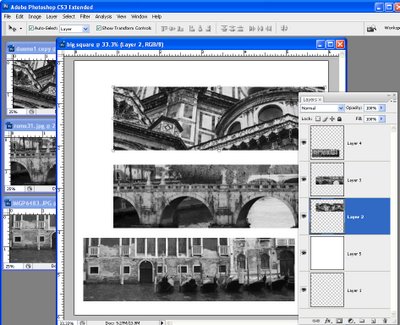
Flatten each image if it is not already flattened. Then drag and drop the three image layers into your main image. Position the layers in roughly in position. Add a new layer, fill it with white and drag it below the image layers.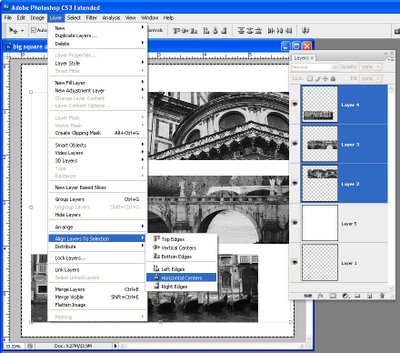
Control + Click (Command + Click on the Mac) on the layer thumbnail for the white filled layer so its contents are selected. Control + Click on the other three layers (not the thumbnails, just the layers) so the layers are selected and not their contents. Choose Layer > Align Layers to Selection > Horizontal Selection – this aligns the layers with the images on them so they are centered in the image. 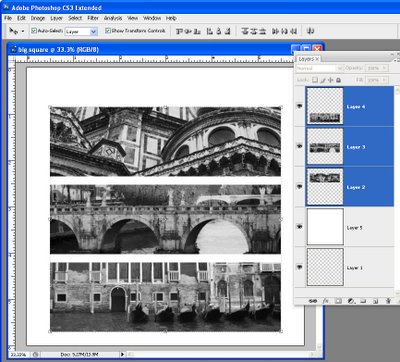
To distribute the layers vertically, select all three layers that have the images on them and choose Layer > Distribute > Vertical Centers so the spacing between the images is evened out. 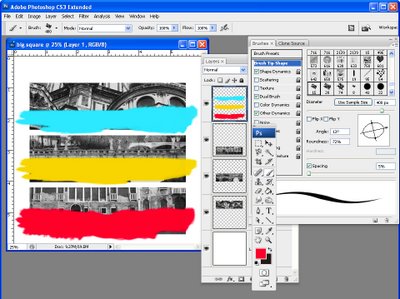
Add a new layer (or drag the empty one from the bottom of the layer stack to the top). Select a bright yellow as the foreground color. Select the Brush too, add the Wet Media brushes and select the Oil Heavy Flow Small Tip brush. Adjust the brush size to around 400 pixels, set the Flow and Opacity to 100 each. In the Brushes palette, adjust the angle of the brush using the Brush tip shape options so it is aligned vertically and not at an angle.
Paint unevenly over the middle image. Repeat and paint cyan on the top image and red on the bottom one.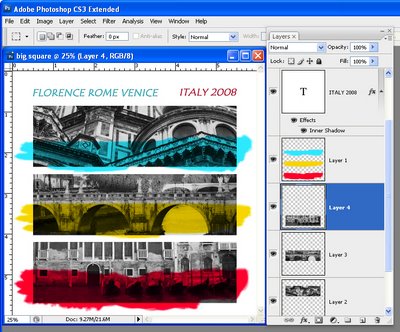 Set the blend mode for the paint layer to Multiply so you can see the image under the paint. Add some text using the same blue and red colors and you're done.
Labels: CD inspiration, compiling images, multiply blend mode, Photoshop

