Articles | Photography Blog | Office Tips Blog | about me | e-mail

Helen Bradley - Photoshop and Lightroom tips and techniques

I'm Helen Bradley - I'm a photographer and Photoshop professional. In this Photoshop and Lightroom blog you will find powerful Photoshop and Lightroom tips, tricks and techniques that will help you get more out of both programs. You will also find step by step guides for working creatively with your photos in Lightroom and Photoshop and any other cool applications I know you will be interested in knowing more about.

Monday, January 04, 2010

Video - Fixing animal eyes in Lightroom

Here is a video presentation of a recent blog post on fixing animal eyes in Lightroom.

How to use the Adjustment Brush in Lightroom to fix dull and dark animal eyes.


I am working on changing the size of the videos. A few of these were made for a special job and they are different sizes than I would actually want to use in future. I am aiming for some that are taller than this and narrower so they fit in the post layout more comfortably.

Labels: , ,

Monday, August 03, 2009

How do you Vignette?


Adding a vignette to an image involves adding a subtle (or not so subtle) edge effect to it. A popular vignette technique involves darkening the edges of your image – it gives the image a slight border which helps keep the viewer's eye in the photo. This is an effect which has been popular for years and which was is a feature of some classic film cameras such as the Holga.

Nowadays many photographers and digital artists use vignettes as a way to finish their images. There are lots of ways to add a vignette to an image and here are some of them. I've included methods that work with Lightroom, Photoshop and Photoshop Elements. The latter process will work with most photo editing programs.

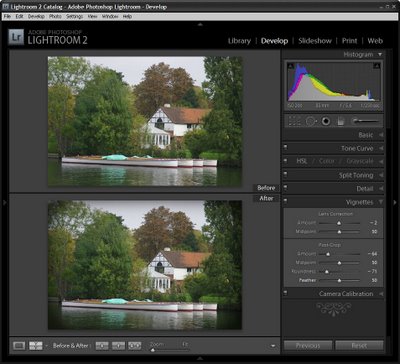
Lightroom 2

To add a vignette in Lightroom, move to the Develop module and choose the Vignette options. Set the Post Crop Amount value in a negative value to darken the edges. Set the Roundness to a low value such as -70 to get a rectangular vignette and set the Feather to around 50 so it is soft but not too soft.

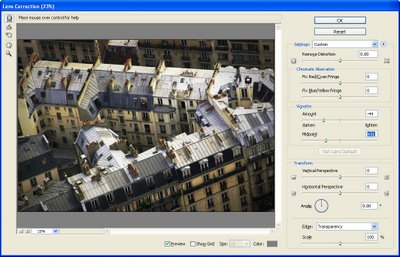
Photoshop #1

A simple way to add a vignette in Photoshop is to use the Lens Correction filter. Choose Filter > Distort > Lens Correction and adjust the Vignette amount to the Left to a negative value and the Midpoint to the left to bring the vignette into the image more.

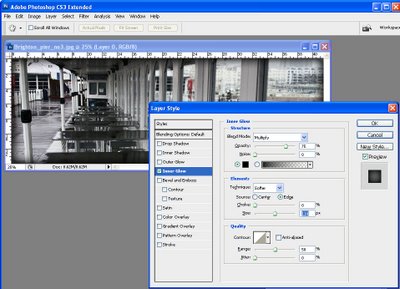
Photoshop #2

Another way to add a vignette in Photoshop is to use a Layer style. This has some benefits and one is that the method works on just about any size image and it's simple to do once you have the Style created.

Make the background layer a regular layer by double clicking it and click Ok. Select the Add Layer Style icon at the foot of the Layer palette and choose Inner Glow. Set the Color to Black, set the blend mode to Darken or Multiply and adjust the Size so you can see the edge. You can save this as a style preset and you can then record the process of adding the style to the layer as an action so that you have a one click vignette solution.

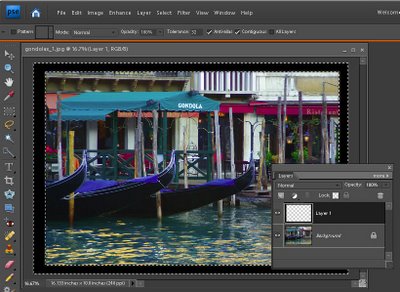
Almost any photo-editing software

If your software supports layers and layer opacity then this method should work just fine in most photo editing programs. I've used Photoshop Elements and you should check your program's help if you are unsure how to perform these tasks in your software.

Add a new layer using Layer > New > Layer and use the Rectangular Marquee to select around the inside border of this layer leaving a small margin. Choose Select > Inverse to invert your selection so the border area is selected. Now use the Paint Bucket to fill the area with black or dark brown. Choose Select > Deselect.

Choose Filter > Blur >Gaussian Blur and use a high radius value to blur the edge and soften it. Adjust the Layer Opacity to blend this edge into the image underneath and, if desired, set the Blend Mode to Darken or Multiply.

Labels: , ,

Tuesday, May 19, 2009

Lightroom - Understanding Clarity, Vibrance and Saturation.


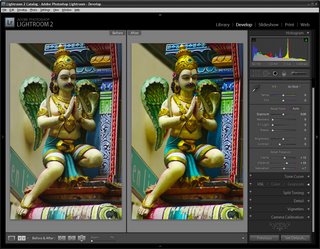
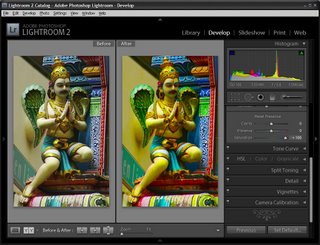
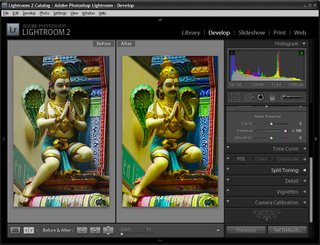
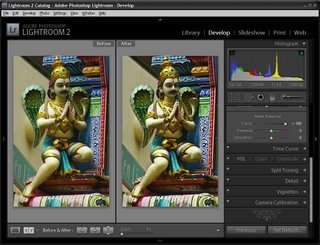
In Lightroom 2 the collection of Basic fixes available for your image includes three Presence sliders that sit together in the Develop module: Clarity, Vibrance and Saturation. This week I'll explain the differences between these three adjustments and how they affect your photos. In each of the screenshots below I have set the slider value to 100 – way more than you would use to fix your image but a setting that will show clearly how the fixes work.


Step 1
Let’s tackle Saturation first. The Saturation slider works similarly to the Saturation slider in Photoshop or any other graphics software. It lets you adjust the saturation of the colors in the image – drag it to the right to brighten and deepen the colors in the photo. If you drag to the left, you remove some of the depth and brightness in the colors and, if you go all the way to -100 you end up with a desaturated or monochrome image.

One of the problems with using the Saturation slider is that it adjusts all the pixels in the image – those where the color is lacking in saturation and those that are already highly saturated. In trying to fix the pixels that need a color boost you can end up shooting some other pixels into right over the edge so the colors tend towards the ridiculous.


Step 2
The Vibrance slider solves some of the problems that you'll encounter when trying to boost color saturation because it is more particular about what it adjusts. With vibrance only the least saturated colors in the image are adjusted and those pixels which are already relatively saturated are adjusted less. The result is that you’ll get a general improvement in the saturation in colors in the image but not to the extent where colors become unrealistically bright. Vibrance also offers some protection for skin tones which makes it a good choice for adding saturation to portraits as it is less likely to over saturate and destroy the subject's skin tones. In many instances you can safely bypass the Saturation slider and adjust Vibrance instead.

Step 3
The Clarity slider affects the contrast in the midtones in the image. It works by increasing some of the edge detail in the midtones giving a general sharpening which adds punch to your photo. Typically you will want to adjust the Clarity of your image in a positive direction using a setting of around 10 to 15. If possible, view your image at 100 percent so that you can see the changes that you’re making to it as you adjust it.

Labels: , , , ,

Thursday, December 11, 2008

Adding Keywords to multiple images in Lightroom


Let's preface this blog entry by stating that what follows makes no sense at all.

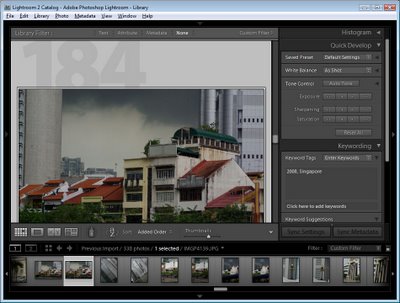
I ran into some inconsistent Lightroom behaviour when trying to add keywords to images. The scenario was this: I needed to add the same keyword to a number of photos all at once. While you can do this as you import the images, sometimes you'll be importing images which shouldn't all have the same keywords so doing it in Lightroom later on makes more sense.

Problem is that you have to be in the right view to do it - choose the wrong one and you can waste a lot of time and have precious little to show for it. Please Adobe - make this simpler and more intuitive because right now it's darn right frustrating and it really makes no sense at all.

Until Adobe fixes the problem, here's the low down on adding the same keywords to multiple images in Lightroom. First select the Library and then choose Grid View, if you don't this things will fail, miserably. Choose View > Grid or click the Grid View button.

Now select the images to add the keywords to - click on one and Shift + Click on the last, for example. Type the keywords in the box which says "Click here to add keywords" and press Enter.

You can also copy keywords from one image and then paste them into others by copying the keywords then select the images to paste into (making sure you are in Grid view - it doesn't work otherwise) and then paste the keywords into the "Click here to add keywords" box - use Control + V to do this.

If you try this and it fails you're not in Grid view. Heaven help me - there's no reason I can see why you should have to go into Grid View to do it but you do.. so now you know.

Labels: , , ,