Articles | Office Tips Blog | Photoshop Blog | about me | e-mail

Helen Bradley - Pro Photo Blog

ProPhoto is a photo site for every photographer. We help you understand what you need to know to take better photos and how to share and enjoy them.

Sunday, February 7, 2010

Better Photos Tip #10 - Camera Raw vs, jpeg

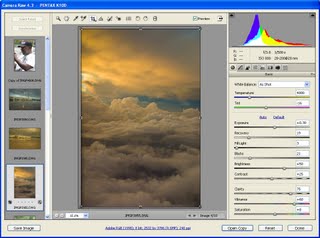
Capturing in Camera RAW offers superior image adjustment options for your photos.

If your camera is capable of capturing images using the RAW format, this will allow you more editing opportunities later on.

It's a good idea to capture JPEG when shooting regular snapshots simply because JPEGs are easier to process and use and to use RAW for more creative captures.

Some cameras have a button you can press which gives you a one shot RAW capture so you can shoot in JPEG but easily capture a single RAW shot when you need one.

Labels: , , ,

Wednesday, February 3, 2010

Better Photos Tip #9 – Read the Histogram

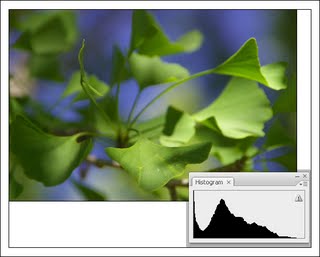
The image histogram on your camera shows the tonal range in the image, use it to assess the quality of the image. Here there is a little too much data in the shadows (we say the shadows are plugged) and we could adjust the exposure accordingly.

To understand if you need to adjust your exposure, check the image histogram in the camera rather than relying on the image that appears in the LCD screen.

The histogram gives you a graphical representation of the image's tonal range. If the chart data doesn’t extend from one edge of the chart to the other, you will probably have a muddy lacklustre image.

If the chart is too far to the left, you need to lighten the image and if all the data is to the right the image is being overexposed.

If you're using a digital SLR you control the exposure by enlarging the aperture or decreasing the shutter speed to let in more light or vice versa to reduce the amount of light.

On a point and shoot camera, the exposure compensation feature lets you adjust the exposure amount to compensate for lighting issues. Typically you can adjust the exposure by any amount in the range -2.0 - +2.0 to darken or lighten the image. Exposure compensation was used here to expose this musician correctly against a very light background - I traded blown out highlights in the background for a properly exposed foreground.

Labels: , , ,

Thursday, January 28, 2010

Better Photos Tip #8 – Take 2 steps forward


When capturing an image, get in close to the subject so they fill your viewfinder.

If there is one technique most digital camera users can use today to instantly improve their photos it is to stand at least two or three steps closer to their subject.

Most photographers stand too far away from their subjects so the subject ends up being very small relative to the rest of the photo.

When you move closer to your subject you make them larger in the viewfinder so they fill the photograph.

The result is not only a much more interesting photo but, because the subject fills the screen, there is less distracting background detail. If you can't get physically closer to your subject use the zoom on your camera to zoom in closer.

Labels: , ,

Sunday, January 24, 2010

Better photos tip #7 - Don’t just look – See

When you really look at a scene you may find things to photograph you might not have noticed at first glance.

When you are looking for things to photograph, study your surroundings. There are plenty of photo opportunities even in places that look anything but photographic.

A good exercise for budding photographers is to set yourself a challenge to photograph a predetermined subject matter such as numbers, signs, a particular colour or shapes like circles or rectangles.

Go out with your camera and set yourself an hour to complete the task. When you set yourself a challenge to capture a particular subject, you have to look to find it in a larger scene.

As you do you’ll see a range of things that you may not otherwise notice.

Part of what sets a good photographer apart from a mediocre one is the ability to see the possibilities in a scene.

Labels: , , ,

Wednesday, January 20, 2010

Better photos tip #6 - Depth of field

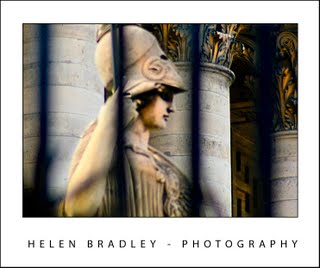
This image shows a shallow depth of field - the statue is in focus but everything else is nicely blurred.

There is a benefit you get when you use the macro setting on your camera and that is that when you use it your camera generally captures the image using a very small depth of field.

Depth of field is the area in focus around and in front of and behind the subject of the image. When you have a large depth of field, everything is in focus and where the depth of field is small, only a very small portion of the image is in focus.

Shooting with a small depth of field requires some skill because you have to make sure that the subject itself is in sharp focus – so that the rest of the image is not.

Check the LCD screen or viewfinder to ensure that the subject looks crisp and in focus before shooting. When you have taken the shot, check the image and zoom in to it and make sure the subject looks sharp – the LCD screen preview at the regular size won't show clearly enough if you have the subject sharp enough.

Depth of field will be a new concept if you've only used inexpensive film cameras in the past. Automatic film cameras shoot with a very wide depth of field so that everything in the photograph is in focus. In the days of film, only SLRs were capable of capturing images with a small depth of field.

Digital cameras changed that and many point and shoot cameras can capture images with smaller depths of field if you know how. The secret is in using the camera's manual controls to set the aperture manually rather than leaving the camera to make the choice. This same option is available with digital SLRs and the results, because of the lenses you use, are generally better with a digital SLR.

For a small depth of field, adjust the aperture to a value such as f2.8 or f3.6 so it is very wide and so the camera takes in a lot of light. To get a large depth of field so everything in the image is in focus, use an aperture setting of f8 or f16 for example. This setting lets in less light so the shutter speed will be much slower than when shooting with an aperture value of f2.8 for example.

Labels: , , ,

Tuesday, January 12, 2010

Better Photos Tip #4 – No flash at night

When taking photographs at night, turn off the flash and take a long exposure to capture the lights.

When shooting a night time concert, sporting event or even the city lights you might think your camera's flash is a necessity. Unfortunately it's not only next to useless at a distance of over 2-3 metres but using it will force the camera to use a faster shutter speed than you need so all you'll get is a severely underexposed image.

Instead, disable the camera’s flash and switch the camera to night mode shooting so it will meter for the surrounding darkness and set a slow shutter speed allowing you to capture the detail in the scene.

A downside of the slow shutter speed is that any camera movement will result in the subject being severely blurred. When shooting at night without a flash, use a tripod or brace the camera so that it does not move.

On the flip side, when you take long exposures at night you can capture light trails from car headlights and taillights as they pass in front of you which can look really great.

Labels: , , ,

Friday, January 8, 2010

Better photos Tip #3 – get down low

The best photos of animals and kids happen when you get down to their level.

When you are photographing children and animals, get down to their level so you shoot from the side and not the top of their head.

This may require you to sit on the floor or to put the animal or the child on a table or bench.

If you are capturing animals that move a lot it can be helpful if you have a handler to hold the animal while you take the photograph.

A good time to photograph the family cat is when they are basking in the sun or asleep.

Labels: , , , ,

Monday, January 4, 2010

Better photos Tip #2 – Hold the camera right

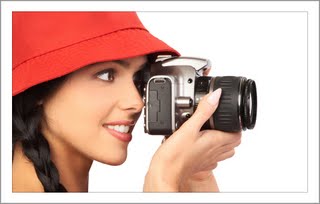
© Iryna Kurhan,istockphoto.com
Hold your camera in both hands as you shoot to steady it and to ensure your shot is in focus.


When you are photographing, take care to hold the camera steady so your photos won't be blurred.

Hold your camera in both hands and position your arms close to your body with your elbows tucked in to form a solid foundation for supporting the camera.

Press the shutter release half way down and pause to let the camera's auto focus system focus on the subject.

Then press the shutter the rest of the way down to capture the image.

If possible, hold your breath as you do this, to avoid the movement which would otherwise occur if you breathe in and out as you are taking the shot.

Labels: , ,

Friday, January 1, 2010

Better photos Tip #1 – Rule of thirds


Place objects at the intersection of lines on an imaginary noughts and crosses board for a more interesting image.

When you are composing your photograph have in mind the principles of the rule of thirds. This rule suggests that you draw an imaginary noughts and crosses board over the photograph that you are about to capture. Where the lines intersect is a good place to position the subject of your image.

For example, if someone’s eyes are located where the lines intersect you will get a much more interesting photo than if the person is positioned dead centre of the photograph.

In addition, placing the horizon along one of the lines of the noughts and crosses board is more interesting than placing it across the middle of the photo.

Simply moving your camera a little bit to the right or left, or up or down can be the difference between a so-so image and one which looks much better.

Labels: , , ,

Monday, June 22, 2009

Capture great cell phone photos

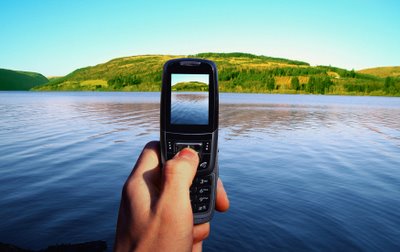
You'll probably never win a major photographic award with a photo snapped from your cell phone. But that doesn’t mean you can't get some wonderful photos if you work within its limitations. Most cell phones lack most of the features of even an entry level point and shoot digital camera but, when you know what it can do (and what it can't), you can capture some fun and dare we say it, artistic photos.

Let's start with the limitations of your cell phone. First of all it probably doesn’t have a flash and, if it does, it's range will be so small that it will be next to useless. So, taking shots in poor light or at night is seldom an option unless your cell phone has a night mode or unless you can light your subject some other way. If your cell phone has a night shooting mode, use this and hold the phone very steady to shoot in the low light as the shot will take longer to capture and any movement will ruin it. On the other hand, the cell phone probably won't do so well in extremely bright sunlight either without some help. If your cell phone takes photos that are blown out in sunlight, see if you can adjust the exposure levels so the photos are darker and less blown out. If not, move around your subject to find the best place to shoot from – often moving around so the sun falls in a different place will be the difference between a well exposed shot and an average quality one.


As you probably won't have a zoom on your cell phone, you need to get up close – that means moving closer to the subject so it fills the viewfinder and then some. If you're used to having a lot of room around your subject's face, move closer so that their face totally fills the viewfinder. Don’t worry if you cut off a person's ear or part of their head as you do this, the photo will be all the better for doing so. If your cell phone shoots landscape mode photos, turn it on the side to shoot portrait or vice versa – the difference can have an impact on how much you fit into your shot.

Shooting right
When shooting with your cell phone, hold it steady – like any other camera the shot won't be in focus if you move. Forget taking a photo holding the cell phone with one hand out from your body, instead, hold it close to you and, where possible, with both hands or brace it against a fence, wall or tree. Just before you shoot, take a deep breath and hold it as you take the shot, then breathe out.
© Matthew Ludgate, istockphoto.com

When looking for things to capture, concentrate on fun and whimsical subjects and think of your photos as being a be a visual diary of your life. You can snap informational subjects like bus timetables and train routes, restaurant menus or a picture of the wine label of a bottle you like and want to buy again. Instead of sticky notes, capture a picture of the note so you have the information with you. Most cameras let you use an image as the wallpaper for the phone and you can use anything for this – fun to look at or practical to use – it's your choice.

When photographing small things that are close to the ground like pets and children, get in close – bend your knees, kneel or sit at the same level to capture the shot. The results will be more compelling when you do.

Many sites are popping up with tools and features to help you download your camera photos and do something with them. For example, Yahoo Flickr has a tool you can use to email photos direct from your camera phone. Sites like this overcome the problem with many phones of having to organise to be near a computer to download your images.


Always edit your photos where possible on your computer rather than using your phone's tools simply because the tools available on your computer are far more sophisticated than those on your phone. Some programs like the new Microsoft Digital Image Suite 2006 have special fixing tools for camera phone photos – this removes any colour cast and noise and adds some sharpening to make the image clearer.

If your phone offers a choice of quality for capturing your images, it's best, where possible, to choose the highest quality. Although you may not notice a difference in quality when viewing the photo on your phone, you will notice it if you're viewing it on a computer screen or if you capture a really nice shot that you want to print.


If you're interested in just what shots people are taking with their camera phones, visit this Flickr cell phone stream and check out the gallery there. You'll find a range of subjects and you just might be inspired to try some of them yourself.

Labels: , , ,