Word 2007's new Content Controls let you do some pretty snazzy things in your Word documents.
You will have worked with Word's own controls when you add a cover page or header and footer using the Insert tab options in Word 2007. In this case you may have noticed that, if your document already has a title configured in the document properties, the title appears automatically on the cover page and in the header.
Alternatively, if it doesn't have a title, when you double click the Title area and type one, any other object in the document that includes a title will be updated automatically. This behavior occurs because the document information is inserted using content containers which are linked to the document properties.
You can take advantage of this behavior in your own designs and you can create and use unlinked content containers to prompt for details to be inserted in your own documents.
To see how content containers work you’ll need to display the Developer tab which you can do by selecting the Office button, click Word Options and from the Popular category choose the Show Developer tab in the Ribbon option.
Click the Developer tab and, in the Controls area you'll find entries for the Building Block Gallery and for elements such as a Date Picker and a Text Box which you can use in your documents.
So, for example, to prompt a user to insert an entry from the Quick Part Gallery, click where you want the Quick Part Gallery entry to appear. Click the Developer tab and click the Design Mode button so you are in design mode.
Now click the Building Block Gallery button. This inserts a small content container with the words [Choose a building block] as the prompt. Exit Design Mode by clicking Design Mode button once again and you will see that the document contains a clickable link in this position prompting the user to choose a building block.
In practice, all the user needs to do is to click on the Choose a building block link to show the dropdown list and they can then select the building block to insert at this position in the document.
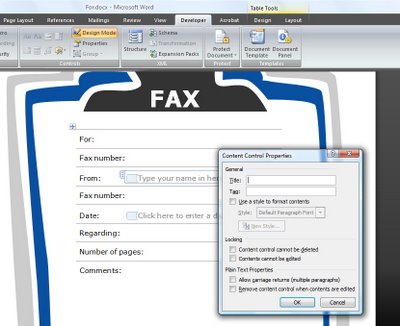
You can also provide a link that the user clicks on to type custom text. To do this, check you're in Design Mode and select the Text button from the Controls group. Between the markers type the text describing the content to be inserted in this position.
To test this, deselect Design Mode and click the element to see it highlighted and type the text prompted for. The text you type appears in line with regular text in the document and can be formatted by right clicking on the text and apply a format to it.
Note, however, that the entire content control is formatted at the one time and individual letters and words cannot be formatted independently of the others.
Labels: click and type control, content control, developer tab, Word 2007
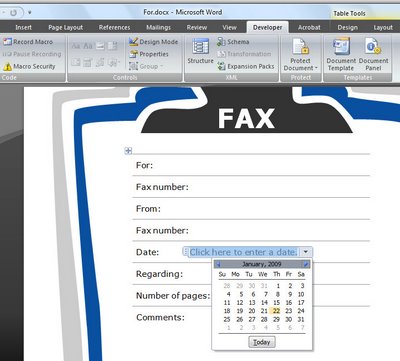
 Word 2007 has a cool Date Picker control you can use to insert a date into a document.


