Saturday, February 13th, 2010

Master Repeating Patterns in Photoshop

By Helen Bradley

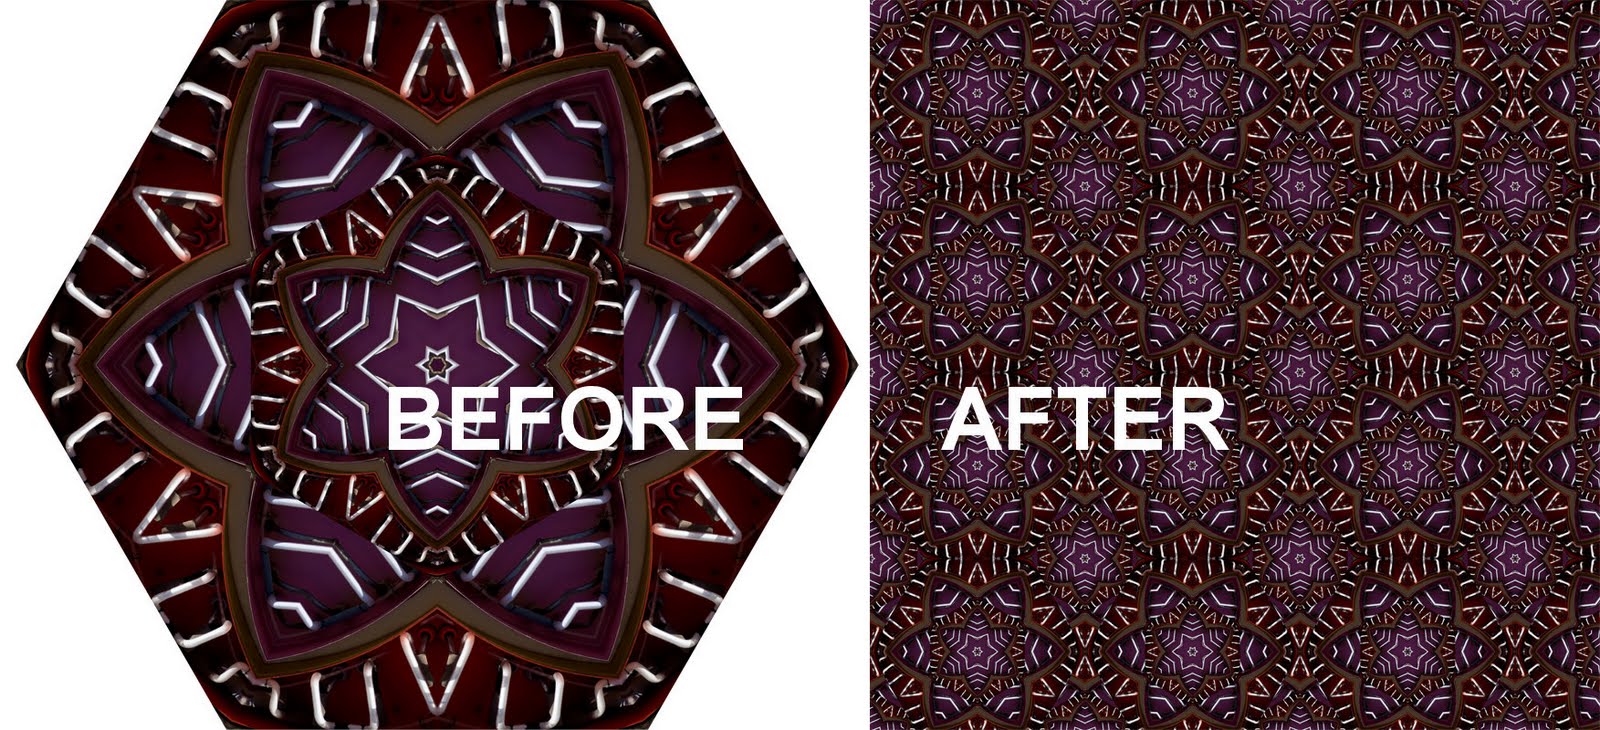
In a recent post I showed you how to create a kaleidoscope using Photoshop. As one of the techniques for using a kaleidoscope, I suggested you could create a repeating pattern from it. One reader posed the question as to how a repeating pattern could be created given that there were spaces around the original shape. Today, I’ll show you how to solve the issue and, in the process, get a grasp on creating repeating patterns in Photoshop.

Step 1
Start with the finished kaleidoscope image document. If you didn’t see the original article, here’s a link to it http://digital-photography-school.com/how-to-create-kaleidoscope-patterns-from-your-photos
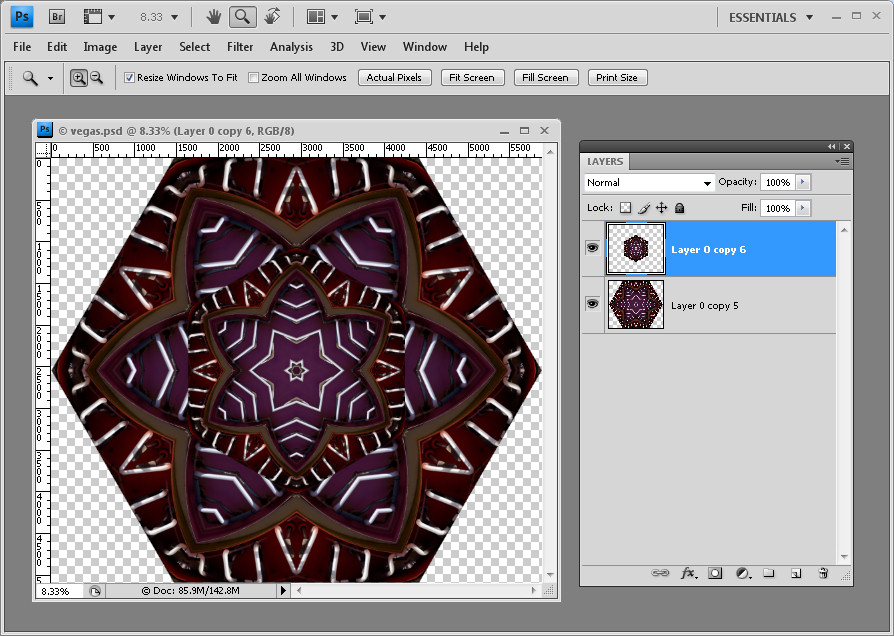
Step 2
Save a copy of this image and this time flatten the image layers – not any solid color or white background layer you may be using.

To do this, select all the layers containing content by Control or Command clicking on them and choose Layer > Merge Layers.

Create a duplicate of the image layer so you have two copies of it.

Hide the top layer for now and select the second of the image layers.

Choose Image > Image Size and read off the image width and height. Divide each by two and write down the resulting values. Click Cancel to exit out of this dialog.

Step 3
Choose Filter > Other > Offset and enter the values for half the width and height of the image. Select the Wrap Around option and click Ok. This offset command creates the repeating part of the pattern and it saves quite a bit of manual work in carving up the image.
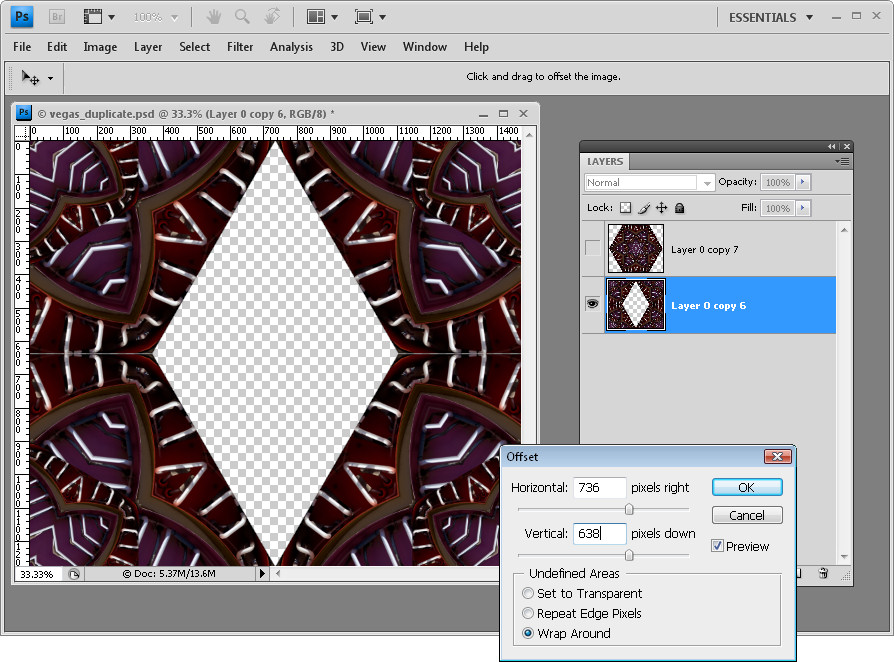
Step 4
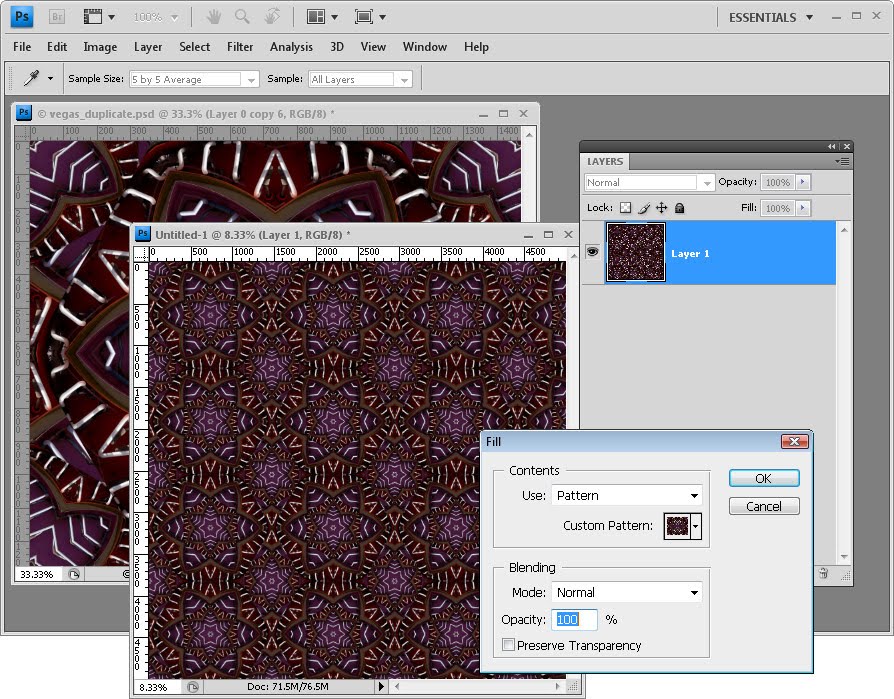
Reveal the top layer again and your canvas will now be complete. Flatten this image and use it to create your pattern. If it is a large design you may want to reduce its size to 25% or less before making it into a pattern by choosing Edit > Define Pattern. Type a name for the Pattern and you’re done.
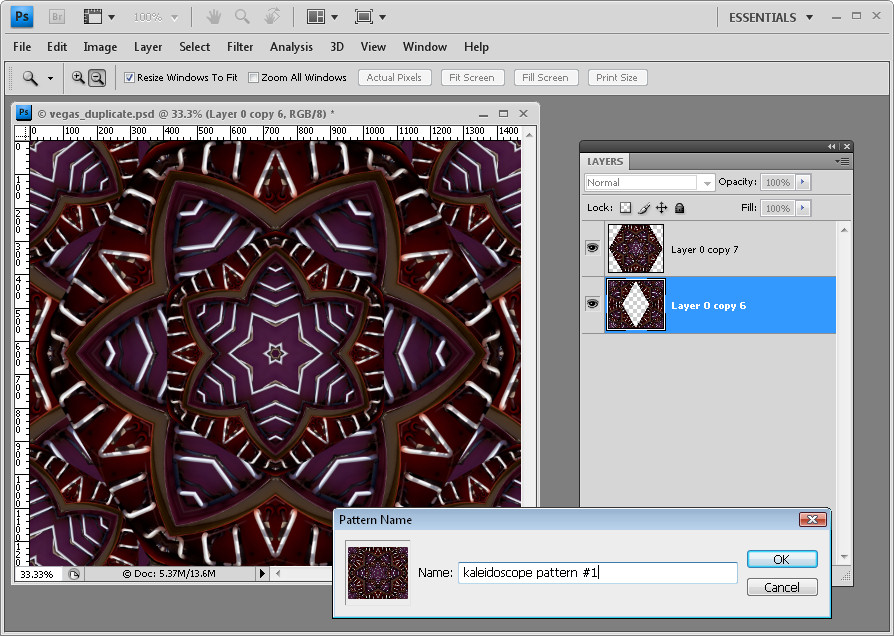
Step 5
Create a new empty document many times larger than your pattern image and fill it with your pattern by using Edit > Fill > Pattern and choose your pattern from the very end of the pattern palette.

Step 6
If you start with a regular rectangular or square image you can create it as a repeating pattern in a similar way. However instead of getting a big empty area in the middle of the image you will have seams. Use your clone tool or some other tool of choice to remove the seams without touching the edge pixels. Then create your pattern and it will repeat perfectly!

Helen Bradley

Friday, January 1st, 2010

All New! Video Tutorial, Fix a Sky in Photoshop

New for the New Year!
I am trialling some videos for the site and here is the first of them.

It is a video rendition of a recent post from my blog, but this time you get to see it in action rather than read about it.

This video shows a simple and effective way to replace a blown out sky in Photoshop without having to make a complex selection to do so.

Let me know by posting a comment if you like the concept of viewing video tutorials. I plan to offer a mix of both videos and text but I’d love to hear what you think.

Helen Bradley

Sunday, October 11th, 2009

10 Photoshop interface features you didn’t know existed

Here it is, short and sweet. 10 techniques for working in Photoshop that you may not know existed:


1 Open a file without using the menus
Simple. Double click the grey background area of the Photoshop window and the File Open dialog appears – magic!


2 If grey is dull, black is wonderful and any color is better!
To change the grey inside an image window from grey to black (or a color of your choice), Control + Right Click (Command + Right Click on the Mac) on the area surrounding the image and select a color.


3 Sample foreground and background colors
Instead of clicking on the foreground or background swatch to change the color to one sampled from the image, click the Eyedropper tool and click to sample a foreground color – hold Alt (Option on the Mac) to sample a new background color.


4 Position a shape or selection
When you’re drawing a shape or selection and the shape is fine but the position is wrong, keep hold of the mouse button and hold the spacebar as you move the shape or selection into the desired position. Let go the spacebar and continue to make your shape.


5 Get a selection back
If you’ve lost your selection, press Ctrl + Shift + D (Command + Shift + D on the Mac) to get it back. Ctrl + D (Command + D on the Mac) deselects the selection.


6 Hide and keep
If the selection marquee is getting in your way, Ctrl + H (Command + H on the Mac) will hide the selection but still leave it in place. Don’t forget to turn it back on or you might wonder why things aren’t working the way you expect them to work.


7 See what you’re working on
This is my all time biggest time saver! When you drag a large layer from one document to another you can view the entire layer and its sizing handles by Ctrl + Click (Command + Click on the Mac) on the layer thumbnail to select it. Then press Ctrl + T (Command + T on the Mac) to view the transform handles and Ctrl + 0 (zero) (or Command + 0 on the Mac) to shrink the image so the sizing handles are all visible.

8 Stack or line up palettes
To stack palettes side by side in the same dialog, drag one palette over the others until a blue line appears around it and let go. To stack palettes one on top of the other down the screen, drag and drop one palette onto the bar just above another palette’s name.


9 No dialog Reset button? Yes there is!
You can reset most Photoshop dialogs to their original settings or at least some version of the original settings by holding the Alt key (Option on the Mac) when inside the dialog – when you do this, the Cancel button turns into a Reset button.


10 May all your ellipses turn into circles
To draw a circle using the Elliptical marquee or a circle shape, hold the Shift key once you’ve started drawing and the ellipse will become a circle. To draw from the center out, hold the Alt key (Option on the Mac) as you start drawing an ellipse, then add the Shift key to make it a circle – keep holding both keys until you let go the right mouse button.

Helen Bradley