Wednesday, September 25th, 2013

Photoshop – 3 ways to make silhouette effects

Learn to make a silhouette in Photoshop and, from that, create an outline of the shape and a pattern fill for the shape. Tools used include the Quick Select tool, Refine Edge, Selection Smooth tool, Pattern Fill Layer, Stroke Layer Style and more.

Transcript:

Hello, I’m Helen Bradley.

Welcome to this video tutorial. In this tutorial I’m going to show you three options that you can use to create silhouettes in Photoshop and I’m using some old vintage clipart to show you how to do this. As usual before we get started let’s have a look and see what it is that we’re aiming to achieve.

I have this image of a red deer head which is an old scanned free image that I found from a public domain site and I wanted to look at some ways that I could use this image in my art but perhaps giving it a little bit of a different flavor. And this is one of the ways that I’m going to show you what we’re doing is making a selection or a silhouette of the deer head and filling it with a pattern or showing it filled as a pattern. This is another one of the options that I’m going to show you how you can create it as an edge effect. And finally we’ll look at creating it as a silhouette itself. So if you’re ready let’s get started working with our image. I have my deer head image here and this is the original scanned image that I downloaded from a public domain website.

The first thing we need to do is to make a selection of the deer head. It’s probably going to be easier to select the white area so I’m going to try with the Quick Select tool and just select over the white areas of the image leaving the deer itself intact and not selected. If I go too far I can hold the Alt key and drag out or I can add to the selection here. I might need to zoom in a little bit to make sure that I haven’t gone too far. This is looking pretty good to me. So I’m going to zoom a bit and let’s just test it by choosing Select and then Refine Edge and that will tell me if I’ve got it right. Well, I’ve got a few areas to tidy up. I’m just going to go back and select those and let’s continue once I’ve made those selections.

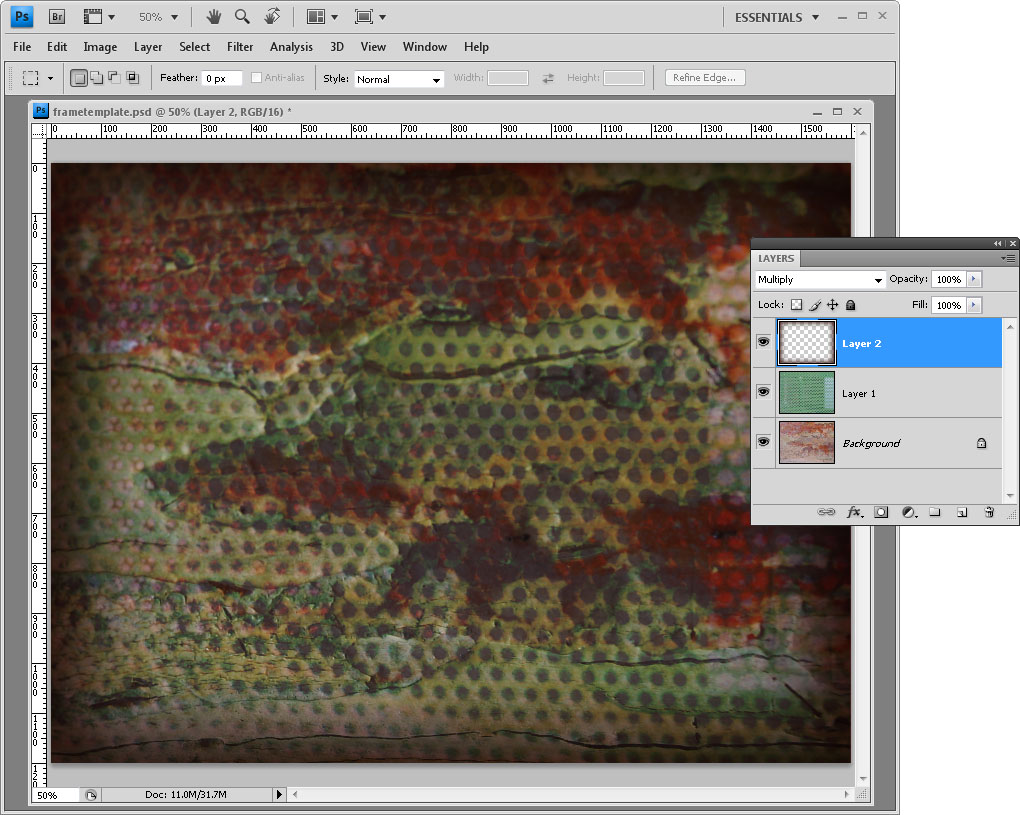
Now I’ve done a little bit more work on this image and I’m reasonably pleased with the result that I’ve got. This is what I’ve got so far. I would clean up a few of these areas if I were being a little bit more careful, had a bit more time. But basically that’s a pretty good selection for now. Now that I’ve got that selection I’m going to create a mask from it by just clicking the Layer Mask icon here. And because my mask has gone the wrong way I’m just going to click it and press Ctrl and I to turn it around the other way. We can test the mask by adding a color filled layer beneath the image. Now at the moment this image is a grayscale image so I’m going to convert it first into RGB color mode.

I’m not going to merge it so I’m just going to click Don’t merge. And now that it’s a color image I can add a color background behind this deer head which I’m going to do just so that we can check and see how it’s looking. At this point you could continue working on the image by painting on the mask using black and white so that you get a really, really good selection. But let’s assume that we’ve done that. For our first silhouette effect we’re just going to Ctrl and click on the mask because that will give us a selection of the deer head. I’m going to create a brand new layer and let’s just turn off the existing layer and let’s see what it looks like when it’s filled with black. I’ve pressed D to set the default foreground and background colors.

I’m going to press Alt Backspace to fill it with black and then Alt D to deselect the selection. Now ignoring the slight problem areas we’ve still got a fairly pixelated edge. So I’m going to trash that and go back and grab my mask selection, add a new layer and before I fill it this time let’s smooth it. I’ll choose Select and then Modify and then Smooth and I’ll smooth it by a couple of pixels. And now I’ll fill it. And you can see that this time we’ve got a much smoother edge. And we could smoother by even more pixels and we would get a much better result each time. So there’s one of the options that you have of creating a silhouette from an image. But let’s go one step further. Let’s turn this off and let’s go and get our selection again. I’m going to add a brand new layer.

This time let’s smooth it by three pixels and see if we get a slightly better result still. And I’m going to fill it with a color and it doesn’t matter what color I fill it with but let’s do black for argument sake. And I’m going to deselect my selection. This time I just want the white outline. So, on this fill layer I’m going to take the fill to zero so I’m effectively filling the layer with the deer shape but then turning that off. Now that might sound counterintuitive but look what happens when we select a layer style and add a stroke. I’m going to click on the stroke. You can see immediately we’re getting this stroked outline for this deer head. Now if I want it to be white I can just come in here and I’m just going to type the numbers for white which are 255, 255, 255 and click Ok. I can choose outside or center.

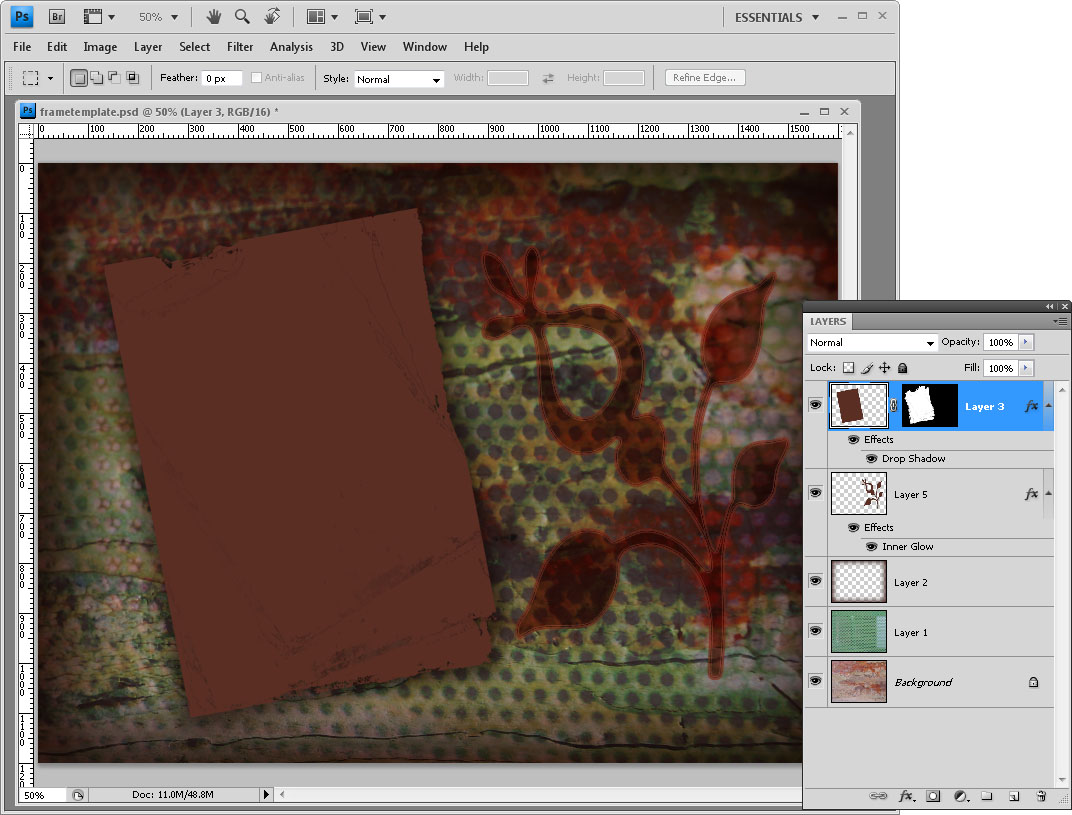
I could even do inside but I think that center is probably going to give me the best results here. And I can size my outline to whatever I want it to be and just click Ok. So that’s a filled layer with the fill turned off but with a white stroke to give us this outline shape. So, so far we’ve got two versions of our silhouette. One’s a black and white and one is an outline. And let’s create another one, a third one. I’m going to take this silhouette and I’m going to duplicate it. So let’s just move that up to the top here and turn the other layers off. Now what I want to do is to fill this area here with a pattern. So I’m going to choose Layer, New Fill Layer, Pattern and I’m going to choose this pattern this square pattern.

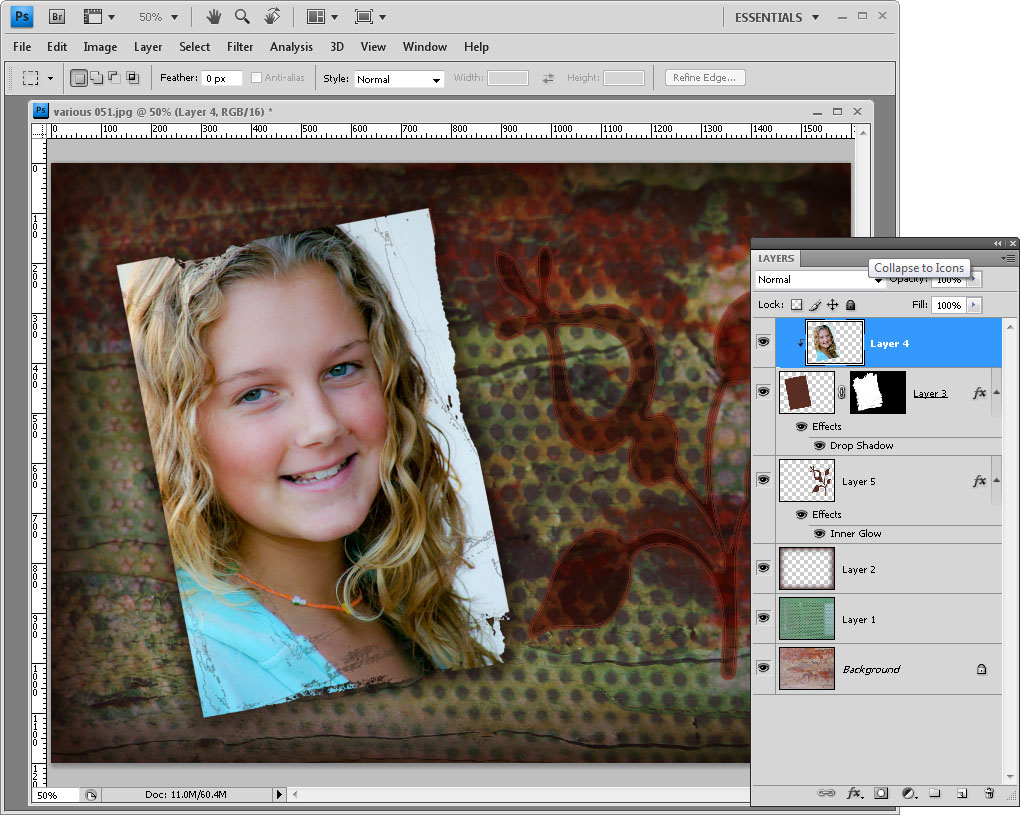
But its way, way too big so I’m going to scale it down to about 10 percent, maybe even 5 percent so it’s a nice small pattern. And I’ll click Ok. Now what I want to do is I want to make this pattern fill layer just the shape of the layer underneath and I can do that by creating a clipping mask. So I’ll select this pattern layer and choose Layer, Create Clipping Mask. And so I’ve clipped the pattern to the shape of the deer head. So there are a few options that you have for working with something like a clipart image, this clipart image of a deer head which I then extracted so I was able to do something with it. And what we did with it was to fill the selection with black to create a silhouette.

We can also fill it with black, or any color indeed, make the fill invisible and then stroke it to get a stroked outline. And the final feature allows us to fill the silhouette with a pattern. And if we wanted to we could even go and borrow the white outline from the layer below.

I’m Helen Bradley.

Thank you for joining me for this video tutorial. Look out for more of my tutorials on this YouTube channel. And visit my website at projectwoman.com for more tips, tricks and tutorials on Photoshop, Photoshop Elements, Illustrator, Lightroom and a whole lot more.

Helen Bradley

Friday, August 2nd, 2013

Photoshop – Create an Oval Frame Effect

Learn how to create an oval frame effect in Photoshop. This video includes how to use a clipping mask, sample a color from an image, make a leaf brush, paint multi-color leaves on an image, add a stroke border to the oval frame and even change its color. This is a jam packed tutorial suitable for a competent beginner or intermediate level Photoshop user.

Transcript:
Hello, I’m Helen Bradley. Welcome to this video tutorial. In this tutorial I’m going to show you how you can make an oval framed photo effect in Photoshop. Before we get started doing this effect let’s have a look and see what it is that we’re aiming for.

What I’m going to do is take this image here and frame it inside an oval frame. And we’re going to add a little border stroke around the frame and then add these decorative elements. The colors for each of these elements is going to be sampled from the image and this is just a single brush that paints in different colors. So if you’re ready let’s get started with this tutorial. So if you’re ready let’s get started with this tutorial.

I’m going to begin here with a new image so I’ll click File, New and I’m just going to do an 11 by 8-1/2 letter size image. But you can make yours whatever size that you like. And here’s my image.

I’m going to center the oval so I’m going to start with a couple of guides. I want a 50 percent guide horizontal and a 50 percent vertical. It’s just a little bit easier to do this with guides. Then I’m going to target my marquee tool. I want the elliptical marquee tool. It shares a toolbar position with the rectangular marquee. But it’s the elliptical marquee that you want. I’m going to hold my mouse pointer over the intersection of these two gridlines and then hold Alt down as I drag out to create my oval. This creates an oval that’s centered over those lines. Of course if I add a Shift key at this point I’ll have everything constrained to a perfect circle centered on this document. But I want an oval so I’m going to let go of the Shift key but make sure that I keep the Alt key held down until I’ve finish drawing my shape. I’ll let go the left mouse button and then let go of the Alt key. This is my shape.

I’ll need a new layer so I’ll click the New Layer icon here and I’m going to fill this with black. So I’m just going to set black as my foreground color and Alt Backspace, Option Delete on the Mac. You can fill it with any color at all but I’m just using black. Now I can get rid of my guide so I’m going to click View and I’m going to clear my guides. I’m going to bring in my image here so I’m just going to drag on the background layer and just add it to this image. Now I want it centered so I’m going to press the Shift key as I center it over this image. I can now close this because I don’t need it any longer. I have my oval still selected. You can probably just see the marching ants there. Now that’s going to get in the way when I start to resize and move this image so I’m going to press Ctrl or Command D to deselect the marching ants. Now I’m going to target my move tool, Ctrl T, Ctrl 0 so I can see my handles. I’m just going to drag everything into position. I’m going to use the Shift key with that corner handle because that will drag everything in proportion. I’m now going to create a clipping mask.

So with this layer selected, Layer, Create Clipping Mask. Now I need to select that checkmark before I can do that so let’s create the clipping mask. And now let’s just fine- tune this image. And I think that’s a pretty good position for it. Now I want to focus on the background layer because I want to sample one of the colors from this image for the background layer. Now the image that we saw had a background which was sampled from the image. So I’m going to target the eyedropper tool here and I’m just going to target this little girl’s dress to get a color from her dress. And when I do you can see that the color is in the top of the ring here. That’s the one I’m going to select. And I have a 3 by 3 average so I’m averaging out the colors under the cursor. So I could go for a slightly lighter blue if I wanted. Let’s select that. And now with the background layer selected I’m going to Alt Backspace, Option Delete to add that color. Now let’s go and add a border around this oval. And to do that I’m going to need to reselect the oval. So I’m going to target the oval shape here, click on the magic wand tool here, it shares a toolbar position with the quick selection tool, but we want the magic wand. We want to make sure that Contiguous is selected. And now I’m just going to click here on this underlying shape which is this black shape here and that gives me this selection.

I’m going to add a new layer so I’m just going to make sure that my new layer goes in at the top and it’s not part of this clipping group. If it were I would have to right click it and choose Release Clipping Mask but it’s now not part of that group. You could see that the marching ants are in position so what we need to do now is to select the color to use. So again I’m going to use the eyedropper and I’m going to select a greeny color from the grass in the background here. So we’ll select that, Edit, Stroke. And you’ll need to experiment a bit with the stroke to see what works best with your image. But I found that a 20 pixel stroke on this particular image is pretty good so I’m just going to settle for a 20 pixel stroke. And I’m doing it over the center and I’ll click Ok. And there’s my stroke. To deselect the marching ants Ctrl or Command D. Now we’re in a position to brush on some leaves around the edge of this image. But to do so we’re going to need to create a brush first up. So let’s go and create a brush. If you’ve already created a brush or you have a brush that you want to use you can skip this step but I’m just going to show you quickly how I created my brush.

I’ll choose File, New and just click Ok. I just need any old document here. I’m going to select the custom shape tool here. It shares a toolbar position with the rectangle tool and these other tools. But it’s custom shape that I want. From the options here on the toolbar I want to select Pixels and I’m going to select black and white as my colors. In earlier versions of Photoshop you’ll still have these three options but they’re going to be side by side here. You just want to make sure that you select the fill pixels or the pixels option. Here I’m going to select a shape which is a leaf shape.

Now last time I selected this shape so let’s make a different shape this time. I’m going to select this one here and then I’m going to drag to draw it on the image. And I’m going to hold the Shift key down as I did so it’s constrained to a nice proportion. Now all I need do is to select Edit and then Define Brush Preset. And I’m going to call this leaf and click Ok. And that is now that shape is now saved as a brush so I can just discard this image. I don’t need it any longer. Now I can go and select my brush. So I’m going to target the brush tool and from the brush dropdown list here I’m going to select my brush. And my brush is always going to be the very, very last one in this brushes palette if I’ve just created it. So this is my brush.

I’m just going to click to select it and then just click outside here to hide that window. Now you can see that the brush is huge and way, way too big right now. So I’m just going to press the square bracket key, the opening square bracket key, to just size it down to size. Now if I start painting I’m first of all going to add a new layer and I’m going to just sample a color from this image. So let’s sample this orange color and let’s just see what happens if I start to paint. Well it’s not looking anything like what it is that we want it to look like. So I’m just going to Ctrl Z to get out of there and let’s go and set up our brush so it paints a little bit more intelligently. I’m going to click here to open the brush panel.

Now in the brush panel here the first thing I want to do is go to brush tip shape, tap on it and I’m going to increase the spacing because I want this brush to be spaced out quite a bit. I could change the size at this point if I wanted to but I’ve already measured this and it’s a pretty good size so I’m going to leave that. I’m going to enable Shape Dynamics and click on Shape Dynamics. Now I want the size to vary a little bit so I’m going to adjust the size jitter. That will make it size in different size brushes as I paint. And I’m also going to adjust the angle jitter. Now I can adjust it to quite a high value here because I don’t mind if these leaves point in completely the opposite direction. In fact that’s going to look pretty good for my leaves. And then I’m going to tap Scattering to enable that and to go to get the Scattering controls. I’ve got Scattering enabled here on both axes and I can just pull it out or push it in to see what I’ve got. I think I want a little bit better control than adjusting count because this is going to give me way too many leaves so I think I’d rather paint more and have less of a count. So I think that’s going to be pretty good.

The last thing I need to do is to enable Color Dynamics. What I want with Color Dynamics is I’d really like this brush to do all the work for me and I want it to paint in color. So I’ve got orange as my background color. Now I’m going to tap here and I’m going to select a color from the image to be the foreground color. So I’m thinking sort of a lighter yellow, maybe I’ll just pick it up from the palette here. So this is my foreground color. This is my background color and I have Apply per Tip enabled and foreground, background jitter at 100 percent. I’ve got hue jitter, saturation jitter and brightness jitter all at zero percent and purity at zero percent as well. What this brush is going to do is it’s going to toggle its colors between these two and so I won’t have to do any of the work myself. I’m going to close this dialog, make sure that I’m painting on a brand new layer, and I’m just going to start to paint. And you can see that the colors are toggling between the foreground and background color. And that just lets me paint my autumn leaves without having to do really much work at all.

Now I can paint as much or as little of these leaves as I want. I’m painting over the edge a little bit here because I’d like some leaves to be eventually underneath this stroke border so I’m just going to add plenty of leaves in there. And I’ll add a couple of stray leaves in the bottom here as well. I can add them by just single tapping or I can paint. When I’m happy with that the last thing I need to do is to get rid of the leaves that are actually over the image here. So I’m going back to my magic wand tool and I’m going back to my stroke layer here and with Contiguous enabled I’m just going to click inside this stroke layer. And what that does is it selects everything inside that layer. And now I can come onto my paint layer and I could do one of two things. I could just press Delete to delete the leaves that are inside this shape but perhaps if I wanted to add some more leaves later on it would be a better idea if I actually added a mask. And that’s very easy to do.

I’m just going to click here the Add Layer Mask icon. Now when I add my layer mask it’s working the wrong way around. You can see what it’s done is it’s clipped and hidden all the leaves around the outside and just left the ones in the middle. We want the exact opposite to be the case so I’ll click on my mask and press Ctrl and I and that just inverts the mask. So you can see now we’ve got the leaves on our image and they’re all around the edge of the image. It’s just that the stroke is underneath the leaves. There’s a very, very easy solution to that. I’m going to select the layer that contains the stroke and just move it up above the leaves and now the stroke is over the leaves. Before we leave this tutorial let’s have a look and see what would happen if we decided that instead of this green edge we would like a pink edge perhaps sampling the pink from this little girl’s headband. Well let’s go first of all and sample the pink. And this is the pink that I’m going to use so I have it selected as the foreground color. I want to make this stroke which is now green into pink.

Now if I press Alt Backspace I’m just going to make the whole layer pink and that’s not what I want to do. I just want to fill the pixels that are already filled on that layer. So I can click here to lock the transparent pixels on this layer, looking for this lock icon to appear. Now if I press Alt Backspace I’m just going to change the color of that stroke. And it’s picked up the foreground color in the image. And now I would just either drag this lock icon into the trash can here or I can just click this icon again. That would unlock it. So there you have an oval framed effect with some autumn leaves that you’ve created using a brush of your own in Photoshop.

I’m Helen Bradley. Thank you for joining me for this video tutorial. Look out for more of my video tutorials on this YouTube channel and visit projectwoman.com for more tips, tricks and tutorials on Illustrator, Photoshop, Photoshop Elements, Lightroom and a whole lot more.

Helen Bradley

Saturday, July 13th, 2013

Create a reusable layered image effect in Photoshop

Learn how to create a layered image effect that can be reused any time. The process can be done in most versions of Photoshop and it uses smart objects, simple to create clipping masks and some layer blending. It is pretty easy to create and can be used over and over again.

Transcript:


Hello, I’m Helen Bradley.

Welcome to this video tutorial. In this tutorial I’m going to show you how you can create a quick cut and layer image effect that’s sure to turn any image into something that looks just a little bit more spectacular.

Before we get started with this project let’s look and see what it is that we’re aiming at. Here is my original image and this is the effect we’re going to create. We’re going to create a number of layers or what look like layers of the image and we’re going to blend them together. Now this effect is customizable.

It’s really easy to select one of the shapes and to move it so that everything gets rearranged and it’s also really easy to replace the base image. So let’s get started. And I have a new image to work with here. I’m going to start by converting the image to a Smart Object.

So I’m going to right click the background layer and choose Convert to Smart Object. And now we’re going to start adding our layers of shapes. So I’m going to click to add a new layer. Let’s get my tool bin. I’m going to select the Rectangular Marquee tool. And let’s create a shape. I’m going to create this big rectangle here.

With this layer selected I’m going to make white my foreground color and Alt Backspace, Option Delete to fill the shape with white. Now in each case I need the layer and the image so I need multiples of this pair of image. So I’m going to right click and choose Duplicate Layers and click Ok. Now I’ve got my second shape up here.

I’m just going to turn off my images so that we can see the shapes alone. And I’m going to move this shape out of the way and I’m just going to resize it to a different size shape here. I’m going to select these two layers, right click and duplicate them again. And now I’m going to this top version and I’m going to again alter it a little bit.

You don’t have to alter it. You can leave it exactly the same shape if you want to. Select the two layers, right click, Duplicate Layers, click Ok, again selecting this top one and just moving the shape into position and resizing it to suit. Now that we’ve done this we can start to create the effect.

And what we’re going to do is we’re going to crop these images. So I need one more of this Smart Object layer so I’m just going to duplicate this layer once more and drop it on the top. Now I’m going to create a clipping mask. So with these layers all visible and all selected first of all I’m going to select the topmost layer and I’m going to choose Layer > Create Clipping Mask. And what that does, let’s just have a look, is it clips the top layer to the shape and size of the layer below.

So when we turn these two on and create a clipping mask here, Layer > Create Clipping Mask, we’re going to get a built up effect. Let’s do that again here and create a clipping mask. First of all we need to turn these two layers on and then with the picture layer selected we can choose Layer > Create Clipping Mask or you can do it using the keys.

What I do is hold down Ctrl and Alt, which is Command and Option on the Mac, and just hold my mouse over the intersection between these two layers until I get this icon and then click once. Now I find that a whole lot easier and you may too if you create a lot of clipping masks. It’s really important that the clipping masks are filled with white.

Now in normal circumstances it doesn’t matter too much what you fill your clipping mask layer with but in this case it’s going to because we want to reduce the opacity of the layers a little bit so that we can see some of the background through. And so when we add two layers together, when we overlap two layers, we’re going to get a darkening in the area where they overlap.

So first of all I’m going to adjust the opacity down a little bit and now I’m going to select all of these layers by Ctrl or Command clicking on each of them in turn and set their blend mode to multiply. And what that does is it multiplies the fill layers so that the layers are built up so that we get some overlap between these layers so we can start seeing where they’re overlapped.

And from here you can just tweak the effect to darken or lighten the individual layers as you want to so that you get the effect that you’re looking for. And you can also fill in the background. So we can add a new layer, drag it to the very bottom of the layer stack and then fill it with whatever we like. I’m actually going to sample some of the yellow color from this leaf and with the layer selected I’ll Alt Backspace on the background layer to fill it with that.

But I could also fill it with a gradient. I could do all sorts of things. Now the important thing to know is that once you’ve created this effect it is fully customizable. So it’s very easy to replace this image with another image. All we need to do is to right click the layer, one of these layers that is a Smart Object, any one of them will do, and choose Replace Contents. So now what I’m looking for is an image to replace the contents with.

The image doesn’t have to be in the exact same proportions. We were using a landscape image but these are square images. But they do need to be good size images. So I had a really large image that I was working with so I want this image to be nice and big. And this one is 3,100 pixels so it’s pretty big. So I’ll select it and click Place and when I do it’s replacing the original image.

And I may want to adjust the opacity of these so that I get the effect that I’m looking for. For example, I mightn’t get enough of a layering effect without adjusting the opacity. And I may also want to adjust the background of this image to give it a darker background in these circumstances.

But it’s very easy to just reuse all of the basic work that you’ve done with this image and just replace it with another image. So I’m just sampling a color to use, Alt Backspace to fill the background. And there we have our effect. You could also use a color for these clipping mask layers but be aware that any color that you use is going to come through the images.

So let’s just make black our foreground color. Let’s just target this particular layer here and I’m going to Alt Backspace to fill it with black. Well you can see that the multiply effect has totally blackened that out. But if I use a sort of fairly light color here, well this is sort of a pale blue, but you’ll get the same effect, and fill it here you’ll see that we get a slightly darker look.

So we can darken this and have an effect on the image. The darker the color we use we’re going to not only see the color itself or example if we use pink we’re going to see the color through the image but we’re also going to darken up the effect.

Now it would be possible for example to choose different colors. So I’ve got some pastel colors that I’m filling these with. Let’s go for a sort of pastel blue here. And you can see the effect that it’s having, well I chose the wrong layer there. Let’s just undo that. Let’s go to this one and actually select the layer and fill it with a pastel blue.

So you could do that as well. And of course any time you choose to replace the image these color layers are going to stay in place so that you’ll get the effect on the new image that you’re replacing this one with. So there’s plenty of creative possibilities here in creating a layer image effect in Photoshop.

I’m Helen Bradley.

Thank you for joining me for this video tutorial. Subscribe to my YouTube channel so you’ll be advised when new videos are released.

And visit my website at projectwoman.com for more tips, tricks and tutorials on Photoshop, Lightroom, Illustrator, Photoshop Elements and a whole lot more.

Helen Bradley

Friday, June 28th, 2013

Photoshop – Adding Images to your Reusable Layout Template

Learn how to populate the layout template that we created in an earlier post with images of your own.

Click Here for Part 1


Transcript:
Hello, I’m Helen Bradley. Welcome to this video tutorial. In this tutorial I’m going to show you how you can actually make use of your reusable layout template that we made in an earlier video. In the previous video I showed you how to create this template.

It has a background color of white but that could be any color. It has space for two images. And then it has two copyright symbols here. One is black and one is white depending on which we want to use for any particular layout.

Now I’m going to show you how you can take this particular template and make it into this by adding images to it. I’m just going to hide this one away and we’ll focus on the one that we created.

I haven’t saved that yet but that doesn’t matter too much. Now I’m going to open some images that I want to use in it. So I’m going to go and select the images that I’d used previously. That’s winter7. And I want bird7 as well. So I’m just going to move these images into position. This is the main template and these are the individual images.

So to start off with I’m going to just drag and drop the background layers from each of these images into my main template. So this is this image first. I’m going to drag and drop it into position and I’m going to drag and drop this one in. Now you can see that the images that I’ve dragged and dropped in are way, way bigger than the template is. But that doesn’t matter because we know how to make them smaller. I’m going to click on the layer thumbnail, Ctrl T and then Ctrl Zero. You can see how much bigger these images are than the actual template itself. I’m going to size the image down quite small, click on this link here so I make sure that I don’t destroy its ratio of width and height, and I’m just going to move it roughly into position as to where it’s going to be in the final template. Now I’ll click the checkmark here and let’s go ahead and resize this one.

Click on the layer thumbnail, Ctrl T, Ctrl Zero. And now I’m going to scale it small, place it roughly in position, make sure that the width and height are scaled correctly in exactly the same proportion, finish off the positioning of it and then click the checkmark here. Now let’s zoom into the image. To make sure that this now works as we expect it to we need to bring back this line down here and we probably need to crop these images. Now the template has those crops already built into it.

The first thing I’m going to do is to drop this particular layer immediately above the layer that’s going to control its size. And then I’m going to drop this one immediately above the layer that’s going to control its size. And we’re going to use a simple feature called Clipping Path. With the topmost of this pair of layers selected, I’ll choose Layer and then Create Clipping Mask. And what that does is it clips this image to the exact size of the rectangle below. And now let’s do that with this one, click on the layer, Layer, Create Clipping Mask. And you can see that that’s clipped this particular image here to the exact size of the black box below.

The black has disappeared. It has nothing to do with it. These colors could be any color you like. But you can see that in doing so we’ve brought back the color from this layer here. And we can prove that that’s where the color is coming from. So I’m just going to select a blue color here and I’ll just fill this layer with blue. And you can see now that the space between those two images is the exact same blue as I just filled the background layer with. I’ll just undo that because I don’t really want blue.

To finish off I’m just going to decide which of these two copyright symbols is going to work better in this instance. Well I think the white one is. So I’m going to click its eyeball or its visibility icon and turn off the black one. So that’s how we would fill that template that we created in an earlier video.

Now your templates don’t have to be as simple as this one. They can be quite complex. And you may be aware that I have templates available on projectwoman.com. This is a free set of templates that you can download and use exactly as you’ve seen here. There are some triptychs and there are also some layouts with 9, 4 and 6 images in them.

I’m Helen Bradley. Thank you for joining me for this video tutorial. If you liked this tutorial place click the thumbs up to give it a like. Think about subscribing to my YouTube channel and visit my website at projectwoman.com for more tips, tricks and tutorials on Illustrator, Photoshop, Lightroom, Photoshop Elements, iPad and a whole lot more.

Helen Bradley

Thursday, November 15th, 2012

Photoshop Grunge Portrait

Give a grunge look to a portrait using the Photoshop High Pass filter and Smart Objects – it is a quick, easy, and fully editable.

Transcript:

Hello, I’m Helen Bradley. Welcome to this video tutorial. In this tutorial we’re going to apply a grunge portrait effect to a portrait in Photoshop. Before we start on creating the grunge effect let’s have a look and see what we’re looking for. This is the original image that I have open here in Photoshop. All I’ve done really is cropped it. And this is the final appearance that we’re going to give this image. It’s a lot more grungy. It’s a lot darker. It’s a lot more interesting image. And the way we’re going to do it is by harnessing the power of the high pass filter which allows us to get edges out of the image. And we going to do it in a way that we could adjust it if we needed to as we go along.

So now that we’ve seen what we’re aiming for let’s get started on our new image. And here’s the image here, and I’m just going to hide away the existing one. And we’re going to start by creating a duplicate of the background layer. I’ll right click and choose Duplicate Layer and click Ok. This is the layer that we’re going to apply the high pass filter to. And if we want it to be editable we need to first convert it for smart filters. All we’re doing effectively is making it a smart object. So we could right click and choose Convert to Smart Object, and it’s exactly the same process to choose Filter, Convert for Smart Filters. This is now a smart object so when I apply the high pass filter to it, it’s going to be done in a way that could be edited later on.

I’m choosing Filter, Other, High Pass. And with this high pass filter what I want is to begin to see the edges in the image but not a lot of color. Now depending on the sharpness of your image and exactly what the image is all about, this might be a larger or smaller value. Usually I suggest around 5 but this image is really quite soft and 5 is just not going to cut it. So I actually have this wound up to 9.6 and click Ok. But because this is a smart filler it doesn’t really matter because if it’s too much or too little we can come back later and fix it. We’re now going to set this layer blend mode to overlay so that we’re picking up these edges in the underlying image. So let’s see how far we’ve come. This is the original image and this is a slightly grittier, grainier version. But it’s going to get better.

We’re going to make another duplicate of the background layer, right click and choose Duplicate Layer. And we’re going to drag this above everything else. And we’re going to make it black and white and then blend it back into the image. It’ll be easier to do if first of all we set the blend mode to something like hard light so we see the effect that we’re going to have. And I would like to do this adjustment using an adjustment layer so that we can also change that later on if we like. Let’s start with Layer, New Adjustment Layer, Black and White. I’m going to click Ok and then I’m going back into this layer stack here. And I’m going to clip this layer because right now this adjustment layer affects everything so we have a black and white image. I just want it to affect this layer. So I click on this top layer and then either position my cursor between the two layers and press the Ctrl and Alt keys, Command and Option on the Mac, to clip that or I could choose Layer and then Create Clipping Mask. It’s exactly the same thing. And what that does is it clips the effect of this black and white layer to adjust this layer underneath.

Now we can have a look at our black and white layer and see how we can grunge up this portrait a little bit better because we’re actually seeing the final results. Now we can drag on these sliders our self to make our own setting or we could select a preset. And I’m going to choose the red filter because I kind of like that effect. And I’m probably just going to lighten these red and magenta channels and perhaps even the yellow channel a little bit before I continue. So I’m just going to close that down now.

Now we’ve got the image that we want we can fine tune it by adding another adjustment to it. And for this I would use a curves adjustment. So I’m going to again choose Layer, New Adjustment Layer, Curves. And this is going to affect the entire image this curves adjustment layer. And I just really want to lighten it and add a bit more contrast into the skin tones. If I click on this slider here you can see where the skin tones are in the image. They’re in this area down here so I can drag around this area to increase the contrast in the skin tones, perhaps lighten them up a little bit as we go. And that’s really personal preference at that point.

So let’s have a look and see where we started and how far we’ve come. This is the original image. It looked a little perhaps grungy when we started but we’ve actually been able to make it even look a lot more grungy with the application of this high pass filter, blending it back in with some black and white and then adjusting the curves. Now all of these changes are adjustable so for example we can come back to this high pass filter, double click here and adjust the high pass filter effect. So we can get more or less grunge effect by just adjusting that filter. We can also come back here and adjust this black and white filter, double click here and adjust this. And the final adjustment layer was a curves adjustment layer and it’s editable too. So there’s how to create a quick and easy grunge portrait effect. It’s all editable so that you can change it and fine tune it if you like.

I’m Helen Bradley. Thank you for joining me for this YouTube video. Look out for more of my YouTube videos on this YouTube channel. I encourage you to subscribe to my channel so you’ll be advised when new videos are released. And remember to visit projectwoman.com. You’ll find more tips, tricks and techniques for working with Photoshop, Photoshop Elements and Lightroom and other applications there.

Helen Bradley

Tuesday, December 8th, 2009

Photoshop image framing template

I love things that look good and which are simple to use and this custom framing technique is one of them. Here’s how it is done:

Step 1
Open an image to use as a template background. Here I’ve stacked two texture photos on top of each other and blended them with the Color Burn blend mode. I then added another layer with a brown blurred edge to give the design a vignette effect.

Step 2
Next create a new layer on the image and make a selection on it for the photo. Fill the selection with a solid colour. You can, if desired, add a grunge layer mask to this layer as I have done – I used a grunge edge from Graphic Authority and added a blended flower for decoration. I think the Graphics Authority grunge effects totally rock.

Step 3
Open the photo to frame with this design and drag its background layer into your template design. Rotate the image to match the rotation of the shape on the layer below and drag it on top of that shape. Choose Layer > Create Clipping Mask to mask the image to the shape below.

Once it is made, you can reuse this template by simply replacing the image layer.

Helen Bradley