Thursday, April 9th, 2009

Stupid Photoshop Tricks #3: Faux Reflections – Pt 2


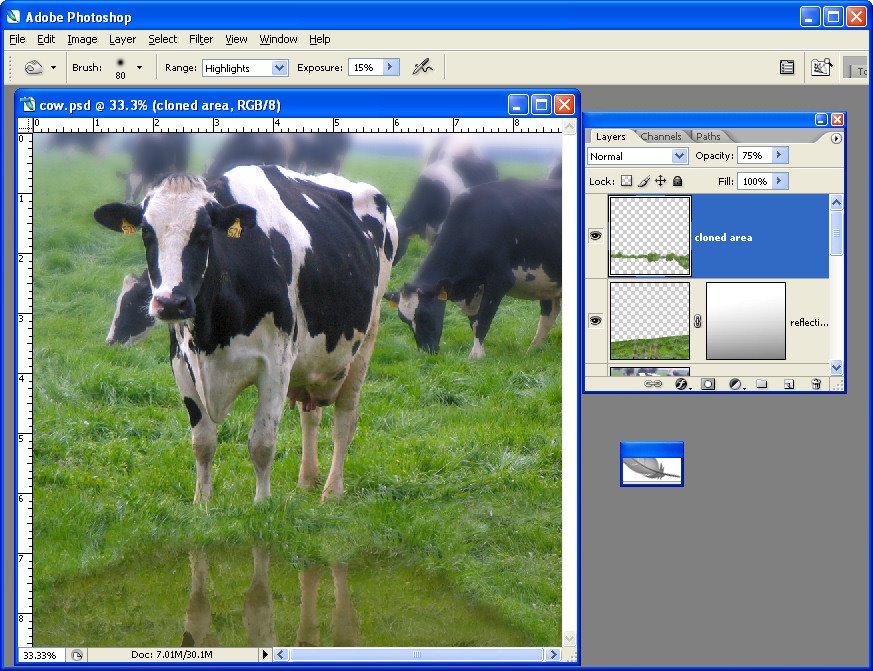
Reflections in Puddles
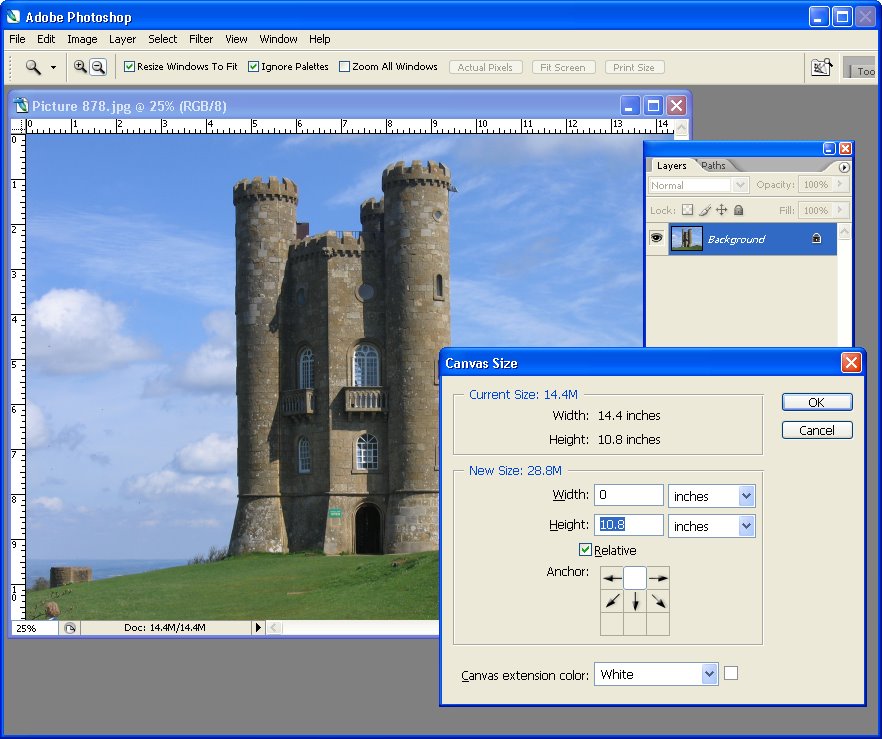
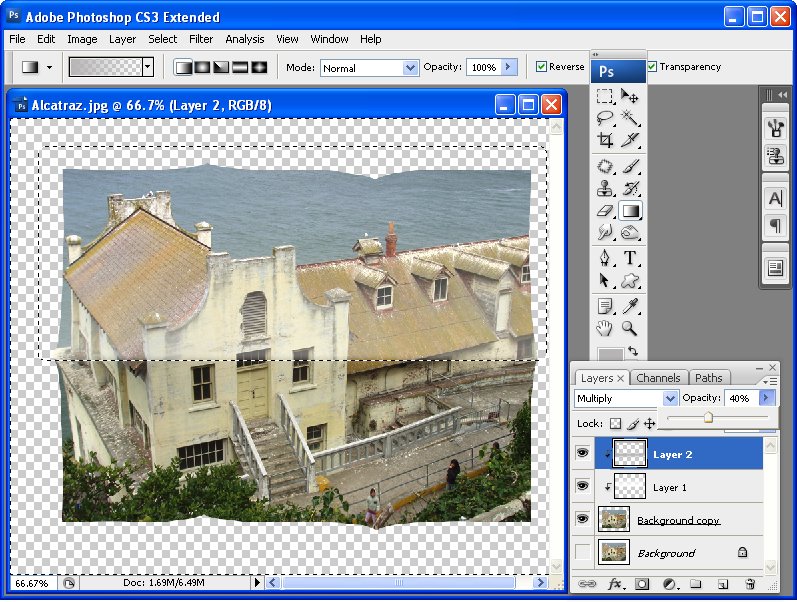
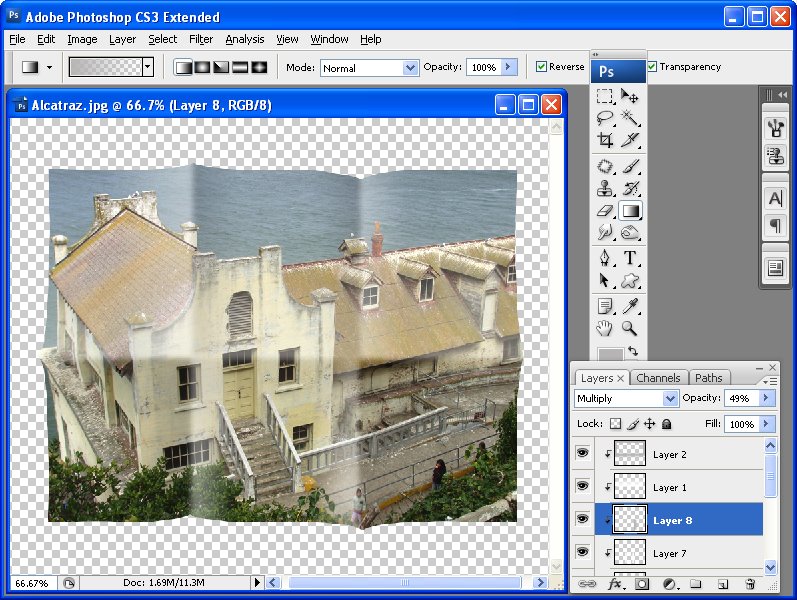
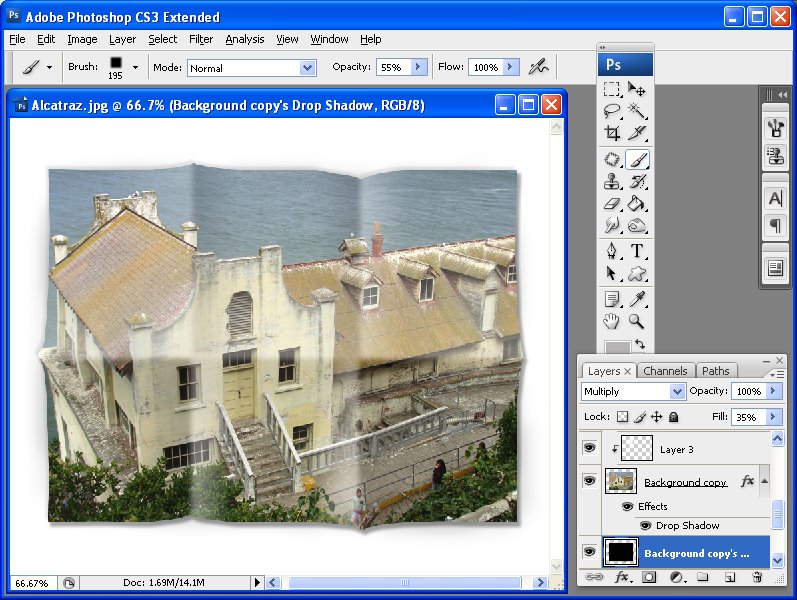
Creating a reflection that looks like a puddle on the ground is a fun technique. Start with an image of a pavement or brick and convert the background layer to a regular layer. Add a new layer on the image and, using black paint and a semi hard brush with 100% opacity, paint a puddle shape over the image.

Open the image to use as a reflection in the puddle and flip it vertically by choosing Image > Transform > Flip Vertical. Drag this layer onto the image with the black puddle in it and move it to the bottom of the stack. Control + Click on the layer thumbnail for the puddle to select it, add a feather to the selection and choose Select > Inverse to invert it. Hide the puddle shape layer.

Now click the original image layer and click the Add Layer Mask icon at the foot of the Layer Palette and a layer mask will be added to the image opening a hole in the pavement so you see the image through it.

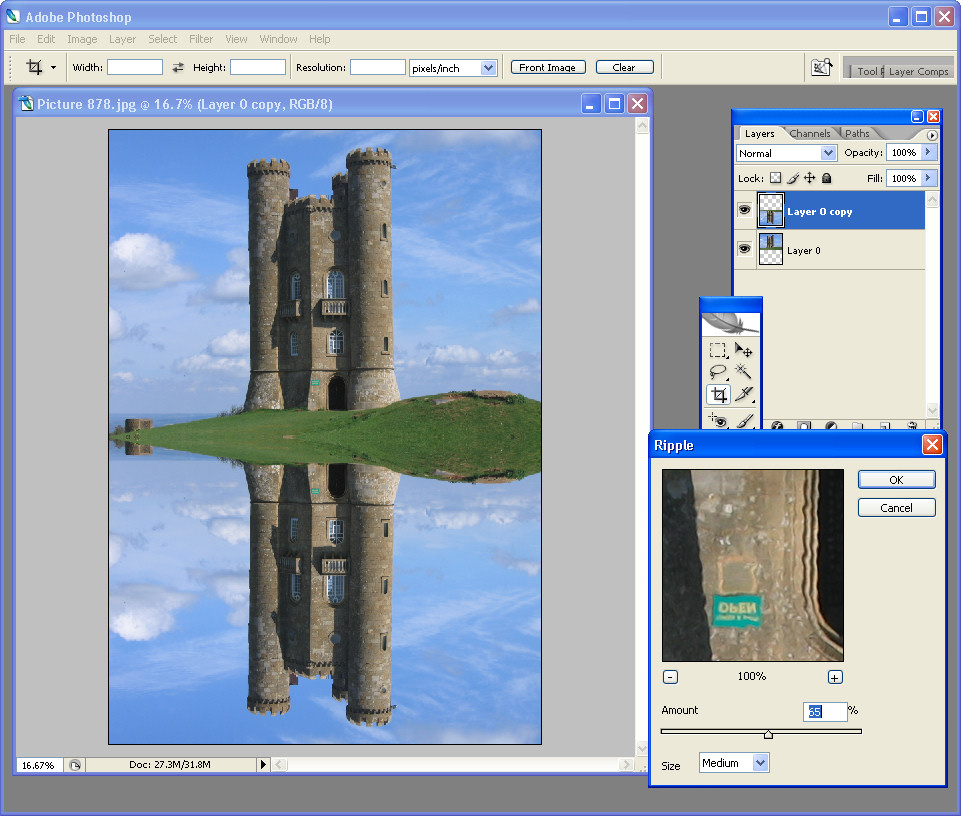
Move the image into position and then darken the pavement if desired using the Burn tool or duplicate the pavement layer and apply the Multiply blend mode to the duplicate and then reduce the opacity to suit.

To edit the reflection paint with black or white on the mask layer. Painting with black will add the reflection in that area and painting with white will remove it. With some fine tuning you should have an interesting result, fig 1.


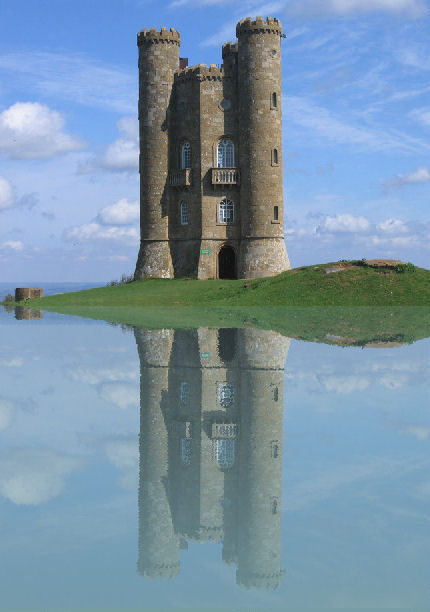
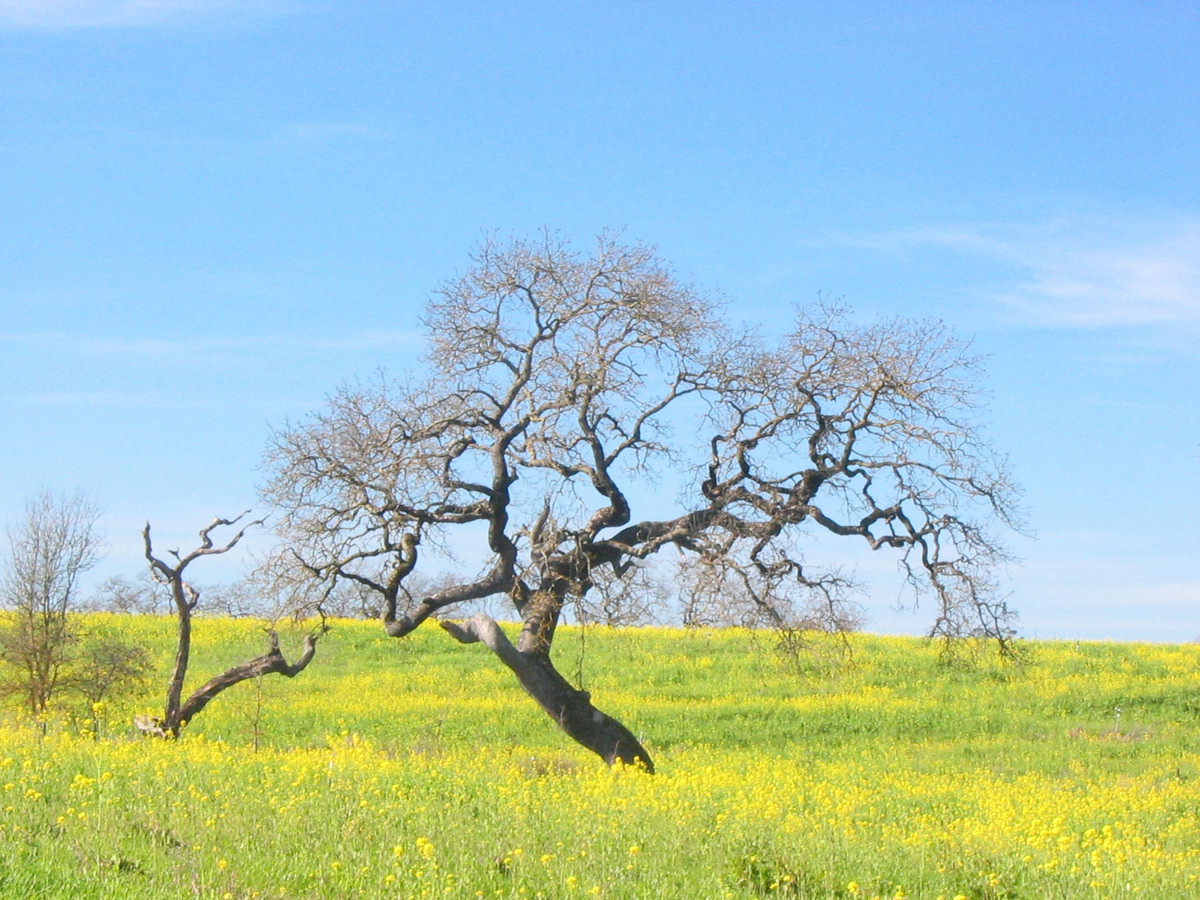
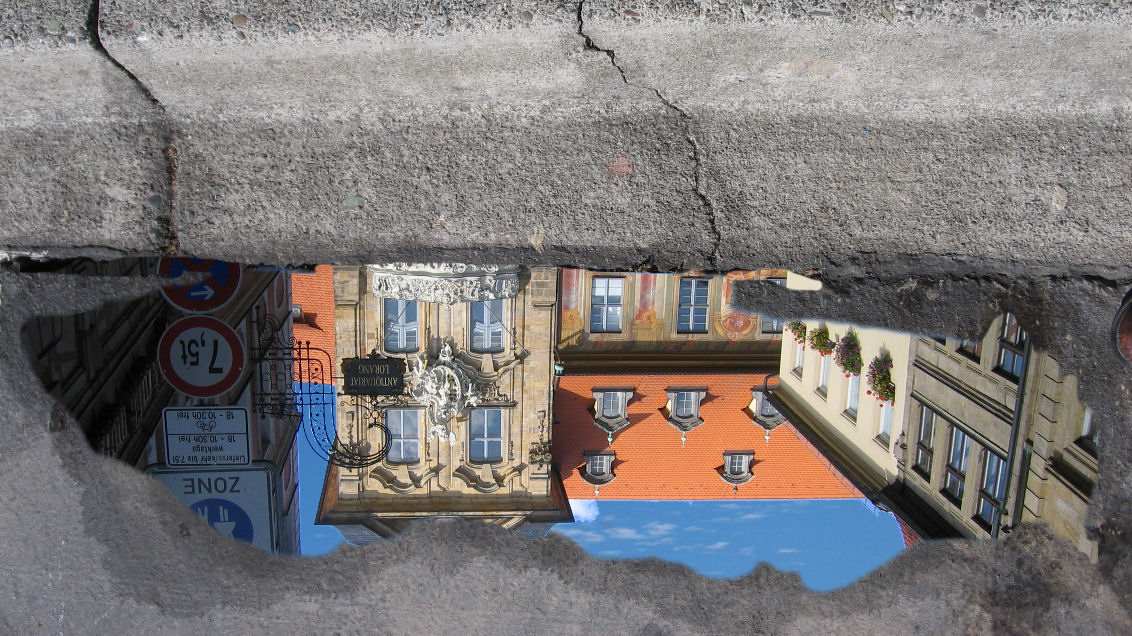
Fig 1 Create a reflection in a pavement image to show off your favorite sky or streetscape.

Mirror Reflections
Having said in part 1 that you should avoid using mirrors to create reflections, here is one way you can do it with a single image and without sacrificing reality – unless of course that’s what you want to do.

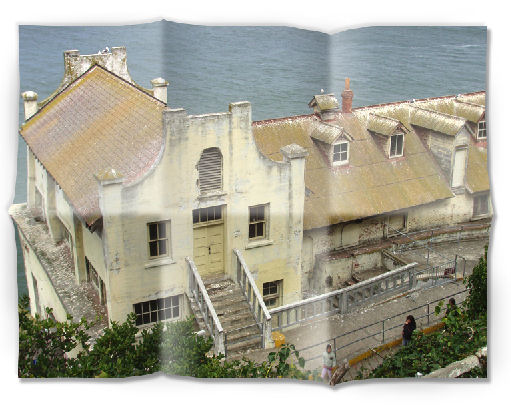
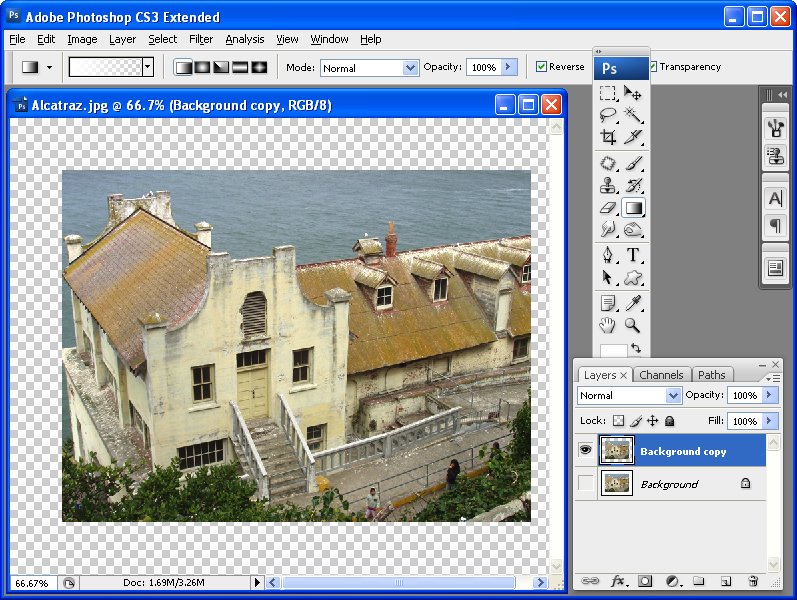
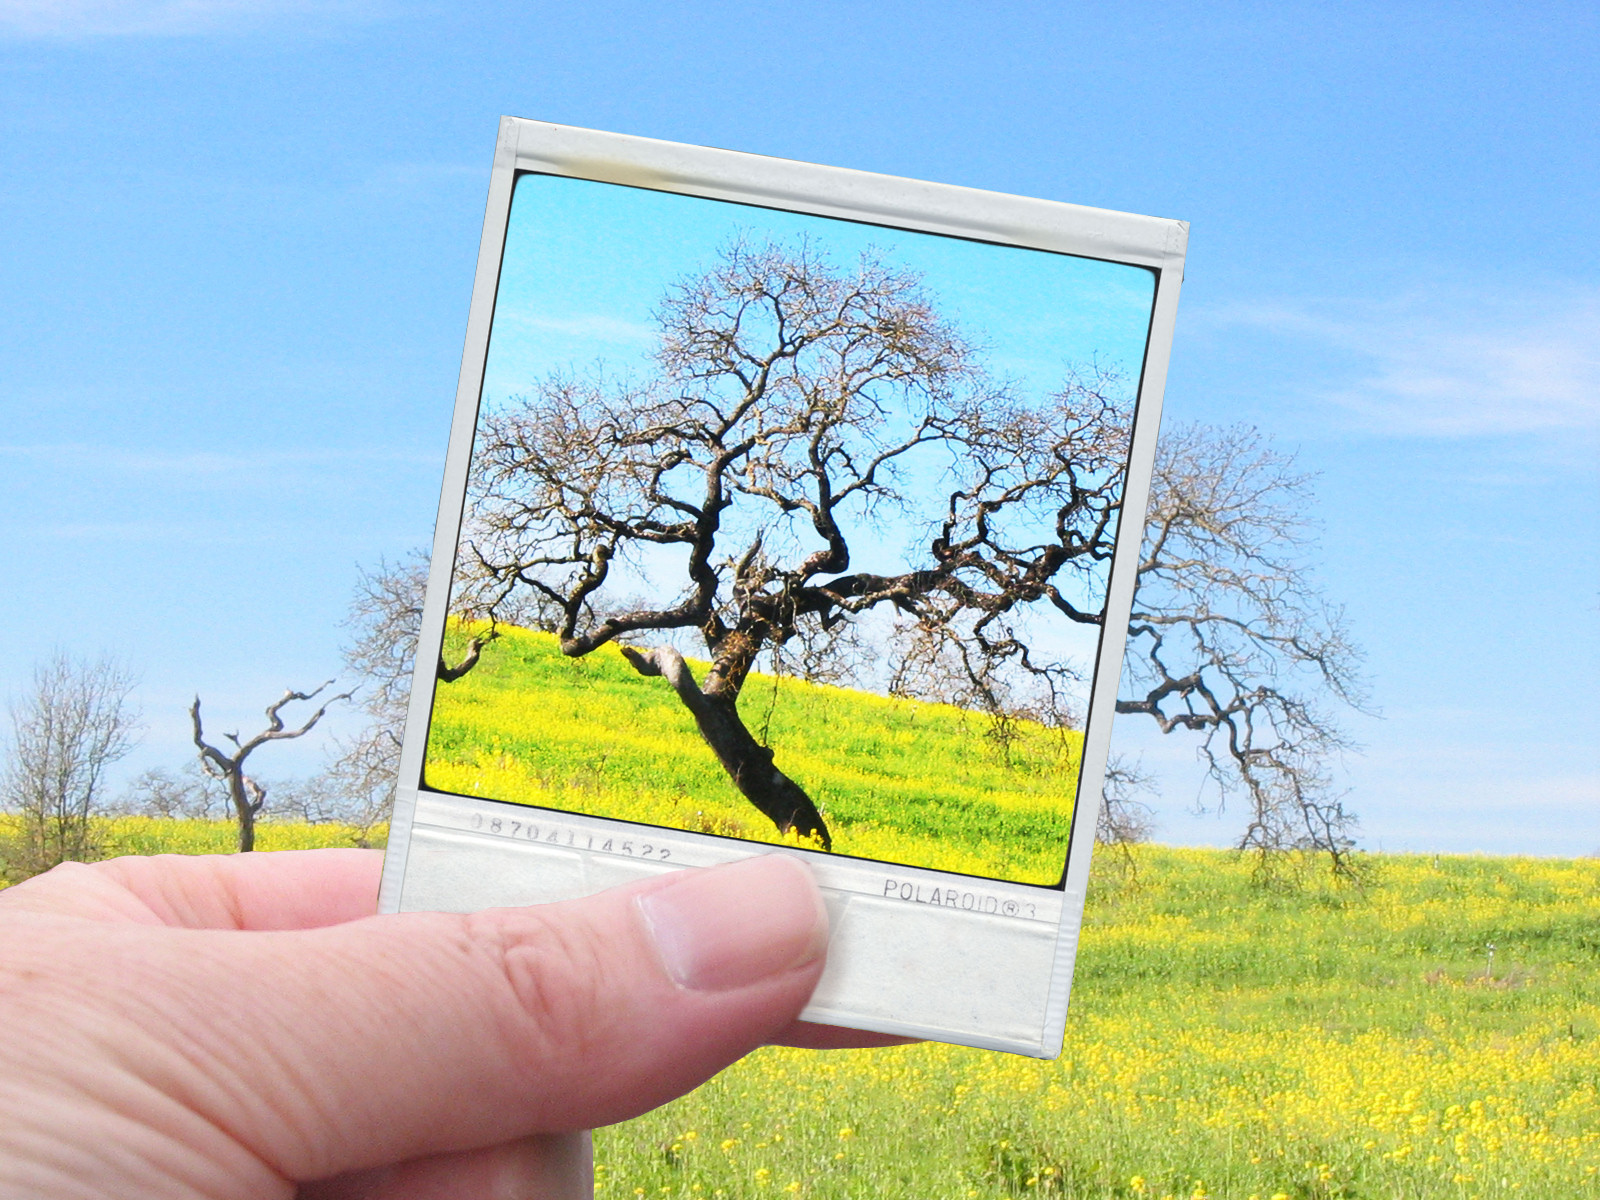
Open an image of a reflective object – a car rear vision mirror is a good choice and it’s easy enough to go out and shoot one if you don’t have anything else to work with. Convert the background layer of the image into a regular layer by double clicking on it and click Ok.

Open an image with a scene that you want to show reflected in the mirror and drag the image layer from this image onto the image with the mirror in it. You can now close the second image.

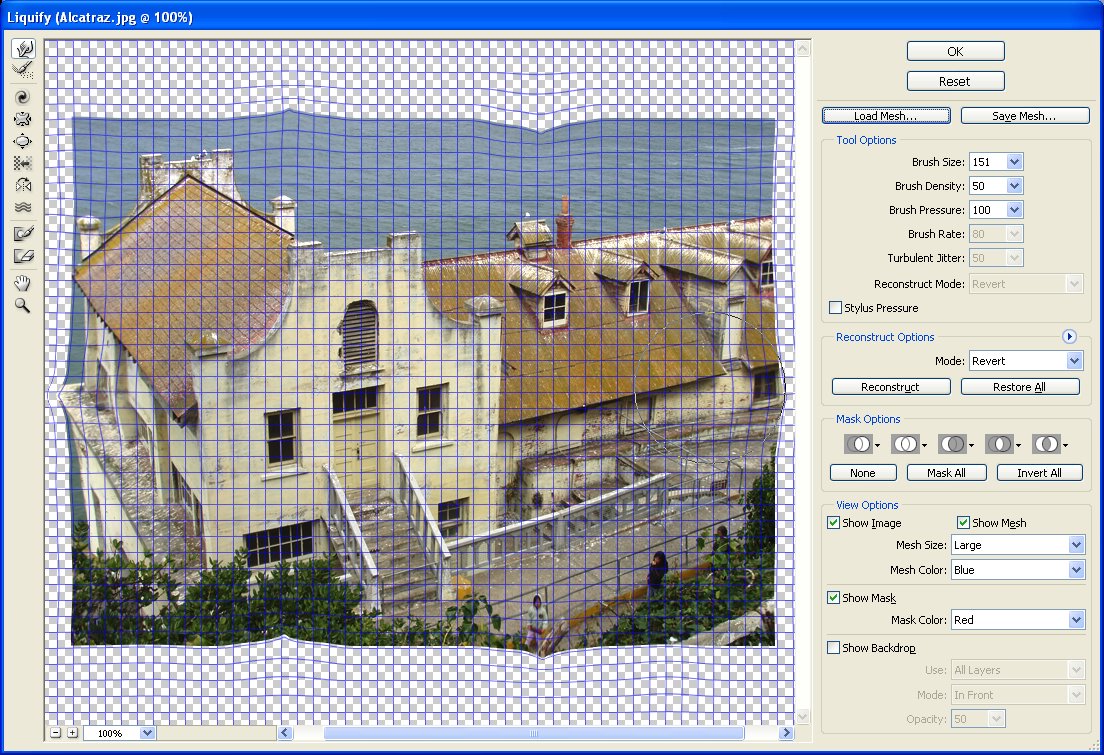
When you look at objects through a mirror they are in revere so you should mirror any image that has type or signs etc, that will look wrong if not flipped. To do this, click the layer to flip and choose Edit > Transform > Flip Horizontal. Hide this new layer for now by clicking its Layer Visibility icon.

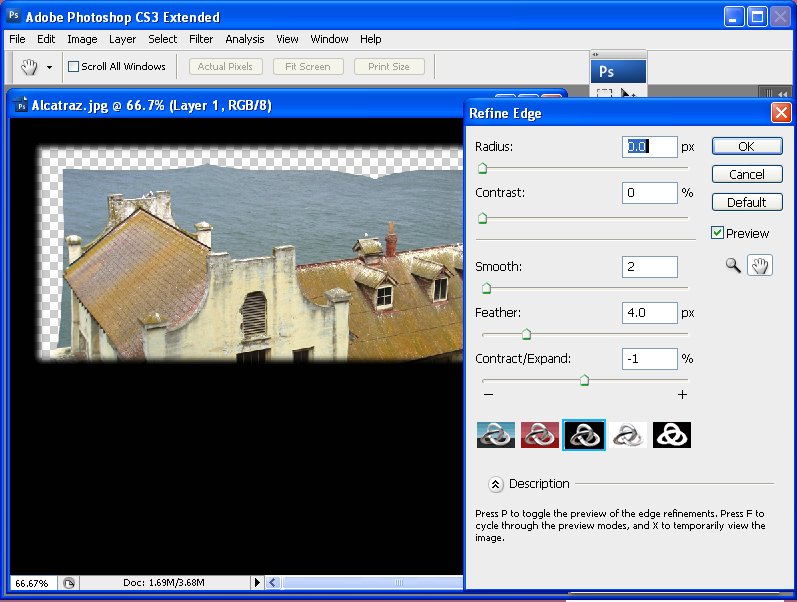
Click the bottom layer to make it active and make a selection around the area where the second image should appear inside the mirror. Feather the selection a little by choosing Select > Feather and apply a small feather value to soften the edge – in Photoshop CS3 and CS4 you can use Refine Edge to refine the selection edges.

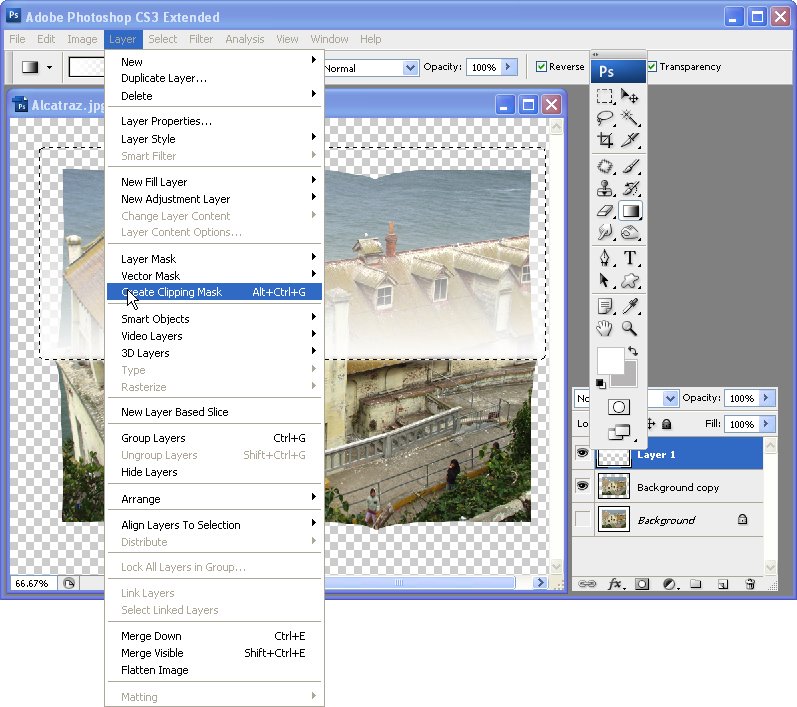
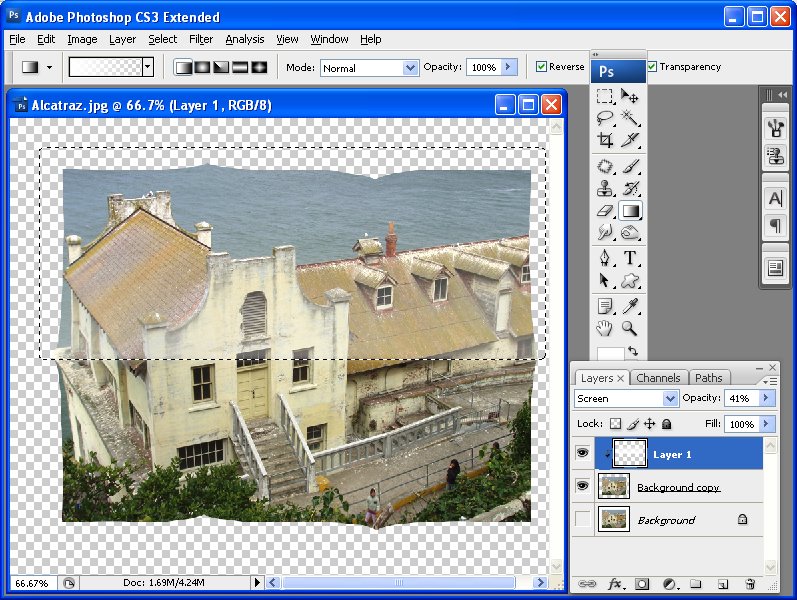
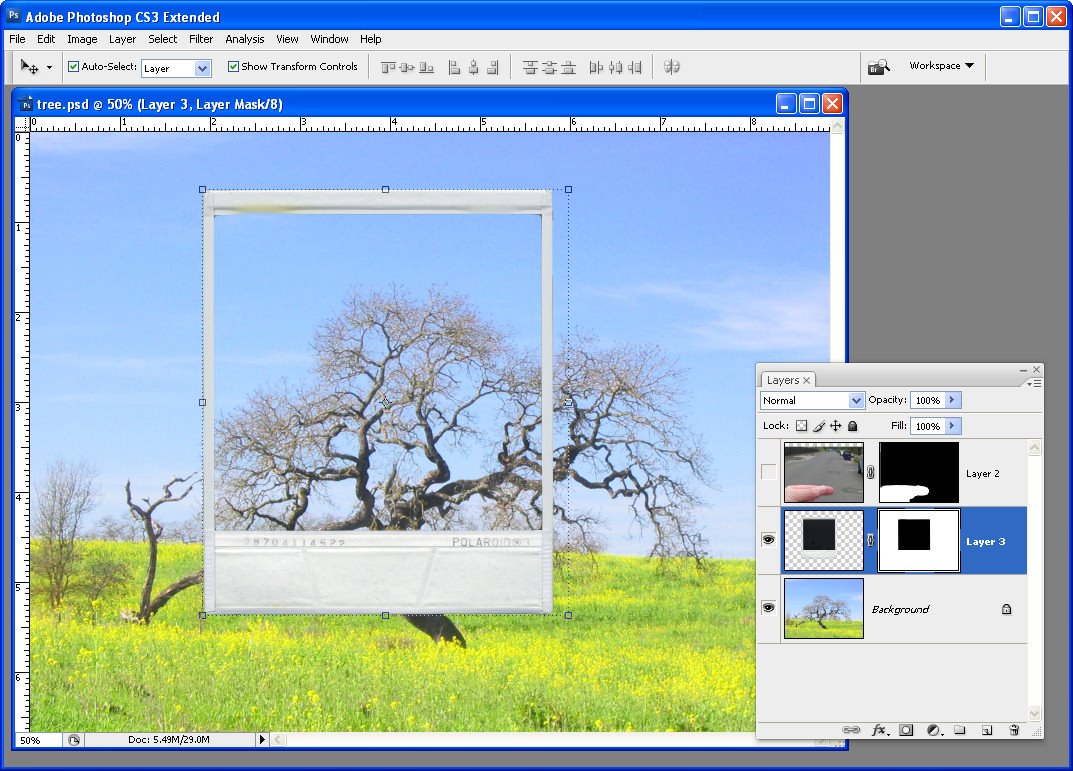
With this selection in place, click the Layer Visibility icon for the topmost layer so it is visible again. Click the Add Layer Mask icon at the foot of the layer palette and, immediately you do this, a layer mask will be created that automatically places the image inside the mirror.

Notice that the layer mask is a black and white image and, where it is black, that part of the image is hidden and where it is white that part of the image shows. A final touch is to darken the inside edge of the mirror as it was in the original image, see fig 2.


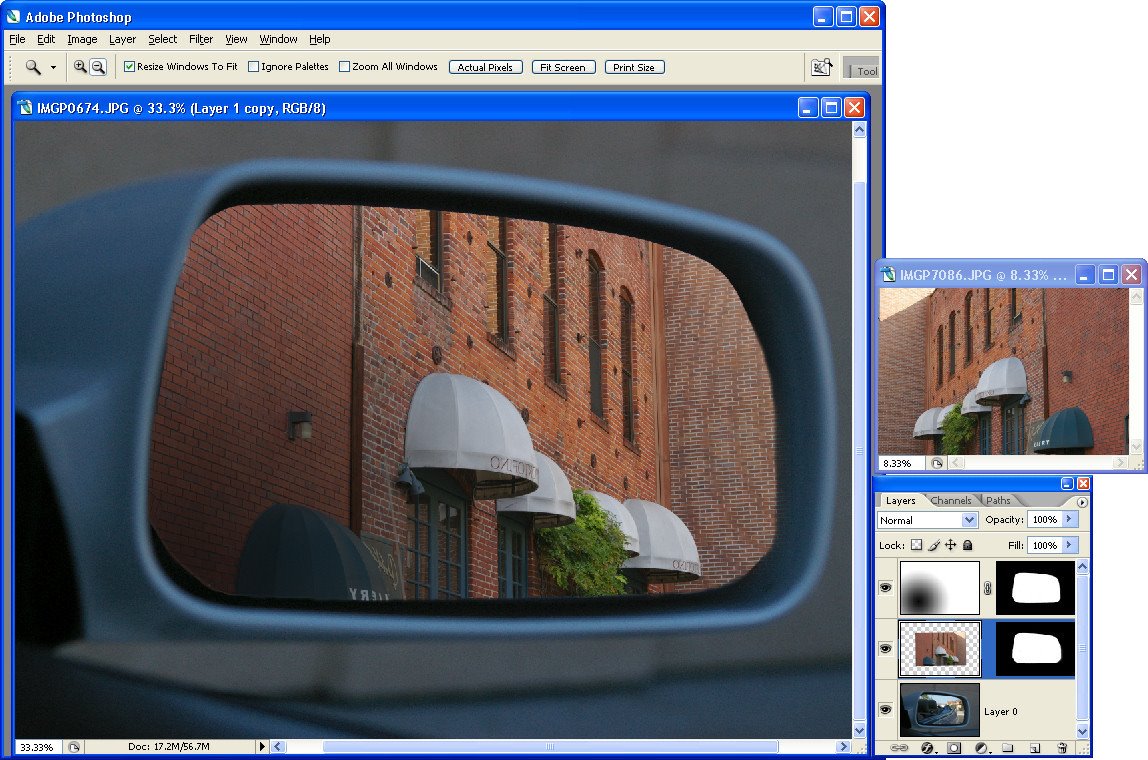
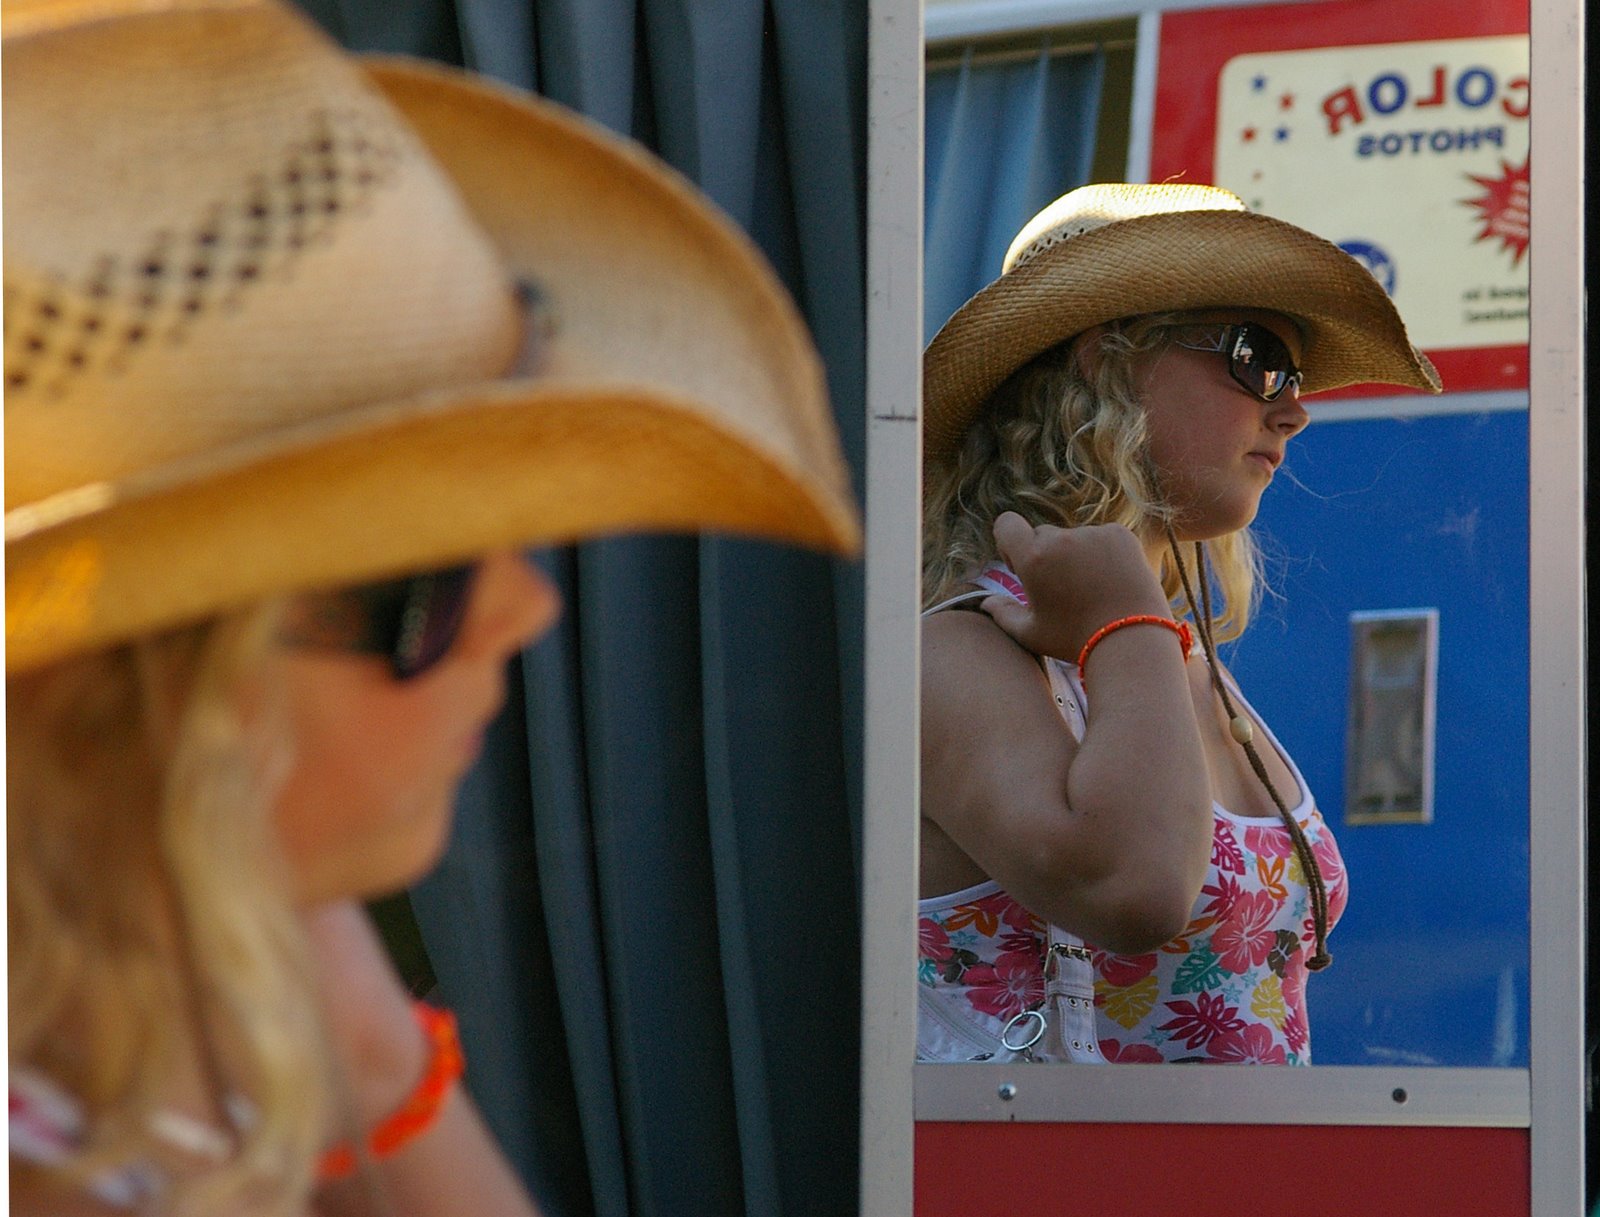
Fig 2. This simple reflection is created by placing a scene inside a reflective object such as a car mirror.

To adjust what portion of the image appears in the mirror, undo the link between the layer mask and the image (it is a small chain icon between them in the layer palette), move the layer into a new position and apply the link again.

If you’re interested in seeing some great real life pavement reflections so you can analyze their characteristics to apply them to your images, visit Photochiel’s wonderful Reflectins collection at Flickr: http://www.flickr.com/photos/photochiel/sets/140720/show.

Helen Bradley

Sunday, April 5th, 2009

Stupid Photoshop Tricks #3: Faux Reflections – Pt 1


There’s something very compelling about photos that capture reflections. These reflections can come from puddles on the ground but they’re not limited to wet environments. In fact any shiny surface can reflect its surroundings.

If you’re not lucky enough to encounter a reflection worthy of capturing, you can create a faux version with Photoshop. The process is relatively simple and you can create results that vary from looking realistic to those that are playfully faux. In this article I’ll show you three variations on the reflection theme including how to make a reflection in a mirror and how to create a puddle of water where there wasn’t one before.

Before you start working with reflections, there are some things to be aware of. One of these is to avoid attempting the impossible, such as placing a person in front of a surface and creating mirror reflection of them in it. The problem here is that you typically need two images, one shot from each side of the person to create the mirror image because what is reflected in the mirror won’t be what you’re seeing in front of it, as shown in Fig 1.

The easiest reflections to create are where the reflective surface is below the object being reflected in it. Examples of this are reflecting a building or scene in a lake or pond. This type of reflection requires only one image to achieve a semblance of reality. Another type of reflection that it simple to achieve is where you show the reflection but not the original object – in this case, almost anything can be reflected.


Fig 1 This is a photo of a person reflected in a mirror, to recreate this digitally you’d need two images, one shot from either side of the person.

Water reflection
When you think of reflections, you’ll probably think first of a scene or building reflected in a lake or large body of water. These reflections are fairly simple to create. Start with your image open in Photoshop and double click the background layer to make it into a regular layer.

Enlarge the canvas so you have room for the reflection by choosing Image > Canvas Size and read the current size from the top of the dialog. You’ll need to double the height so, to do this, click the Relative checkbox and the box in the top center of the 9 boxes in the Anchor preview. Type the value of the current height of the image into the dialog and click Ok, (see Fig 2). You should have lots of extra room below the image.


Fig. 2. Add more canvas to the foot of the image so you have room for the reflection.

Duplicate the image layer by right clicking it in the Layer palette, choose Duplicate Layer and type a name for this layer – Reflection – and click Ok. Select and delete any portion of the bottom of the image you don’t want to use. Click the layer name to select the layer and flip it by choosing Edit>Transform>Flip Vertical. Use the Move tool to drag the flipped version of the image down below the original image and align them carefully.

The reflection is in place but it’s probably won’t be particularly realistic. To add realism, add a ripple to the reflection layer by choosing Filter>Distort>Ripple and select a ripple amount of either Small or Medium. This adds a subtle distortion to the reflection and makes it look more like water, see Fig 3.


Fig 3 Add a ripple filter effect to make the reflected area look like water.

Because not all reflections will be perfect you can make the reflection disappear as it moves father away from the reflection line. To do this, add a new layer using Layer>New>Layer and fill the layer with black, muddy brown or blue/grey and drag it under all the layers. Return to the reflection layer and add a layer mask by clicking the Add Layer Mask icon at the foot of the Layer palette.

Click in the layer mask and click the Gradient tool on the toolbar. Select a White to Black gradient and set the style to Linear. Drag vertically on the image with your mouse to fill the mask with the gradient. It should be filled with white at the top and black at the bottom. If not, click the Reverse checkbox on the toolbar and repeat the gradient fill until you get a transition from fully opaque to partially transparent for the reflection layer. As you do this, the underlying black or brown layer will show through, see Fig 4.


Fig 4 The reflection has been made partially transparent so it’s not as perfect and it’s more realistic.

Other fine tuning options include duplicating the reflection layer and blur this duplicate by choosing Filter>Blur>Gaussian Blur. Blend this layer into the one below by decreasing its opacity.

If having a reflection appear as a straight line along the image doesn’t look good, you can clone elements from around the reflection to make it less obvious. To do this, add a new layer to the image and drag it on the top of all the layers. Select the Clone Stamp tool and ensure the Sample all Layers checkbox is selected. Now Alt + Click on an area to sample it and paint over the horizontal line to soften it. Cloning onto a new layer allows you to edit the cloned area separately from the original image. In fact, you may notice that nothing we’ve done in these steps has affected the original image.

Crop the image to create a more interesting result. For example, crop so the line between the original and the reflection is along the top third of the image so you’re showing more of the reflection and less of the original or crop so it’s along the bottom third so you see just a little of the reflection, see Fig 5.


Fig 5 This image has the reflection line softened by cloning and it’s cropped so only a little bit of the reflection shows.

Helen Bradley

Wednesday, April 1st, 2009

Stupid Photoshop tricks #2 – Fold a Photo


I love the texture of old heritage photos, particularly those that have been kicking around for some years and which have managed to accumulate folds and crinkles. While it can take many years for a printed photo to develop this sort of quality, luckily Photoshop allows us to create a similar effect for our digital photos in far less time. With the help of the Liquify filter to distort the edge of the photo and some gradient fills to add the highlights and shadows you can create the effect of a folded photo in minutes.

The Liquify filter is a tool which is often used to create funny effects like making a person’s eyes bulge or pushing their nose out of shape. It also has more serious applications, not only in photo retouching but also, as you are about to see, in creating interesting effects with your photos. We will use the Liquify filter to bend the edges of the photo to give the impression that it’s been folded and then unfolded.

Here’s how to get started on the effect:

Step 1
Open the photo that you want to use with this effect. I have used a landscape orientation photograph which will be folded into six panels. Duplicate the background layer by choosing Layer, Duplicate Layer and click Ok. Turn off the layer visibility icon for the Background layer.

Step 2
Add some extra canvas around the image by choosing Image > Canvas Size and click the middle of the nine Anchor points. Select the Relative checkbox and add a small amount of space around the image. For example, for an 7 x 5 inch image add 2 inches to the Width and Height. Click Ok to add the extra canvas, (see Fig 1).


Fig. 1. To make room around the photo so you can warp its edges, add some extra canvas.

Step 3
To alter the edges of the photo so they’re not square, you will use the Liquify filter. Choose Filter > Liquify and select the Forward Warp Tool in the top left of the screen. Select a large brush size and, working across the top edge of the image, start at a position one third of the way across and pull the edge gently up using the Forward Warp Tool. At the two-thirds mark pull down slightly.

Along the right edge, pull the image out at the half way position and do this again half way down the left edge, pulling outwards here too.

Across the bottom, push the edge up at a position one-third in from the left hand edge and push it down at a position two thirds in from the left edge.

Step 4
Reduce the brush size and push again on all these points to create a sharper distortion in the edge. Reduce the brush size again and continue to refine these points until they are smooth but obvious.

Step 5
Switch to a large brush size and push or pull on the corners of the image to get a very subtle change so the corners aren’t perfectly square, (see Fig 2). When you are done you can save the mesh so you can use it later on by clicking the Save Mesh button. Click Ok to return to editing in Photoshop.


Fig. 2. The Liquify Filter lets you warp the edges of your image so it will look like it has been folded.

Add the shadows
Shading will help you achieve the effect of a photo that has been folded and then opened flat:

Step 6
Use the Rectangular Marquee tool to select the top half of the image. Apply a feather to this selection by choosing Select > Refine Edge and adjust the Feather value to achieve a soft edge, (see Fig 3). Add a new layer by choosing Layer > New > Layer and click Ok.


Fig. 3. Use the Refine Edge tool in Photoshop CS3 to add a feather to the selection to soften it.

Set the foreground color to white and the background color to a mid-grey. Click the Gradient tool – it shares a toolbar position with the Paint Bucket Tool – and click in the gradient display on the tool options bar to open the Gradient Editor. Select the Foreground to Transparent gradient and click Ok, (see Fig 4).


Fig. 4. The shadows and highlights are created using a Foreground to Transparent gradient.

Drag your mouse from the top of the image downwards and just over the edge of the selection you made. You will get a gradient which ranges from transparent to white and the white part will be across the middle of the image. The gradient fill is contained inside the selection.

With this layer still selected, choose Layer > Create Clipping Mask so that the gradient fill constrained so it appears over the image and no longer outside it, (see Fig 5).


Fig. 5. To confine the gradient so it covers the image and not the area round it, use Layer > Create Clipping Mask.

Set the Blend Mode for the layer to Screen to lighten the image and adjust the Opacity so the effect is subtle – around 30-40% Opacity is a good value, (see Fig 6).


Fig. 6. Blend the highlights into the image using the Screen layer blend mode and a reduced layer opacity.

Step 7
Invert the selection by choosing Select > Invert. Add a new layer, switch the foreground and background colors by clicking the Switch Foreground and Background Colors icon and apply a light grey gradient fill to the bottom half of the image, this time drag the gradient from the bottom of the image upwards to finish slightly over the top of the selection marquee.

Again, create a clipping mask from this layer by choosing Layer > Create Clipping Mask. Set the blend mode for this layer to Multiply and reduce the opacity to get a slight darkening of the photo along the middle ‘fold’ line, (see Fig 7).


Fig. 7. Add the shadow to the bottom of the image using a grey gradient, this time using the Multiply blend mode.

Step 8
To add the additional highlights you will need six layers, one for each of the six panels that would be created by folding a photo three times. Each panel will have either a white or grey gradient applied to it. When you apply a grey gradient, use the Multiply blend mode and when you apply a white gradient, use the Screen blend mode for the layer.

When creating each panel, create a new layer, make your selection using the Rectangular Marquee tool, feather the selection, apply the gradient, set the layer blend mode, adjust the layer opacity and create the layer as a Clipping mask.

The gradients should be applied as follows:
top left – apply a white gradient to the right hand side of the panel
top middle – apply a grey gradient to left and right sides of the panel
top right – apply a white gradient to the left side of the panel
bottom left – apply a grey gradient to the right hand side of the panel
bottom middle – apply white gradient to the left and right sides of the panel
bottom right – apply a grey gradient to the left side of the panel

You might recognize there is a pattern to how these gradient fills are applied.


Fig. 8. Add shadows to all six of the panels that the folded photo shows.
Step 9
Click the Background layer and choose Layer, New, Layer. Fill this layer with white.

Click the Background Copy layer to select it and click the Layer Style icon at the foot of the Layer palette. Select Drop Shadow and add a drop shadow with the angle of the light at around 130 degrees. Click Ok when you’re done. Right click the Effects layer that contains the Drop Shadow and choose Create layer. This moves the Drop Shadow to its own layer.

Apply a second drop shadow to the Background Copy layer, this time make the shadow smaller, lighter and configure it so the light comes from the opposite direction.


Fig. 9. Add two drop shadows using the Layer Style tool to make the paper look dimensional on the page.

The final image looks like our photo has been folded in three and then opened out. This process can be applied to other creative folds. You can use it to create a photo that has been ‘folded’ more or less times than the three shown here, or one which has a bent corner or which is folded accordion style. A simple combination of lights and darks created using gradient fills will give you a realistic folded look.

Photo credit: Brenda Smith

Helen Bradley

Sunday, March 15th, 2009

Stupid Photoshop tricks #1 – hold your own photo

There are heaps of creative things you can do with your images in Photoshop and one I think totally rocks is a collage technique that turns your photo into a photo of itself. If you’re totally confused, check out the image – you’ll see a hand holding up what appears to be a Polaroid image in front of a scene – the Polaroid image itself shows part of the background scene and it’s all done in Photoshop – here’s how:


To create this image you will need a photo with an interesting subject. I’ve used a spring landscape.


You will also need a photo of your hand held as if you are holding a photo in it. Take the photo of your hand with your point and shoot camera held in one hand and your other hand stretched out in front of you. You may need to use macro mode to ensure that the hand is in focus and not the scene behind. The ideal setup for photographing your hand is with a road or carpark as the background – the contrast between your skin and the road will make it easy to select around your hand.

While you can create your own faux Polaroid image, there is a good one you can download from http://lured2stock.deviantart.com/art/Polaroid-3262470.

Open the photo of your hand, the landscape and the Polaroid image in Photoshop. Crop the hand to remove excess background.

Select around the edge of the Polaroid image and remove its excess background so you have only the image itself.

Drag the background layer from the Polaroid image and the hand image into the landscape image. Each element will appear on its own layer.


Drag the hand to the top of the layer stack and hide the other two layers. Use your favourite section tool to select around the hand and add a layer mask by clicking the Add Layer Mask icon at the foot of the Layer palette (use Alt + Add Layer Mask if you selected the background rather than the hand). Using a layer mask makes it easier later on to remove parts of the hand so the Polaroid will look like it is held in your hand.


To transform the Polaroid image so it is the correct size, Ctrl + click on its layer thumbnail and select the Move tool. Press Ctrl + T to select the free transform tool and then Ctrl + 0 (zero), to scale the image so that you can see its sizing handles. Drag the Polaroid into the approximate position it should appear in the image and size it to suit. It should appear partially covered by the hand.


Make a selection around the inside of the Polaroid image and delete it or add a mask to hide it. Select the background layer and hide the two top layers. Move the selection over the underlying image – choose Select > Transform Selection and resize it in proportion if desired.


Choose Edit > Copy to copy the selection onto the clipboard, then Edit > Paste to paste it into a new layer, size it to fit the hole in the layer above. Brighten this layer if desired. Select this layer and the Polaroid image by Shift + clicking on each of them and choose Layer > Link Layers. Rotate the Polaroid slightly.


Make the hand layer visible again. Select the brush and black paint, click on the layer mask for the hand layer and paint out portions of the hand that should be behind the Polaroid. Add a new layer below this layer and paint a small drop shadow along the edge of the fingers over the Polaroid.

Helen Bradley