Sunday, August 25th, 2013

Lightroom Tip – Add a Vignette Effect to an image

Learn how to darken the edges of an image using a Vignette in Lightroom

Vignettes are a darkening or lightening of the edges of an image – they can make an image look very attractive.

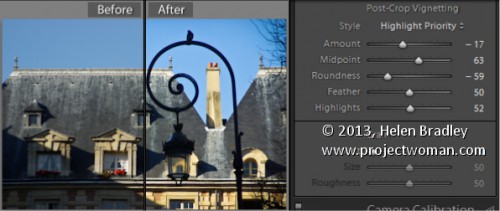
To add a vignette, open the Effects panel, set the Style to either Highlight Priority or Color Priority – Paint Overlay is the least attractive option. Drag to the left on the Amount slider to add a dark vignette and to the right to add a light one.

The Midpoint slider adjusts how the effect is applied to the edges of the image. Increase it to remove the vignette from the edges leaving it mainly in the corners.

Roundness controls the roundness of the vignette, drag to the left to make it more square, to the right to make it more circular. Feather controls the softness of the edges so use 0 for a hard-edge and 100 for a very soft edge.

Highlights applies when you use a negative Amount to create a darkened vignette. Zero gives no change and larger values preserve highlight contrast when you select Highlight Priority or Color Priority.

Helen Bradley

Friday, August 23rd, 2013

Word 2010 and 2013 Tip – Markup the changes to your document

Keep track of the changes made to your document

Word’s Reviewing tools make it easy to show someone the changes you’ve made to a document.

You can set Word to record the changes before you make them by selecting the Review tab on the ribbon and click Track Changes > Track Changes.

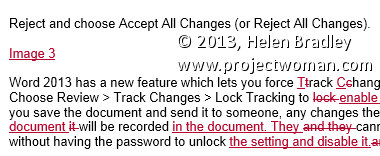
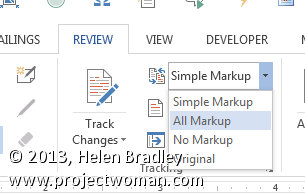
Now, in Word 2007 & 2010, every addition to your document will be underlined and every deletion will be marked with strikeout. Word 2013 defaults to Simple Markup so you will need to choose All Markup to see the changes marked up.


These changes are retained when you save the document.

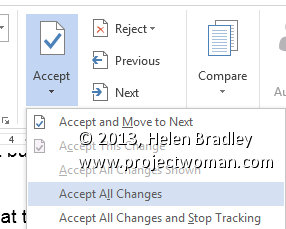
You can apply the changes permanently at any time by selecting Review > Accept or Reject and choose Accept All Changes (or Reject All Changes).

Word 2013 has a new feature which lets you force Track Changes to be enabled. Choose Review > Track Changes > Lock Tracking to enable this feature. Now if you save the document and send it to someone, any changes they make to the document will be recorded in the document. They cannot disable this feature without having the password to unlock the setting and disable it.

Helen Bradley

Thursday, August 22nd, 2013

Lightroom Tip – Sharpen only the edges in the image

How to use the Masking Slider to limit image sharpening to only the edges in the image

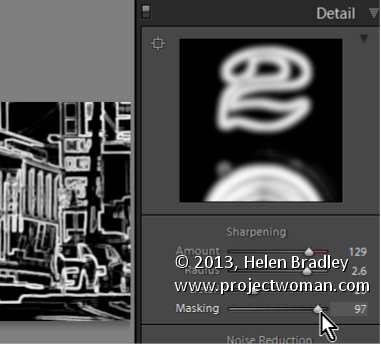
The Masking slider in the Lightroom Detail panel allows you to control the areas of the image that are sharpened and those that are not.

Hold Alt (Option on the Mac) as you drag on the Masking slider. As you do you will see a black and white overlay on the image. The areas that are black are not sharpened, those that are white are sharpened. The farther you drag to the right the more the sharpening is limited to just the edges in the image where you want it to be applied to.

Drag on the slider to control just how much of the image you want to have sharpened. When you’re done, adjust the Amount to a value that makes sense for the image.

Helen Bradley

Monday, August 19th, 2013

Lightroom Tip – How to manage halos when sharpening

Learn how to suppress halos with the Detail Slider when Sharpening in Lightroom

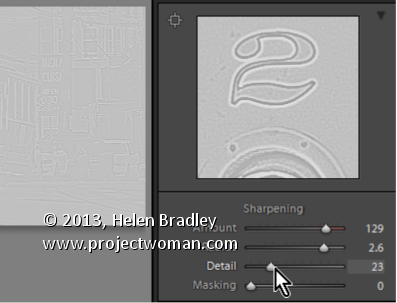
The Detail slider in the Detail panel in Lightroom lets you suppress the haloes you create with the Radius slider.

At zero position you will fully suppress any halos and at 100 you will have no halo suppression so you will see all the halos added using the Detail slider.

This means that a low value for the Detail sider sharpens only the largest edges in the image and a large value for Detail will tend towards sharpening everything.

Hold Alt (Option on the Mac) as you drag on the Detail slider to see the effect on the halos around the edges in the image.

Typically if you use a high Radius value then you will want to use a low value for Detail and vice versa.

Helen Bradley

Thursday, August 15th, 2013

Word 2010 and 2013 Tip – How to sort data in a Word document


Sorting data in Word 2007, 2010 & 2013

In the pre-ribbon versions of Word you would use the Table commands to sort data in a Word document.

In Word 2007, 2010 & 2013 you can’t use the table sort options any longer for plain old text simply because you can’t select the table options if you don’t have a table – it’s a Catch 22 situation.

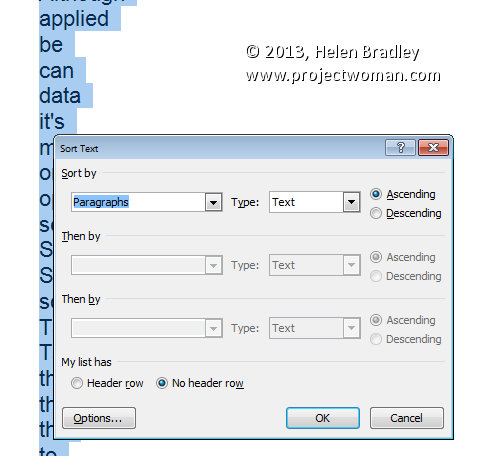
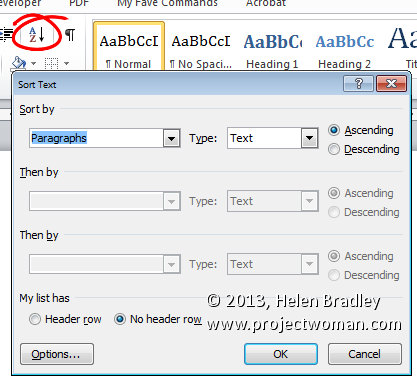
Luckily, Word now includes a proper sort option for any text – not just table text. To use it, first select the text to sort and then click the Sort button on the Home tab of the Ribbon.


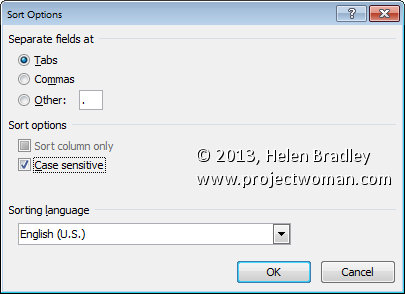
When the Sort Text dialog opens you can choose what to sort such as Paragraph or Field and the type of sort. If you want a case sensitive sort so A is treated differently to a then click Options and check the Case Sensitive checkbox.

Once you are done select the sorting options, click Ok to perform the sort.

Helen Bradley

Wednesday, August 14th, 2013

Lightroom Tip – Using Amount and Radius when Sharpening

Learn how to fine tune sharpening with the Amount and Radius Sliders

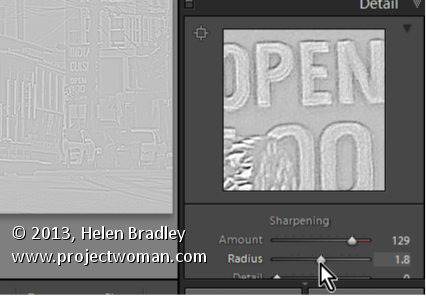
The Detail panel in Lightroom controls sharpening on the image. Use the Amount slider to manage the intensity of the sharpening – set this to a high value to begin.

The Radius slider adds halos around the edges in the image which is what gives the sharpening effect.

For an image with lots of fine lines and detail such as a building select a low radius. For a portrait or an image with softer detail, use a high radius value.

Hold the Alt key (Option on the Mac) as you drag on the Radius slider to see the halos.

Helen Bradley

Sunday, August 11th, 2013

Lightroom Tip – Preparing to Sharpen an Image

How to prepare your image for sharpening so you can make a good adjustment

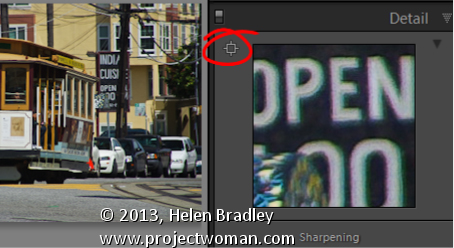
To sharpen an image, first make sure that the main image is visible at a 1:1 ratio in size so you can see the resulting sharpening effect more clearly.

To control what appears in the Preview window, click the indicator in the top left of the Detail panel and click an area of the image to preview. Choose a good position on the image as a preview – something that needs to be good and sharp.

You can also click on the image in the Preview – click once to see the preview filled with the image and again to zoom into the image.

Drag the image in the Preview window to see different parts of it.

Helen Bradley

Friday, August 9th, 2013

Word 2010 and 2013 Tip – Flow text through a document with linked text boxes


How to use linked text boxes to flow text throughout a document automatically

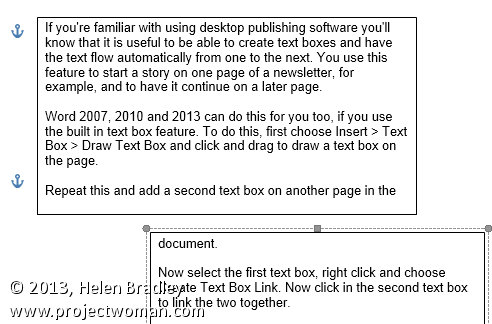
If you’re familiar with using desktop publishing software you’ll know that it is useful to be able to create text boxes and have the text flow automatically from one to the next. You use this feature to start a story on one page of a newsletter, for example, and to have it continue on a later page.

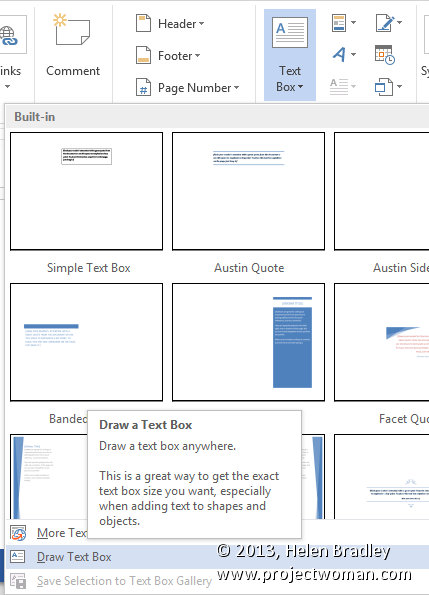
Word 2007, 2010 and 2013 can do this for you too, if you use the built in text box feature. To do this, first choose Insert > Text Box > Draw Text Box and click and drag to draw a text box on the page.

Repeat this and add a second text box on another page in the document.

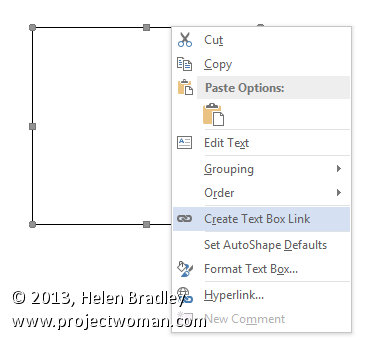
Now select the first text box, right click and choose Create Text Box Link.

Now click in the second text box to link the two together.

In future, any text which you type into or paste into the first text box and which won’t fit because the box is not large enough to accommodate it, will flow automatically into the second text box.

Helen Bradley

Thursday, August 8th, 2013

Lightroom Tip – Using a Split Tone effect on a Black and White Image

Split Toning a Black and White Image – learn how to make the Highlights and Shadows Different Colors

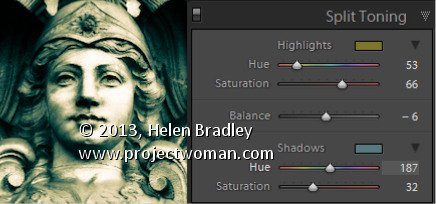
Split Toning applies one color to the highlights and another to the shadows in an image.

Good color choices when applying a split tone are colors that are opposite each other on the color wheel such as magenta and green, blue and yellow, or red and cyan – although you can choose any combination you like.

To apply the split tone effect, drag on the Hue slider or click the color picker to choose a color to use for the Highlights and then choose something else to use for the Shadows.

Adjust the Saturation of the colors as desired.

Balance allows you to fine tune how the colors are applied to the image – drag to the left to adjust the balance towards the shadow color and drag to the right to add more of the highlight color.

Helen Bradley

Tuesday, August 6th, 2013

Photoshop Tip – Create an Image Watermark

Make a Watermark Reminiscent of a Post Office Stamp Cancellation

In a older post I talked about using an image watermark in Lightroom to apply to your images.

Lightroom Tip – Using Image Watermarks

Finally, in this post, I’ll show you how to create the watermark image to use.

This watermark has two concentric circles with text between them and a set of wavy lines making it look like a post office stamp cancellation. The watermark also has a slightly grunge look.

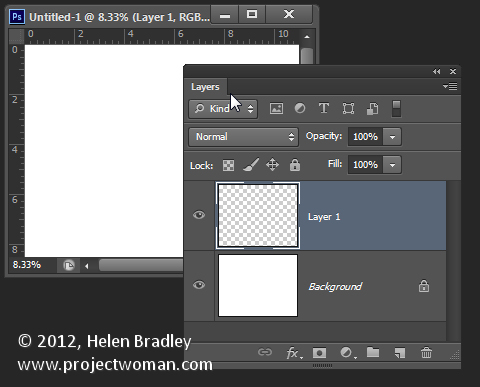
To make it, start in Photoshop with a letter size image. I set mine to landscape orientation with a white background. This will make it easy to create a black watermark and I will be able to see it as I work.

Add a new layer by choosing Layer > New > Layer. This is a transparent layer on which you’ll place the circles.
Start with the Ellipsis Tool which shares a position in the Tools with the Rectangle tool – it is a shape tool – don’t use the Elliptical Marquee Tool.

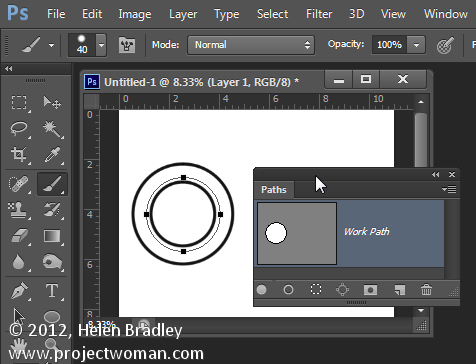
Make sure that the option on the Tool Option bar is set to Path and hold Shift as you drag a circle on the screen.
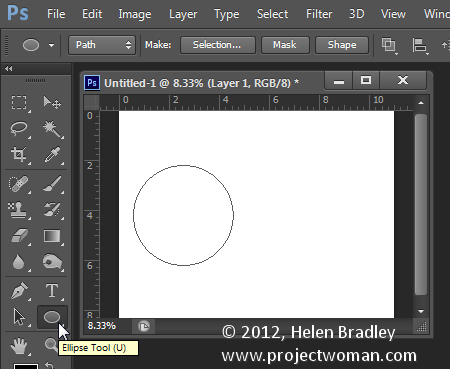
When the circle is in position choose Window > Paths to view the Paths palette.

Select the Brush tool and select a brush. I used a Hard Round brush sized down to around 40 pixels.

Set the foreground color to black, click the Work Path in the Paths palette to select it and then click the Stroke Path with Brush icon at the foot of the Paths palette. This strokes the path with the current brush.
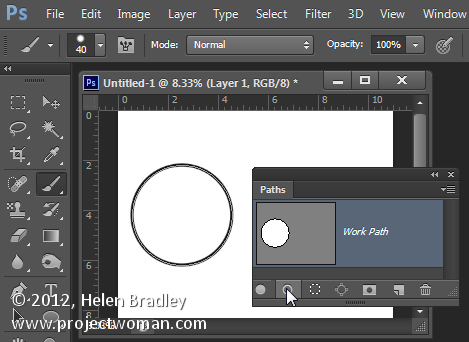
Click the Path Selection Tool which shares a position in the Tools palette with the Direct Selection Tool. Click on the path and it will select the entire path.

If the transformation handles do not appear press Ctrl + T (Command + T on the Mac). Hold Shift and Alt (Shift and Option on the Mac) and drag inwards to create a circle which is concentric with the previous circle.
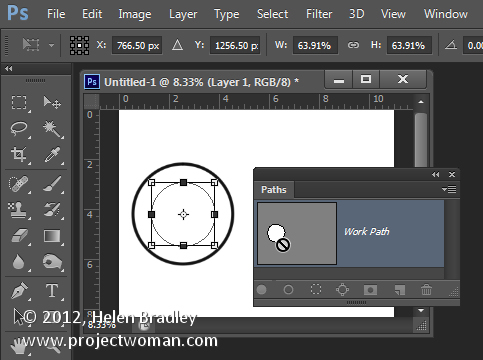
Repeat the process of selecting the Brush, click on the path so it is selected and click to Stroke Path with Brush.
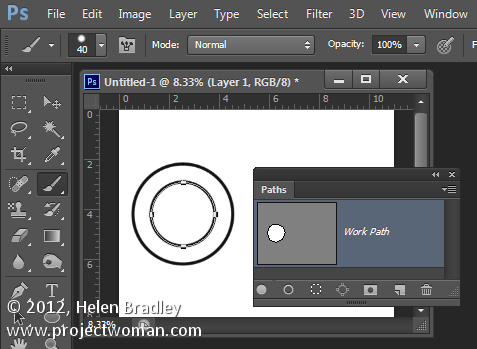
Click the Path Selection Tool and, with this smaller circle selected, press Ctrl + T (Command + T on the Mac). Hold Shift and Alt (Shift and Option on the Mac) and drag a little outwards to create a circle path for typing the text along.
Select the Text tool and hold the mouse over this third path.

Look for the text tool to show as an I-beam pointer with a bent line through it – this tells you Photoshop will align the text along the path.

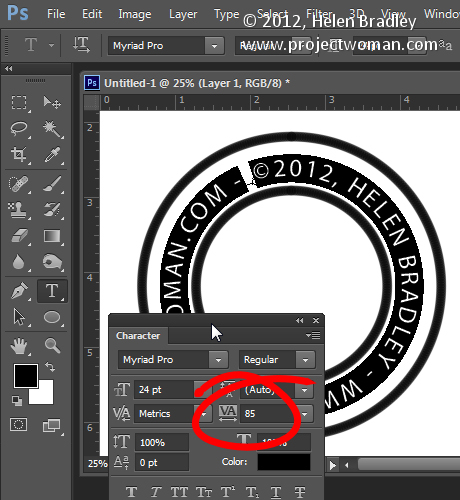
Click once to anchor the Text tool to the path. Select the text color – in my case I chose black – and select the font and font size – I used Myriad Pro – 24 points. Type the text to use – I typed:

© 2012, Helen Bradley – projectwoman.com –

To enter © hold Alt and type 0169.

With the text selected display the Character palette by choosing Window > Character and adjust the tracking to expand the text so it wraps all the way around the shape.
You can draw your own lines for the cancellation lines using the Custom Shape Tool. First create a new layer then select the Wave shape and on the Tool Options bar make sure that it is set to Path.
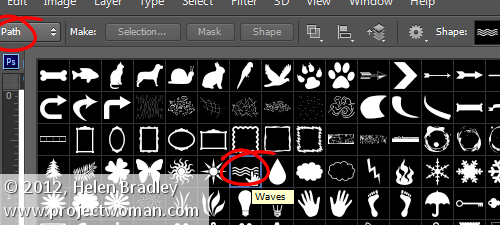
Drag to make your curved lines.
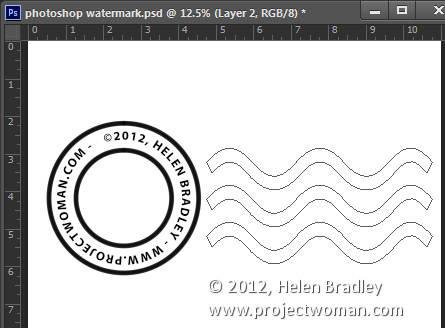
Select the Add Anchor Point Tool (it shares a position with the Pen tool) and click once in the middle of each end of the path to add a point.
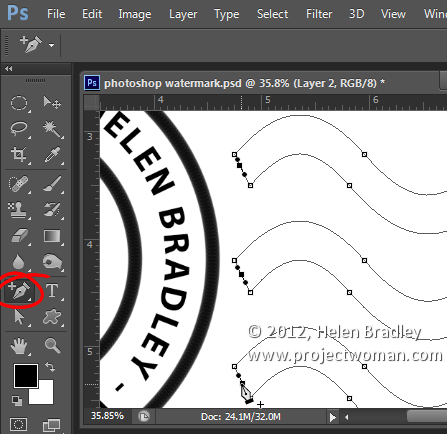
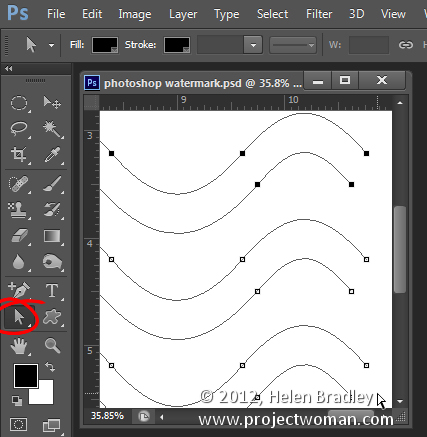
Target the Direct Selection Tool, click one at a time on the Anchor points you just added and press Delete – this breaks the 3 paths in half to make 6 paths. When the Anchor is selected it will show as a dark filled square.
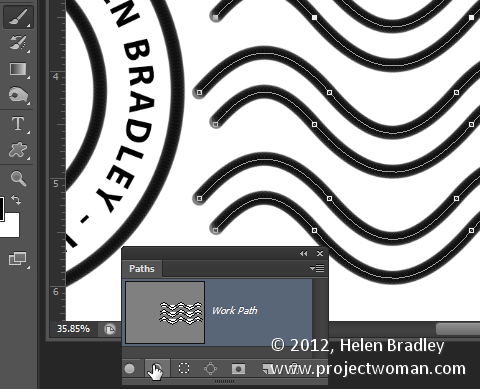
Select your Brush and black paint and select the path in the Paths palette and click the Stroke Path with Brush icon.
Once you’ve done this you can add a grunge effect.

Start by hiding the background layer, target the top layer and press Control + Alt + Shift + E to create a flattened layer with transparency. Hide all layers but this top one.

If the lines aren’t dark enough duplicate this layer a few times and they will darken. Then merge all these duplicated layers

To add the grunge effect click Add a Layer Mask icon at the foot of the layers palette to add a mask to the layer. Locate an interesting texture image to use such as this one from www.mayang.com/textures.
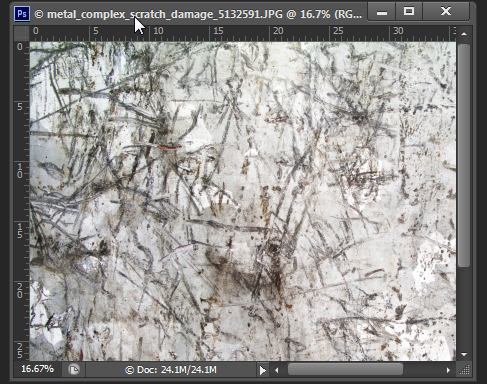
Make it the same size as your image by choosing Image > Resize, deselect the Constrain Proportions checkbox and click Window and click your copyright image file to use its dimensions. Click Ok.

Now return to your Copyright image, click the mask to target it and choose Image > Apply Image. From the Source box select the texture image (it won’t appear in the list if it isn’t the right size), and then set the other options to suit so you get a distressed look to your copyright symbol. Click Ok.
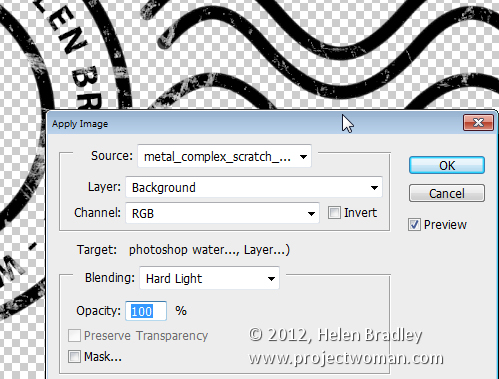
Add a new layer and press Control + Alt + Shift + E to create a flattened version of the image on this layer but maintaining its transparency. Make all other layers invisible and crop the image close around your shape.

Then choose File > Save As and save it as a .PNG image to use in Photoshop or Lightroom as a copyright overlay.

If you select the top layer and press Control + I you’ll invert it to make a white version of the copyright image that you can then save as a second .png file.
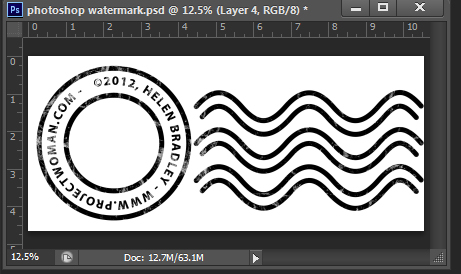
Make sure to also save your file as a .psd file if you think you might need to make changes to it – for example, to change the date – a .png file is flattened so it won’t be easy to edit – a .psd file will be much easier to update.

Helen Bradley

Page 2 of 812345Last »