

 One feature you’ll see a lot in advertising is silhouetted images generally of people or recognisable buildings. Here’s how to capture and create a silhouette image:
To capture a photo to use as a silhouette place the subject so they are backlit. You can do this easily by positioning your subject between your camera and the sun.
You’ll need an area that is clear behind the subject so that you can cut the shape from the photo later on. You can do this on the beach in summer or find a location where you can get down low enough to shoot from and so you capture some clear sky behind the subject.
The cleaner the background the easier it will be to isolate the subject. 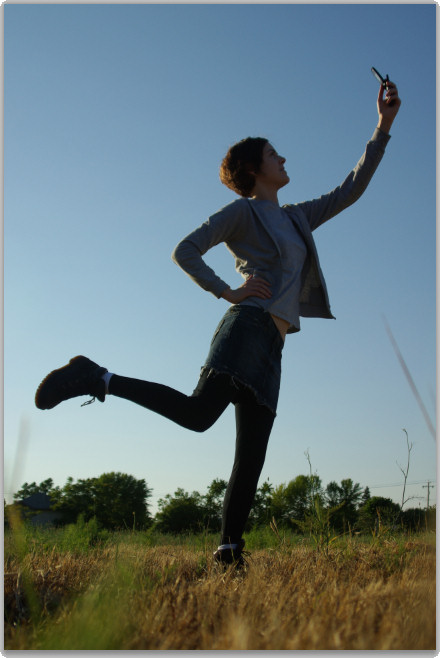 I shot my image from ground level looking upwards late in the afternoon with my model in shadow but with plenty of clear sky behind her.
To create the silhouette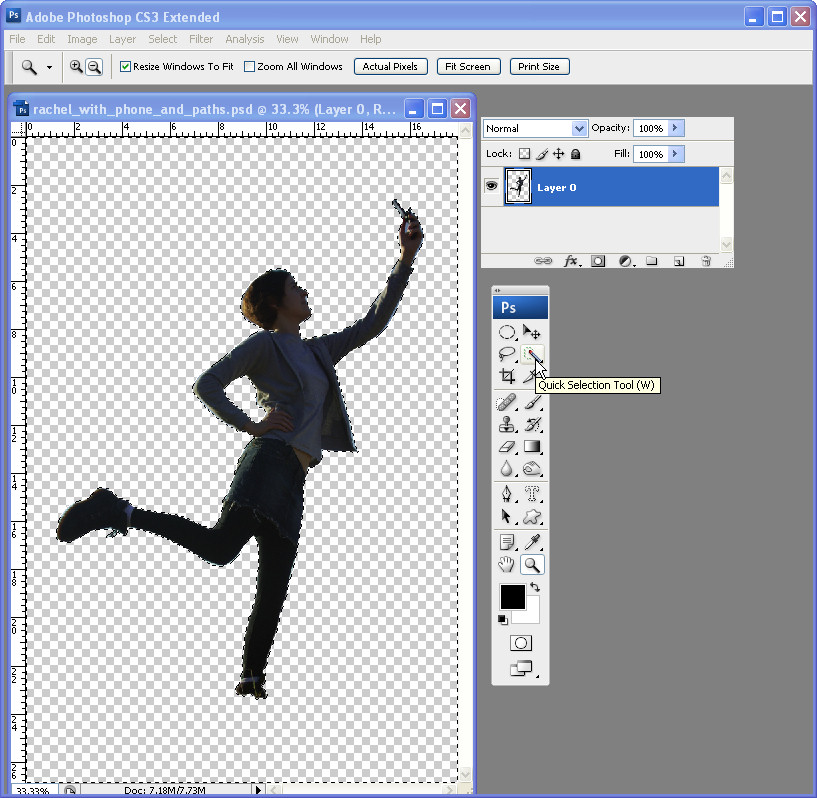 Step 1
Open a duplicate of your image and double click the background layer to convert it to a regular layer.
Make a selection around your subject using your favourite selection tool such as the Magnetic Lasso or Quick Selection tool.
Choose Select > Invert to invert the selection and press Delete to remove it. 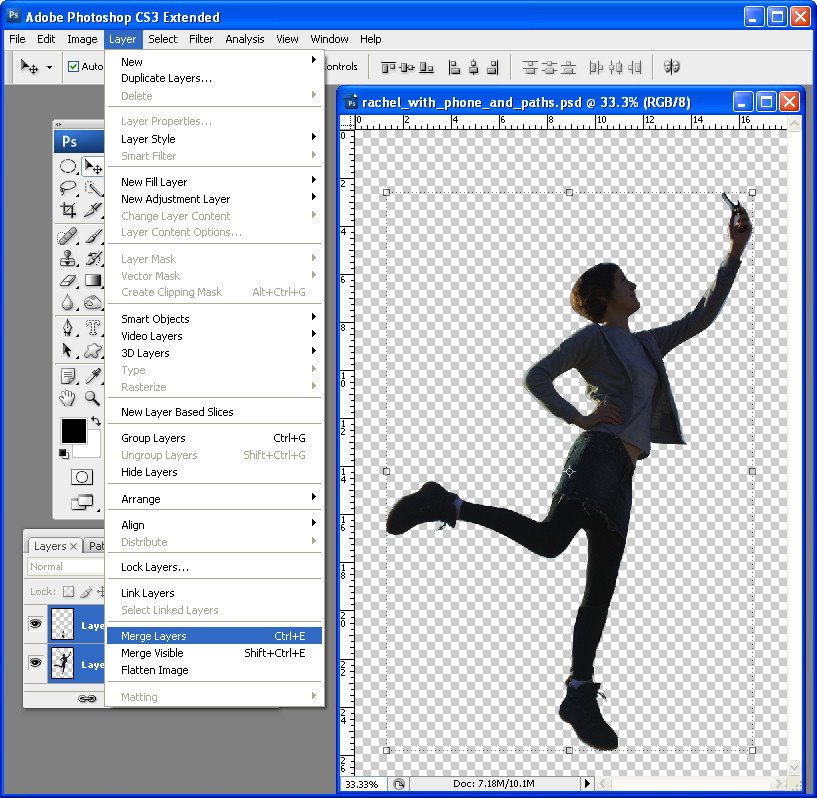 Step 2
Tidy up the selection by removing any remaining background or add missing elements by selecting, copying and pasting pieces in from elsewhere in the image.
Don’t worry about matching colours – just get the outline right.
Choose Layer > Merge Layers to merge the layers. Here I copied and pasted one leg to create the one I was missing.
 Step 3
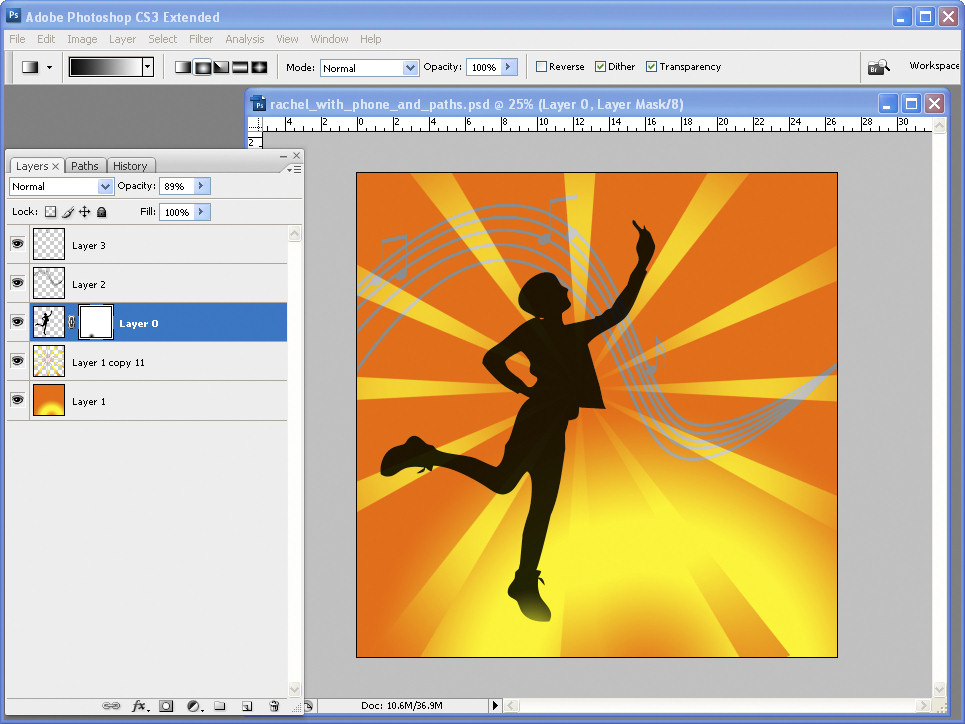
Control + Click on the layer that contains the shape that will become your silhouette.
Set the foreground colour to black and press Alt + Backspace to fill the silhouette shape with black. Add the extra details to finish your image.
In a future post I’ll explain how to create the sunburst shape.
Post a Comment
Please feel free to add your comment here. Thank you!