|
|
|
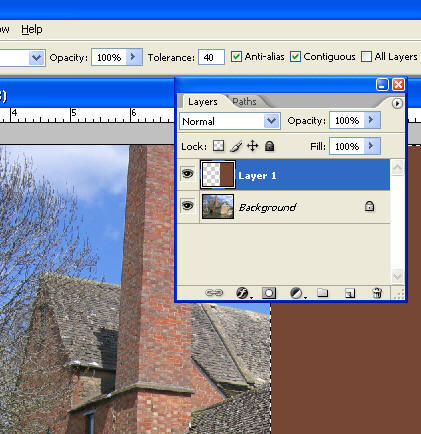
Photoshop: Working with ShapesHelen Bradley how to use the Shape tools in Photoshop to make shaped elements to add variety and dimension to your photos.Most graphics programs contain a set of shapes you can use when working with your images. Shapes are pre-drawn images of items like stars, flowers, arrows and ornamental designs and you can combine them with photos for interesting effects as I'll show you here. You can use shapes to make cut-outs from your photos – for example you might drag a heart shape over a photo of two lovers and then remove everything but the shape from the image to create a fun photo effect. To do this, select a shape and draw it on your image using the Path option on the Tool Options bar. At the foot of the Paths Palette click the Load Path As Selection icon to convert the path to a selection, invert the selection by choosing Select, Inverse and press Delete to remove the excess image. Shapes can be used for other effects than simply making a cutout from an image. In the example below, I've created a shape on an image and filled it and then blended it into the layers below. You can use this effect to block out part of a photo you don't like or that you don't want to focus on. In the example shown, the shape overlays a filled rectangle and the photo but you can omit the rectangle if desired. An alternate effect can be achieved by using the shape to make a cutout from the rectangle so the photo appears through it. In this case, you won't add a second new layer in step 3 and, instead you'll position the shape selection on the rectangle layer and press Delete to remove the coloured area. You will now see through the shape to the image below. Most programs offer a large range of shapes and, for many, you can download more shapes from the web either from the developer's web site or shapes that are created to share by other users. In Photoshop, you can use the pen tool to create your own custom shapes and save them to the program's shapes collection. To do this, use the Pen tool to create the shape, click the Direct Selection tool and choose Edit, Define Custom Shape. Type a name for your shape and click Ok and it will be added to the program's shapes list. It is also possible to use the Shape tool's Fill Pixels option to fill the shape with the current foreground colour, and use the Shape Layers option to create the shape on a new vector shape layer filled with the colour indicated in the colour swatch on the Tool Options bar. A shape layer can also have a Style applied to it from the Style palette. Add a shape overlay to an image:Step 1 Open a photo to use which has the point of interest on one side. Create a new layer by choosing Layer, New Layer and make a rectangular selection around the area that is not of interest on the photo below. Fill this area with a colour that compliments the photo – if desired, use the Eyedropper tool to sample a colour from the photo.
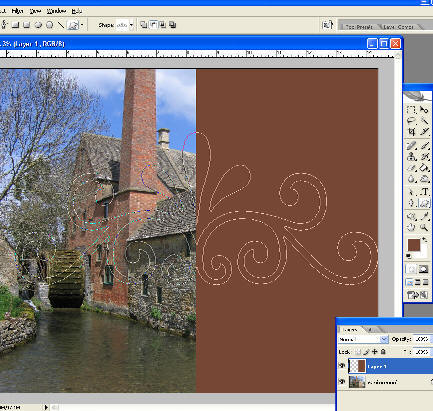
Step 2 Click the Custom Shape tool. On the Tool Options bar click the Paths option, and click the Custom Shape icon and select an ornamental shape from the Shape palette. Drag over the top layer to create the shape. Select the Paths palette, click the Work path and click the Load Path as a Selection button at the foot of the palette.
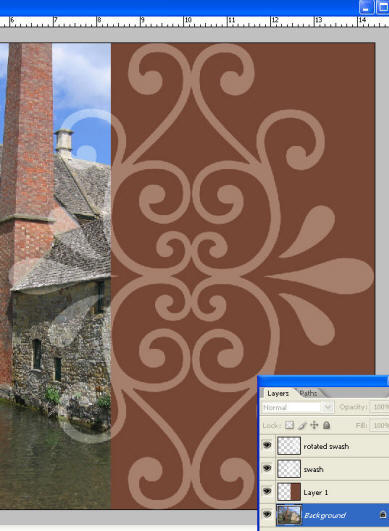
Step 3 If desired choose Select, Transform Selection and adjust the shape size and rotation. You can now add a new layer and fill the shape with the same colour as the rectangle or another colour and then use a blend mode to blend it into the layers below. Here I've duplicated the shape layer and rotated the second layer to mirror it. |
|
|
(c) 2019, Helen Bradley, All Rights Reserved. |