|
|
|
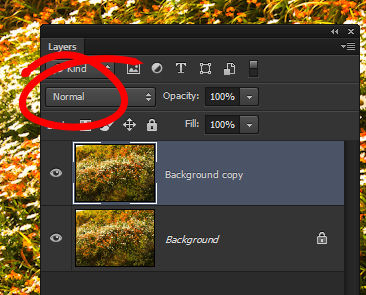
Photoshop: Using Blend ModesHelen Bradley Learn what the Blend Modes are in Photoshop and how to use them to fix your images.If there's one technique sure to confuse Photoshop newbies is it layer blend modes. Blend modes can be used for simple fixes and for complex effects but when you're starting out it can be hard to make sense of what they do and how they work. Here I'll show you the best blend modes, I'll tell you how they work and what you can do with them. Normal Blend ModeTo get started with blend modes open an image in Photoshop and display the Layers palette by choosing Window>Layers. Right click the background layer and choose Duplicate layer and click Ok. At the top left of the Layer palette is the Normal box. This tells you that the Normal blend mode is in use.
The normal blend mode does no blending. When it is chosen the top most layer appears as being 100% opaque and it will totally block out any pixels on the layers below. If you set the layer so it is 50% opaque using the Opacity slider you will see some of the image on the top layer and some of the pixels on the layer below.
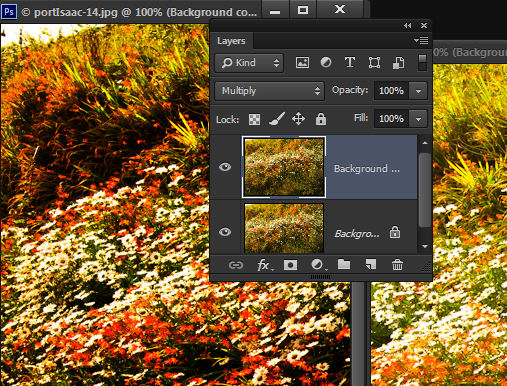
Darken an image with Multiply Blend ModeWhen you set the blend mode to Multiply you will darken the image. This is a good way to fix an overexposed image. When multiply is used the pixels on both layers are assigned numbers according to their colour and these are multiplied together. If you multiply black by black you get black, and white by white gives white, so the blacks and whites remain unchanged but the remainder of the pixels are darkened.
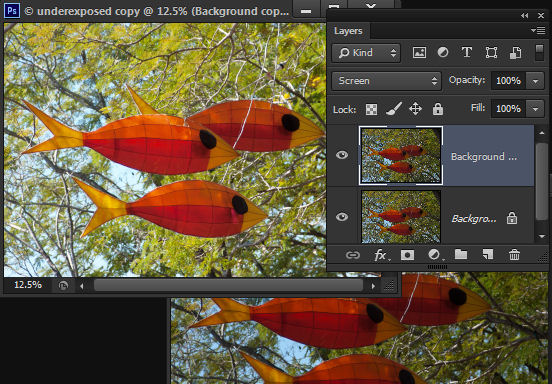
Using the Multiply Blend Mode is a great way to fix an overexposed image. Lighten an image with the Screen Blend ModeWhen you set the blend mode of the top layer of an image to Screen, you're doing a multiplication of pixel values again but this time using the inverse values. Where the top layer is black the underlying colour is the same, where it is white, the result is white and all other pixels are lightened. Screen is a great way to fix an underexposed image because it lightens it.
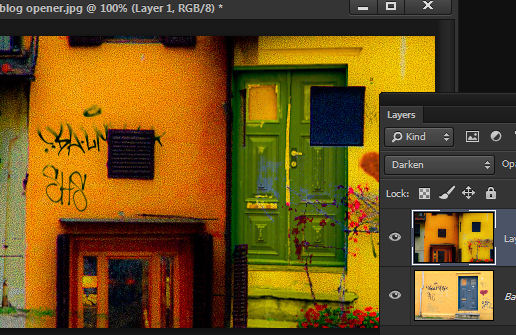
Use the Screen Blend Mode to fix an underexposed image Creative blending with the Darken and Lighten Blend ModesThe Darken and Lighten blend modes won't show any change when used with an image that has two layers that are the same. So, to see them at work, open two images and drag the background layer of one into the other image so you have two layers in the image both with different images on them. Set the blend mode of the topmost layer to Darken. The Darken blend mode compares each pixel on the top layer with the one below and displays the darkest of the two. The result is a darker image and one that is a composite of the two images.
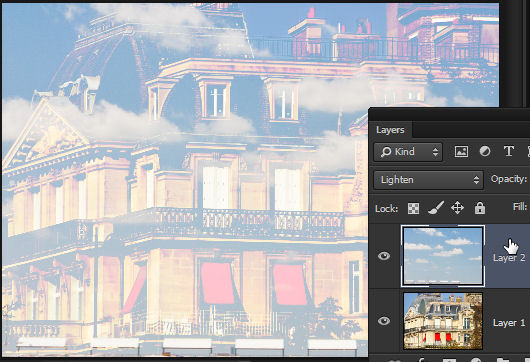
The Lighten blend mode works similarly and it displays the lighter of the two pixels. The overall image is lighter and again, you have a composite of the two images.
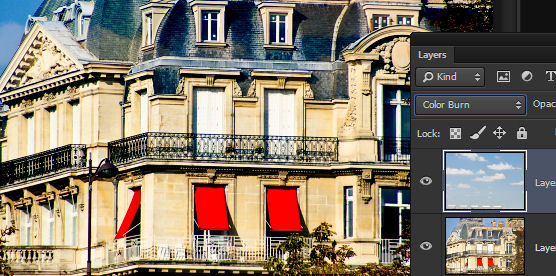
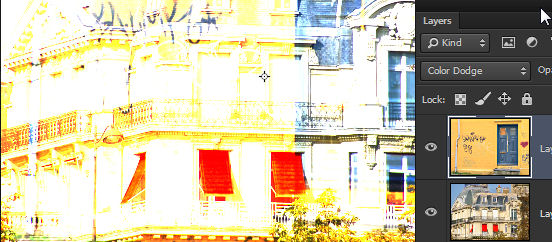
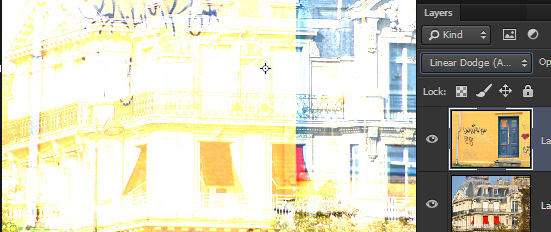
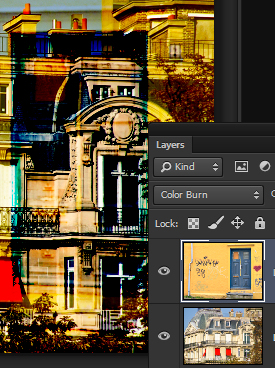
The Lighten blend mode in Photoshop lets you create a composite of two images. Using the Color Dodge, Linear Dodge, Color Burn and Linear Burn blend modesThe Photoshop Color Dodge, Linear Dodge, Color Burn and Linear Burn blend modes all work similarly. In each case the base layer pixel is compared to the corresponding blend layer pixel and the brightness or contrast is altered according to the brightness or contrast of the corresponding pixel in the blend layer.
When you use Color Burn the contrast is increased.
When you use the Linear Burn blend mode the brightness is decreased.
When you use Color Dodge the contrast is decreased and the image lightened.
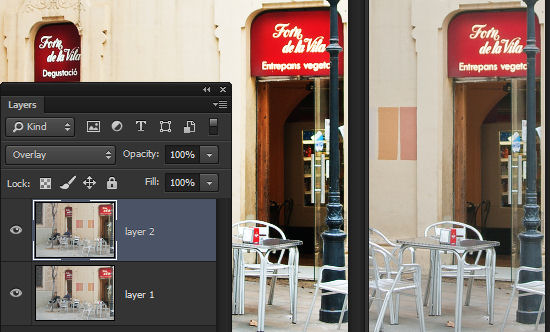
The Linear Dodge blend mode increases the brightness in the image. When choosing blend modes - remember that Burn blend modes result in a darker image and the Dodge blend modes will lighten it. Improve images with the Overlay Blend modeOne of the most useful blend modes for improving saturation and contrast in an otherwise correctly exposed image is the Overlay blend mode. Use it on the top layer of an image that has two identical layers and it boosts the colours. It works by applying a multiply or screen effect depending on the darkness or lightness of the image pixels.
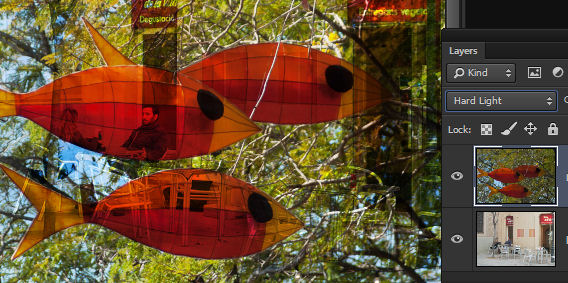
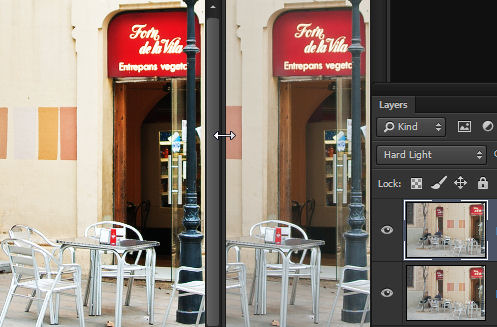
Using the Hard Light blend modeThe Hard Light blend mode also multiplies or screens the image but this time the result depends on the lightness or darkness of the colours on the blend layer (not the base layer). It is handy for adding lights and shadows to an image because light pixels on the top layer are lightened and dark ones are darkened.
Hard Light blend mode blends using detail from the blended layer so you get different results depending on which image is on the top layer as shown here when the layer order is reversed.
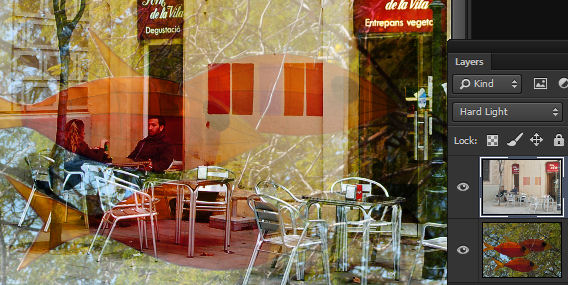
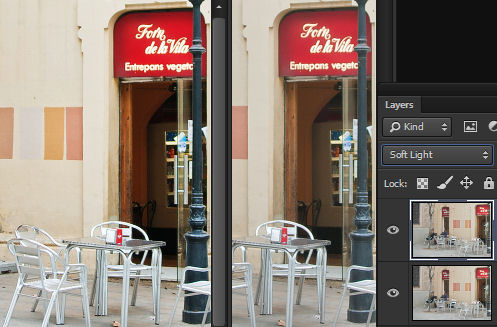
Here the Hard Light blend mode has been used to add contrast and some saturation to an image where both layers are identical. Enhancing an image using the Soft Light blend modeSoft Light has a similar but more muted effect than Hard Light and the results are more like dodge or burn has been used on the pixels. Both these blend modes work to boost the colour saturation and contrast in an dull image.
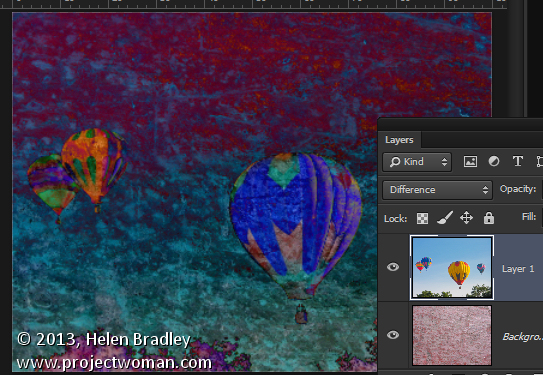
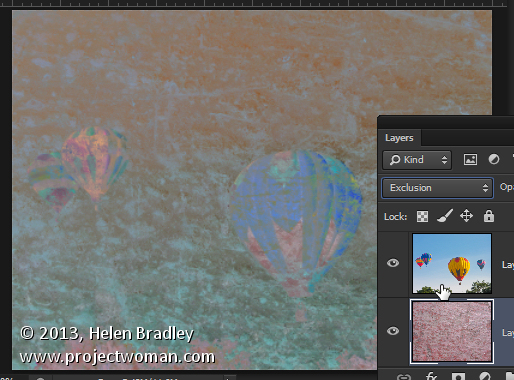
Using the Soft light mode on an image with two layers the same boosts the contrast and saturation of the image The Difference, Exclusion and Subtract Blend ModesThe Difference and Exclusion blend modes work similarly to each other but the Difference mode is the more severe. Both subtract the colours in the layers from each other depending on which is the lightest. Using either mode with a white blend layer inverts the image and blending with black leaves the image unchanged. Difference blend mode results in a more contrasty image than using Exclusion. Both blend modes result in the same image if the layers are reversed.
The Difference blend mode results in the same image if the layers are reversed. It subtracts the blend color from the base color or the base color from the blend color depening on which is brightest.
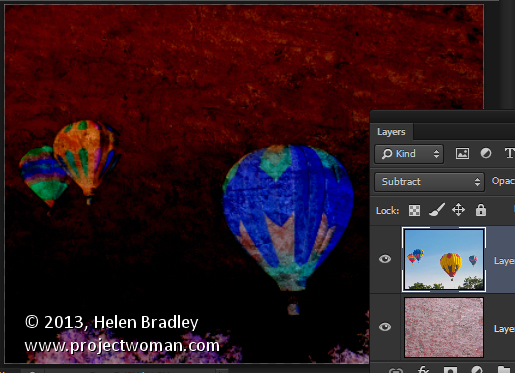
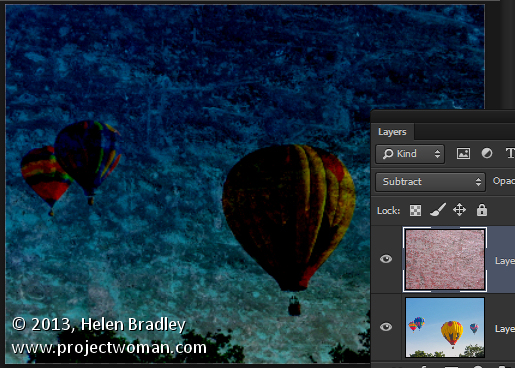
The Exclusion blend mode results in the same image if the layers are reversed. It is similar to using the Difference blend mode but with less contrast. The Subtract blend mode subtracts the colors on the blend layer from those on the base layer. The resulting image is different depending on which layer is on top.
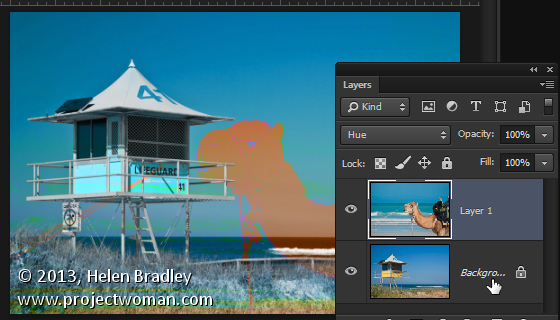
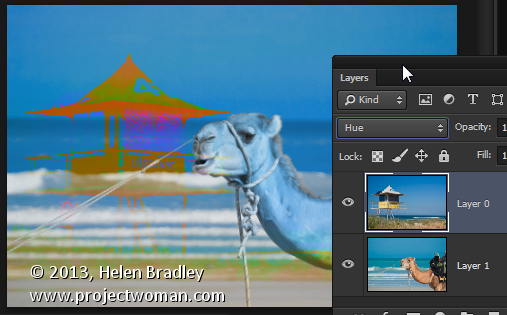
Hue, Saturation and Luminosity Blend ModesThe Hue, Saturation and Luminosity (called Value in GIMP) blend modes each change one element of the base colour's Hue/Saturation/Lightness and leave two unchanged. So, selecting Hue gives a color that has the brightness and saturation of the base color but the color of the blend ayer.
Here the color of the blend (camel) layer is used but with the brightness and saturation of the life guard layer.
Here the color of the blend (life guard box) layer is used but with the brightness and saturation of the camel layer. Choosing Saturation alters the saturation to that of the blend layer and leaves hue and brightness untouched.
Here the saturation is that of the camel (blend) layer but the hue and brightness are those of the base layer.
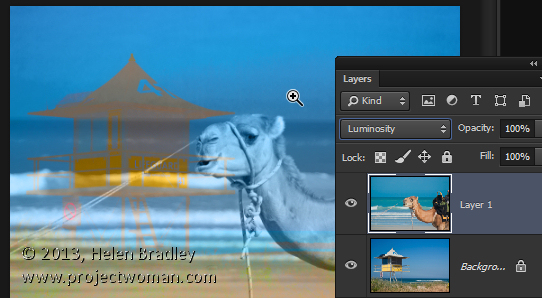
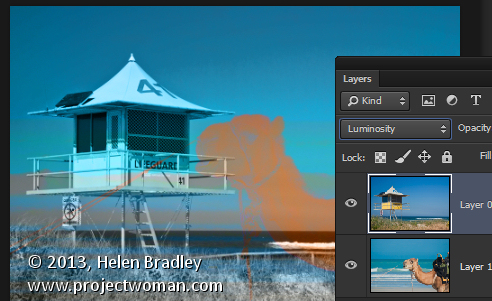
Here the saturation is that of the life guard box (blend) layer but the hue and brightness are those of the base layer. Luminosity changes the lightness to that of the blend layer while preserving the base colour and saturation.
Here, Luminosity shows the Luminance of the camel layer colors and the hue and saturation of the base (life guard box) layer.
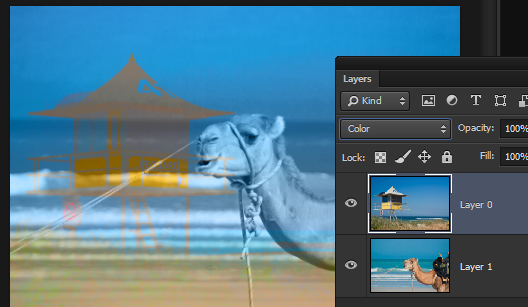
Here, Luminosity shows the Luminance of the life guard box layer colors and the hue and saturation of the base (camel) layer. The Color blend mode is a little different again. It gives an image that has the luminance of the base layer and the hue and saturation of the blend layer. It and the Luminosity blend mode are the functional opposite of each other (you can see this if you compare these two images with the two above).
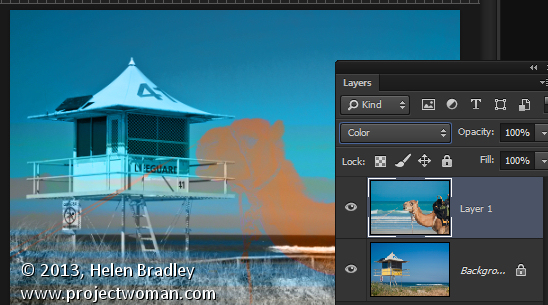
Here, Color shows the Luminance of the (base) life guard box layer colors and the hue and saturation of the blend (camel) layer
Here, Color shows the Luminance of the (base) camel layer colors and the hue and saturation of the blend (life guard box) layer In summaryYou will find that you can use blend modes not only to fix less than perfect images but, by applying them to two different images on two layers, you can get an interesting composite image as the result. |
|
|
(c) 2019, Helen Bradley, All Rights Reserved. |


 Blend modes affect how a layer blends with the layers below. So, if you have an image with two layers a blend mode will only do something if it is applied to the top most layer.