

Helen Bradley
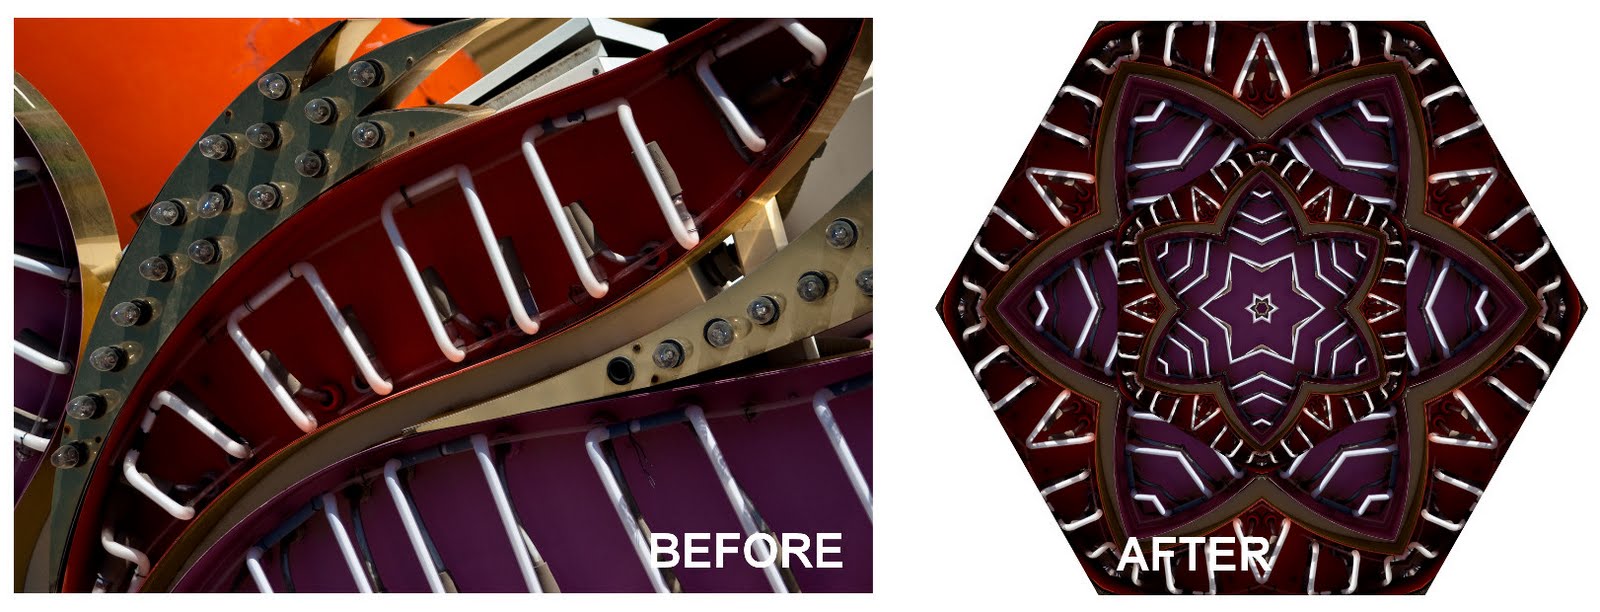
If you are like me you had a kaleidoscope as a kid. You would look through one end and turn a dial and the world would be displayed as a mirrored fractured shape. Thanks to Photoshop you can create kaleidoscopes from your photos. Any image with interesting color and shapes will work just fine.
Step 1 Convert the background layer to a regular layer by double clicking it and click Ok.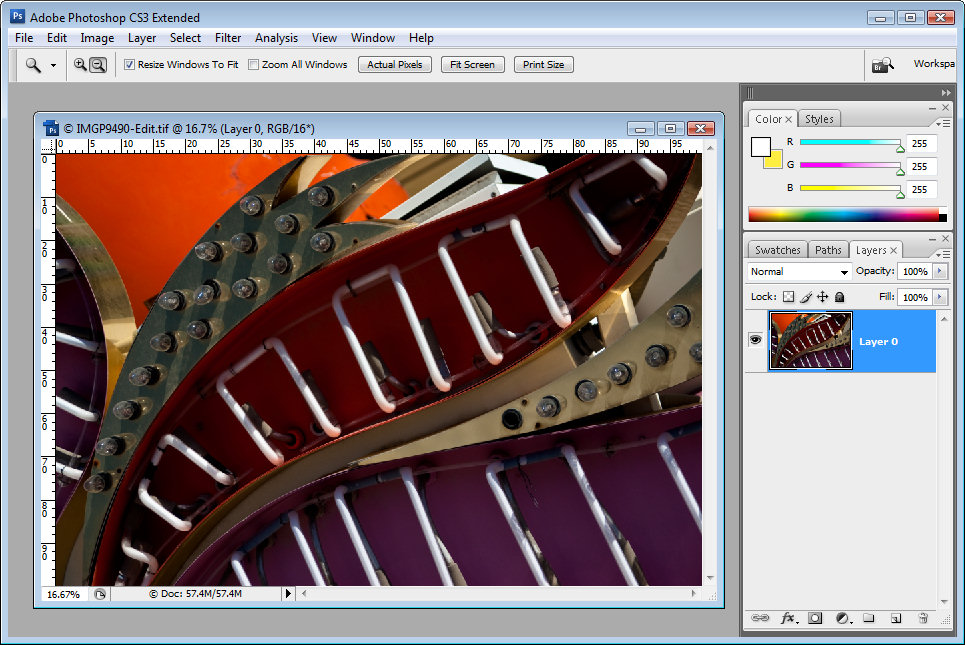
Step 2
Select the layer and use the Move tool to rotate to 60 degrees and position it over one corner of the image canvas making sure one side of the image sides crosses two sides of the canvas.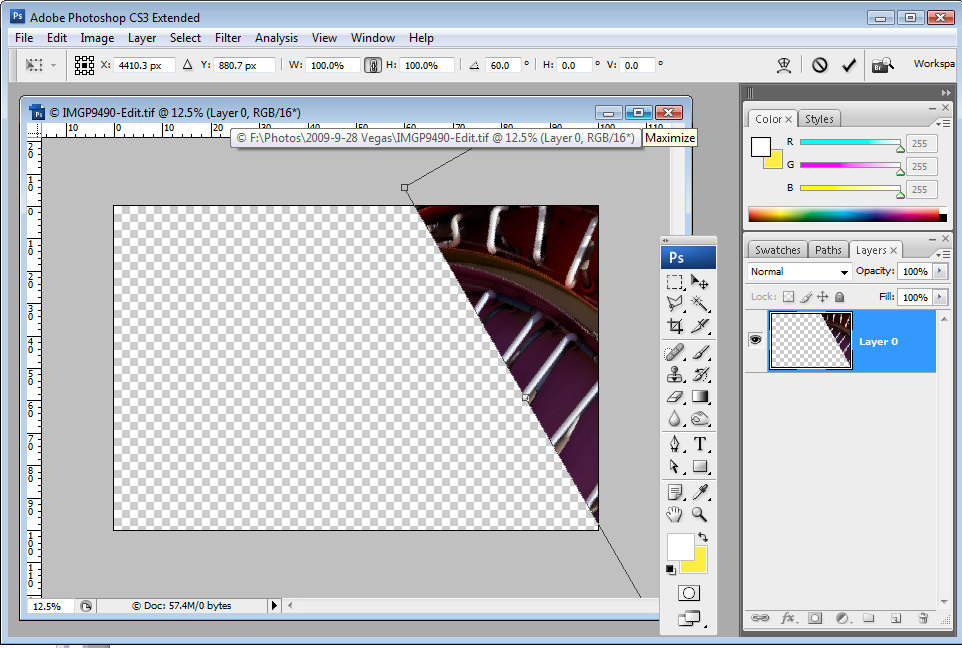
Step 3
Use the Magic Wand tool to select the empty background, choose Select > Inverse to select the shape and choose Select > Modify > Contract and contract the shape by one pixel. Now choose
Image > Crop to crop the image to the shape itself. It is important to do this to remove the anti-aliasing that Photoshop applies to the image edge as it rotates it.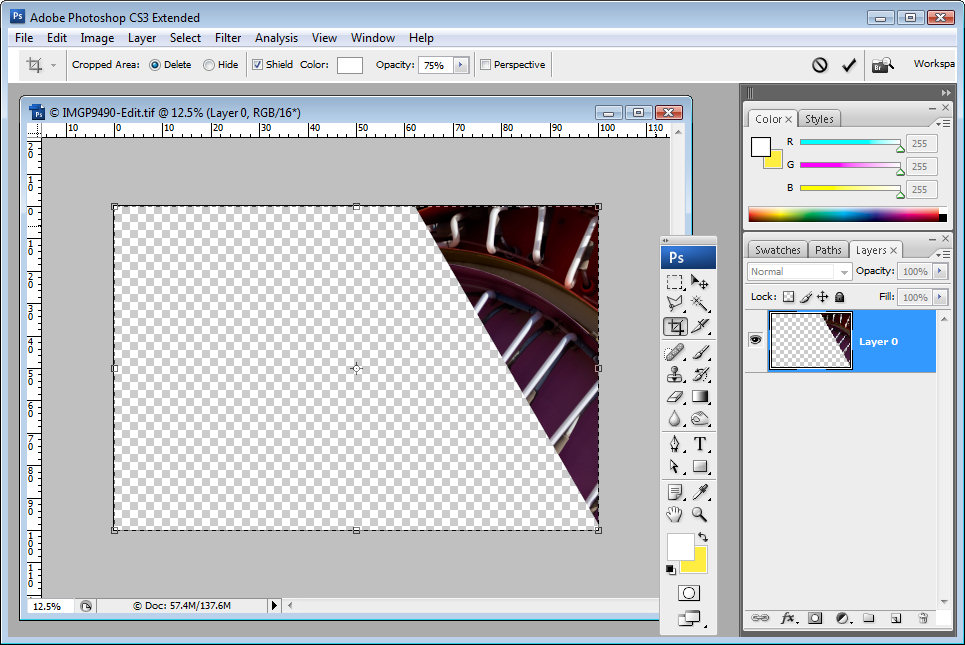
Step 4
Duplicate the image layer.
Choose Image > Canvas size, click Relative and set the width to around 3 times the current image height (NOT its width), and the height to 2 times the current height. Select the middle top of the nine positioning boxes and click Ok.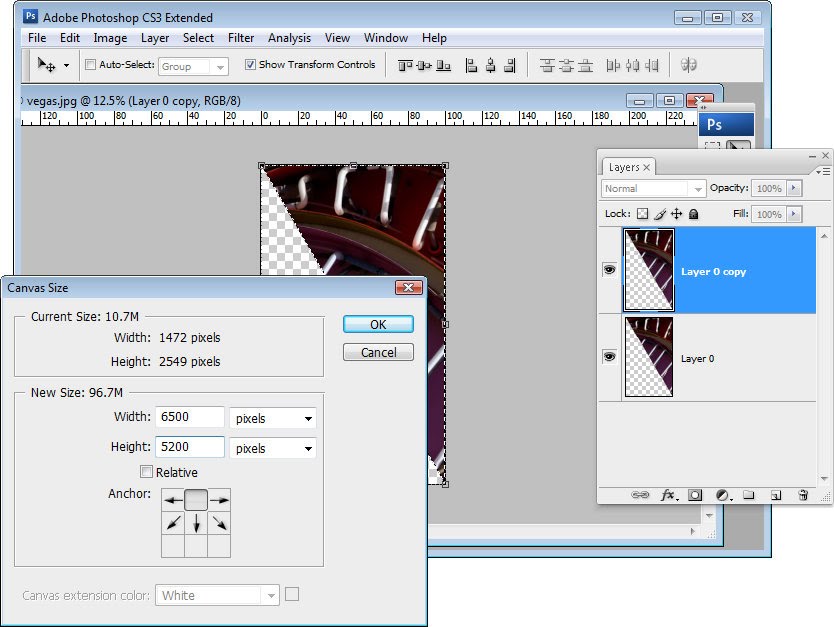
Step 5
Choose View > Snap to > All and make sure View > Snap is selected. Click the Move tool and the top layer of the image and drag the left edge over the right until the W: value is -100%. Ensure the piece is lined up against the edge of the piece on the layer below.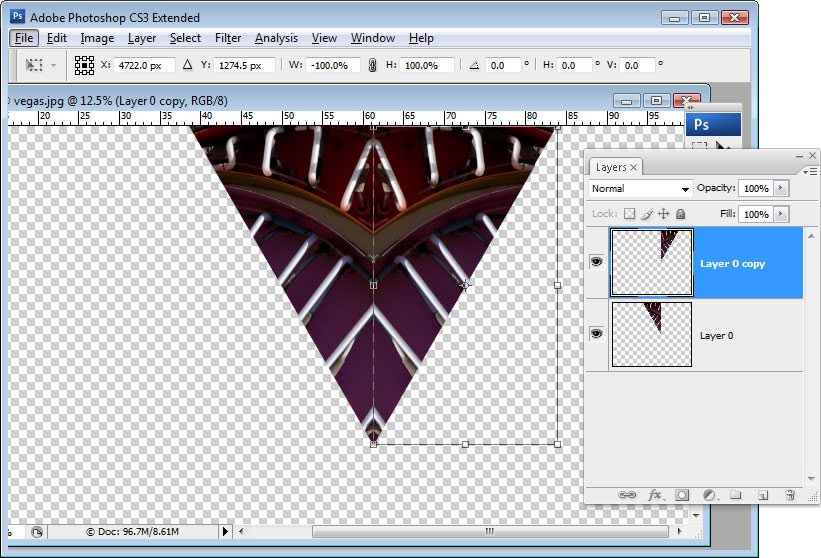
Step 6
Merge these two layers by selecting the top one and press Control + E (Command + E on the Mac).
Duplicate this merged layer, select the top layer and choose Edit > Free Transform and, in the tool options area, select the middle bottom of the 9 point grid to fix the point around which the shape rotates. Set the Rotation to 30 degrees.
Step 7
Press Control + J (Command + J on the Mac) and then Control + Shift + T (Command + Shift + T on the Mac). This duplicates the current layer and repeats the transformation on it.
Repeat this until the kaleidoscope is complete – four times in all. 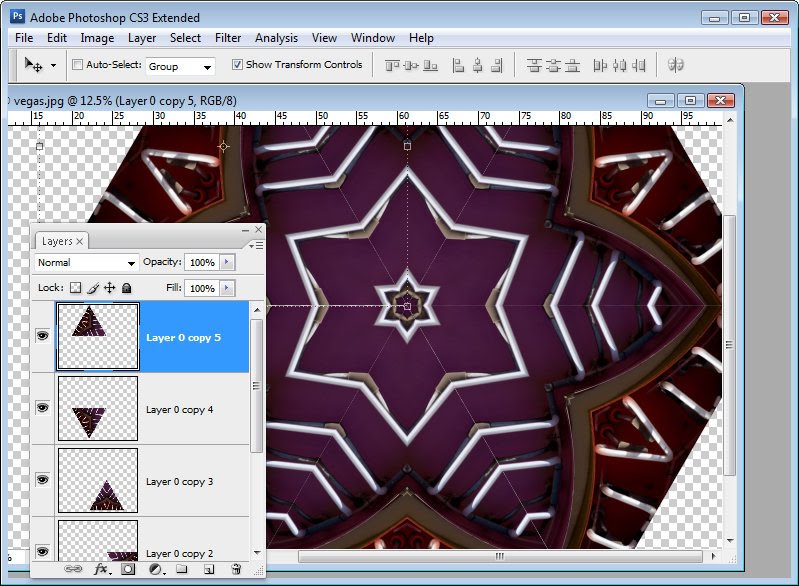
Step 8
Merge all the layers. Use the crop tool to select around the canvas. You can drag outwards if necessary to add back in any of the image that extends beyond the outside of the image canvas. 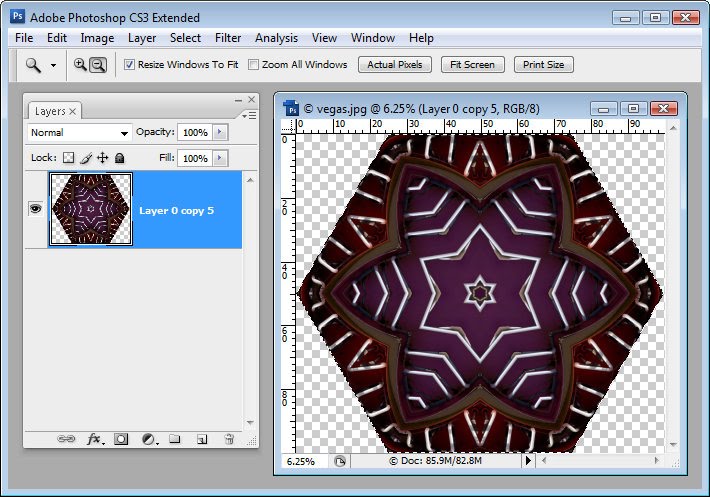
Step 9a
Now you can get creative with the shape. For example, you can make a duplicate of the shape and place it in the middle of the original shape sizing this second version down to a small size and then cropping the final image to a square shape. Use the Alt and Shift keys (Option and Shift on the Mac) to size the shape down leaving the middle in the same place and in proportion.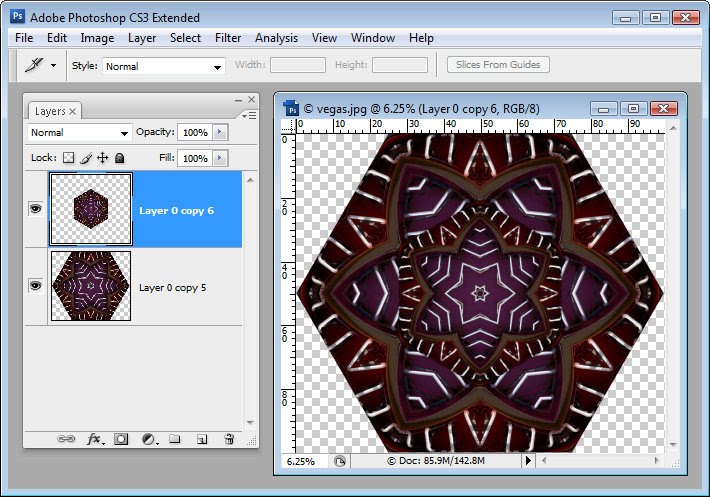
Step9b
You can fill the middle with another kaleidoscope if desired. Here I used a Hue/Saturation adjustment layer to match the colors of the two kaleidoscopes better.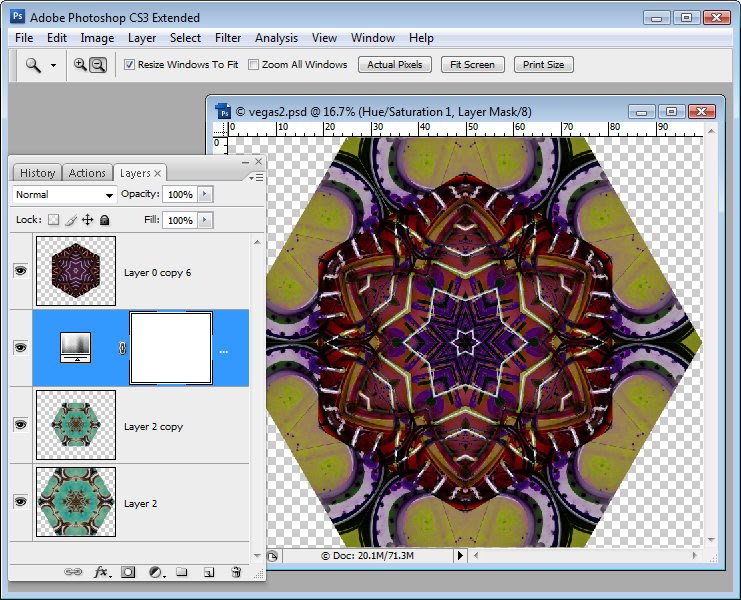
Step9c
You can select the shape and choose Edit > Define Pattern to make it a pattern. You can then fill a larger image with it so it displays as a repeating shape. 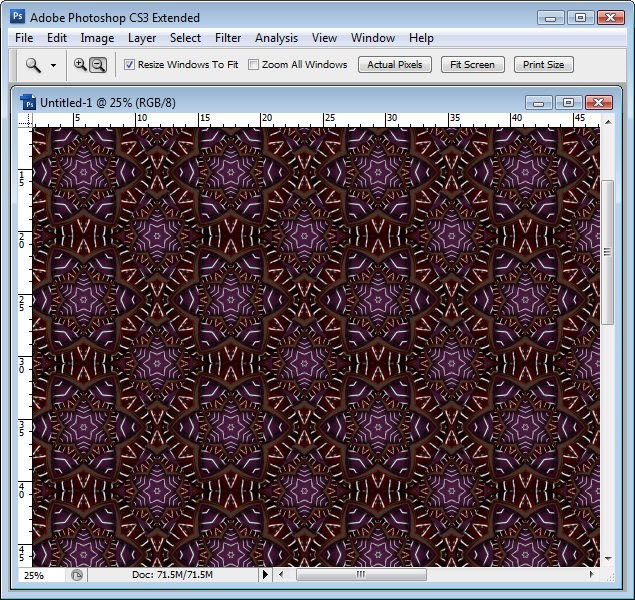
There are lots of creative ways you can use your Kaleidoscope.