Monday, March 31st, 2014

Create Guides Accurately in Illustrator


image credit ©ezza116, istockphoto.com

Learn to place guides in Illustrator in the position you want them to appear

Sometimes the differences between Illustrator and Photoshop are really annoying. In Photoshop it is simple to place guides in exactly the position you want them to appear but in Illustrator it isn’t easy at all.

I want to create a square document with guides half way vertically and horizontally so, I’ll start with a new document of a fixed and known size such as 1000 x 1000.

Then choose View > Rulers > Show Rulers so you can see the rulers top and left. With the Selection tool selected, click and drag on the ruler and drag a guide into position. You probably won’t be able to get it exact but that’s ok for now. You can go ahead and drag a guide from the other ruler too.

Guides are, by default, locked so you need to unlock them to move them. Choose View > Guides > Lock Guides to disable the check mark. Now you can drag the guide into position. On the Tool options bar you will see values for X and Y. For the vertical guide, X should be half your document width – in my case 500 and for the horizontal guide the Y value should be 500.

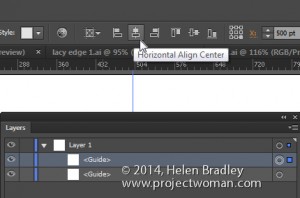
If you open the Layer palette you will see that guides are objects in the current layer. This means that you can click on a guide to select it in the Layer palette and use the tools at the top of the screen to align the guide. So, clicking on it and choosing Horizontal Align Center will center the vertical guide and Vertical Align Center will center a Horizontal guide.

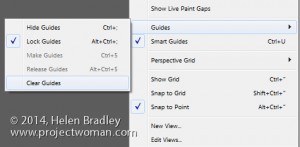
Once your guides are in position, choose View > Guides > Lock Guides to lock them so they won’t move. On this same submenu you can hide guides – this locks them when they are unhidden again or clear guides to remove them from the document entirely.


Other handy tricks include being able to create a vertical guide by dragging down from the top ruler  and hold Alt or Option to change if from horizontal to vertical.

You can make new guides (but not existing ones) snap to dividers on the rulers if you hold Shift as you draw them by dragging down from the ruler.
Helen Bradley

Helen Bradley

Wednesday, March 26th, 2014

Play and Burn DVDs in Windows 8

© ugaldew, sxc.hu

If you’re using Windows 8 or 8.1 you can play videos and movie files you have stored on your computer but you can’t view DVDs using Windows Media Player—this feature was removed from Windows 8 along with the Media Guide.  If you want to be able to play DVDs in Windows 8 you will need to download and install a DVD player. If you’re using Windows 8 Pro then you can download and install Microsoft’s Windows Media Center which costs $9.99 – this site will step through the process. If you’re not using the Pro version then you would need to upgrade to Pro to use the Media Center, which ends up being a $100 upgrade  just for the ability to play a DVD. Instead, I recommend you use the free VLC Media Player.

If you need to burn DVDs you will need a DVD burner to do so. Windows 8 doesn’t ship with a DVD burner but that doesn’t mean that the manufacturer of your computer hasn’t provided one. Check the Start screen and see if there’s a DVD burner already installed. If not, here is a round up of some of the DVD burning tools around which are Windows 8 compatible. The good news is that most have free trial versions so you can test them out and see how they perform:

Wondershare DVD Creator — $39.95

Ashampoo Burning Studio Free — upgrade to full version for $49.99

Aimersoft DVD Maker for Windows – $39.95

Nero Burning ROM 12 – $49.99


Helen Bradley

Helen Bradley

Sunday, March 23rd, 2014

Easily Paste Web Content into Excel with Destination Formatting

When pasting large data tables from your web browser into an Excel file you’ll probably be displeased to find that they do not match the formatting of the worksheet.

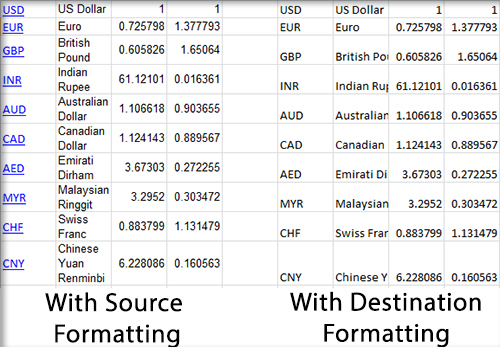
By default Excel will paste the data with the formatting it used on the source web page instead. This is rarely useful, since it’s very unlikely the web page had formatting that is compatible with your document. As you can see in the image above, using the source formatting can result in the inclusion of links, improper font and font size, and a number of other formatting issues.

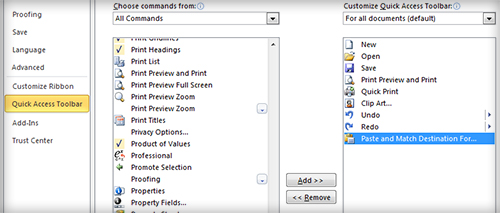
To make Excel paste the data with destination formatting (i.e. the formatting of the destination Excel worksheet), you’ll need to add a special command to your quick access toolbar. To do this, select File > Options > Quick Access Toolbar. Above the left column, select the Choose commands from dropdown and choose All Commands. Scroll down the list and find Paste and Match Destination Formatting. Select it and click Add, then OK.

Now whenever you wish to paste web data into Excel, click the Paste and Match Destination Formatting button in the Quick Access Toolbar instead of using the standard paste tool. This will result in the data being automatically formatted to match the look of the rest of your worksheet.

Helen Bradley

Helen Bradley

Friday, March 21st, 2014

How to Fix Excel Printing a Workbook to Multiple PDF Files

Learn how to  make sure that printing multiple sheets to a pdf gives one pdf and not many

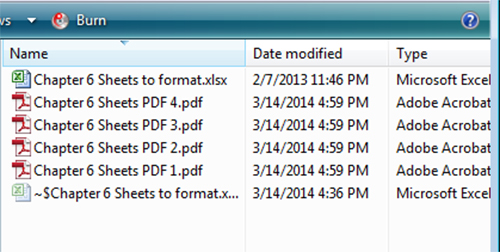
If you have ever tried to print a large Excel workbook to a PDF file, you’ve probably run into this issue. You press print, Excel asks you to name the PDF, and then it begins to print. Everything seems fine, but then Excel asks you to name another PDF, then another, then another, ad infinitum. When the operation finally finishes, Excel has properly printed the workbook to a PDF format, but your worksheets have been split into several different PDF files. Some PDFs contain multiple worksheets, others only a single one, but all you really wanted was one PDF file with the entire workbook.

It turns out this issue is caused by having different Page Setup options on each worksheet. For example, Excel can’t print two pages with different paper sizes to the same “piece of paper” (actually a PDF in this case). Instead, it insists on having two different PDFs to print to, one for each paper size. So, to resolve this issue, you must make sure each worksheet’s page setup agrees with the others.

Fortunately, doing this is very simple. To begin, in your Excel workbook, right click one of your worksheet tabs at the bottom of the window and choose Select All Sheets. Any changes to the Page Setup options will now be applied to every worksheet.

This means we don’t have to check each worksheet to make sure it has the same settings as the others; we simply choose which settings we want and all the worksheets will automatically match. To do this, go to the Page Layout tab in the ribbon. In the Page Setup section, click the small arrow in the bottom right corner to open the Page Setup dialog.

The Page tab of the dialog contains the critical options that can lead to this issue, namely the paper size and print quality settings. Change these to whatever you wish, typically something like letter paper at 300 dpi. Other settings, such as orientation and scaling, do not cause the multiple PDFs issue so if you wish you can change them for individual worksheets. Still, it’s best to have all worksheets print with the same settings. Once you have chosen your desired settings click OK and they will be applied to every worksheet.

You can now print your workbook to a single PDF file.

Helen Bradley

Helen Bradley

Thursday, March 20th, 2014

Create Your First Access Database – Pt 4 – Report Design

Database in Microsoft Access

Learn to create a database in Microsoft Access. This video steps you through the process of creating a report for your Access database file. In other parts of this series you can learn how to create the database, write Queries and create a Form for easier data entry.

For a text version of this video check out this article on my website: First Steps with Access

Helen Bradley

Helen Bradley

Thursday, March 20th, 2014

Photoshop – Recover an Unexposed Subject

Add an Artistic Effect to the Overall Image in Photoshop


Learn to recover an unexposed subject in your photos and how to add an artistic effect to the overall image in Photoshop.

Helen Bradley

Saturday, March 15th, 2014

Scroll though Blend Modes in Photoshop – Mac and PC

scroll through blend modes on the mac

by Helen Bradley

Learn the keystrokes that help you quickly scroll through blend modes in Photoshop on the PC and Mac

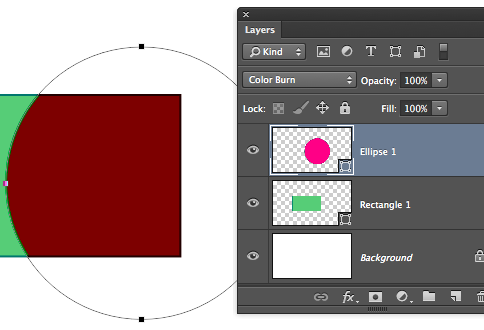
On the PC, being able to scroll through the blend modes in the Layers palette is a simple as selecting one blend mode in the list then use the Up Arrow and Down Arrow key to go from one to the next.

On the Mac, it isn’t as easy but it (thankfully), can be done.

On the Mac, click in the Blend Modes list and select a blend mode. Then use the Shift + + or Shift + – keys to scroll up and down the list. Unlike on the PC, the Mac keys roll you around the list so, when you reach the bottom and press Shift + + once more you go right back to the top. Neat huh?


Helen Bradley

Monday, March 10th, 2014

Format Sticky Notes – Learn the Hidden Secrets

Learn these quick techniques to format your Sticky Notes

I love using sticky notes to stick things to my desktop. Using these on my digital desktop is helping keep my real desktop clean and tidy. However, sometimes I need to format my notes and help for doing this is not easy to find. So, here, in a nutshell, are the super secret shortcut keys you can use to format your text on your sticky notes :

Bold                     Ctrl+B
Italic                   Ctrl+I
Underlined               Ctrl+U
Strikethrough            Ctrl+T
Bullet list              Ctrl+Shift+L 
    (press this twice for a numbered list)
Subscript                Ctrl+= 
Superscript              Ctrl+Shift++ 
Increase/Decrease font size
                        Ctrl+Shift+> and Ctrl+Shift+<
                        (or Ctrl+Scroll wheel)
Single space lines      Ctrl+1
Double space            Ctrl+2
1.5 Line spacing        Ctrl+5
Captialize Text         Ctrl+Shift+A 
Right Align             Ctrl+R
Left Align              Ctrl+L
Center Align            Ctrl+E

You can also use fancy effects in sticky notes if you create them in another application such as Word and then copy and paste them into the Sticky Note.

Other handy Sticky Notes keyboard shortcuts:

Undo                    Ctrl+Z
Redo                    Ctrl+Y
Cut                     Ctrl+X
Copy                    Ctrl+C
Paste                   Ctrl+V
New Note                Ctrl+N

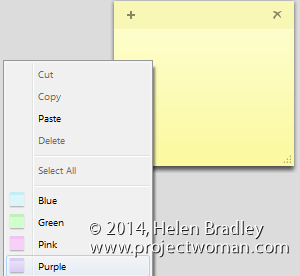
To change the color of a note, right click it and choose a color.

To Backup your Sticky Notes:

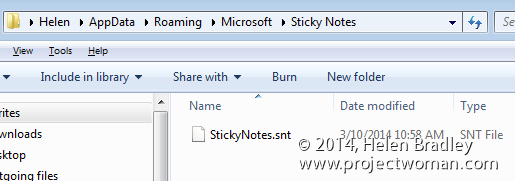
You will find your Sticky notes file at
c:\users\<username>\AppData\Roaming\Microsoft\Sticky Notes

To make a backup, copy the stickynotes.snt file you find there.

To launch Sticky Notes if you haven’t yet discovered them:

Start > All Programs > Accessories > Sticky Notes


Helen Bradley

Saturday, March 1st, 2014

Create a Graffiti Wall Effect in Photoshop

Learn to paint graffiti without a risk of being arrested

See how easy it is to create a graffiti effect on a wall in Photoshop. The video shows you how to use a graffiti font to create graffiti writing and how to use styles and colors to format the test to make it look like real graffiti. Then see how to use the Vanishing point filter to place the graffiti text onto a wall in a photo. Finish the effect by blending the text with brushes, blend modes and textures all created using layers and masks so that the effect can be edited in future.

Helen Bradley