Friday, April 29th, 2011

Remove everything from a cell in Excel 2007/2010

In Excel 2003 and earlier you might recall that you could click a cell and choose Edit > Clear and choose to clear its Contents, Comments, Formatting or choose All to remove everything.

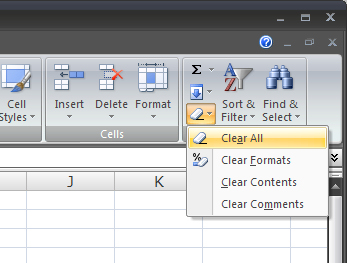
In Excel 2007/2010 there is a Clear Contents option on the right click menu but, in the absence of the Edit menu you’ll need to look elsewhere for the other options. On the Home tab of the Ribbon look for the Clear icon – it has an eraser on it and it has a dropdown list from which you can select the desired option.

It’s pretty obvious if you’re using Excel at full screen size but shrunk down it isn’t clear (pun intended) that it is there or what it does. I like to add the Clear All option to the Quick Access Toolbar so it’s easy to find and use. You will find it in the All Commands list and it is called Clear All if you’re looking for it.

Helen Bradley

Tuesday, April 26th, 2011

Permanently fix Word’s image insert behavior

I was at dinner the other night and talking computers with some friends. We were joking about Excel not being a word processor when the subject of images came up. And Lo! and behold someone suggested that Excel was a much better option to use than Word so far as images are concerned.

This has been a particular issue for me for years. You see Word inserts all images, by default as in line with text which is the option you’d probably never want to use.

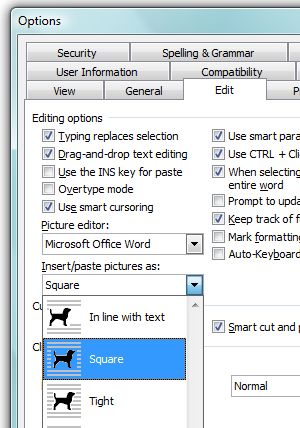
I promised my friends to show them how to fix Word – permanently – so images get inserted as you’d want them to be – with a square wrap around. It’s a good starting point and my recommended default for Word. You can change the wrapping if you want but 99.9% of the time this is the setting you’ll want to use.

In Word 2003, choose Tools > Options > Edit tab and from the Insert/Paste Pictures as dropdown list choose Square and click Ok.

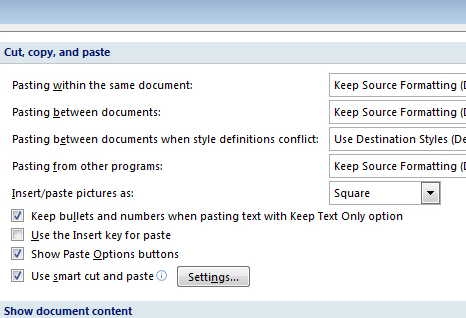
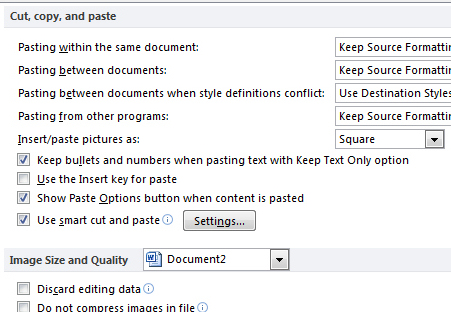
In Word 2007 choose File > Word Options > Advanced tab and locate the Cut, Copy and Paste group. From the Insert/Paste Pictures as dropdown list choose Square and click Ok.

In Word 2010 choose File > Options > Advanced tab and locate the Cut, Copy and Paste group. From the Insert/Paste Pictures as dropdown list choose Square and click Ok.

Now you know how to fix it … spread the love and tell a friend!

Helen Bradley

Sunday, April 24th, 2011

Photoshop – “repeat rotate with a copy” shortcut

This week I discovered a totally cool new keystroke combination which I just have to share. Here’s the back story…

I love making regular shapes from irregular ones. Think kaleidoscopes but not always made from images – sometimes I make the kaleidoscope shapes from other shapes. Shapes are the best kept secret in Photoshop because, unlike brushes, they can be scaled up or down to any size and they don’t lose their smoothness.

So, here’s how to make shapes from shapes and how to put my new keystroke to use:

Click the Custom Shape tool and select a shape to use – you can use anything – I’ve used an ornament. On the Tool Options bar, click the Shape Layer icon – it’s the first of the three at the far left of the bar.

Drag the shape onto the image. It will appear as a new layer. It doesn’t really matter what color your shape is right now.
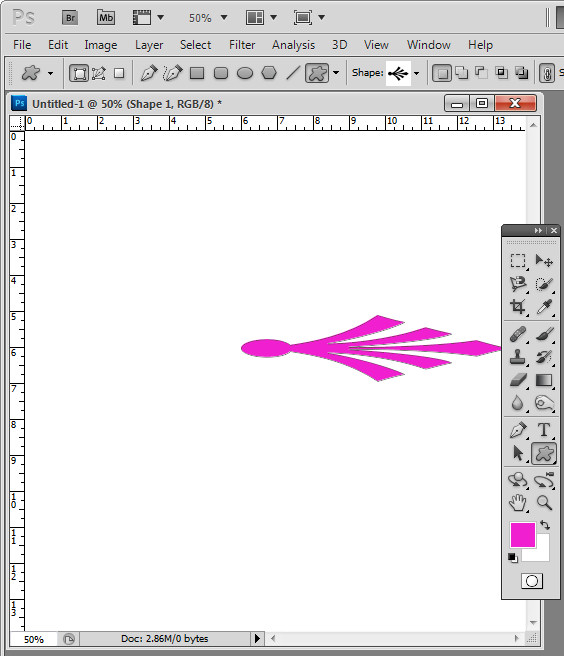
Click the Move tool then choose Edit > Free Transform Path (or press Control + T), click to select the point around which the shape will rotate. You do this using the small indicator on the toolbar – you can choose any of the squares to get an interesting effect – each one will give a different result.

On the Tool Options bar set the Angle to something which is a factor of 360 – 10, 15, 30, 45, 60 and so on. I typically use 30. Press Enter to confirm the rotation.
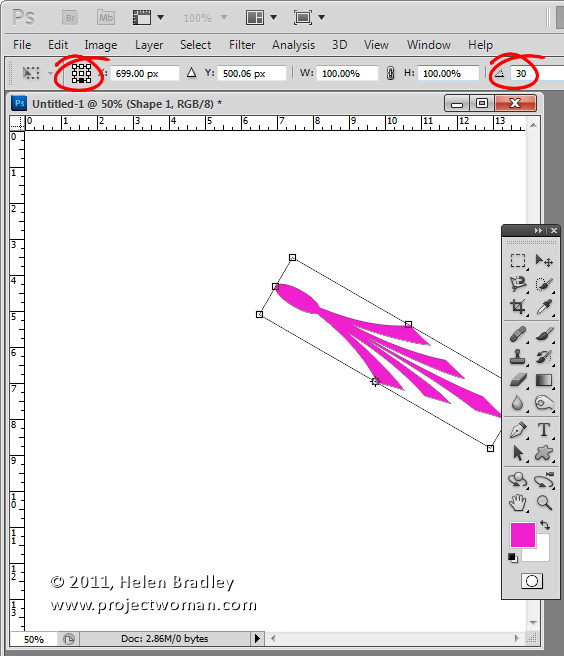
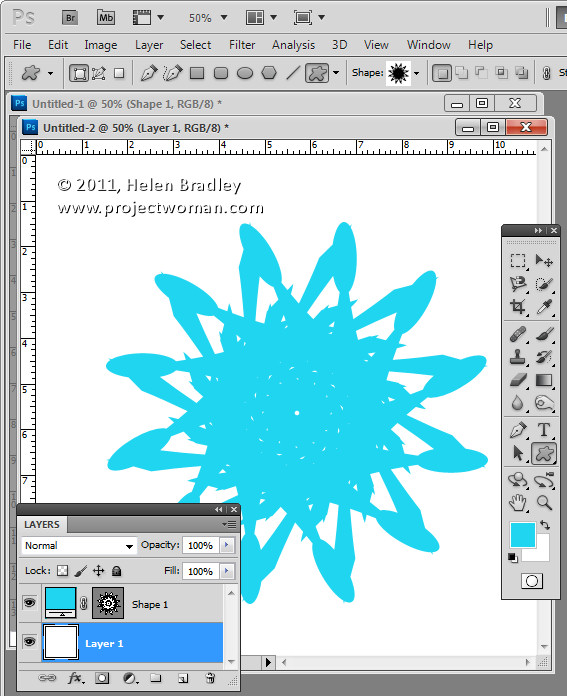
So far you have created a shape and rotated it. Now for the fun stuff – it is time to use the new keystroke combination. With the shape layer selected press Control + Alt + Shift + T (Command + Option + Shift + T on the Mac). Press it a few times until you have duplicated the shape sufficient times to rotate around 360 degrees. The key combination Control + Alt + Shift + T (Command + Option + Shift + T on the Mac) repeats the most recent rotation with a new copy of the shape. Totally cool stuff.
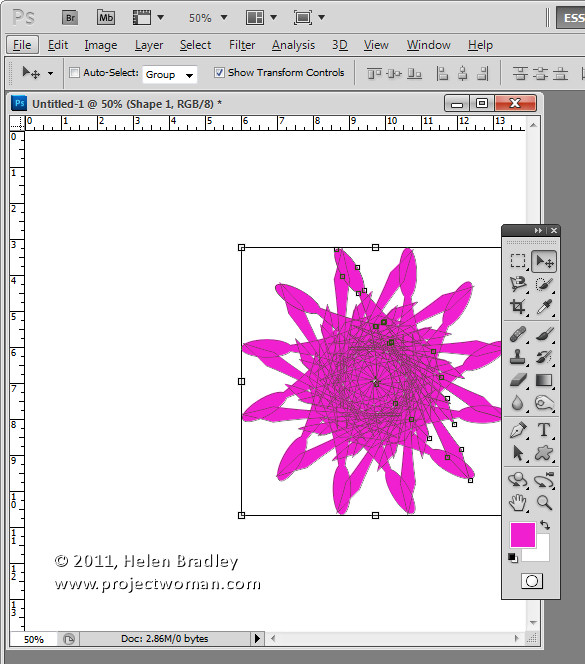
If the final shape goes off the edge of the image you can automatically resize the canvas to include the shape by selecting Edit > Reveal All.

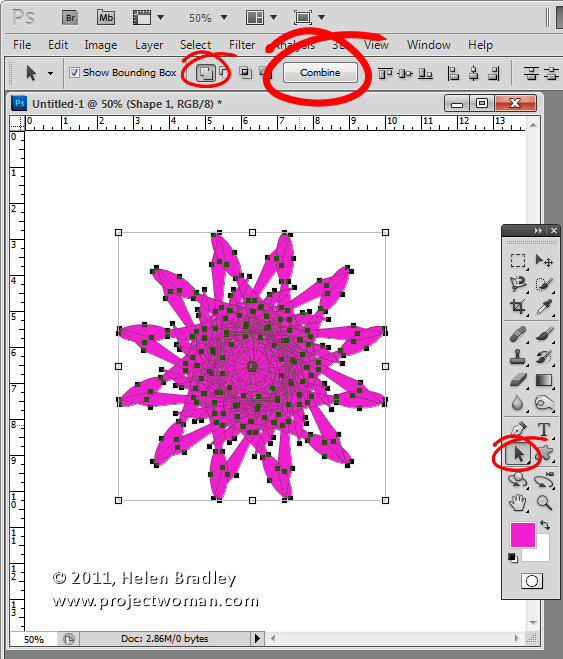
If you like the final shape you can make it a single shape – instead of multiples – by selecting the Path Selection tool and drag over all the shape so you have it selected. From the Tool Options bar select the Add to Shape Area icon and click the Combine button. This makes a single shape from all the combined shapes.
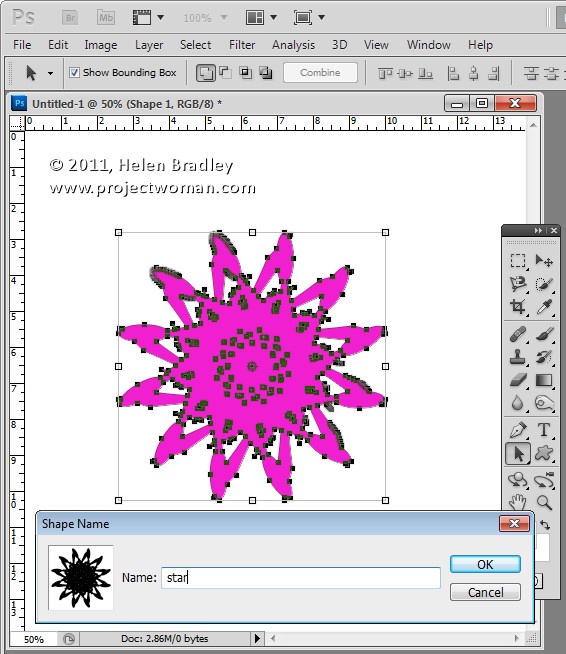
To save the shape so you can use it again in future – with it still selected, choose Edit > Define Custom Shape. Now your kaleidoscope shape is a shape you can use any time in Photoshop by selecting it from the Custom Shape collection.

Helen Bradley

Wednesday, April 20th, 2011

Photoshop – How to fill a shape with a gradient

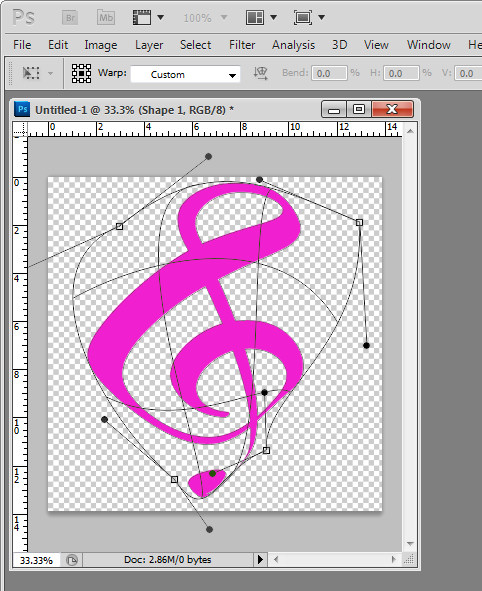
Tricky this one. There are three ways to create a shape in Photoshop and I’ve been working with shape layers so I can warp the result. So far so good. You select the Custom shape tool and then from the tool options you select the Shape Layer option and create your shape. You get a Fill layer with a vector mask showing the shape.

To change the color – double click the Fill layer thumbnail and choose another color. Again – so far so good.

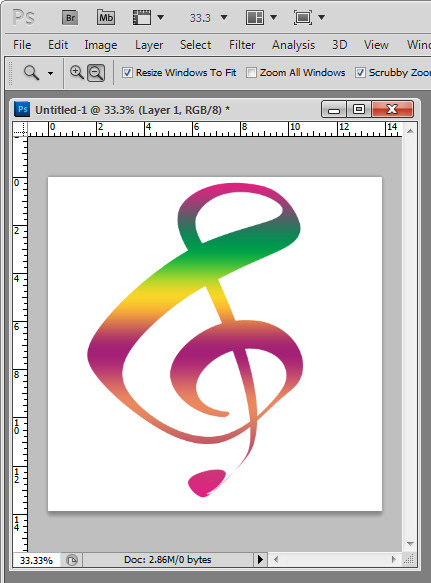
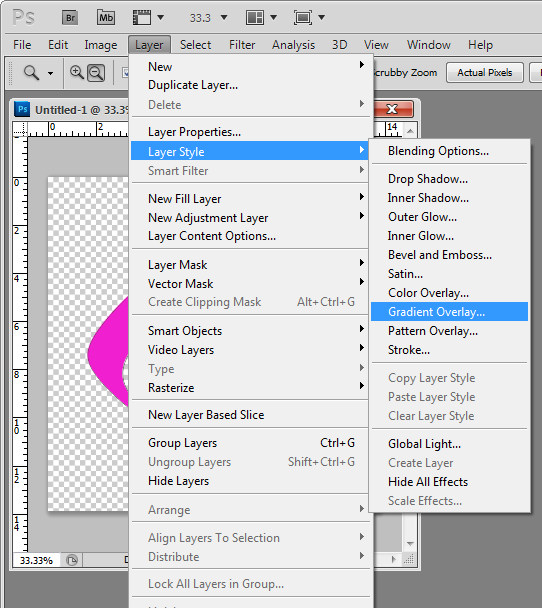
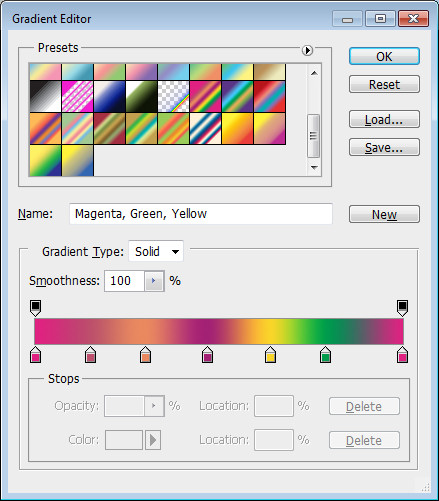
To fill the shape with a gradient – yikes.. there is no obvious option. Here’s a hint – Layer styles! Click the shape layer so you have it selected, choose Layer > Layer Style > Gradient Overlay. Select the gradient to use or make your own custom gradient and click Ok.

Now you know…

Helen Bradley

Friday, April 15th, 2011

Lightroom Vignettes aren’t all equal

I was recently looking around for some cool Lightroom Presets to replicate vintage and toy camera effects. I found a couple of Lomo ones which had some good features but one horrendous failure that really made them usable in all conditions and that’s sad ’cause it didn’t have to be that way.

You see the problem was that the designer didn’t know the difference between vignette tools in Lightroom and they picked the wrong one to use. They used the Vignette tool in the Lens Correction panel to add the vignette – Way Wrong Technique. This tool is for removing vignettes and while it might seem to work for adding vignettes when used on one or a few images it won’t work on all images – hence it is a very poor choice for a preset when there is a better alternative.

The Lens Correction vignette tool removes a vignette from (or adds one to) the edges of the image. So, if you later crop the image, the vignette gets cropped away. If you’re using the tool to remove a vignette then that’s not an issue at all. However, if you are using it to add a vignette – it is a big issue. The presets I found with the vignette added using Lens Correction made a mess of any image I’d cropped – the vignette either got cropped away or worse still it appeared on one side of the image and not the other – yikes!

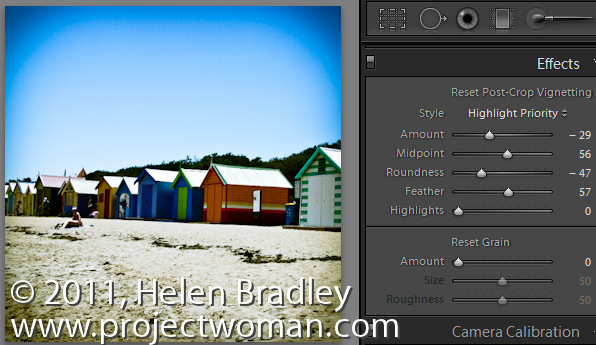
The correct tool to use to add a vignette is the Effect panel’s Post Crop Vignette. This, as its name suggests is a vignette added after the image is cropped so it always appears around the edge of the image regardless of whether it is full size or severely cropped or anything in between and regardless of when you choose to crop the image.

To add a vignette to darken the image edges drag the Amount to the left – dragging to the right will lighten the edges. The Midpoint setting moves the vignette inwards or pushes it outwards. The Roundness setting makes it rounder or squarer and Feather adds a softer or harder edge. For Style, I prefer Highlight Priority although Color Priority is ok – Paint Overlay is an overlay effect and not a blended one so I like it least of all.

So, next time you need a vignette effect for an image, choose the one that not only has plenty of customization options but also the one that will survive any cropping applied to the image.

Helen Bradley