Monday, July 26th, 2010

Photoshop: Pen tool trick


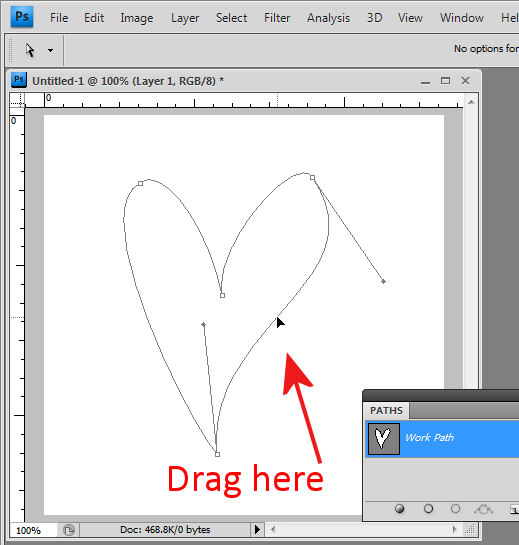
Ok, I am first to admit it, when I stumbled across this trick I went “Wow! I didn’t know you could do that!” I was designing a small heart using the pen tool and I dragged near one side of the shape with the Direct Selection tool and woah! The entire side of the heart moved. Amazing what you find when you get some time to play – well I was going over some notes for a Photoshop presentation I was doing but all the same – it was a lightbulb moment and I just love them when they happen.

 So, here’s how to do it. Make a shape with the pen tool or choose the Custom Shapes tool and the Paths option and draw a path in an image. Click the Direct Selection tool (it shares a toolbar position with the Path Selection tool). Drag over one of the nodes to select it and now drag near the path either side of that node. When you do, the path moves with you.  It’s yet another way of reforming your paths and it’s not what I would call intuitive but it is very handy when you know how it works.

Helen Bradley

Sunday, July 25th, 2010

Lightroom: Arrange files your way

Often when you’re working in Lightroom you will want the images to be sorted in the order that you want to see them, not in as order such as capture date which is one of the Lightroom sort options.

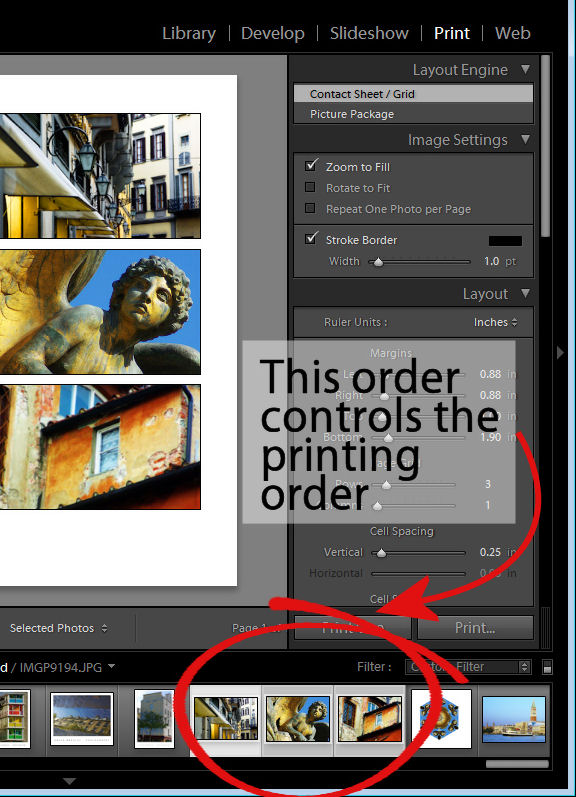
You may want to do this when assembling images for a slide show or for printing, for example as the order of the images in the filmstrip will affect how the images appear in a print template and in the slideshow.
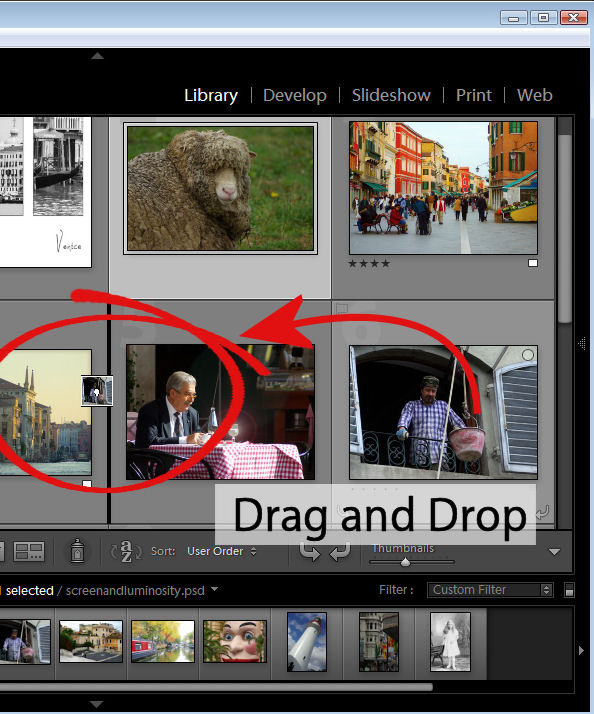
You can control the order of images in a Lightroom folder by dragging and dropping an image from one place to the other in the filmstrip view. To do this, grab the image in the middle and drag on it until you see a black bar appear between two images. If you let go the image it will drop into the indicated position.

This drag and drop process works in most instances but there are some exceptions to be aware of.
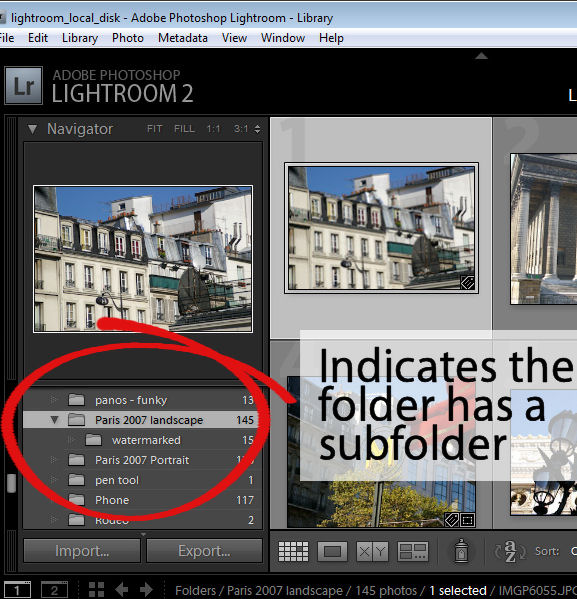
The first is that this will not work if you are in a  folder where there are images in a subfolder below it which are also visible. You can see if this is likely if you open the fly-out for the folder in the Folders panel in the library. If there is another folder the one you are working on, chances are that the images in the subfolder are included in the filmstrip and so you cannot arrange the images by dragging them into position if this is the case.
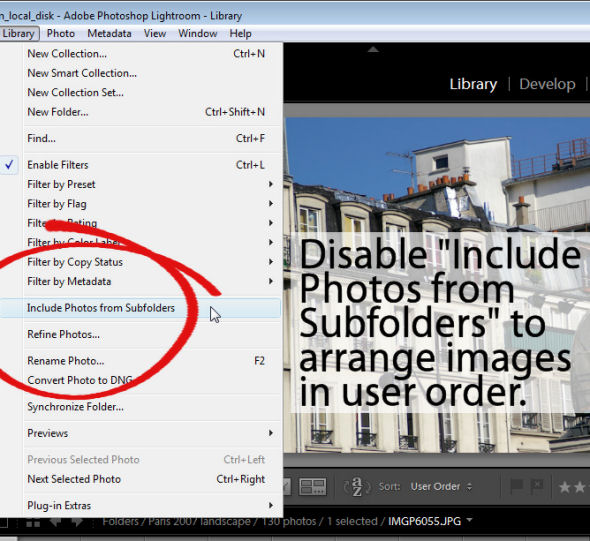
To workaround this limitation you can remove the photos in the subfolder from view – this just removes them from the grid and filmstrip and not from Lightroom or your disk. To do this, click Library in the menu and disable the Include Photos from Subfolders option.

With this disabled, you can now move images by dragging and dropping them into position.
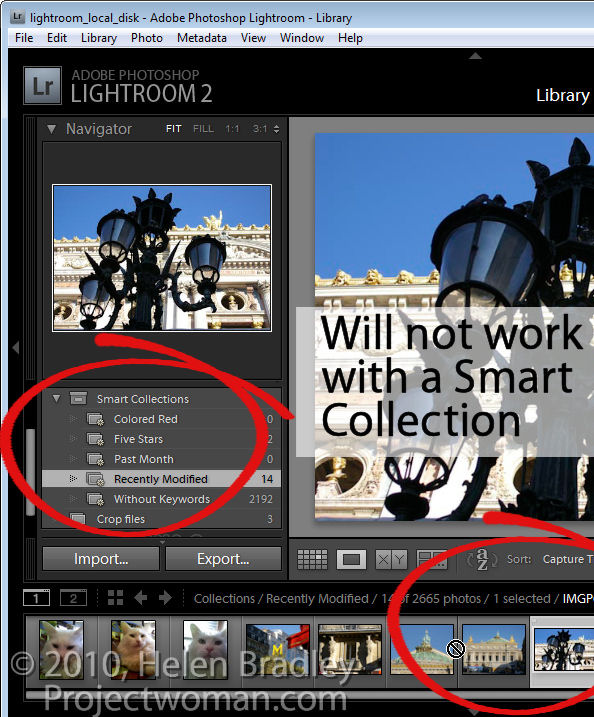
Another exception is when you are working with a Smart Collection. While images can be located in a regular collection and rearranged in order to suit, they cannot be rearranged if they are in a Smart Collection. If you have images in a Smart Collection that you want to be in a specific order, you will need to create a regular collection for them and add them to it to do so.
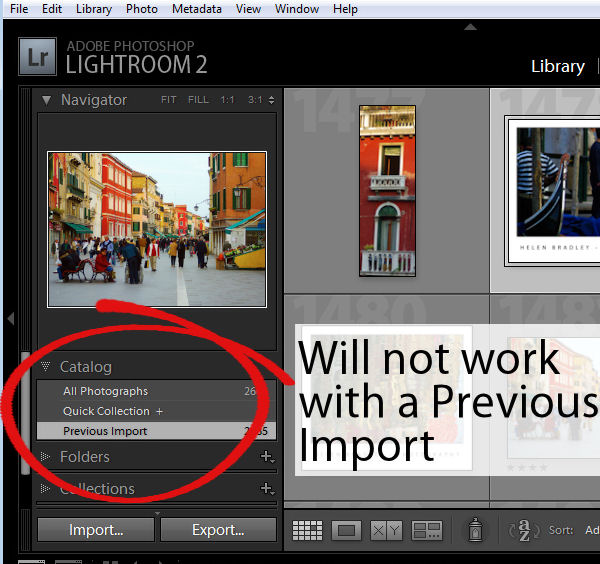
Another situation where you cannot reorder images to your own preference is when you are working on the images in the Catalog such as Previous Import. You must, instead, locate the folder or collection in which the images are stored and rearrange them there.
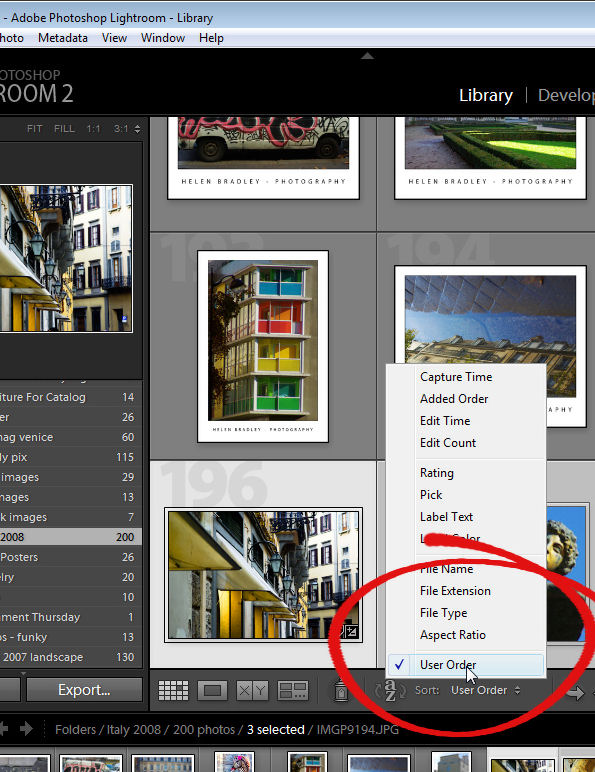
Once you have arranged the images as you want them to appear, Lightroom stores your ordering so it is as accessible as, for example, any other sort order options for that folder or collection. So, you can return to your preferred sort order at any time by selecting User Order from the Sort dropdown list.

Helen Bradley

Thursday, July 22nd, 2010

Excel – cell reference in SumIF

I love SUMIF. It’s a handy tool for summarizing data. So, today I was checking how much I had invoiced a client – I have actual charges for stories I write in one column and the invoice numbers that these were charged under in another. I wanted a summary so I know the total of invoice 1 was $x and invoice 2 was $y.

SumIF is the tool to use. It goes like this:

=sumif(G1:G200,”=1″,H1:H200)

this sums the values in the range H1:H200 only if the corresponding values in the range G1:G200 is 1. So, it does the deed for Invoice #1. Repeat as required for invoices 2-20 – no way!

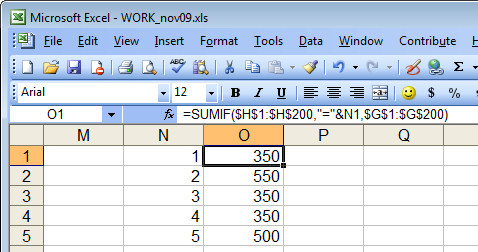
It is much easier if I place the numbers 1, 2, 3 and so on in cells of the worksheet and reference them in a single formula that can be copied rather than writing this 20 times… or 100 times… you get the picture… it’s simply not on to do this.

Problem is – how to refer to a cell in the SumIF function. This DOES NOT WORK!  =sumif(G1:G200,”=N1″,H1:H200). Excel doesn’t see the N1 as a cell reference – it sees it as a value to match.

So, you have to write it differently:

=sumif($G$1:$G$200,”=”&N1,$H$1:$H$200

the “=”&N1 references the value in N1 as the one to match and the $ symbols are needed so the formula can be copied.

Helen Bradley

Monday, July 19th, 2010

Format Hyperlinks in PowerPoint 2010

If you’ve added an email link or a website URL to a PowerPoint slide, you’ll know that PowerPoint 2007 and PowerPoint 2010 automatically format the hyperlinks for you.

Because PowerPoint doesn’t use styles, it’s not obvious exactly how the formatting gets applied and how you control it.

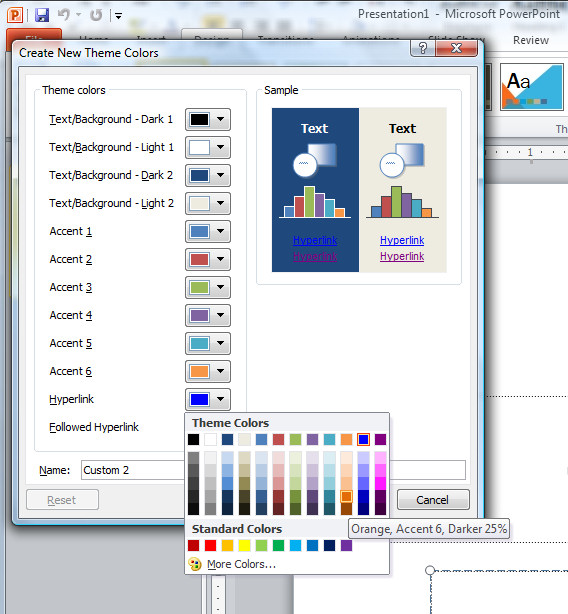
The first thing to know is that you simply can’t control the underlining, it’s there and it’s there to stay. You can, however, change the colors used.

Click the Design tab > Colors > Create New Theme Colors, locate the Hyperlink color and change it to something different if desired. To control the Followed Hyperlink color, select that option and change it.

You now need to save your changes as a custom color scheme, so type a name for your color scheme and click Save.

Now the chosen hyperlink color and followed hyperlink color will be used to format the hyperlinks in your PowerPoint presentation.

Helen Bradley

Monday, July 5th, 2010

Units of measure in PowerPoint

Units of measure in PowerPoint tied to regional settings

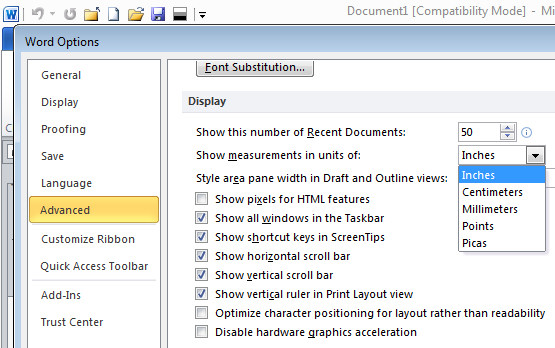
Ok, so its easy to change units of measure in Word by setting the Word Options to measure in inches or cm – depending on where you live. However, if you’re using PowerPoint don’t waste your time looking in PowerPoint for the setting – it ain’t there.

Instead, the measurements in PowerPoint are tied to your geography. If you live in the US you get inches, if you fess up to living else where you get your local units of measure. To change where you live, launch the Control Panel and look for a Regional settings option and set your location there.

For those of us who live in the US but who think imperial measurements suck big time and who yearn for the metrics of our childhood in the far off land of Aus, thanks to Microsoft we are s*** out of luck. You see, if I set my region as Australia or the Uk to get metrics, everything else goes pear shaped and Google starts serving up UK or Australian pages in preference to US ones, or I get £ by default in Excel. It’s all round not a good choice. So, I’ll have to suck it up and learn to embrace feet and inches – but provided you still call the land of your birth home chances are you’ll be just fine.

Helen Bradley

Thursday, July 1st, 2010

Don’t spell check this – Word 2010

do not spell check this text

I write a lot of code in Word documents, Excel spreadsheets and in PowerPoint slide shows. I’m not totally unusual in including macros in my files as well as detailing the macro code within the various documents.

However, as you can imagine, Office applications spit the dummy when they see code and everything gets squiggly lines under it. Which makes your documents look horrible when anyone who has Spell Check as you type enabled opens one of these documents.

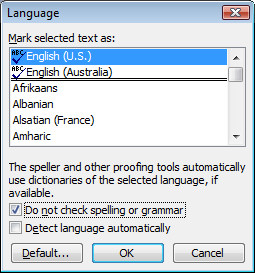
In Word 2003, 2007 & 2010 I can stop proofing by selecting the code, double click on the proofing language in the program Status bar and reselect the language to use and click Do not check spelling or grammar. For some reason if you don’t reselect your language in Word 2007 and 2010 the Do not check spelling or grammar option isn’t applied – go figure. It took me a while to work this one out.

In PowerPoint 2010 and 2007 just choose Do  not check spelling and it works fine. In PowerPoint 2003 where I spent this morning, there’s actually a language entry for No Proofing.. so select that and your text won’t be spell checked.

Helen Bradley