Tuesday, September 15th, 2015

Black Text on a White Background and Vice Versa

Invert text in one simple step in Photoshop

Today I needed to make some text which is white where the layer below is black and black where the layer below is white.

I didn’t want the text to have to be made in two ways (for preference) and I did want it to remain editable. Turns out it is all very easy and it works like magic.

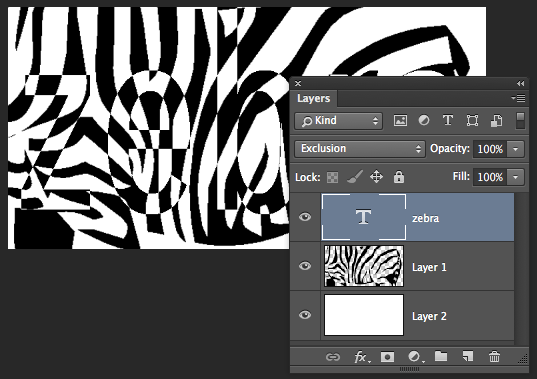
Start by creating your black and white layer. I used a zebra image but you can use anything. Type your text on a layer above and make it white. Then just set the blend mode for the text layer to Exclusion and the colors will flip – the white text will become black where the image below is black.

The wonderful thing about this effect is that the text remains editable and so too is your background. You can move or adjust the black and white layer and the text layer and everything just changes to match.

Simple to do, when you know how.

Wednesday, December 10th, 2014

Photoshop Quick tip: Change from Dodge to Burn Tool

Switch between the Dodge and Burn tools with one key press

While you are making small photo edits one easy trick that could save you a lot of time is switching between pairs of editing tools like Dodge and Burn with one key press.

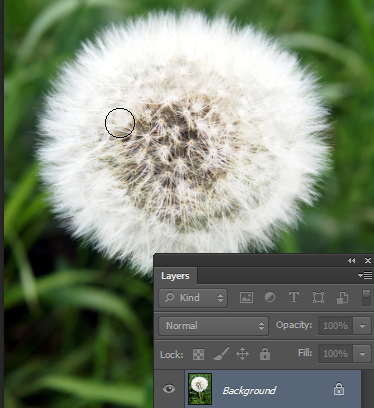
So to change from the Dodge to the Burn tool (or vice versa), hold down the Alt key (Option on the Mac).

While you have the Alt key (Option key) held you will be using the other tool. Let go the Alt (Option) key to return to the original tool you were using.

Now you can easily move back and forth between tools to speed up your edits.

Photo credit: © anitab0000 freeimages.com

Friday, November 21st, 2014

Photoshop – Quickly Change Your Brush Size

Quickly change the brush size (without using the slider)

When you’re using any tool in Photoshop that uses a brush such as the Brush itself, Eraser, Dodge, Burn and many others, you can change the size of the brush using a keyboard shortcut rather than having to use the size slider.  This fast and easy shortcut can save you a lot of messing around.

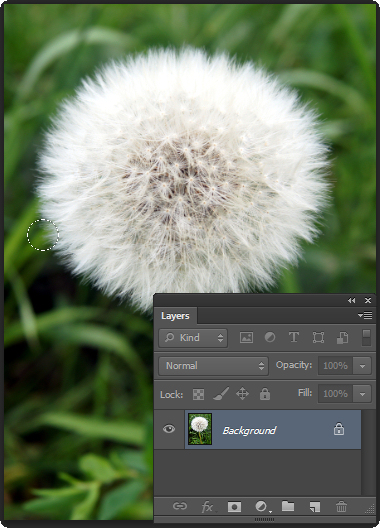
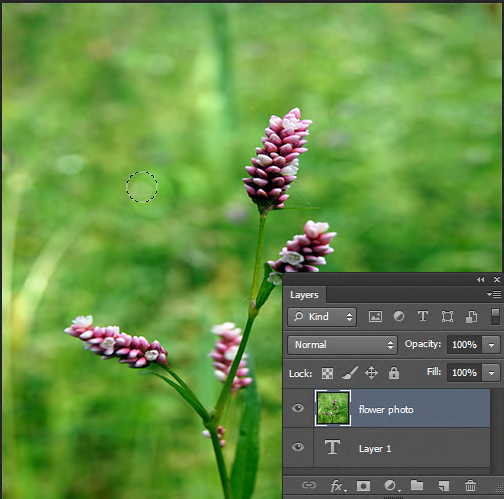
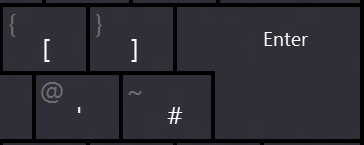
To change the size of the brush for any tool that uses it, press the opening square bracket key ([) to decrease the size of the brush and press the closing square bracket key (]) to increase the size of the brush.

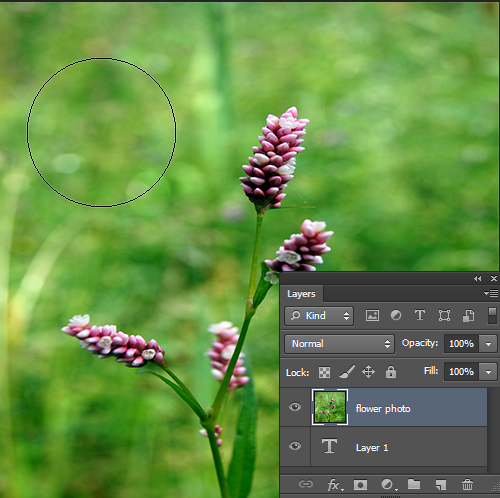
Notice from the top image to this one the brush has increased in size (I pressed the keyboard shortcut ] to do this) and I can easily make my adjustments without having to mess around with the brush size slider.

Photo credit: © anitab0000 freeimages.com

Tuesday, November 18th, 2014

Quickly Add Placeholder Text to a Newsletter Mock up in Photoshop

Automatically put placeholder text in a newsletter mock up in Photoshop

If you are creating a mock up of a newsletter in Photoshop I suggest you use “Lorem Ipsum..” as your sample text instead of real text. One thing the human eye is always looking for is readable text, but when you use “Lorem Ipsum” because it makes no sense at all your reader’s eye will go to your design instead of tying to read the placeholder text. 

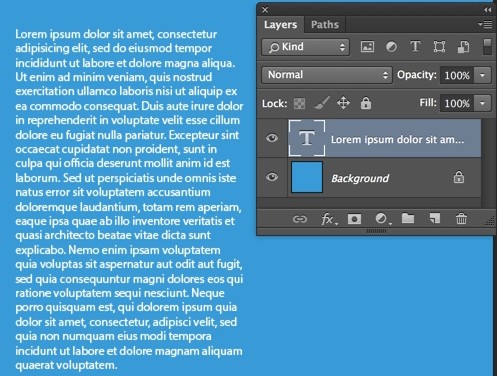
To create a text box and fill it automatically with “Lorem Ipsum”, select the Type tool on your tool bar and click and drag where you wish your text box to go.

Select the font face, font size, and font color on the tool options menu.

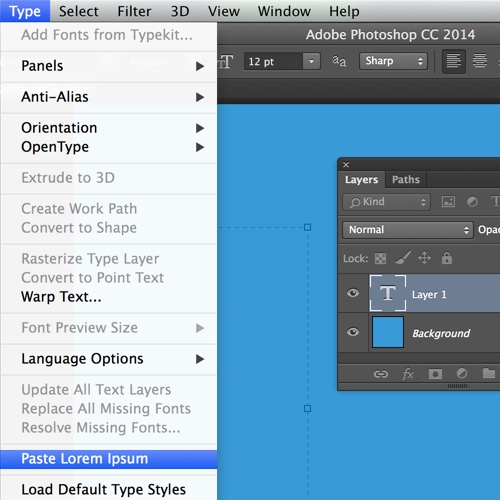
To fill the text box with your placeholder text, click Type on your main menu then click Paste Lorem Ipsum on the drop down menu.

This fills your text box with the placeholder type.

Only make and fill one text box at a time, if you need more text then click in the text box and reselect Type>Paste Lorem Ipsum to refill it.

Monday, September 29th, 2014

Merging two layers into one in Photoshop

Learn a handy keyboard shortcut to merge two layers in Photoshop

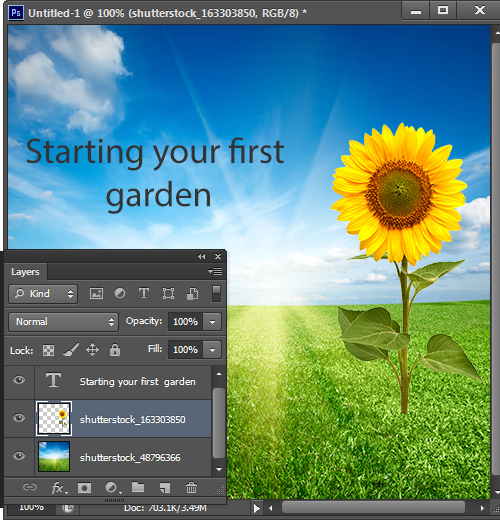
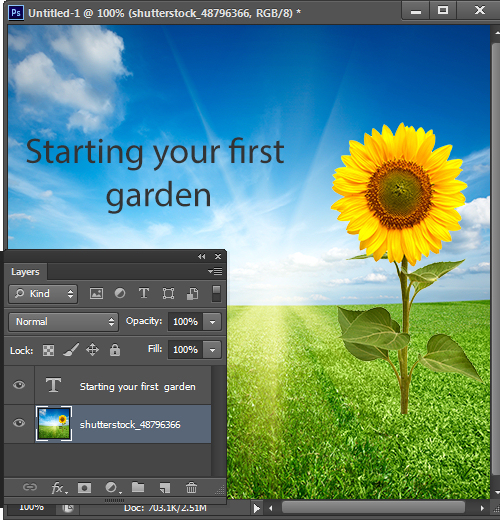
One simple trick but one that comes in handy constantly for me is merging two layers into one in Photoshop. This trick can save your life with so many Photoshop projects that require two images to be merged to a single layer.

Make sure the layers you wish to merge are on top of each other in the Layers palette. Click on the thumbnail of the top most layer of the two you want to merge.

Press Control/Command + E.

Now your layers are merged.

Something to keep in mind is the new layer when it does merge will take the name of the layer on the top.


Friday, September 19th, 2014

How to center a layer in a Photoshop document


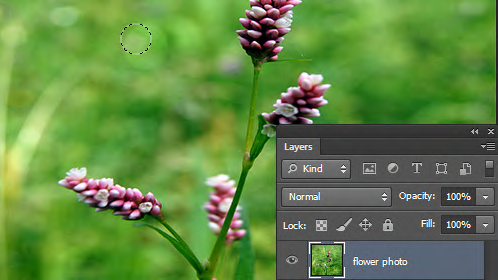
Image Credit: © 2014 freeimages.com, anitab0000

Help! How to center a layer’s contents in Photoshop

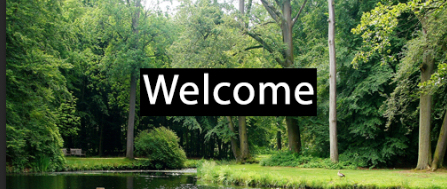
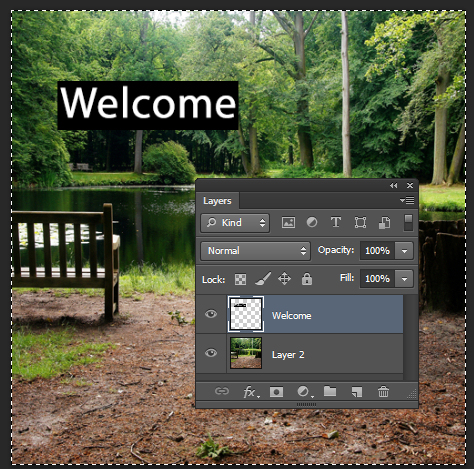
Whether you’re making a simple document, newsletter or editing a photo a necessity is being able to center your layers. This task took me by surprise as to how challenging it was but in a few steps it can easily be done.

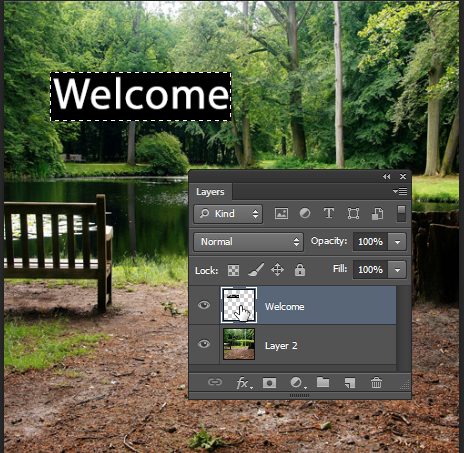
First press Control + click (Command + Click on the Mac) on the layer thumbnail for the layer you want to center in your Layers panel.

Click Select > All (Control/Command + A). This selects the entire image. You can tell this is done by the marching ants around your full image.

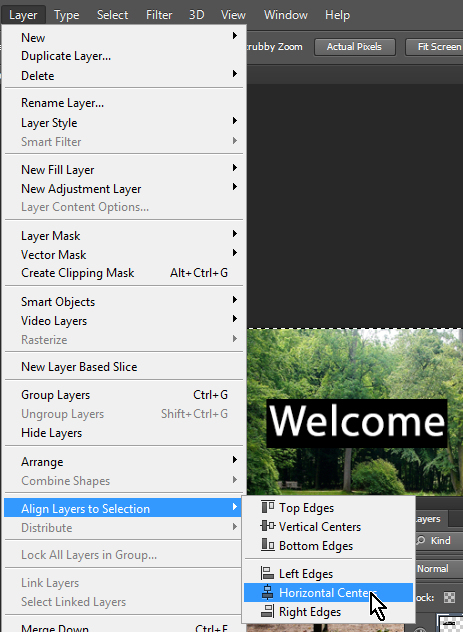
Click Layer >Align Layers to Selection > Horizontal Centers.

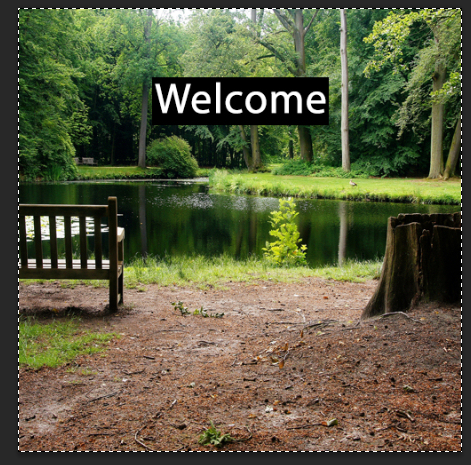
Notice that your layer is now centered horizontally. You can do the same vertically by choosing Layer >Align Layers to Selection > Vertical Centers.

Press Control/Command + D to deselect your layers.

Now your layer content is deselected and aligned horizontally (and/or vertically) and you’re free to continue editing.

Saturday, September 13th, 2014

Activate Photoshop’s Full List of Filters

Despite their existence in earlier versions of Photoshop some categories of filters are mysteriously missing from the menus in Photoshop CS6, Photoshop CC and Photoshop CC 2014. This is the default behavior so you won’t find the Artistic, Brush Strokes, Sketch, Stylize or Texture category of filters in the Filters menu. This is a problem if you use these filters so luckily you can bring the filters back when you know how.

It turns out that an option in the Preferences menu acts as gatekeeper for displaying the missing filter categories. To re-enable them, select Edit > Preferences > Plug-Ins…. Then check the box that reads Show all Filter Gallery groups and names. Click OK and restart Photoshop. This will put the filter categories back in the Filters menu.

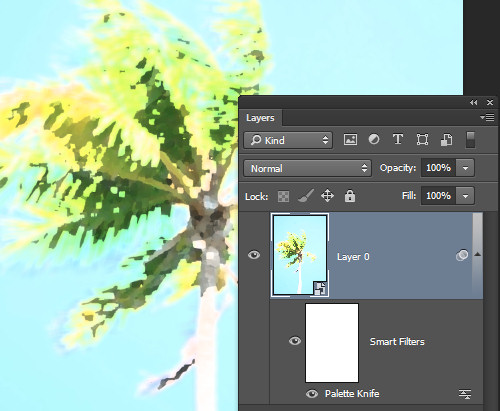
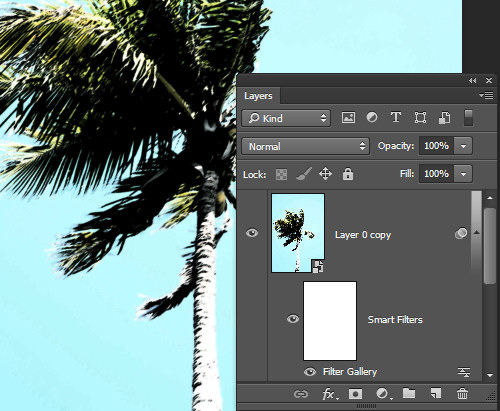
Now you could have accessed the missing filters from the Filter Gallery but the way the filters are named in the Layers palette is different if you access them from the Filter Gallery rather than from the menu itself. So, if you use Convert for Smart Filters to create a smart object before applying the filters and if you start a filter from the menu then the filter name appears below the layer so you can tell the name of the filter you are applying. This image shows this situation:

If, on the other hand, you start your filter from the Filter Gallery the Layers palette simply shows Filter Gallery – with no indication of which filter you applied. This is what the Layers palette looks like – not very helpful at all.

In short, having the filters back on the menu and selecting them from there is the better option.

Be aware too that the Oil Paint filter was removed from Photoshop CC 2014 so it is gone for good.

Saturday, July 26th, 2014

How to Find, Install and Use Free Photoshop Brushes

Find Free Brushes Online to use in Photoshop

Learn how to find and download free and for fee brushes for Photoshop. See how to install these brushes into Photoshop and use them in your work.

This video covers all the steps in downloading and installing the brushes so you can ensure they are  always available to you.


 Helen Bradley

Saturday, July 12th, 2014

Illustrator for Photoshop Users – Part 1

If you already use Photoshop you’re well on your way to using Illustrator

)

Designed specifically for people who already use Photoshop, this video is part 1 of a series on  learning Illustrator. What makes this video different from most is that it uses what you already know about Illustrator from using Photoshop as a starting point.

The similarities and differences between Illustrator and Photoshop are explained and the video introduces you to the basic tools in Illustrator that you need to know to create designs.

Helen Bradley

Thursday, May 8th, 2014

Photoshop Basics: Learning About Layers

image credit © 2008 lockstockb, freeimages.com
Guest post

Understanding how layers work is crucial to being able to work effectively in Photoshop and in this post I will cover everything related to Layers including,

How to Create a New Layer

How to Duplicate a Layer

Add a Layer style

Using Adjustment Layers

How to Merge Layers

CREATE A NEW LAYER:

This is a very basic function in Photoshop which is elaborated further in this Photoshop tutorial. On the menus choose Layer > New > Layer to create a new empty layer right above your image. On that brand new layer, you can paint, create shapes, etc… all in a non-destructive way. This means that if you don’t like what you just did, hide or delete that layer on your image underneath will still look like it did at the start.

DUPLICATE A LAYER:

To duplicate a layer click on the layer you want to duplicate then go to Layer > Duplicate Layer and voila, you now have two identical layers!

ADD A LAYER STYLE:

Say you added a button or some text on your image and you’d like to add a shadow to it. To do this, choose Layer > Layer Style and choose Drop Shadow. Other popular options are Inner Shadow, Outer Glow, Inner Glow and Bevel & Emboss. I suggest you play with each of them to really understand how they can benefit you.

USING ADJUSTMENT LAYERS:

Adjustment layers are one of the most powerful tools in Photoshop. Use these to change the look of your image in a non-destructive way by, for example, adjusting the colors as well as the shadows, highlights and contrast. To add an adjustment layer to any image, go to Layer > New Adjustment Layer and choose the type of adjustment layer. Here is a list of the adjustment layers I use most frequently:

Brightness/Contrast: This lets you make simple adjustments to the tonal range of your image. In layman’s terms, when you move the Brightness slider to the right your image gets brighter, when you move it to the left the image gets darker. If you move the Contrast slider to the right, your image becomes more contrasty, you move it to the left, contrast is reduced and the image becomes more grayish.

Levels: A Levels adjustment allows you to adjust the intensity levels of shadows, midtones, and highlights in your image. Drag the slider on the left inwards to darken the shadows and drag the slider on the right inwards to brighten the highlights. If you drag the middle slider to the left you will brighten the midtones and drag it to the right to darken the midtones in your photo.

Curves: Use can use Curves to adjust the image tonality with more precision than by using Levels. By adding points on the curve, you’ll be able to adjust the brightness or darkness of the Highlights, Midtones and Shadows.

Hue/Saturation: This one is really helpful for adjusting colors. You can either adjust the saturation of all colors at the same time (this is the default and occurs when the Master channel is selected) or select individual colors from the dropdown menu to adjust the saturation of that color and also its Hue and Brightness.

In adjusting the hue you can, for example, with red selected, drag the slider to bring the red towards either pink or orange. The Brightness slider will either brighten or darken specific colors or the entire image – depending what you have selected in the dropdown menu.

Color Balance: Perfect for color correction, Color Balance changes the mixture of colors in a photo. You have the option here to adjust the colors in the Midtones, Shadows and Highlights. Let’s take the color blue for example, if you want to adjust the color of a blue sky, choose Highlights, a blue shirt, choose Midtones, a blushish shadow, choose Shadows. To color correct an image, I suggest you try each slider and move to the next slider once you like the look of the image.

Selective Color: This is another powerful tool for color correcting or color grading. Selective color will allow you in a very precise way to fine tune color. For every color (Reds, Yellows, Greens, Cyans, Blues, Magentas, Whites, Neutrals/Gray, Blacks) you’ll be able to fine tune them by adjusting the Cyan/Red, Magenta/Green, Yellow/Blue, Black/White found in each of those colors.

MERGING LAYERS:

Sometimes you want to duplicate a layer, other times you want to merge them together. To do this, from the Layer menu choose Merge Layers, Merge Visible, or Flatten Image:

Merge Layers: Use this option when you want to merge layers you have selected.

Merge Visible: Use this when you want to merge all the visible layers.

Flatten Image: Use this when you want to flatten the entire image/all the layers.

Helen Bradley

Page 1 of 23123451020Last »