Saturday, September 13th, 2014

Activate Photoshop’s Full List of Filters

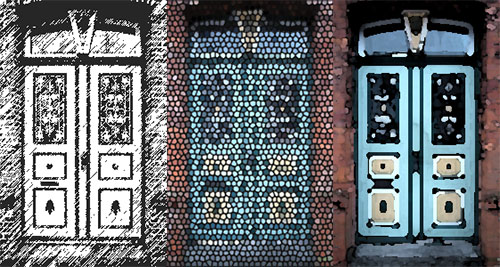
Despite their existence in earlier versions of Photoshop some categories of filters are mysteriously missing from the menus in Photoshop CS6, Photoshop CC and Photoshop CC 2014. This is the default behavior so you won’t find the Artistic, Brush Strokes, Sketch, Stylize or Texture category of filters in the Filters menu. This is a problem if you use these filters so luckily you can bring the filters back when you know how.

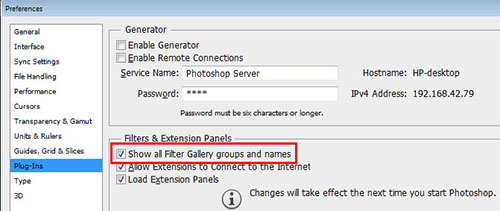
It turns out that an option in the Preferences menu acts as gatekeeper for displaying the missing filter categories. To re-enable them, select Edit > Preferences > Plug-Ins…. Then check the box that reads Show all Filter Gallery groups and names. Click OK and restart Photoshop. This will put the filter categories back in the Filters menu.

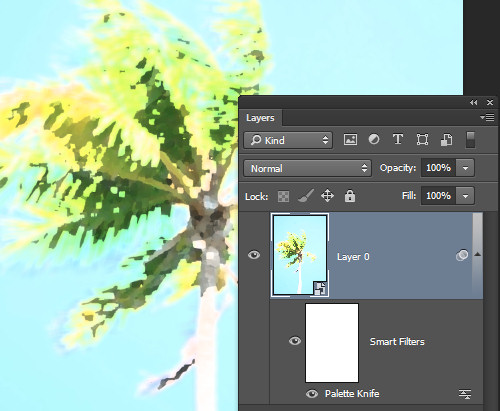
Now you could have accessed the missing filters from the Filter Gallery but the way the filters are named in the Layers palette is different if you access them from the Filter Gallery rather than from the menu itself. So, if you use Convert for Smart Filters to create a smart object before applying the filters and if you start a filter from the menu then the filter name appears below the layer so you can tell the name of the filter you are applying. This image shows this situation:

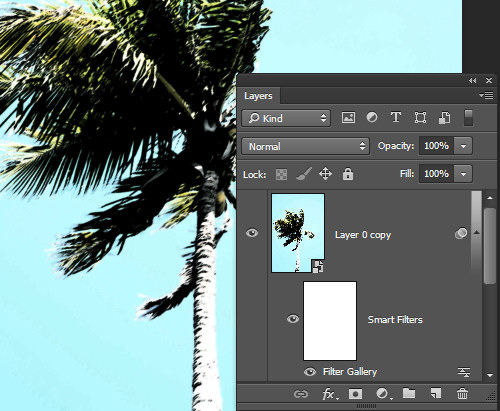
If, on the other hand, you start your filter from the Filter Gallery the Layers palette simply shows Filter Gallery – with no indication of which filter you applied. This is what the Layers palette looks like – not very helpful at all.

In short, having the filters back on the menu and selecting them from there is the better option.

Be aware too that the Oil Paint filter was removed from Photoshop CC 2014 so it is gone for good.

Wednesday, June 19th, 2013

Capturing Photos of reflections – Pt 2

Let’s look a little deeper into how to capture great reflections

In the previous post we looked at the basics of capturing reflections. Here we’ll look at some additional tips and tricks.

Frame the image

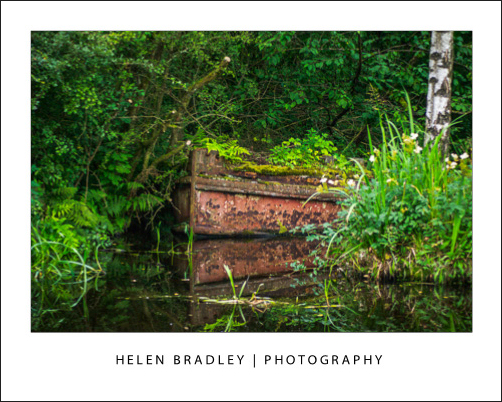
When capturing a reflection of a building in a lake, for example, you have two choices for framing the image. You can capture the reflection alone or you can capture the original object and its reflection. The choice is yours. If you’re shooting digital, capture both shots and see which you like best later on.

If you opt to capture both the original and the reflection, consider where the line where one ends and the other begins should be. You can shoot with the ‘line’ across the middle of the photo but this can be distracting as the eye doesn’t know exactly which image to focus on.

A better solution is to place the ‘line’ along the top one third or bottom third of the image – so the reflected area is double the size of the original or half its size. This will balance the image better and give a more restful image. Make sure the line between the reflection and what’s being reflected is very straight, if it is not, it will be very distracting.

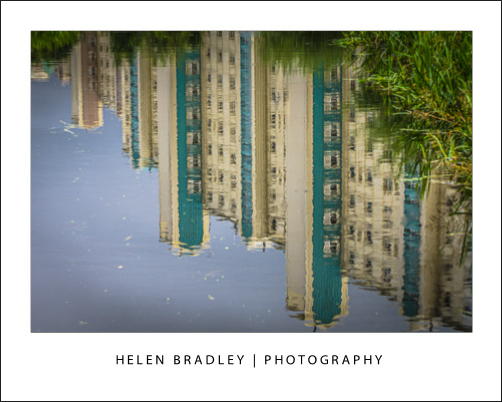
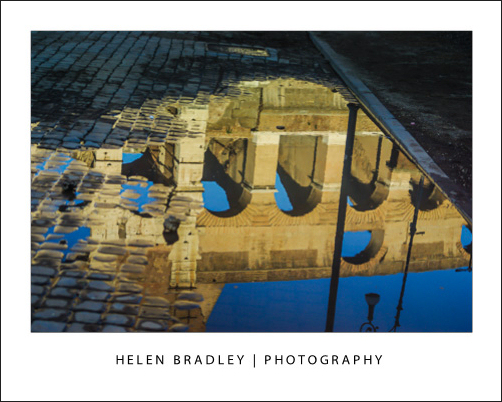
Here the buildings are much more interesting as a reflection than they were right side up!

Capture the imperfect

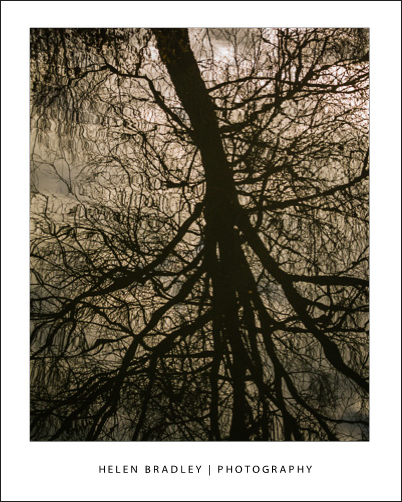
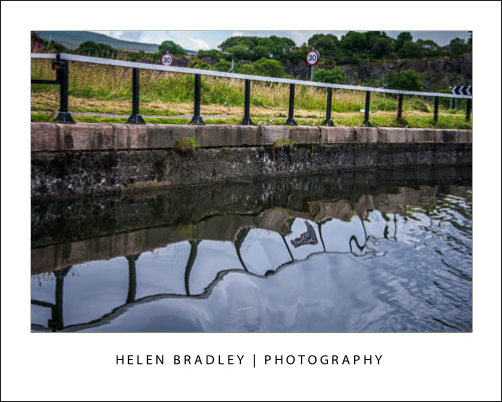
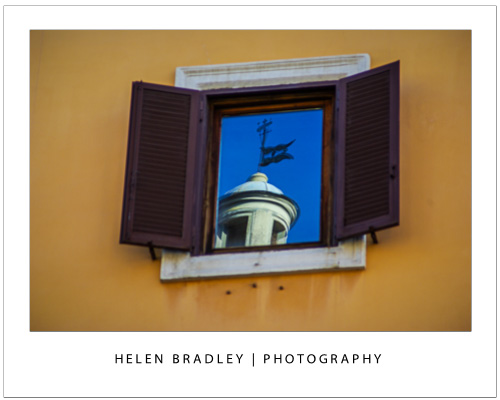
When you’re looking for reflections, don’t always look for perfection. There are interesting photos to be taken where the reflection is bent or rippled because of the characteristics of the reflective surface.

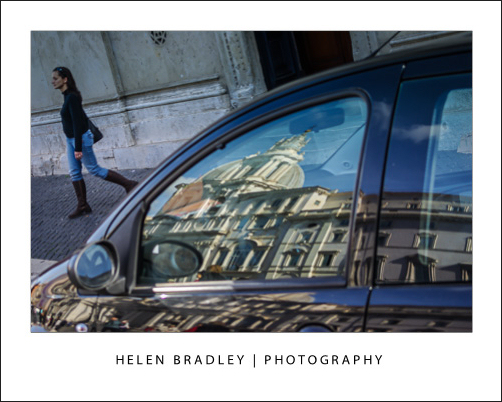
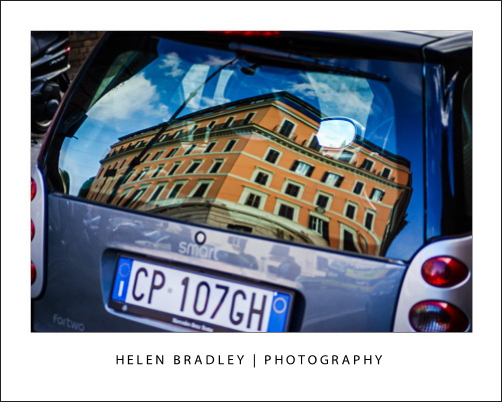
For example, try shooting a reflection captured in a car windscreen. The reflection will be bent and distorted because of this and all the more interesting.

Here the wake of the boat I was travelling on broke the reflection in a very visually rich way:

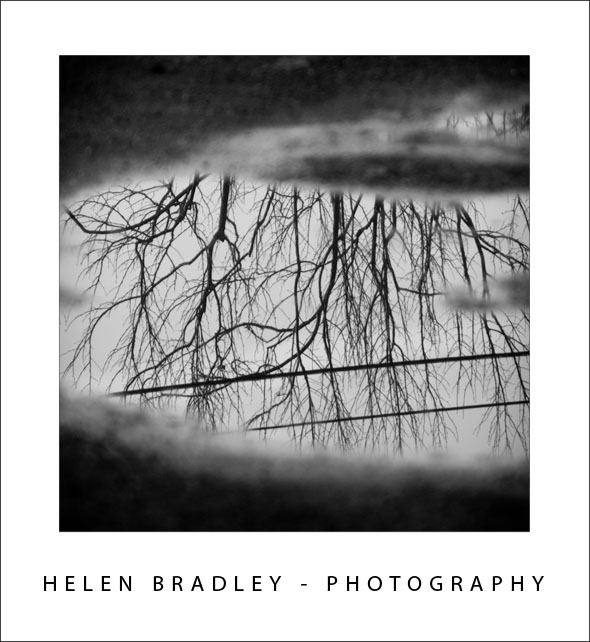
A sudden shower of rain will open up new adventures in capturing reflections as you will see the surrounds reflected in puddles of water on the ground. Even a storm-cloud laden sky will look more threatening if captured reflected in a puddle.

Focus on the point of focus

When you’re shooting a reflection, check your camera is focusing correctly. You want it to focus on the reflected surface and some cameras may not do this correctly and may, instead, focus on the objects behind the reflective surface.

If you’re using a digital SLR, you can switch to manual focus and focus the lens yourself so you can make sure that the area you’re most interested in is  nice and sharp.

Once you start looking for reflective surfaces to shoot images from you will be surprised at just how many there are and what great effects you can get from them with not
much effort.

Helen Bradley

Wednesday, June 12th, 2013

How to photograph reflections

Reflections make for great photos so here’s how to capture them

Reflections occur all around us. When you’re driving, the road behind you is reflected in the car rear vision mirror and your car will be reflected in the chrome on the car next to yours at the stop light.

Other reflections are more obvious and often constructed to be so, for example, the Reflecting Pool at the War Memorial in Canberra reflects the surrounding buildings and beautiful houses are often constructed with lakes in front of them to reflect their beauty.

Capturing these objects and their reflections can lead to some wonderful photos so here I’ll show you want to look out for and how to capture a great shot.

Axe the Polarizer

The first thing to do when shooting reflections is to remove the polarizing filter from your camera. This filter is designed to reduce reflections which, most of the time is a good thing, but not when it’s the reflections themselves you’re interested in.

If you leave the filter on and photograph something reflected in a window, chances are you’ll capture an image of what’s behind the window instead of what is reflected in it.

Ideas for reflections – sunglasses

While a beautiful building reflected in a lake makes for a great shot, there are reflections you’ll come across every day that will often be more interesting because they are not staged or expected.

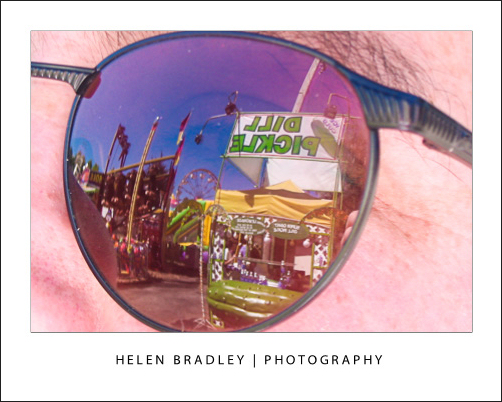
For example, the lenses in sunglasses will reflect the scene around them. By positioning yourself so you can see something interesting reflected in the lens you can capture a mini scene within the glasses themselves.

Ideas for reflections – rear vision mirror

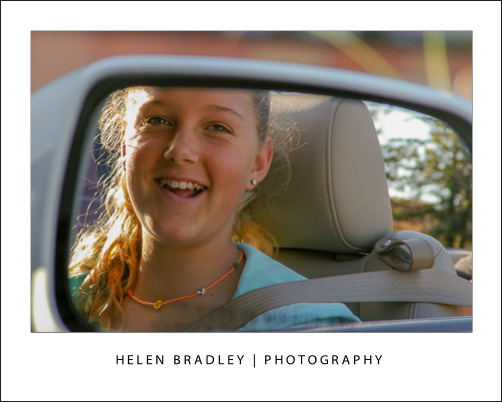
Car rear vision and side mirrors are great for capturing interesting reflections.

Hold the camera at an angle to the mirror so you don’t capture the camera in the shot (unless you actually want to) and frame the shot in the mirror. You’ll need to frame it very accurately because anything outside what shows in the mirror won’t be captured.

Ideas for reflections – city buildings

If you live in a city there will be reflection opportunities in the buildings around you. For example, capture a busy streetscape in the glass front window of a shop. Look out for an interesting shop to use for this purpose such as a fruiterer or bakery or some shop where what is in the window is as much of interest as what is reflected in it.

When you’re shooting reflections in shop windows, there’s a good chance the final shot will be a mix of reflection and what shows through the glass.

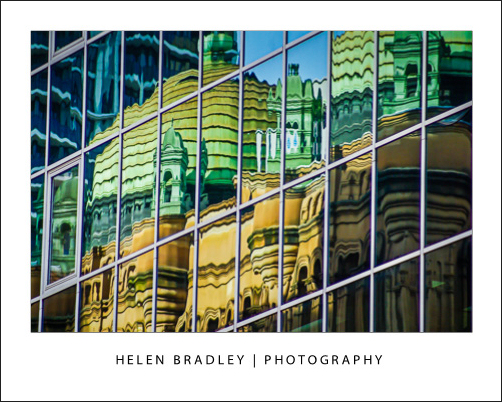
Tall buildings with mirror glass will reflect the buildings around them and the sky too. Look for opportunities where the sun is right and the reflected image an ideal one to compose and capture.


Helen Bradley

Wednesday, May 8th, 2013

Portraits of Mum – Part 2 – select and fix

In my last blog post I talked about how to take great photos of mum for Mother’s Day or any other occasion. Today I am going to explain how to process them.

Once you’ve downloaded and chosen the best shots – I use Lightroom because it is so simple to use, it’s time to fix the photos.

I will adjust the white balance – in the series of images I shot the white balance was a little too warm so I cooled the images down and adjusted the Exposure in the Develop module.

I will then fix any skin blemishes either in Lightroom or, if you’re using Photoshop Elements, for example, I’ll do that with the Spot Healing Brush – it is as simple as painting out the problem areas and uneven skin tones.

To lessen the effect of wrinkles a good fix is to make a duplicate of the image background layer and to blur this duplicate layer with a small radius Gaussian blur filter (Filter>Blur>Gaussian blur). Then selectively erase the top layer to reveal the sharper features underneath leaving the blur over the wrinkles. You will want to erase the blurry eyes and mouth and perhaps some of the blurred hair. Finally, reduce the Opacity of the top layer to blend the two layers together for a great result.

If your images are a colder blue color then use a warming filter to give the portrait a warm pink glow which is very flattering to skin tones. In Photoshop Elements, to do this, choose Filter > Adjustments > Photo Filter and choose a Warming Filter (85). You can set the density of the filter to control how strongly it is applied. In the Lightroom Develop module, you can drag the Temperature slider a little to the right.

I like to use the Photoshop Elements Lightening Brush to lighten a person’s teeth slightly and I’ll often use the Saturation Enhancing Brush to brighten their eyes. Err on the side of caution though, the edits you make should be subtle and gently enhance the photo – you’re not applying Halloween makeup!

If your mum gets just one photo that she loves of herself from those you’ve taken – you’ve given her a wonderful gift. Best of all, you can bet she’ll be happy to pose for you again next year.

Helen Bradley

Wednesday, May 1st, 2013

Portraits of Mum – Part 1 – How to get the best shot

Helen Bradley explains how to get the best shots of that very important person in your life – mum!

My mum hates being photographed! I’m not that fussed about photographs of myself either. As I age, my face doesn’t always refect the age I feel inside and many photos catch me looking less attractive than I’d like to look. I have every sympathy for my mum who is obviously years older again than I am.

However, chronicling the women in our lives, our mums, mums in law, grandmothers and aunts is an important part of recording our family history. This mother’s day or some time soon, grab the special woman in your life, sit them down and take a portrait that they’re happy to look at. It’s not difficult when you know these few tricks for capturing them at their best.
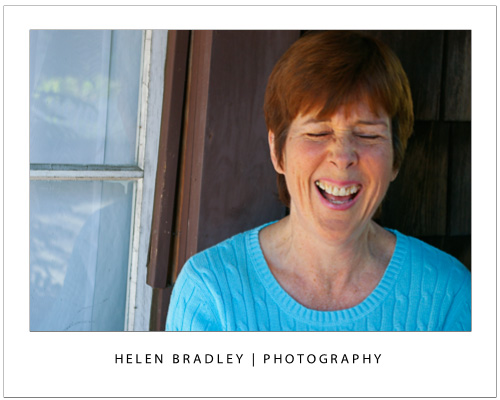
When something really strikes your subject as funny – be ready to capture a one off shot that will make you smile.

Most people look better looking up at the camera rather than looking down at it. Even someone with no double chin will get one when looking down! Looking down at the camera also accentuates a person’s nostrils which isn’t always flattering.

When taking a photo, position your mum so you can stand higher than she is – this usually means that she needs to be sitting down. Find a place indoors with good natural light and shoot inside or find a shady spot outside.

For our pictures of Anne here we hung some dark curtains from a front porch to shield the worst of the bright and uneven sunlight and shot outdoors.
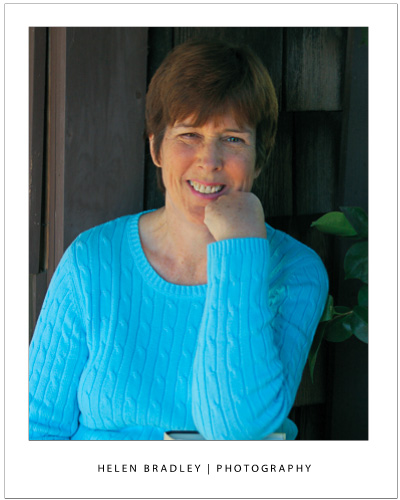
Here the subject leans on a favourite book and the pose is nice and relaxed.

Using a tripod will ensure that the camera is still when you take the shot – if not, focus on keeping it steady – especially if you start clowning around and you need to laugh. Jokes are good – in fact anything that works to make mum relaxed will help lots. I usually take a friend who is a bit of a wag with me and she makes comments and asks questions of the person I’m shooting. By the time a few minutes have passed the person being photographed forgets I’m even there.

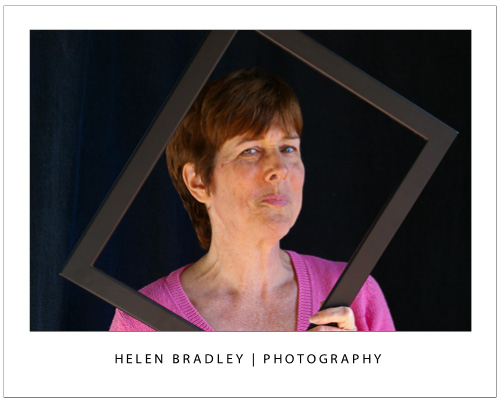
Having something for your mum to hold or to rest on works well as it gives her something to do with her hands. We used an empty picture frame, a chair turned backwards, a book and a sledge hammer (there was some discussion about eyelet setting that prompted Anne to pick it up) when shooting.

Holding a frame gives the subject something to do with her hands and the natural reaction is to ham it up a bit for the camera.

You can use anything from a flower to a stuffed toy – whatever helps to take mum’s attention off the fact that you’re photographing her. Ask mum to wear some light makeup – while you can remove obvious blemishes later on, the even skin tones you get from wearing makeup can save hours of fixing on the computer and really will improve the portrait a lot.
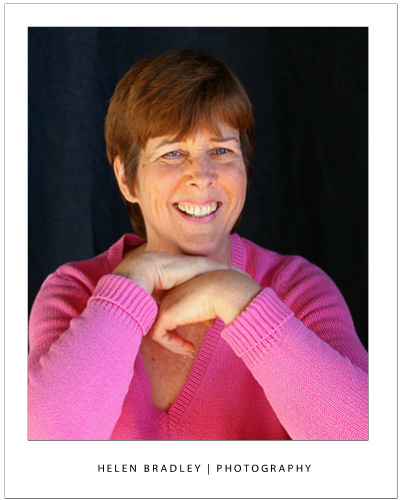
Having the subject lean on something – here a chair turned around gives them something to do with their hands.

When you’re shooting, take lots of photos. I take as many as I can with the promise that I’ll keep only the best and anything that the person absolutely hates will be deleted – no questions asked. After all, I want to do this again and building trust in me as a photographer is really important.
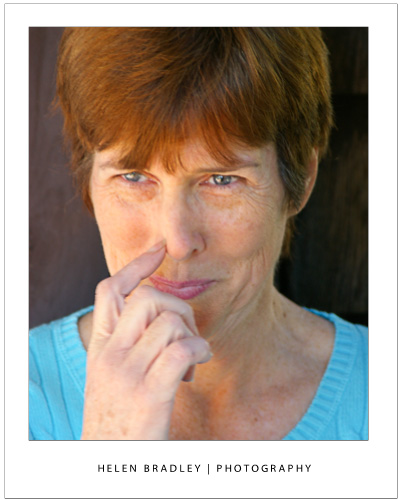
Keep shooting even when the subject is scratching their nose!

You will find that the best shots generally have the person looking direct at the camera – this isn’t to say you won’t get great shots when they’re looking elsewhere but you can improve your chances by having them look at the camera as much as possible. When shooting, fill the frame with the person’s face. The closer you get, the more detail you will capture and the more intimate the resulting portrait will be. Check the results from time to time to make sure they are well lit and check again every time you move position, because the light will change – particularly when you are out of doors.
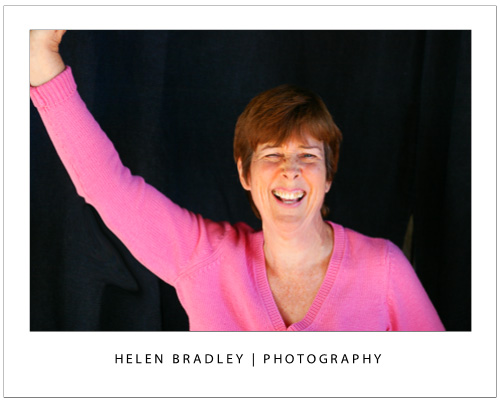
Here we asked our subject to strike some funny poses and the result was captivating.

If time permits, have mum change clothes half way through the shoot to a different colour so you get a different feel to your photos. You might be surprised how some colours work better with certain skin tones. We liked Anne in the pink jumper best of all. If you have the space to work, move around to get a different perspective of your mum, but always take care that the background isn’t cluttered and that it remains unobtrusive.

Helen Bradley

Monday, April 22nd, 2013

iPhoto won’t enlarge images

Learn how to enlarge images from iPhoto – because it won’t do it for you!

If you try to export an image from iPhoto on the Mac you’ll be invited to resize it on export. Funny thing is that even if you ask for the size to be larger than the original iPhoto won’t warn you it is about to ignore your request – seriously! It happily takes the size you ask for and, if it is bigger than the original, it exports the image at the original size but doesn’t tell you it did so. So you can think you’ve been successful but you have not.

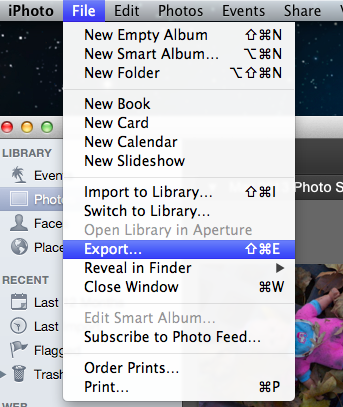
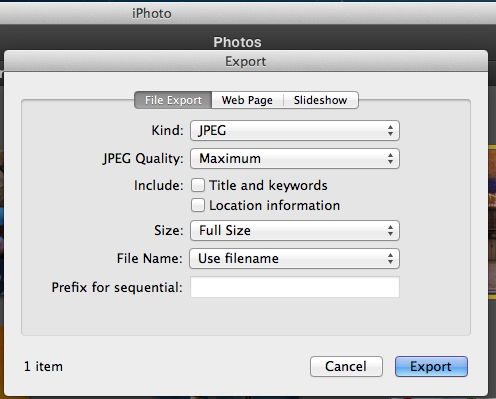
In short, you can’t enlarge or upsize an image from iPhoto. So here’s a simple solution – I use PIXizer.com. So, start from inside iPhoto, select an image and then select File > Export.

Then select to export the image as a JPEG maximum quality and leave the size set to Full Size – ie the original image size.

Then export the image to your desktop or somewhere else it will be easy to find.

Launch a browser and head to PIXizer.com.

Click Choose File and choose a file to upload and use the tabbed panels to choose the quality and image size. When you click to Preview Image the image is uploaded and resized. You can then click to download it and it will download automatically to your download folder.

I like the efficiency of PIXizer – it would be nice if iPhoto actually enlarged images but since it won’t – I now have a free and quick and easy solution when I need a quick image enlargement.

Helen Bradley

Helen Bradley

Monday, November 19th, 2012

Photoshop Smart Objects

Learn how to link Smart Objects so, when one changes, they both change and how to un-sync them so they are separate. I’ll also show you how to replace the contents of a Smart Object with another image. Useful for wedding photographers and for creating albums in Photoshop.

Transcript:

Hello, I’m Helen Bradley. Welcome to this video tutorial. In this tutorial I’m going to show you how to work with smart objects in Photoshop. In this video I’m going to show you how you can use smart objects to assemble complex images, and you can do it in a way that harnesses the value of the smart objects. For example, I’m going to create a smart object for this background and then a smart object for this couple. This will allow me to go to this smart object and choose Replace Image. This will allow me to go to this smart object layer, right click and choose Replace Contents. And I can then replace the contents of that smart object with any of the images from that album. And so I can quickly and easily create images for an album with a background in place. But there is a catch and you’ll want to use the right tool for creating these smart objects so I’m going to show you that too.

Let’s just hide this away and let’s go and get our starter document. I’ve already got a vignette that I’m going to use, but we’re going to put in here the original background. So I’m going to choose File and then Place because that’s a way of getting an image in as a smart object. Here’s the portion of this image that I want to use as my background. I’ve already extracted it as a separate image so I’m going to click Place. And I know that this needs to be enlarged a little bit so I’m just going to enlarge it to 75 percent and then click the checkmark. So it’s now in place and it’s a smart object. It has a special little smart object icon. And I’m just going to show you that you have this vignette which is separate and it just goes over the top.

Now we want to create another smart object, but we want this smart object to be unhooked or unlinked to this one. So I’m going to right click and I’m going to choose New, Smart Object via Copy. And what that does is makes a copy of the existing smart object as a separate layer,  but it is not linked to the original layer. So now if I go into this and resize it, I’m just going to link these two together, this gives us a new smart object layer in the image which is not linked to the background layer although the two share the current image. I’m just going to add a drop shadow to it. So if we were creating a bridal album we could use this as the starting point for our album. I’m just going to get a slightly nicer drop shadow here and pull that vignette down so that it’s over the top of the background and not the image here. So having created this, this could be the first image in our album. And we can then go ahead using the same background image and just change the smart object out without having to recreate this document, right click, choose Replace Contents.

This time I’m going for an image of the bride and groom, and here they are in place. They’re a little large so I’m just going to choose the transform tool with Ctrl or Command T. I know they need to be taken down to about 10 percent so I’m going to scale them down to 10 percent and just move them into position. You can see that the drop shadow is still in place, the background is still in place, the vignette is still in place, and we’ve got another page of our album already created. If I right click and choose Replace Contents I can go and select yet another image to go in here. And again, the border and everything are already on that image. So it gives me a smart way of creating an album very quickly.

I’m just going to discard that for now and let’s have a look at what you might want to use and which would be a bad choice in this situation. And that would be to right click and choose Duplicate Layer. Now that would give us on the face of it exactly what we had before, a smart object with a second smart object layer over the top. Let’s just go ahead and select that and let’s add our drop shadow to it. Let’s position it where we want it to be above the vignette. And here’s what we had, an image over the background. And we’re ready to print that out.

But look what happens if we go to replace the contents of this image with our bride and groom. Not only do we replace the contents of the image with our bride and groom, and we can scale them back down to the 10 percent size that we were using before, but let’s just link that so that it’s going to be 10 percent in both directions. But look what’s happened to our background. These two smart objects instead of just being a duplicate of each other are in actual fact an exact copy of each other. And so anything that happens to this background smart object is also going to happen to this one and vice versa. If we change this one we’re going to change this one. So if we want the ability to create a smart object from another one but to unlink it so that they’re no longer the same image each time, we need to right click and choose New Smart Object via Copy.

But if we do want two smart objects that are linked and they’re always going to be the same image even if they’re different sizes of the same image then we would simply use Duplicate Layer. Smart objects are a really good tool to use when you’re assembling an album like this because it gives you the ability to create a background image and a smaller image on top and to easily replace that image and create an album very quickly.

I’m Helen Bradley. Thank you for joining me for this YouTube video tutorial. If you liked the tutorial please like it and feel free to add comments to the video tutorial. I encourage you to subscribe to my video YouTube channel. We release videos twice a week at the very least and you’ll be alerted to the new video releases. And don’t forget to visit my website at projectwoman.com. There you’ll find more tips, tricks and techniques for Photoshop, Lightroom, Illustrator and lots of other programs.

Helen Bradley

Saturday, October 20th, 2012

How to shoot from a (fast) train


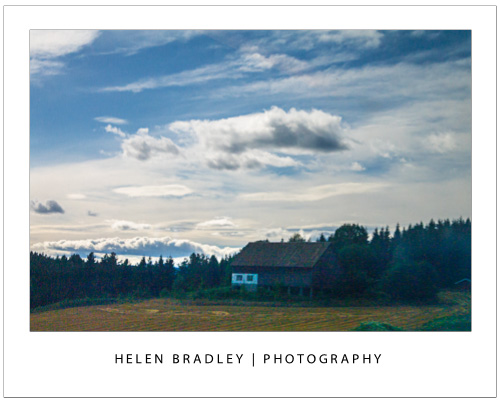
Ok, I’ve struggled with taking good shots on trains for a while now. The biggest problem is that by the time I know I have bad results it’s just impossible to go back and try to fix the problem.

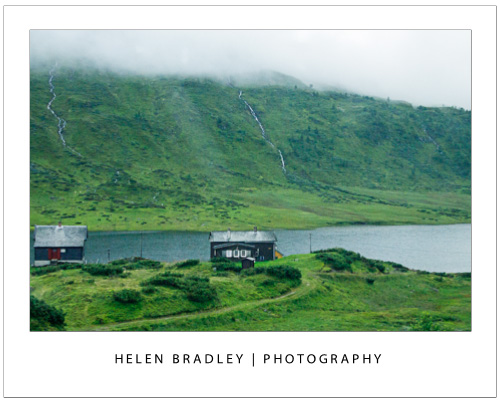
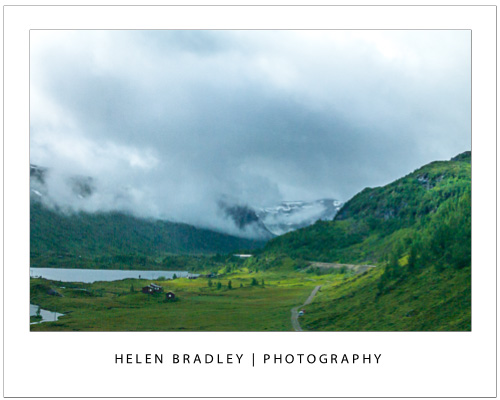
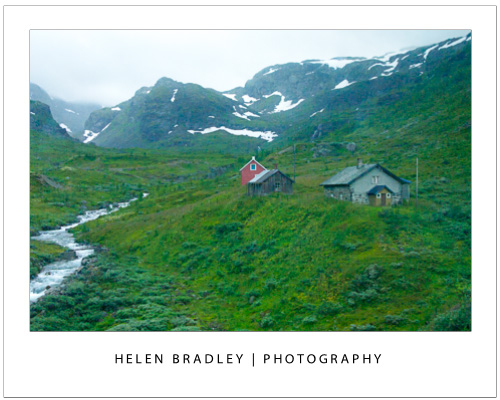
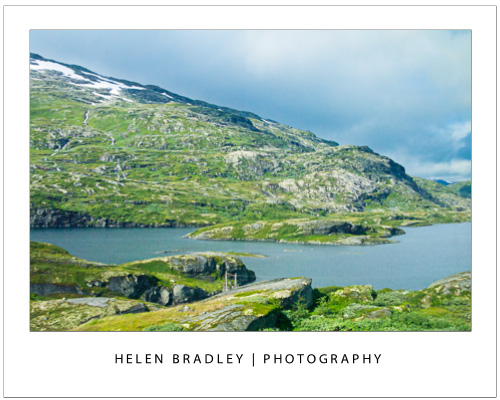
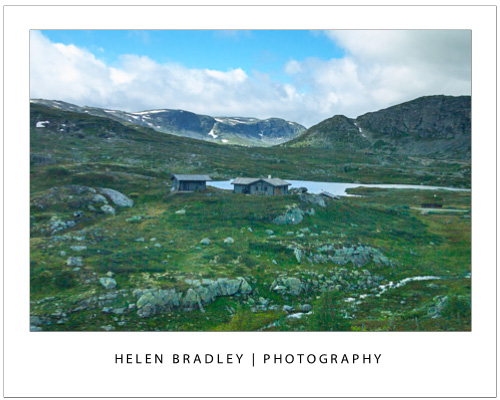
Recently,  on a trip between Bergen and Oslo in Norway I nailed the shoot and ended up deleting only one third of my shots. There’s no way you won’t mess up a lot of your shots when shooting from a train or fast moving car, but with these tips you can make the percentage that are keepers so much higher.

First of all you have a choice between noise and blur. You need to bite the bullet on this – you can get sharp images but you might have a bit of noise. Personally, I actually like some noise and I think it’s fine. But, if you can’t live with some noise it might be as well to pack your camera away and just enjoy the trip.

Second you need a small aperture so you get a lot of the image in focus. I shoot at 7.1 or 8 which is pretty small so it  requires a corresponding high ISO to compensate. So, I dial up the ISO to 1600 and sometimes 3200. That is very sensitive but it means I can capture at speeds like 1/2000 of a second or even much faster than that – and that freezes the motion.

Third, you need to use manual focus. Unless you have a stupid fast focus on your camera it will get caught trying to focus and refocus and you won’t ever get a shot as the train moves. The autofocus will  be confused by things going fast close like trees, tall grass and power poles. If you manually focus you can work faster and ignore distractions. I have to say, I practically NEVER shoot manual so in shooting manual in this situation I’m doing this because there really isn’t any alternative to doing so.

Fourthly, the grass is always greener on the other side of the train. You will always think your side of the train has nothing interesting and it is all on the other side. This probably isn’t the case so don’t keep running back and forth  across the train. Instead, focus on what is on your side of the vehicle, learn to anticipate what you might see so you can react to it instantly when you see it.

Fifthly, I like to sit facing backwards so things move away from me and in a window seat of course. YMMV on this.

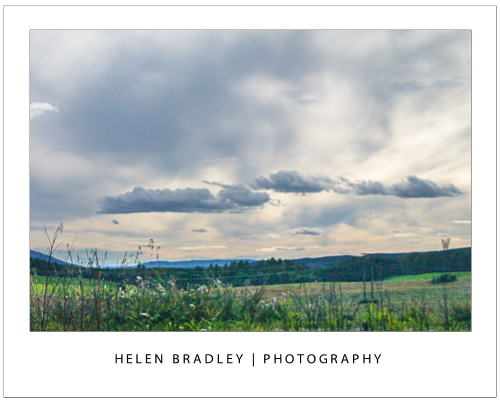
Once you are set up, find a direction to shoot that minimizes the reflections from the train window and inside lighting and start shooting. Accept the fact that trees and poles will mess up a lot of shots but if you take more than the usual number of pictures you will get a good number of good shots. Also accept that you will miss more than you capture depending on the situation. On my trip across Norway trees, power poles, tall grass and numerous tunnels played havoc with my shooting but the skies were wonderful and I did nail some really great shots and i felt way more in control of the shooting than ever before.

So, next time you are. on a fast train traversing a continent, set your camera up and enjoy the shooting experience.

Helen Bradley
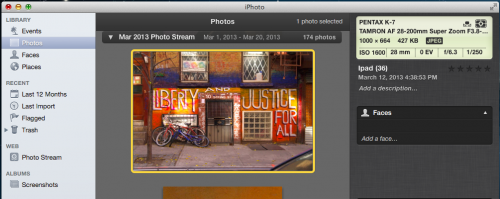
Wednesday, January 4th, 2012

Winter photography tip #1 – B&W

Most digital SLRs and point and shoot cameras can capture black and white images. Winter is a good time to experiment with this feature because of the general lack of color.

Find and enable this feature on your camera and then head out looking for suitable subjects.

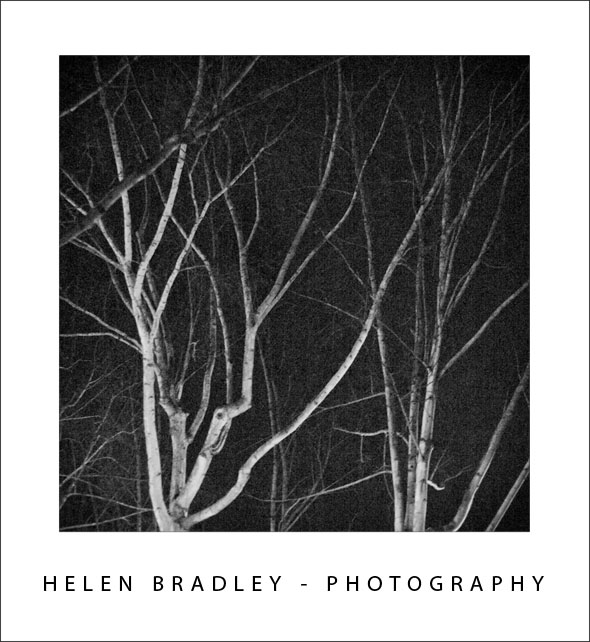
This early morning scene shows the mystery of the branches lit by a streetlight against the dark predawn sky.

Because you will not be capturing any color from your images, look for a scene that shows the contrast between light and dark elements. You may also find that foggy scenes where everything is not only by nature monochromatic but also biased towards mid tones is a great option for black and white photography.

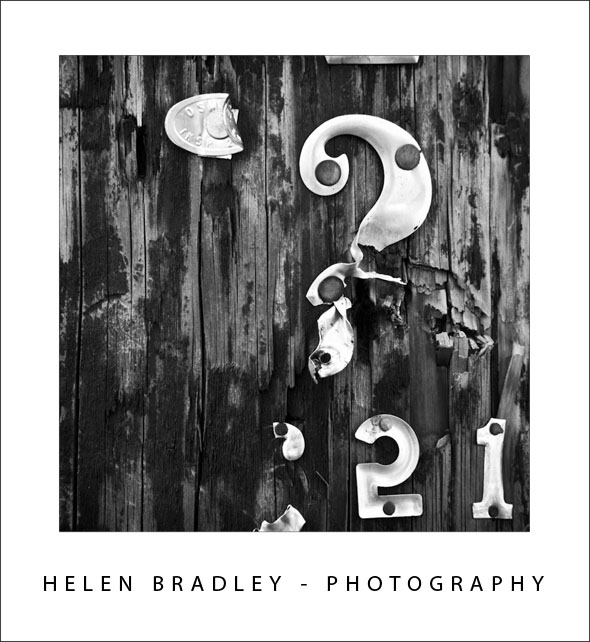
Another topic which can be rendered interestingly rendered in black and white is texture and repeating elements – the lack of color will enhance the texture and draw attention to the repeating elements.


In this image the texture and contrast between the rough wood and the metal letters is more apparent when captured in black and white.

Helen Bradley