Saturday, September 13th, 2014

Activate Photoshop’s Full List of Filters

Despite their existence in earlier versions of Photoshop some categories of filters are mysteriously missing from the menus in Photoshop CS6, Photoshop CC and Photoshop CC 2014. This is the default behavior so you won’t find the Artistic, Brush Strokes, Sketch, Stylize or Texture category of filters in the Filters menu. This is a problem if you use these filters so luckily you can bring the filters back when you know how.

It turns out that an option in the Preferences menu acts as gatekeeper for displaying the missing filter categories. To re-enable them, select Edit > Preferences > Plug-Ins…. Then check the box that reads Show all Filter Gallery groups and names. Click OK and restart Photoshop. This will put the filter categories back in the Filters menu.

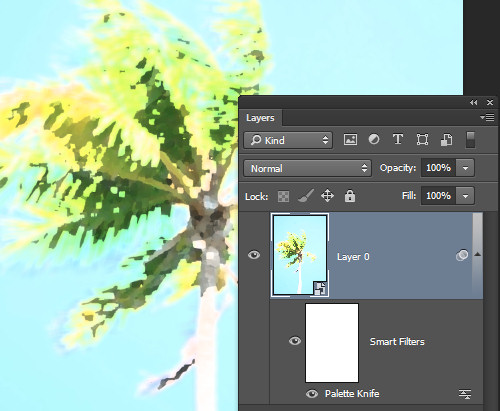
Now you could have accessed the missing filters from the Filter Gallery but the way the filters are named in the Layers palette is different if you access them from the Filter Gallery rather than from the menu itself. So, if you use Convert for Smart Filters to create a smart object before applying the filters and if you start a filter from the menu then the filter name appears below the layer so you can tell the name of the filter you are applying. This image shows this situation:

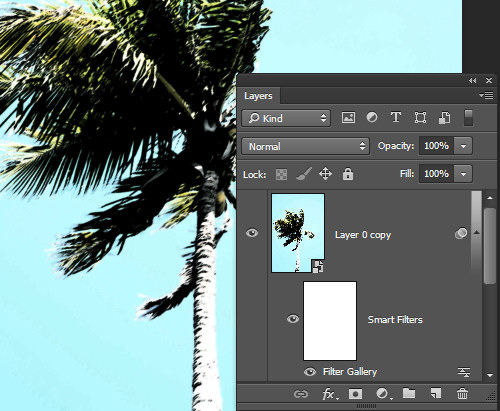
If, on the other hand, you start your filter from the Filter Gallery the Layers palette simply shows Filter Gallery – with no indication of which filter you applied. This is what the Layers palette looks like – not very helpful at all.

In short, having the filters back on the menu and selecting them from there is the better option.

Be aware too that the Oil Paint filter was removed from Photoshop CC 2014 so it is gone for good.

Sunday, February 25th, 2007

GimpSHOP – all about layers, layer palettes and masks

GimpSHOP is Gimp with a great front end that makes it work much like Photoshop which you can find free for downloading here: GimpSHOP.

GimpSHOP, like any good photo editing program supports layers, and layer masks. These features aren’t always simple to get your head around but when you do, you’ll find they’re invaluable tools to use for photo editing tasks. Here, step by step, is how to work with them:

Step 1
To display the Layers palette press Shift F7 or choose Window, Layers. To add a new layer choose Layer, Duplicate Layer. There are no adjustment layers available in Gimp or GimpSHOP so this process keeps your original photo layer safe in case you need to use it later on.

Step 2
To adjust the levels in the image to improve its tonal range, choose Image, Adjustments, Levels and drag the sliders on the Input area of the dialog to adjust the contrast. The sliders under the chart should be moved inwards so they appear under the ends of the chart. The middle slider adjusts the midtones. Click Ok to apply this to the layer.

Step 3
To see how you can apply an effect or adjustment to this layer and blend it with the layer below, first create a duplicate of the top layer by choosing Layer, Duplicate Layer. Apply the edge detect filter by choosing Filter, Edge Detect, Edge and choose the Sobel Algorithm with the default value. This gives a new layer which is predominantly black and which displays the coloured edges in the image.

Step 4
Now, in the Layers palette, select the Divide blend mode from the dropdown list. Blend modes control how the top layer interacts with the layers below. Drag the opacity slider to the left to reduce the opacity of this layer so that some of the layers below show through thus mitigating some of the effect created by blending the layers together.

Step 5
To edit the effect the top layer gives to the image, use a Layer mask. Choose Layer, Mask, Add Layer Mask and choose White (full opacity) and click Ok. You should see no change in the image. Now select black or grey as the paint colour and paint the image to show part of the layers below through the image, thus effectively removing the effect of the blended edge filter. Paint with white to reapply the layer effect.

Step 6
The Layers menu offers tools for viewing a layer mask, applying it permanently to the layer, deleting it and making a selection based on it, etc.. You can also use the menu to configure the size of the thumbnail images by clicking by choosing Preview Size and then choose a view size from the list.

Helen Bradley