Friday, May 29th, 2015

Stop iPhoto from Importing your Photos

How to stop iPhoto from launching when a camera card is inserted into your Mac

Disclosure: I hate iPhoto like the plague.  It isn’t that I just have no need for it but it tends to grab your photos and hide them where you can’t find them and, every time I put a camera card into my Mac it used to insist on grabbing the photos from it.

Now I use Lightroom so I have reason to want iPhoto to do anything at all with my photos. So to save having to close it down each time I put a camera card into the Mac, I stopped it from launching at all. If you’d like to do the same thing, here’s how to put iPhoto in its place:

1.    Launch iPhoto

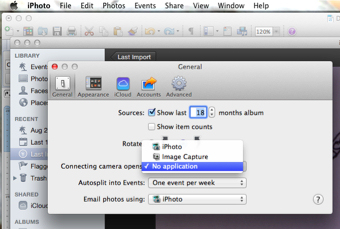
2.    Choose iPhoto > Preferences > General

3.    From the Connecting Camera Opens dropdown list choose No Application

4.    Click the dialog’s Close button

5.    Exit iPhoto


Monday, April 22nd, 2013

iPhoto won’t enlarge images

Learn how to enlarge images from iPhoto – because it won’t do it for you!

If you try to export an image from iPhoto on the Mac you’ll be invited to resize it on export. Funny thing is that even if you ask for the size to be larger than the original iPhoto won’t warn you it is about to ignore your request – seriously! It happily takes the size you ask for and, if it is bigger than the original, it exports the image at the original size but doesn’t tell you it did so. So you can think you’ve been successful but you have not.

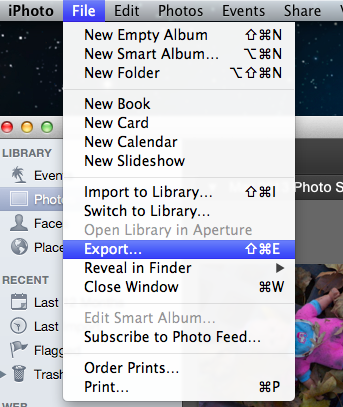
In short, you can’t enlarge or upsize an image from iPhoto. So here’s a simple solution – I use PIXizer.com. So, start from inside iPhoto, select an image and then select File > Export.

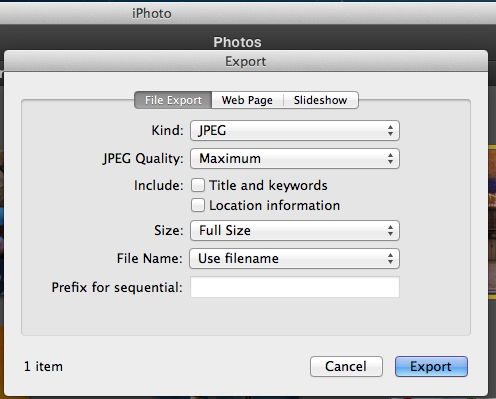
Then select to export the image as a JPEG maximum quality and leave the size set to Full Size – ie the original image size.

Then export the image to your desktop or somewhere else it will be easy to find.

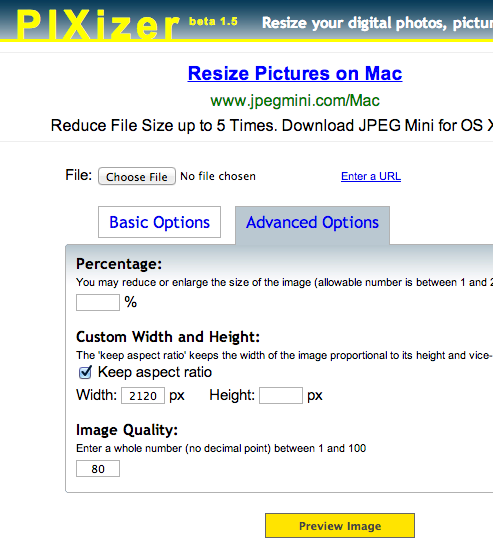
Launch a browser and head to PIXizer.com.

Click Choose File and choose a file to upload and use the tabbed panels to choose the quality and image size. When you click to Preview Image the image is uploaded and resized. You can then click to download it and it will download automatically to your download folder.

I like the efficiency of PIXizer – it would be nice if iPhoto actually enlarged images but since it won’t – I now have a free and quick and easy solution when I need a quick image enlargement.

Helen Bradley

Helen Bradley

Friday, March 22nd, 2013

Sync photos from iPad or iPhone to your Mac

Learn how to download photos from your iPad or iPhone to your Mac


I’ve been using iCloud on the PC for a while now to sync photos from my iPad to my PC and it works well. On my new Mac, however, I had a problem, you see the feature is built in so you don’t have to install it – but you do have to find it! Here’s how:

1. Assuming you already have an iPad or iPhone and you have been taking photos with it, then you want to get them to your Mac. Start on your iPad and make sure it is set to sync. Do this in Settings – scroll to find Photos & Camera and make sure that My Photo Stream is turned on. This means that when you are on a wifi connection your photo stream will be synced with iCloud.
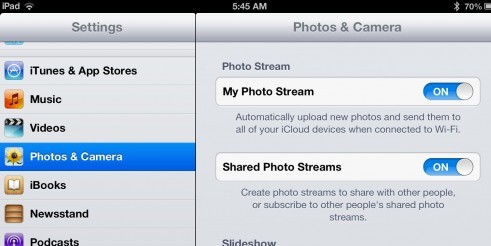
Note:
The photo stream has some limits. One is that iCloud itself only stores images for 30 days so after that they disappear. However provided you are connected via wifi on a regular basis these will be synced frequently so that won’t be a big issue.

On a device like the iPad and iPhone the photo stream will only contain those most recent 1,000 images – older ones are removed. This is because you have less space on your iPad and iPhone than on a Mac or PC. Remember too that the photo stream contains images from the iPad/iPhone and from your Mac or PC so this 1,000 image limitation is for images from all devices in total, so it’s not as big as it might seem.

On the PC that is less of a problem because you have a special Photo stream folder that you put images into to sync them, so you know how many you are putting there. It is more of an issue on the Mac because the process is more automated so you have to be mindful of what is happening. On your Mac or PC all the images from your Photo stream are stored – because there is more storage available on them.

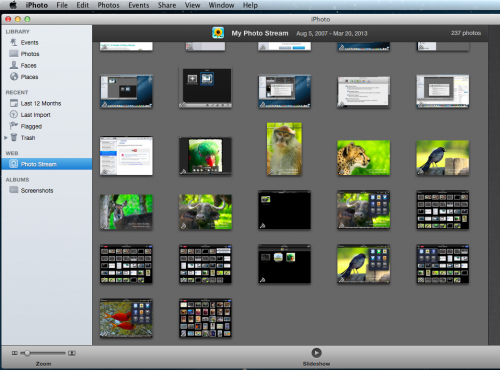
2. To set up the Mac. You need to click iPhoto to launch it and then click Web: Photo Stream and turn this on.

3. Now, if you are connected via wifi you can wait as your photo stream downloads automatically for you otherwise this will happen automatically next time you are connected.

Once images are downloaded to iPhoto they will be added to the Photos folder so even if you turn off Photo Stream at some time the images that are already downloaded will have be stored there permanently.

Helen Bradley

Sunday, March 17th, 2013

Add images to your iPad & iPhone photo stream from your Mac

See how to upload images from your Mac to your iPad or iPhone

Sometimes you will get images on your Mac that you want to share with your devices such as your iPad or iPhone. To do this you can add them to your photo stream and they will be synced automatically next time you are connected using a wifi connection.

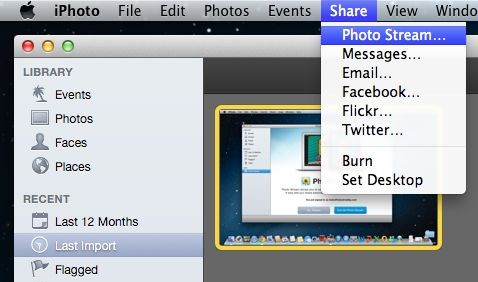
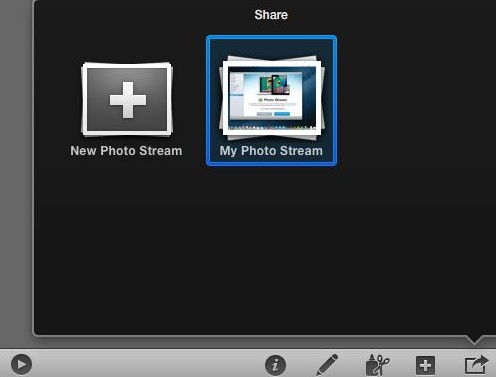
To do this, from inside iPhoto, click the image(s) to add to the photo stream then click the Share option on the toolbar, click Photo Stream > My Photo Stream. The images will be uploaded to your photo stream and then downloaded to other devices when they next update via a wifi connection.

Of course, for this to work the images have to be in iPhoto. If an image is not, for example, it is on the desktop – you can add it to iPhoto by dragging and dropping it into iPhoto and then add it to your photo stream.

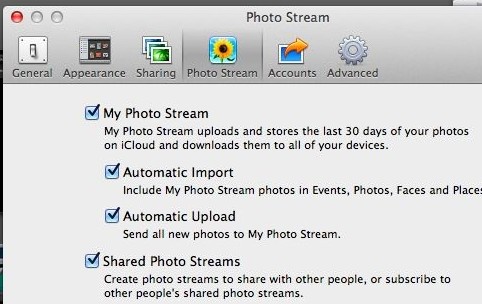
Of course if you have your iPhoto set up to automatically send all new images to your photo stream the very process of adding images to iPhoto will add them to your Photo Stream. To do this in iPhoto, choose iPhoto > Edit Preferences > Photo Stream and, under My Photo Stream (which should already be enabled), check Automatic Import.

Helen Bradley