Tuesday, April 16th, 2013

Help! My images disappeared from my iPad and iPhone

Understand the limits of the Photo Stream and how to save images from it so they aren’t removed from your iPad or iPhone

Sometimes you may know that you had some images on your iPad or iPhone but suddenly you find that they’ve gone.

This happens to me when I drop some images into my Photo Stream on my Windows PC that I want to use on my iPad. I drop images into the Uploads folder on my PC and, via the iCloud, they are synced automatically to my iPad. I know the images got there safely – I put them there months ago and I know that I saw them on my iPad but suddenly today they aren’t there. Confusing? Happened to you? It probably has and here is the explanation as to why they disappear and how to stop them from doing so.

The issue is the Photo Stream. The photo stream on the iPad and iPhone only store the last one thousand images – if you shoot lots of images and, say have your iPhone and iPad synced then you’ll run out of space pretty quickly. When you do then images are knocked out of the Photo Stream to make room for more recent ones.

The issue doesn’t happen on your Mac or PC because they have plenty of space so photos in your Photo Stream folders there are always there – it is just a protection against junking up your iPhone or iPad with ‘stuff’.

So, what do you do when you want to keep some of the images from your Photo Stream permanently and you don’t want to lose them? The answer is to move them to an album or to your Camera Roll. The images in your camera roll and in albums are there to stay. And just to clarify, you don’t have to move images from the Photo stream that you captured with that device – because images you capture on the iPad for example are in the Camera Roll and stay there. The images you want to save are those that get synced to the iPad via iCloud from other devices such as your iPhone or PC or Mac – they are the ones that only hang around for a short time.

How to move images from your Photo Stream to an album

So, to move a lot of images to an album (an easy solution for lots of images that you want to save to somewhere that isolates them from all your other images), tap Photos, tap Photo Stream, tap My Photo Stream.

You should now see all the thumbnails of images in your photo stream. Then tap Edit.

In this mode you can now tap the images that you want to save – each of them should have a blue checkmark on them. Now tap Save and choose to Save to an Existing Album or Save to New Album.

I have an album for images I want to edit and play with on the iPad called Editable Pix so I typically tap that to select it. This lets me store those images so they are isolated from all the other images in my Camera Roll.

How to move images from your Photo Stream to your Camera Roll

It is also possible to save photos from the Photo Stream to the Camera Roll. The advantage of this is that they are in the Camera Roll itself and in some situations that might work best for you.

To do this, again tap Photos, tap Photo Stream, tap My Photo Stream so you see all the thumbnails of images in your photo stream. Again tap Edit. In this mode you can now tap the images that you want to save – each of them should have a blue checkmark on them. Now, tap the Share button in the top left of the screen:

And choose Save to Camera Roll. (It is very confusing that these two processes that really are so similar are handled so differently in iOS6).

How to save one image from your Photo Stream to your Camera Roll

Now, if you just want to save one image from the Photo Stream to the Camera Roll, tap Photos, tap Photo Stream, tap My Photo Stream so you see all the thumbnails of images in your photo stream. Tap the one image that you want to copy to the Camera Roll so it is showing full screen. Now tap the Send to button that is a box with an arrow coming out of it in the top right of the screen and choose Save to Camera Roll from the menu.

Now you will never again lose images off your iPhone or iPad that you really want to keep.

Helen Bradley

Friday, March 22nd, 2013

Sync photos from iPad or iPhone to your Mac

Learn how to download photos from your iPad or iPhone to your Mac


I’ve been using iCloud on the PC for a while now to sync photos from my iPad to my PC and it works well. On my new Mac, however, I had a problem, you see the feature is built in so you don’t have to install it – but you do have to find it! Here’s how:

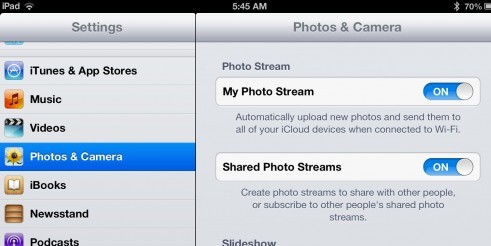
1. Assuming you already have an iPad or iPhone and you have been taking photos with it, then you want to get them to your Mac. Start on your iPad and make sure it is set to sync. Do this in Settings – scroll to find Photos & Camera and make sure that My Photo Stream is turned on. This means that when you are on a wifi connection your photo stream will be synced with iCloud.

Note:
The photo stream has some limits. One is that iCloud itself only stores images for 30 days so after that they disappear. However provided you are connected via wifi on a regular basis these will be synced frequently so that won’t be a big issue.

On a device like the iPad and iPhone the photo stream will only contain those most recent 1,000 images – older ones are removed. This is because you have less space on your iPad and iPhone than on a Mac or PC. Remember too that the photo stream contains images from the iPad/iPhone and from your Mac or PC so this 1,000 image limitation is for images from all devices in total, so it’s not as big as it might seem.

On the PC that is less of a problem because you have a special Photo stream folder that you put images into to sync them, so you know how many you are putting there. It is more of an issue on the Mac because the process is more automated so you have to be mindful of what is happening. On your Mac or PC all the images from your Photo stream are stored – because there is more storage available on them.

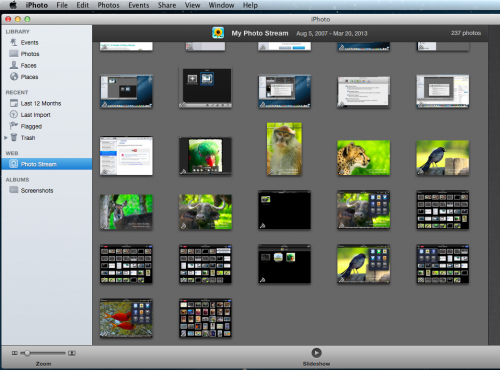
2. To set up the Mac. You need to click iPhoto to launch it and then click Web: Photo Stream and turn this on.

3. Now, if you are connected via wifi you can wait as your photo stream downloads automatically for you otherwise this will happen automatically next time you are connected.

Once images are downloaded to iPhoto they will be added to the Photos folder so even if you turn off Photo Stream at some time the images that are already downloaded will have be stored there permanently.

Helen Bradley

Sunday, March 17th, 2013

Add images to your iPad & iPhone photo stream from your Mac

See how to upload images from your Mac to your iPad or iPhone

Sometimes you will get images on your Mac that you want to share with your devices such as your iPad or iPhone. To do this you can add them to your photo stream and they will be synced automatically next time you are connected using a wifi connection.

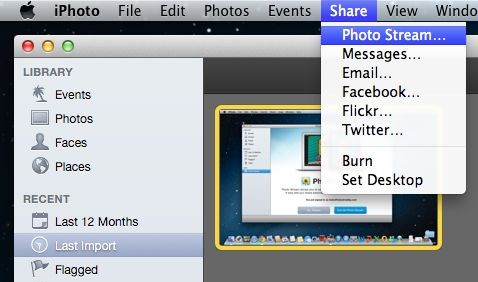
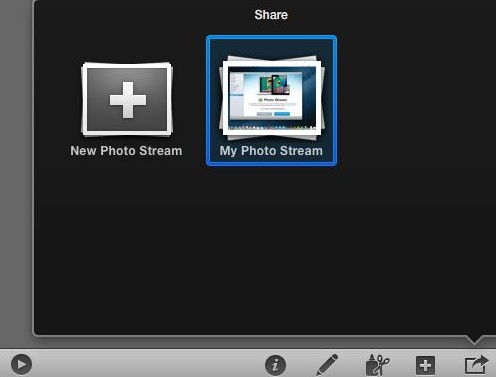
To do this, from inside iPhoto, click the image(s) to add to the photo stream then click the Share option on the toolbar, click Photo Stream > My Photo Stream. The images will be uploaded to your photo stream and then downloaded to other devices when they next update via a wifi connection.

Of course, for this to work the images have to be in iPhoto. If an image is not, for example, it is on the desktop – you can add it to iPhoto by dragging and dropping it into iPhoto and then add it to your photo stream.

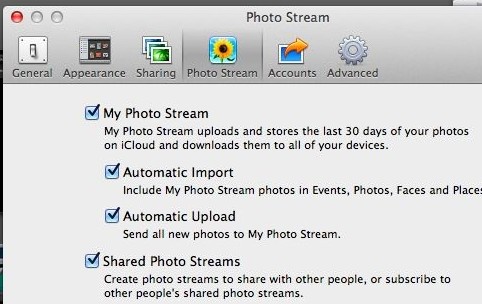
Of course if you have your iPhoto set up to automatically send all new images to your photo stream the very process of adding images to iPhoto will add them to your Photo Stream. To do this in iPhoto, choose iPhoto > Edit Preferences > Photo Stream and, under My Photo Stream (which should already be enabled), check Automatic Import.

Helen Bradley

Sunday, June 20th, 2010

Lightroom to Flickr

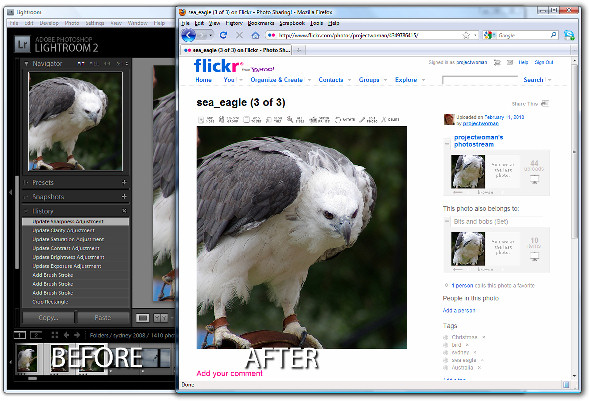
If you’re a keen photographer, chances are that you publish some of your photos to Flickr for sharing with friends and family. One of the disadvantages of Lightroom 2 is that it does not come with a built in tool for publishing direct to Flickr although this has been addressed in Lightroom 3 which does offer this ability.

There are, however, tools like Jeffrey Friedl’s Lightroom plug-in that you can use to do the job. Here’s how it works:

Step 1

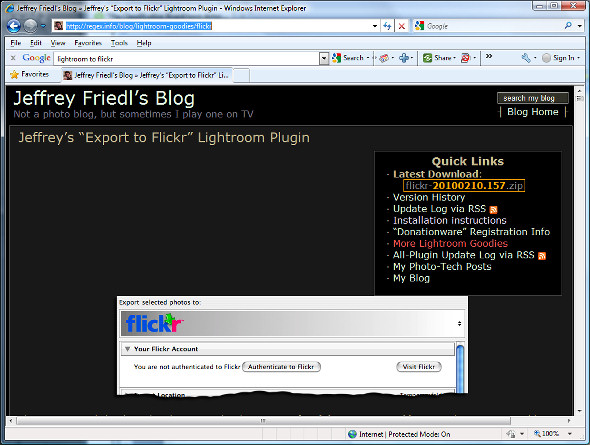
To download the tool, visit http://regex.info/blog/lightroom-goodies/flickr and locate the tool for your version of Lightroom. There are different downloads for Lightroom 1 and Lightroom 2 so get the right one.

Step 2

Download the zip file which, if you are using Lightroom 2 is via a link in the top right hand corner of the screen.

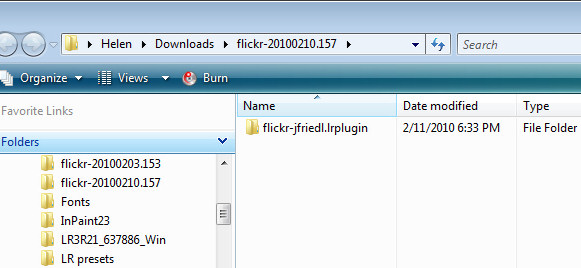
Unzip the downloaded file and, when you do, you will see a .LRPlugin folder inside the zip file.

You need the entire contents of this folder so drag and drop the entire folder from your Downloads folder into the place where you plan to keep it long term.

Lightroom isn’t fussy about where you place your plug-ins but it makes good sense to place them all in a central location where it is easy for you to find them. I suggest you place it nearby your Lightroom folder or in your Documents folder where it will be included in your regular system backup.

Step 3

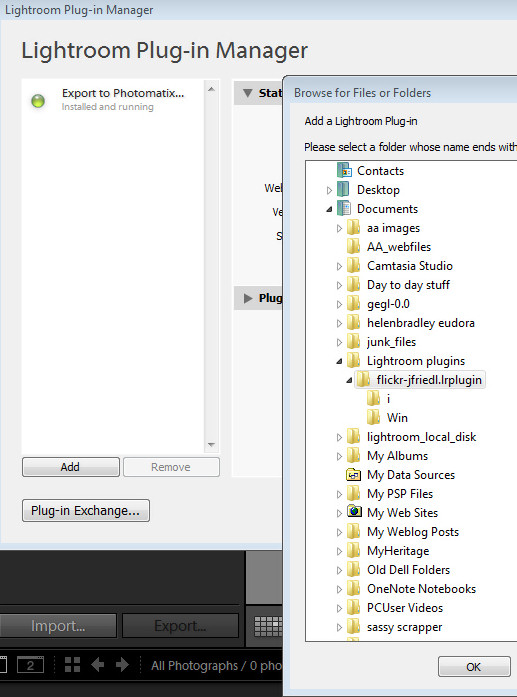
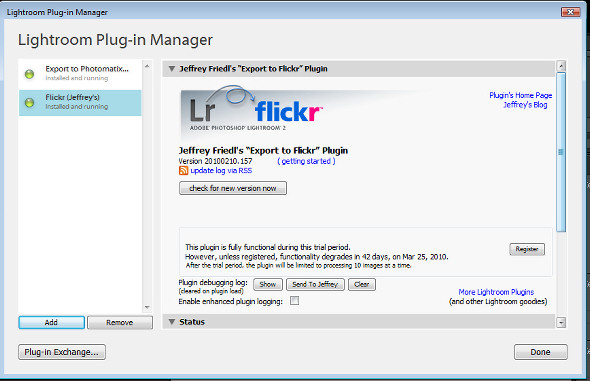
Now return to Lightroom and choose File > Plug-in Manager. This opens the Plug-in Manager dialog where you install your Lightroom plug-ins. Click Add and navigate to the folder that you stored the .lrplugin folder. Click the folder to select it and click Ok.

Click Update if prompted to update your catalog to support the plug-in. A dialog will appear with more instructions in it. Read the information and click Ok when you are done.

Step 4

The Plug-in will be listed in the plug-in list so click Done to exit the dialog.

Step 5

Now select a few images to upload to Flickr. Right click one of the selected images and choose Export > Export.

At the very top of the dialog you will see the Files on disk heading, click this panel and locate the Flickr (Jeffrey’s) option in the list.

Go ahead and (ignoring the Export Location settings) complete the other areas of the Export dialog as you would for any export task.

Pay particular attention to the file names, file format and quality because, when you click to Export the files they are sent direct to Flickr.

If you plan to resize the images select the Image Sizing options and choose the desired option.

Step 6

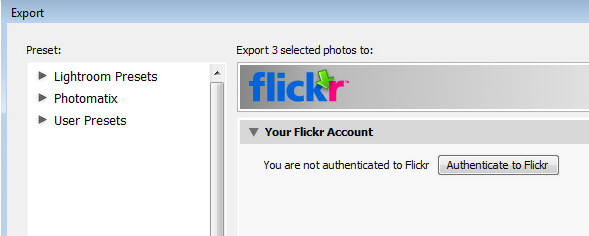
Click the Authenticate to Flickr button at the top of the dialog. You only need do this the first time you upload images. Your browser will open and you should sign in using your Flickr log-in and password.

Step 7

When prompted, click the second Next button to authenticate the connection then click Ok, I’ll authorize it if you are happy with the conditions displayed.

Once you have done this, close your browser, return to Lightroom and click the I’ve authenticated at Flickr.com button to confirm you have done so.

Step 8

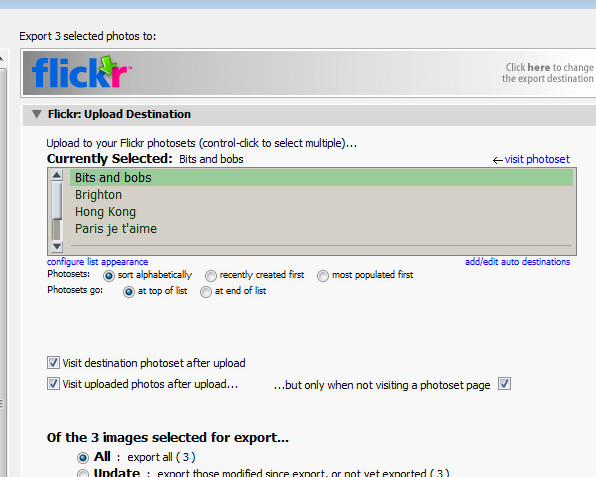
Once you are authenticated, additional options are available in the Export dialog. You can, for example, select the photosets for the images and ask to view the Flickr photoset when uploading is complete.

Step 9

You can also set Licence types for the images, add keywords and configure a range of options for uploading.

Step 10

When you are done, click the Export button to export your images to Flickr.

This Lightroom plug-in is, what is called, donation ware. It is functional for six week and then you’re asked to register and make a donation one cent is the minimum PayPal fee. If you don’t register then functionality is reduced to uploading ten images at a time.

This plug-in works well and, until you upgrade to Lightroom 3 it is a smart addition to your Lightroom toolkit. For my money it makes the upload process seamless. And, because it saves me an entire step by rolling Export from Lightroom and upload to Flickr into a single step it represents the difference between things being left on my to do list and tasks getting a big black line drawn through them – and I like that!

Helen Bradley