Monday, August 13th, 2018
Download your photos and videos from your iPhone onto your Mac – quickly and easily and bypassing the Photos app
If you are like me, you hate the Mac Photos app like the plague but you like to periodically download your photos from your iPhone to your Mac. Well, turns out it’s easy to do when you know how.
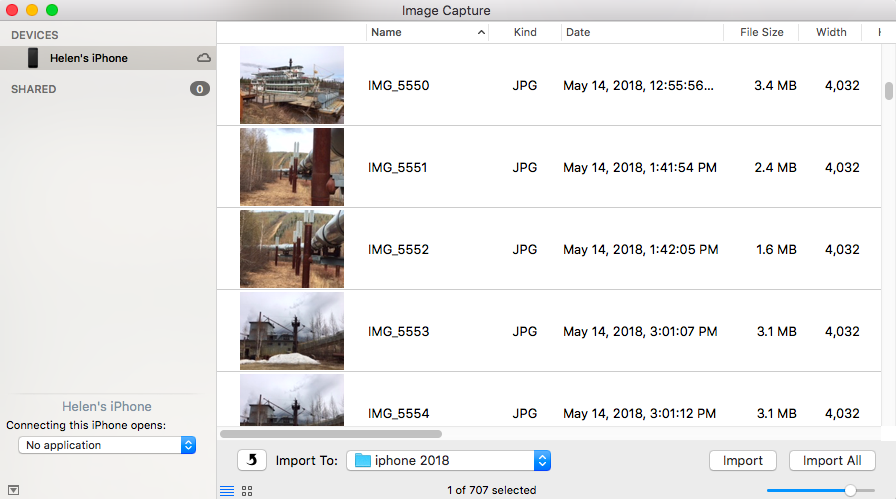
Start by launching ImageCapture from the Mac’s Applications folder. Then plug your iPhone into your Mac using a USB port.
Inside ImageCapture, your iPhone will appear automatically in the list on the left. Select it and select a download location from the box at the bottom of the screen. Select the photos to import and click Import or click Import All to download all of them. It’s as simple as that.
Labels: bypass iPhoto, bypass Photos App, download, download photos from phone, get photos off phone, image capture, Import, iPhone to Mac
Categories:Mac
posted by Helen Bradley @ 10:02 amNo Comments links to this post
Saturday, July 26th, 2014
Find Free Brushes Online to use in Photoshop
Learn how to find and download free and for fee brushes for Photoshop. See how to install these brushes into Photoshop and use them in your work.
This video covers all the steps in downloading and installing the brushes so you can ensure they are always available to you.
Helen Bradley
Labels: brush settings, brushes, download, free brushes, install, Photoshop, Photoshop brushes
Categories:photoshop, video
posted by Helen Bradley @ 8:37 amNo Comments links to this post
Friday, December 20th, 2013
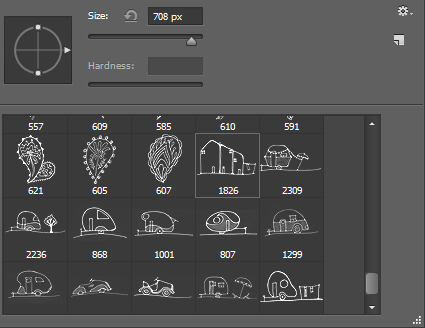
Curious or confused about where brushes go? Here’s the info you need and how to do it
It’s pretty easy to find the wrong place to install brushes on the PC and the Mac. The Adobe program file folders are more accessible than the user areas where you really should be installing your brushes. So, to help you out, here is where the brushes should go and a couple of tips for showing the hidden and hard to find folders on the PC and the Mac:
In Mac OS X:
Photoshop CS4
~/Library/Application Support/Adobe/Adobe Photoshop CS4/Presets/Brushes
Photoshop CS5
~/Library/Application Support/Adobe/Adobe Photoshop CS5/Presets/Brushes
Photoshop CS6
~/Library/Application Support/Adobe/Adobe Photoshop CS6/Presets/Brushes
Photoshop CC
~/Library/Application Support/Adobe/Adobe Photoshop CC/Presets/Brushes
The tilde (~ ) indicates your hidden user library.
You can open it this way:
1 Launch Finder
2 Choose Go > Go to Folder
3 Type ~/Library and click Go
4 This opens the ~/Library folder and you can now navigate to the appropriate folder listed above.
On a Windows PC:
Follow these instructions to install the brushes where they can be found by both 32 and 64 bit versions of Photoshop (this is the prefered method of installing downloaded brushes):
Photoshop CS4
C:\Users\<your name>\AppData\Roaming\Adobe\Adobe Photoshop CS4\Presets\Brushes
Photoshop CS5
C:\Users\<your name>\AppData\Roaming\Adobe\Adobe Photoshop CS5\Presets\Brushes
Photoshop CS6
C:\Users\<your name>\AppData\Roaming\Adobe\Adobe Photoshop CS6\Presets\Brushes
Photoshop CC
C:\Users\<your name>\AppData\Roaming\Adobe\Adobe Photoshop CC\Presets\Brushes
To locate your c:\users\<your name>\AppData folder, launch Windows Explorer and type this in the address bar :
%USERPROFILE%\AppData
This automatically opens the AppData folder for you so you can now navigate to the desired folder as detailed above.

Helen Bradley
Labels: brush, brush preset, brushes, download, free, how to, install, location, mac, pc, Photoshop brushes, preset folder, step by step, Tutorial
Categories:photoshop
posted by Helen Bradley @ 11:42 am1 Comment links to this post
Friday, March 22nd, 2013
Learn how to download photos from your iPad or iPhone to your Mac
I’ve been using iCloud on the PC for a while now to sync photos from my iPad to my PC and it works well. On my new Mac, however, I had a problem, you see the feature is built in so you don’t have to install it – but you do have to find it! Here’s how:
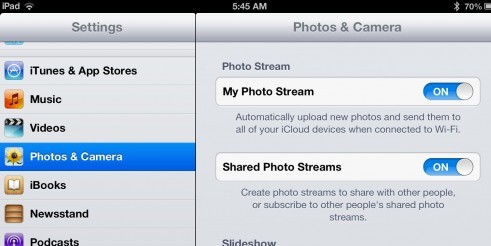
1. Assuming you already have an iPad or iPhone and you have been taking photos with it, then you want to get them to your Mac. Start on your iPad and make sure it is set to sync. Do this in Settings – scroll to find Photos & Camera and make sure that My Photo Stream is turned on. This means that when you are on a wifi connection your photo stream will be synced with iCloud.
Note:
The photo stream has some limits. One is that iCloud itself only stores images for 30 days so after that they disappear. However provided you are connected via wifi on a regular basis these will be synced frequently so that won’t be a big issue.
On a device like the iPad and iPhone the photo stream will only contain those most recent 1,000 images – older ones are removed. This is because you have less space on your iPad and iPhone than on a Mac or PC. Remember too that the photo stream contains images from the iPad/iPhone and from your Mac or PC so this 1,000 image limitation is for images from all devices in total, so it’s not as big as it might seem.
On the PC that is less of a problem because you have a special Photo stream folder that you put images into to sync them, so you know how many you are putting there. It is more of an issue on the Mac because the process is more automated so you have to be mindful of what is happening. On your Mac or PC all the images from your Photo stream are stored – because there is more storage available on them.
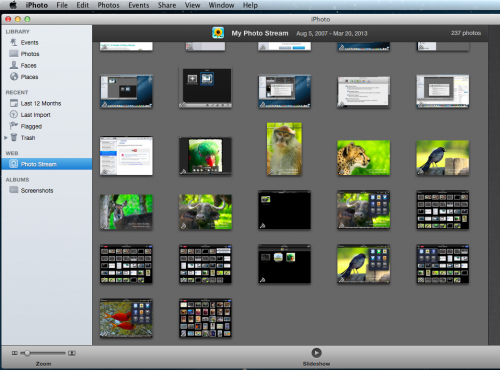
2. To set up the Mac. You need to click iPhoto to launch it and then click Web: Photo Stream and turn this on.
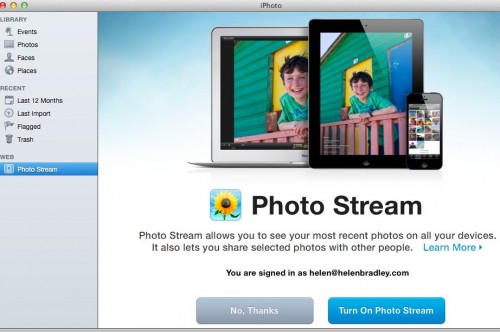
3. Now, if you are connected via wifi you can wait as your photo stream downloads automatically for you otherwise this will happen automatically next time you are connected.
Once images are downloaded to iPhoto they will be added to the Photos folder so even if you turn off Photo Stream at some time the images that are already downloaded will have be stored there permanently.
Helen Bradley
Labels: copy photos to iphone, download, icloud, images, ipad, iPhone, iphoto, move photos to ipad, photo stream, photos, photostream, pictures, sync, upload
Categories:iPad, Mac, photography
posted by Helen Bradley @ 5:38 amNo Comments links to this post
Tuesday, February 12th, 2013
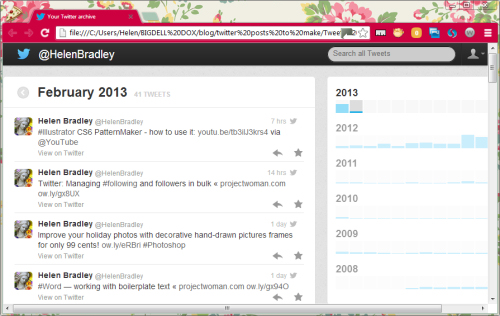
Download a history of your Twitter Tweets today!
I could really do with a file of my tweets. It will help me to schedule future tweets by being able to recycle some of the best of our old ones. Luckily, recently, Twitter began offering this as an option. If you want to, you can download an entire file of your tweets from the first of them that you made.
To do this, log in to Twitter and go to your Settings, click Edit Profile and then click Account. Scroll to the bottom. There you will find a button Request Your Archive that you can press to get your tweets.
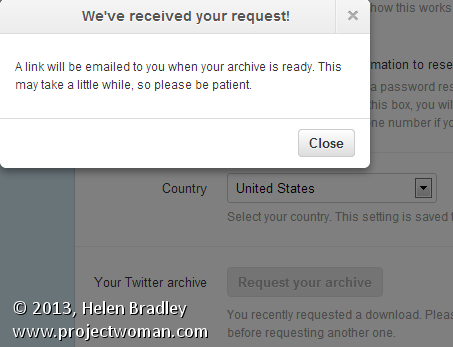
Wait and in a few hours and you’ll be emailed a link to download your entire archive.
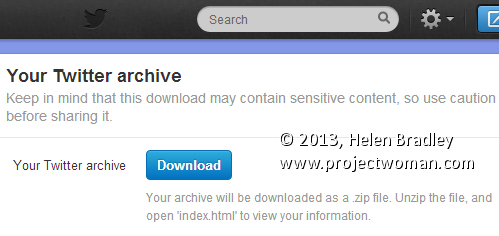
This comes as a zip file which you must first unzip. There is an index.html file in the zip that you can run to view all your tweets in a browser interface. There are also other files containing them – such as a series of .csv files one for each month that you can open in Excel.
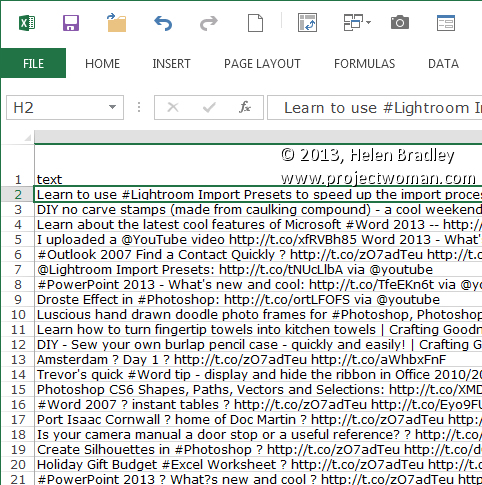
It’s a great way to get a permanent record of your tweets it you need it.
Helen Bradley
Labels: download, file, History, list, list of tweets, tweets., Twitter
Categories:General
posted by Helen Bradley @ 9:56 amNo Comments links to this post
Saturday, February 2nd, 2013
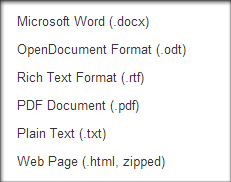
Google Docs provides a neat way of turning any document into a simple HTML web page, perfect for any novice interested in building a basic website. To do so, simply open the desired document and select File > Download as > Webpage (.html, zipped). The file will be compressed in a .zip file so you’ll have to extract it, but it will be instantly ready for use. This functionality can also be used with spreadsheets.
Helen Bradley
Labels: .html, create, download, easy, google docs, website
Categories:hunter, office
posted by Hunter Delattre @ 9:00 am1 Comment links to this post
Monday, January 14th, 2013
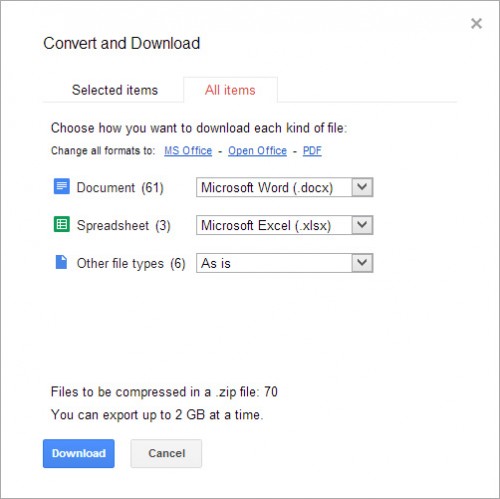
You can quickly save all of your Google documents to your hard drive by Right Clicking on any one of your documents and selecting Download…. In the popup window select the All Items tab along the top. Google Docs will display the quantity of each document type and allow you to select the format you want to download each type in. Click Download and all of your documents will downloaded as a zip file.
Google compresses the files into a zip file for you, which can take some time. If you have many documents, you can have Google email you the download link once it finishes the zipping process so that you don’t have to sit and wait.
Helen Bradley
Labels: all, download, export, files, google docs, quick
Categories:hunter, office
posted by Hunter Delattre @ 8:00 am2 Comments links to this post
Saturday, December 1st, 2012

Just in time for the holiday season, I’ve updated the Photoshop brushes page with a brand new set of Christmas tree brushes. Dress up your greetings cards and gifts with 32 hand drawn trees of all varieties. Best of all, it’s completely free! Happy holidays!
Helen Bradley
Labels: brush, christmas, download, free, holiday, Photoshop, tree
Categories:photoshop
posted by Helen Bradley @ 9:00 am1 Comment links to this post
Wednesday, November 21st, 2012

Some of you may already know that I’m a bit of a brush junkie, and hopefully you’ve checked out Project Woman’s brush collections before. If not, now is the perfect time! I’ve recently updated the page to include a new collection of adorable hand-drawn bird brushes. The set is entirely free and all pertinent licence information is included.
I update the collections regularly, so make sure to keep an eye out for any new brushes!
Helen Bradley
Labels: bird, brushes, download, free, hand drawn, Photoshop
Categories:photoshop
posted by Helen Bradley @ 3:00 pmNo Comments links to this post
Thursday, October 18th, 2012
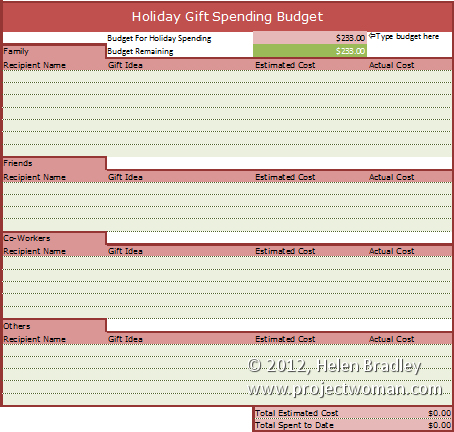
Don’t blow the budget this holiday season!
Our holiday gift buying budget worksheet will help you avoid a Yule tide spending blow out.
In the interests of helping you better control your spending this Holiday Season we have a free spreadsheet download in the form of a Holiday Gift Spending Budget.
Grab this version for Excel 2007/2010/2013 – gotta love the formatting available in those versions.
If you’re stuck in the land of Excel 2003 and earlier (or want to use it in Zoho, Google Docs, OpenOffice.org or anything else that can read Excel files), then grab this plainer but still fully functional version.
The worksheets are protected against wiping out key formulas and entering data in the wrong cells but there’s no password there so you can easily unprotect if you desire.
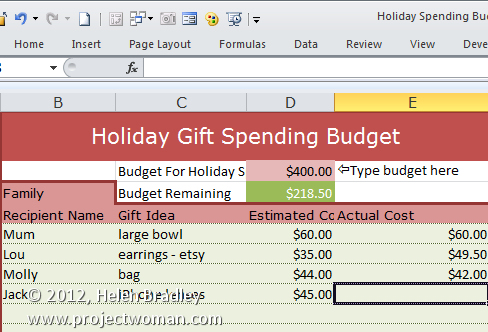
To use this worksheet, download the one for your Excel version, open it in Excel (or another compatible program), and then, in cell D2 type the amount you can afford to spend.
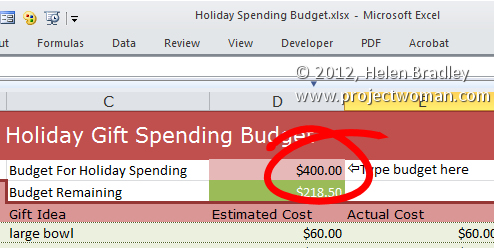
Then add entries for family, friends, co-workers and others – determine what you will get them and how much you are budgeting to spend. At this stage you can see if you are on track or already over budget.
As you buy presents, fill in the actual amount spent and in cell D3 you will see what you still have to spend of your budget amount or if have spent all you have allowed for.
Helen Bradley
Labels: budget, christmas, download, Excel, free, gift, holiday, present, spending, spreadsheet, worksheet, xls, xlsx
Categories:office
posted by Helen Bradley @ 6:20 am3 Comments links to this post


