Monday, January 13th, 2014

Dotted edges in Illustrator


Learn to add multiple strokes to a shape in Illustrator

One way I force myself to extend my knowledge of Illustrator is to take an existing illustration and to try to reproduce it. I don’t use these for anything but for learning and improving my skills. It’s a great tool because, when you try to copy someone else’s illustration you have to work out how to do things you may not typically do. You can’t just fluff yourself off and do the same old thing – if you don’t know how to achieve an effect you have to think about the problem and work it out using your existing skills or go research solutions.

Today I’ve been working on shapes that have neat edges and, in particular shapes with solid edges and dots – all in the one shape!

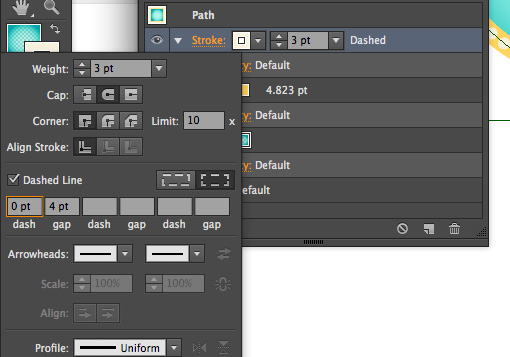
Start by drawing your shape – mine was a speech bubble but you can do it with anything. Then add a fill color and a stroke – this stroke is the thick band around the shape so make it the right size for the edge effect.

Now open the Appearance panel and add a second stroke by choosing the Add New Stroke icon. Make sure this is the top stroke – if not you can drag it up as if it were a layer. In the Appearance panel select a different color for this stroke and size it smaller than the previous one. You can now make it dots by setting up the panel so it looks like this – just note that your gap value should be the same or just larger than the stroke to make dots and that the cap shape is rounded – to get dots!


Helen Bradley

Monday, January 6th, 2014

Multicolor Sunburst in Illustrator

So, you know how to make a sunburst in Illustrator – here’s how to color it

Some time ago I wrote a post and created a YouTube video to show how to make a sunburst in Illustrator. This is one of my most popular posts and the video has been popular too – seems like it really hit a spot with a lot of readers.

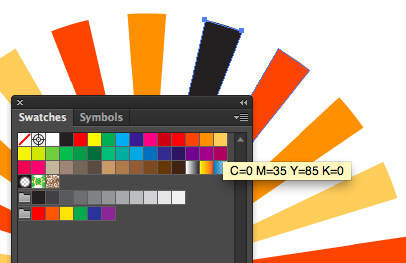
Now, today I received an email from a reader asking how to make the sunburst multicolored. Turns out it isn’t as simple as selecting a ray and recoloring it – because when you select one ray you select them all. However, once you know how to break them up, it works just fine.

To do this, follow the instructions to create the circle, add the dashed line, expand it, select the inside anchors and choose Path > Average. This gets the sunburst made.

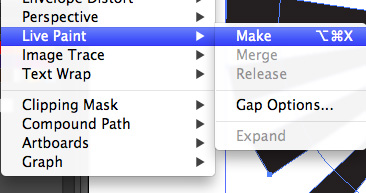
Now, to break the shape up, select it and choose Object > Live Paint > Make.  Now you can use the Live Paint Bucket tool to color each piece of the sunburst – or not. You see the Live Paint > Make command breaks up the shape (in a way that Object > Expand does not) so you can now select each ray in turn and color it.

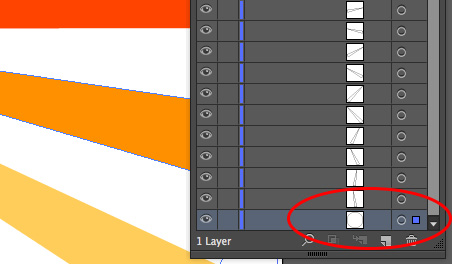
If you want to see the change happen, watch the Layers palette when you do the Live Paint > Make command – it turns the compound path into a set of individual vector objects – just what you need to have to be able to recolor them. The plus is that once the shape is broken up like this you can recolor it in the usual way by selecting each shape and color it or you can use Live Paint. You get to choose which works best for you.

Now, one side effect of this is that the spaces between the rays is filled with color – typically white. So you can’t put a solid color behind the rays and have it show through. There is a solution – open the Layers palette and locate the filled white circle shape at the bottom of the expanded sunburst shapes and delete it. Once it is deleted you can add your own background filed shape behind the sunburst.

It’s one of those things that is simple when you know how but not immediately obvious how you do it.

Thanks to the reader who asked the question!


Helen Bradley

Friday, December 20th, 2013

Where to Install Photoshop Brushes on the PC and Mac

Curious or confused about where brushes go? Here’s the info you need and how to do it

It’s pretty easy to find the wrong place to install brushes on the PC and the Mac. The Adobe program file folders are more accessible than the user areas where you really should be installing your brushes. So, to help you out, here is where the brushes should go and a couple of tips for showing the hidden and hard to find folders on the PC and the Mac:

In Mac OS X:

Photoshop CS4
~/Library/Application Support/Adobe/Adobe Photoshop CS4/Presets/Brushes

Photoshop CS5
~/Library/Application Support/Adobe/Adobe Photoshop CS5/Presets/Brushes

Photoshop CS6
~/Library/Application Support/Adobe/Adobe Photoshop CS6/Presets/Brushes

Photoshop CC
~/Library/Application Support/Adobe/Adobe Photoshop CC/Presets/Brushes

The tilde (~ ) indicates your hidden user library.

You can open it this way:

1 Launch Finder
2 Choose Go > Go to Folder
3 Type ~/Library and click Go
4 This opens the ~/Library folder and you can now navigate to the appropriate folder listed above.

On a Windows PC:

Follow these instructions to install the brushes where they can be found by both 32 and 64 bit versions of Photoshop (this is the prefered method of installing downloaded brushes):

Photoshop CS4
C:\Users\<your name>\AppData\Roaming\Adobe\Adobe Photoshop CS4\Presets\Brushes

Photoshop CS5
C:\Users\<your name>\AppData\Roaming\Adobe\Adobe Photoshop CS5\Presets\Brushes

Photoshop CS6
C:\Users\<your name>\AppData\Roaming\Adobe\Adobe Photoshop CS6\Presets\Brushes

Photoshop CC
C:\Users\<your name>\AppData\Roaming\Adobe\Adobe Photoshop CC\Presets\Brushes

To locate your c:\users\<your name>\AppData folder, launch Windows Explorer and type this in the address bar :

%USERPROFILE%\AppData

This automatically opens the AppData folder for you so you can now navigate to the desired folder as detailed above.

Helen Bradley

Friday, November 8th, 2013

Depth of Field – how to use it in your photography

Once you  know how to achieve  different depths of field, the question then becomes when would you use this in your photography?

Once you understand how you can achieve different depths of field in your photography – the question then becomes when would you use this knowledge to craft better photos?

Portraits and a shallow depth of field

There are a number of situations where it is a good idea to have a shallow depth of field and one of these is for portrait and pet photography. In this case you will want to remove any distracting background from around your subject. When the background is cluttered or distracting, a shallow depth of field helps you to isolate the subject from the background.

To achieve this effect, you would do one of these things or a combination of them:

1    Use a zoom lens and zoom in to your subject,

2    Get closer to the subject, and

3    Set your camera to use a large aperture, such as f/2.8 – f/3.8.

When you do this, take care to focus carefully on the subject. One disadvantage of working with a very shallow depths of field is that the amount of the area in the image that is in focus is very small so if you don’t get your focus right, your subject will be out of focus. You need to make sure that what you want to see in focus is the area you are focusing on.

Photographing flowers and products

Another situation in which you may want to use a shallow depth of field is when photographing flowers. The closer you get to the flower the more likelihood the background will be attractively blurred.

In product photography, you may also want to get a shallow depth of field and you’ll find that in many cases, the shallower the depth of field, the more attractive the image is. The difference between a shallow depth of field and a deep depth of field can often be the difference between an attractive photograph and one that looks more like a snapshot.

Landscapes benefit from a deep depth of field

While a shallow depth of field is extremely attractive for portraits and many other types of photographs, when you’re shooting landscapes and cityscapes you will typically want the opposite to be the case and you will want a deep depth of field. For landscape photography, you’ll typically want everything in the image to be in focus.

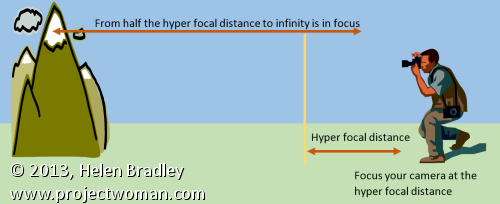
When photographing landscapes photographers often talk about hyper-focal distance. The hyper-focal distance is the point at which you point your camera at to focus the shot so that everything from that point to infinity is in focus and, in addition, an area halfway from the hyper-focal distance to your camera is also in focus. The image shows you how this hyper-focal distance affects the depth of field.

For landscape photography, you’ll typically want to use a small aperture such as f/9 – f/11, a short focal length such as 17mm and be a good distance away from your subject. Calculating the hyper-focal distance then becomes the issue. In many cases, people simply opt to focus the camera at infinity as this typically gives good results without needing technical calculations.

Too much of a good thing

If you’re tempted to increase the depth of field by simply dialing down your aperture to the smallest possible size such as f/35 or so, think again. While it may seem that this will give you a very deep depth of field it can be counterproductive. At very small apertures an effect called diffraction kicks in and this can cause a decrease in quality in your images. Instead you need to find the sweet point at which the smaller aperture gives you a good depth of field but stop short of where it gets so small that light is diffracted decreasing the image quality.

DSLR vs Point and Shoot for controlling Depth of Field

When you’re looking to achieve different effects with different depths of field, you’ll find that a digital SLR will give you much better results than a point and shoot camera. The reason for this has to do with the relative sensor size of the cameras – the larger the sensor size – the more control you’ll have over the depth of field.

Understanding depth of field and how it impacts the images that you take is a key way that you can impact the quality of your images. Choosing the right option for each shooting situation and knowing how to set your camera to achieve the desired result will enhance your photos.


Helen Bradley
Tuesday, October 29th, 2013

Controlling Depth of Field in your Photographs

Learn what depth of field is and how your camera settings affect it

Some subjects need to be fully in focus to be shown at their best and others need dreamy out of focus backgrounds to create the right setting. The feature that is key in both situations is called depth of field – it gives you both that ‘everything in focus’ look and it also gives you soft out of focus look. Depending on what you are photographing getting the depth of field right is often the difference between a snapshot and great image.

I’ll explain what depth of field is and how to control it with your camera settings.

What is depth of field?

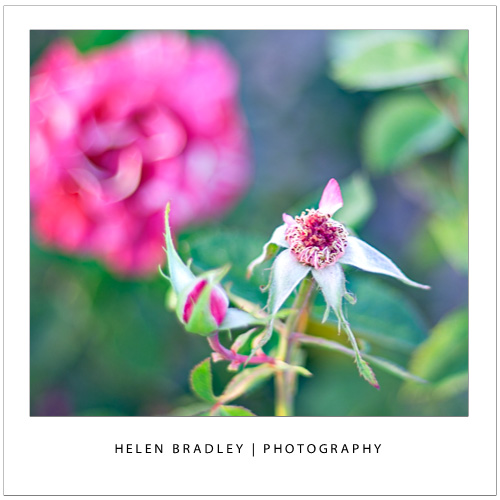
At its simplest, depth of field is the zone of sharp focus in front of, around and behind the subject in your photo when you are focused on that subject. When you have a shallow depth of field, only a small area around the subject will be in focus and quite often only a small part of the subject will be in focus. Everything else in the image will be out of focus with things further away from the subject, either in front of or behind the subject, being more out of focus the further away they are. This image has a shallow depth of field – it’s a great way to shoot flowers:

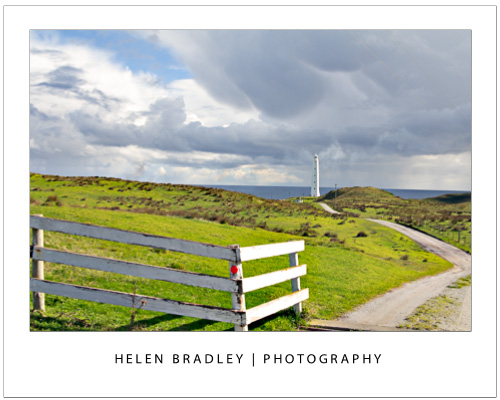
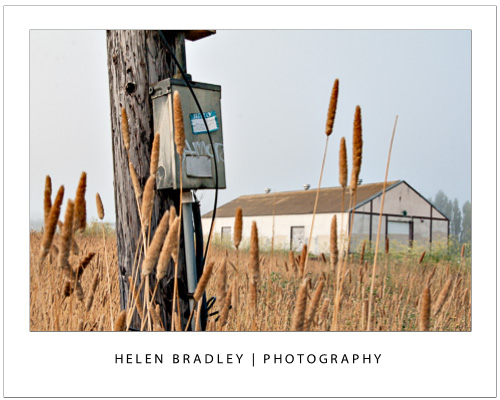
When the depth of field is deep, nearly everything in the shot is in focus. You control the depth of field in your images by adjusting the camera’s settings for aperture, adjusting the focal length of the lens and the distance you are from the subject. This image has a deep depth of field – that’s important as we want to see everything in this scene from the grass in front of us to the horizon miles and miles away.

Let’s look at each of these in turn.

Control depth of field with aperture

One way that you can control the depth of field in an image is to change the aperture that you are using. For this, you will need to have your camera set to Aperture Priority or Manual mode. Selecting an aperture that is very large, such as f/1.4 to f/2.8 will give you a shallower depth of field around your subject. The aperture used for this image was a huge f1.4 so only a small portion of it is in focus:


If you shoot with a small aperture, such as f/9 to f/11 or more you will find that more of the image will be in focus, which gives you a deeper depth of field. If everything else stays the same, the difference in the aperture setting you use can result in a very different image. The aperture used here was a small f11:

One benefit of shooting with a large aperture, such as f/1.4 to f/2.8, is that a lot of light is getting into the camera so you can use a fast shutter speed. Conversely, a down side of shooting with a small aperture such as f/9 to f/11 or more is that less light gets into the camera so you will need to use a slower shutter speed  or a higher ISO value. In some cases you will be shooting with such a slow shutter speed that you will need to use a tripod.

Control depth of field with focal length

The focal length of your lens can also have an impact on the depth of field when you use this to make a subject bigger. So, if you are shooting with a 50 mm lens, you will get a much deeper apparent depth of field than you would if you were capturing an image with a 200 mm lens at the same aperture and if, in both situations the subject size is the same. The depth of field is actually not significantly different but it looks different because there is more background in an image when you capture it with a 50mm lens than you will get when you capture it with a 200 mm lens. So a rough rule of thumb is that the more zoomed into the subject that you are, the shallower the depth of field will appear to be. This giraffe was shot at f5.6 which isn’t a particularly large aperture but it was shot at 300mm zoom so the giraffe is quite sharp and the background is nicely out of focus:


If you are shooting landscapes you will get best results when you use a short lens such as a 28 mm lens as the image will appear to have a much deeper depth of field. On the other hand, a zoom lens can be a good lens to use when shooting portraits because the further you’re zoomed in to the subject the less background will be in the image and the shallower depth of field you will appear to have. This image was shot at f11 with a 28mm lens so everything from the lamp post to the building is in focus:

Control depth of field by varying the distance from your subject

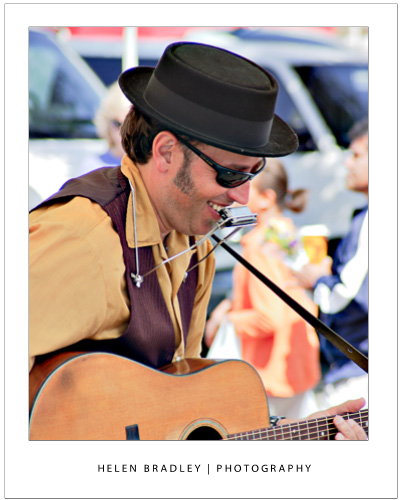
The distance between the subject and the camera is another way that you can impact depth of field. So, for example, if you photograph a subject close up, such as in the region of up to 10 feet away, then the depth of field will be much shallower and more of the image behind the subject and a little in front of the subject will be out of focus. On the other hand, if you move the subject further away from you so that the subject is 20 feet away then the depth of field will be much deeper and there will be a lot more of the image in front and behind the subject in focus. This image was shot with a 200mm lens – the singer was relatively close to the camera  and the background was some distance behind him so the musician is in focus and the background nicely out of focus:

Whenever you’re considering depth of field, you should also note that, when the subject is in focus, the amount of the image that is in focus behind the subject will be greater than the amount of the image that is in focus in front of the subject. The ratio is approximately one-third to two-thirds, so the depth of field will extend roughly one-third in front of the subject and two-thirds behind the subject.

Helen Bradley
Wednesday, June 19th, 2013

Capturing Photos of reflections – Pt 2

Let’s look a little deeper into how to capture great reflections

In the previous post we looked at the basics of capturing reflections. Here we’ll look at some additional tips and tricks.

Frame the image

When capturing a reflection of a building in a lake, for example, you have two choices for framing the image. You can capture the reflection alone or you can capture the original object and its reflection. The choice is yours. If you’re shooting digital, capture both shots and see which you like best later on.

If you opt to capture both the original and the reflection, consider where the line where one ends and the other begins should be. You can shoot with the ‘line’ across the middle of the photo but this can be distracting as the eye doesn’t know exactly which image to focus on.

A better solution is to place the ‘line’ along the top one third or bottom third of the image – so the reflected area is double the size of the original or half its size. This will balance the image better and give a more restful image. Make sure the line between the reflection and what’s being reflected is very straight, if it is not, it will be very distracting.

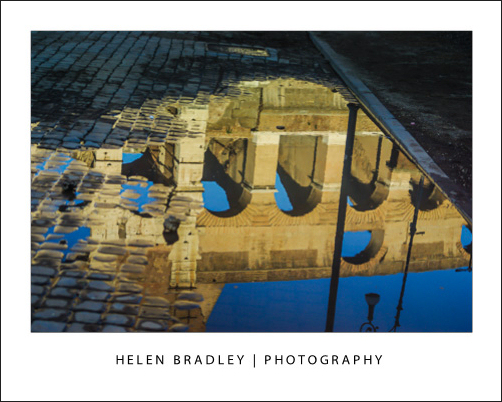
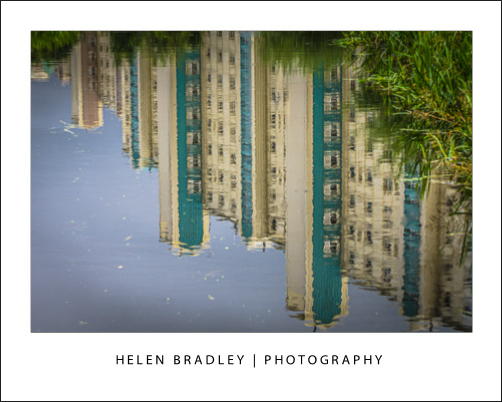
Here the buildings are much more interesting as a reflection than they were right side up!

Capture the imperfect

When you’re looking for reflections, don’t always look for perfection. There are interesting photos to be taken where the reflection is bent or rippled because of the characteristics of the reflective surface.

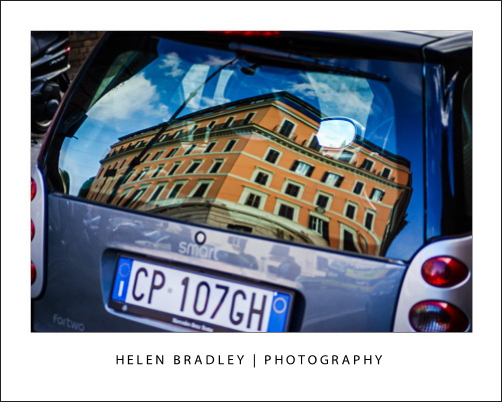
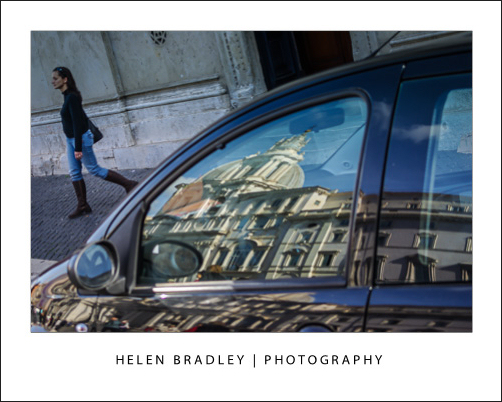
For example, try shooting a reflection captured in a car windscreen. The reflection will be bent and distorted because of this and all the more interesting.

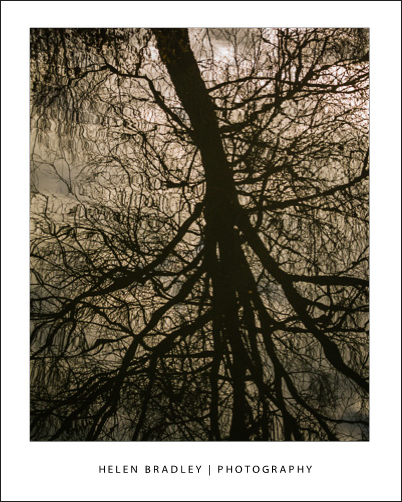
Here the wake of the boat I was travelling on broke the reflection in a very visually rich way:

A sudden shower of rain will open up new adventures in capturing reflections as you will see the surrounds reflected in puddles of water on the ground. Even a storm-cloud laden sky will look more threatening if captured reflected in a puddle.

Focus on the point of focus

When you’re shooting a reflection, check your camera is focusing correctly. You want it to focus on the reflected surface and some cameras may not do this correctly and may, instead, focus on the objects behind the reflective surface.

If you’re using a digital SLR, you can switch to manual focus and focus the lens yourself so you can make sure that the area you’re most interested in is  nice and sharp.

Once you start looking for reflective surfaces to shoot images from you will be surprised at just how many there are and what great effects you can get from them with not
much effort.

Helen Bradley
Wednesday, June 12th, 2013

How to photograph reflections

Reflections make for great photos so here’s how to capture them

Reflections occur all around us. When you’re driving, the road behind you is reflected in the car rear vision mirror and your car will be reflected in the chrome on the car next to yours at the stop light.

Other reflections are more obvious and often constructed to be so, for example, the Reflecting Pool at the War Memorial in Canberra reflects the surrounding buildings and beautiful houses are often constructed with lakes in front of them to reflect their beauty.

Capturing these objects and their reflections can lead to some wonderful photos so here I’ll show you want to look out for and how to capture a great shot.

Axe the Polarizer

The first thing to do when shooting reflections is to remove the polarizing filter from your camera. This filter is designed to reduce reflections which, most of the time is a good thing, but not when it’s the reflections themselves you’re interested in.

If you leave the filter on and photograph something reflected in a window, chances are you’ll capture an image of what’s behind the window instead of what is reflected in it.

Ideas for reflections – sunglasses

While a beautiful building reflected in a lake makes for a great shot, there are reflections you’ll come across every day that will often be more interesting because they are not staged or expected.

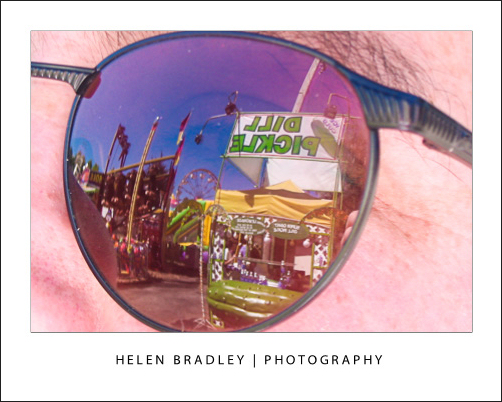
For example, the lenses in sunglasses will reflect the scene around them. By positioning yourself so you can see something interesting reflected in the lens you can capture a mini scene within the glasses themselves.

Ideas for reflections – rear vision mirror

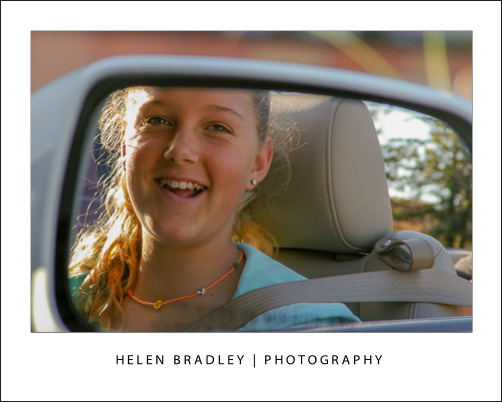
Car rear vision and side mirrors are great for capturing interesting reflections.

Hold the camera at an angle to the mirror so you don’t capture the camera in the shot (unless you actually want to) and frame the shot in the mirror. You’ll need to frame it very accurately because anything outside what shows in the mirror won’t be captured.

Ideas for reflections – city buildings

If you live in a city there will be reflection opportunities in the buildings around you. For example, capture a busy streetscape in the glass front window of a shop. Look out for an interesting shop to use for this purpose such as a fruiterer or bakery or some shop where what is in the window is as much of interest as what is reflected in it.

When you’re shooting reflections in shop windows, there’s a good chance the final shot will be a mix of reflection and what shows through the glass.

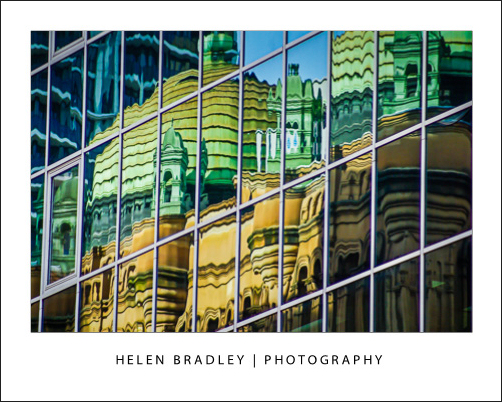
Tall buildings with mirror glass will reflect the buildings around them and the sky too. Look for opportunities where the sun is right and the reflected image an ideal one to compose and capture.


Helen Bradley
Wednesday, May 8th, 2013

Fix and perfect a portrait of Mum – Part 2


Image credit: UglyHero at www.sxc.hu

Once you have captured a great image of mum it’s time to fix it before sharing.

In a recent blog post I talked about how to take great photos of mum for Mother’s Day or any other occasion. Today I am going to explain how to process them.

Once you’ve downloaded and chosen the best shots – it’s time to fix the photos.

Start out with adjusting the white balance if the images need this. You might also want to warm the image if it is too cold so add a slight yellow/orange color cast to it to warm it a bit. This image is a little bit too blue for my taste and it will look better a bit warmer.

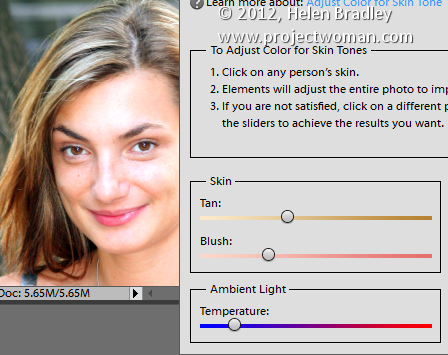
You can do this in Photoshop Elements – a good fix there is to adjust the skintones as explained in this blog post http://projectwoman.com/2010/03/step-8-photo-editing-workflow-fix-skin-tones.html. Photoshop doesn’t have this fix but whenever I use Photoshop Elements I find it really useful. You can fix skintones and warm the image all in the one step.

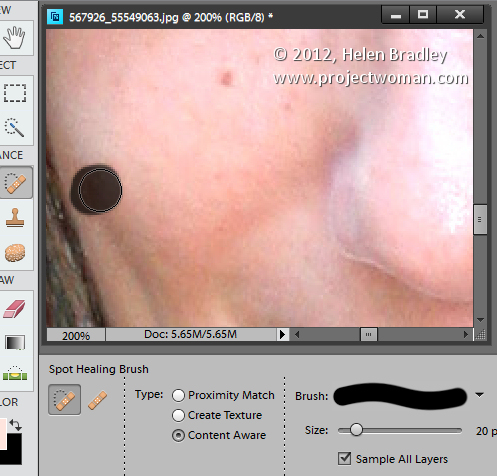
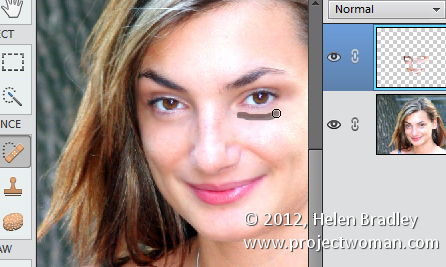
I will then fix any skin blemishes – if you’re using Photoshop Elements do that with the Spot Healing Brush Tool. The process is as simple as painting out the problem areas and the uneven skin tones will be smoothed.

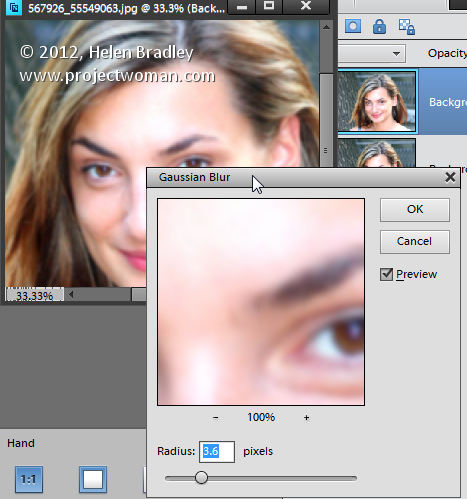
To lessen the effect of wrinkles a good fix is to make a duplicate of the image background layer (Layer > Duplicate Layer) and to blur this duplicate layer with a small radius Gaussian blur filter (Filter > Blur > Gaussian blur).

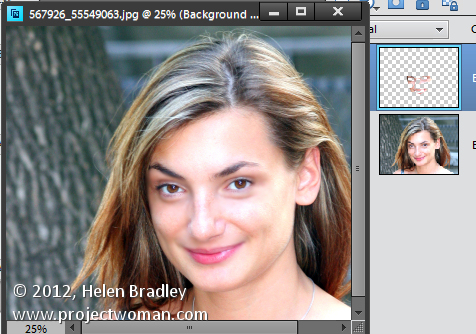
Then selectively erase the top layer to reveal the sharper features underneath leaving the blur over the wrinkles. You will want to erase pretty much all but the area under the eyes. Finally, reduce the Opacity of the top layer to blend the two layers together if desired. If you’re handy with using masks do it with a mask instead of the eraser.

If the fix is not enough, use the Spot Healing Brush Tool on the top layer to blend out the wrinkles and dark areas under the eyes even more.

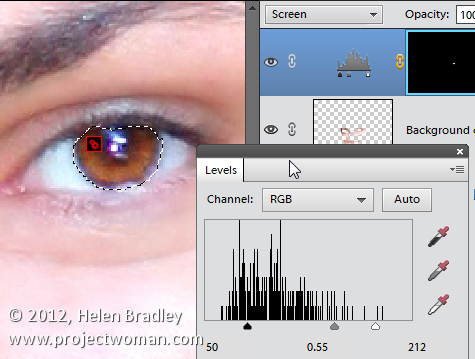
I like to use the Photoshop Elements Lightening Brush to lighten a person’s teeth slightly and I’ll often use the Saturation Enhancing Brush to brighten their eyes. Err on the side of caution though, the edits you make should be subtle and gently enhance the photo – you’re not applying Halloween makeup!

If your mum gets just one photo that she loves of herself from those you’ve taken – you’ve given her a wonderful gift. Best of all, you can bet she’ll be happy to pose for you again next year.

Helen Bradley
Friday, February 15th, 2013

Setup and Wait – the secret of great shots

Often the secret to a great shot is to stop and wait

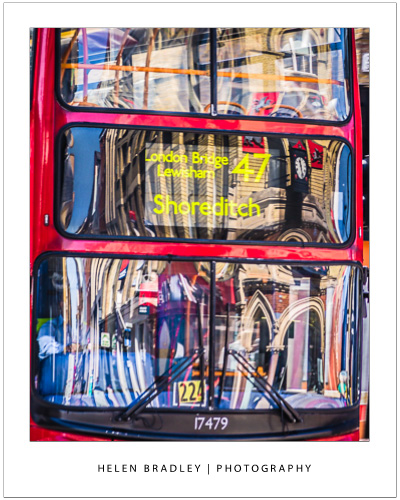
I shot this image in London recently. I had stopped at a busy street corner waiting for the lights to change and I saw a double decker bus go past and I caught the reflection in the front window. It was bright and colorful – but before I could do anything the bus motored past.

I had a choice, keep walking or stop and wait. I waited. I stood on that street corner waiting for the next double decker bus to come past in a position where the reflection hit the window nicely and without any distracting vehicles between the bus and me. I also wanted a clean bus so the window would reflect well.

It took a while and I shot quite a few buses until I got this shot. It’s a lucky shot in part because I saw the possibilities, the rest of the shot is pure patience – waiting long enough for the situation to occur again.

Do you stop and wait for things to happen or do you just keep moving on?

Helen Bradley
Page 1 of 121234510Last »