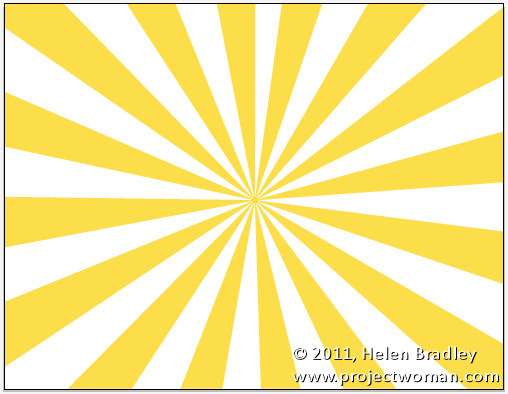
I’ve been looking around for some time for a good way to make sunbursts in Illustrator. Those methods I’ve seen suffer from one of two problems, one is that some use a triangle shape which is repeatedly copied and rotated to create the sunburst – I’m lazy so that’s too much repetition for me to be bothered doing. In addition, getting a good balance between width of the ray and the number of rays is also a problem with this method so it’s a lot of trial and error. The other method uses a dash line stoke on a circle but it suffers from the problem that the middle of the shape never closes up to a good tight fit.
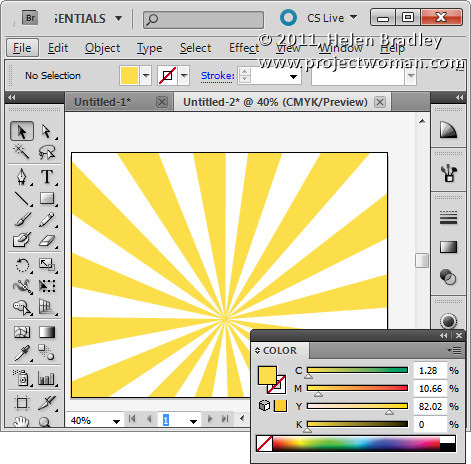
So, I’ve come up with my own take on creating sunbursts in Illustrator. What I like about it is that you can decide as you are making it the number of rays so you can make lots of thin rays or a few really thick ones and it’s all done automatically so there’s not copy and rotating involved. You can also adjust the spacing between the rays on the fly. The final thing I like is that the middle closes up nicely into a small circle.
The finished sunburst can be saved as a symbol so you can reuse it and, of course you can crop it to fill the artboard and color it to suit – I’ll show you how to do all this. Here’s how:
Step 1
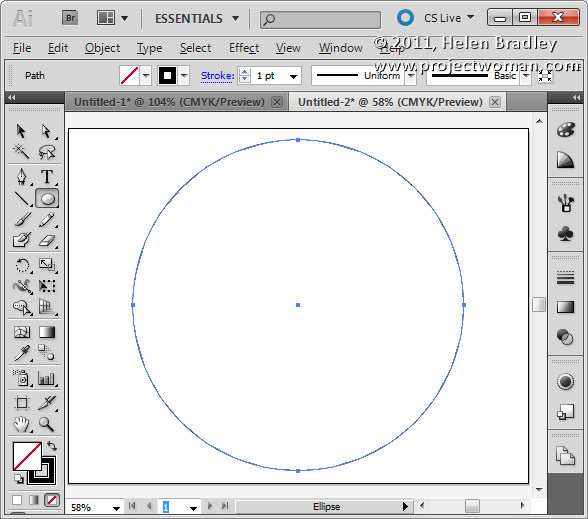
Start with any sized document in Illustrator. Select the Ellipse tool, hold Shift as you draw a circle on the screen. Set the Fill to No Fill and the Stroke to black.
Step 2
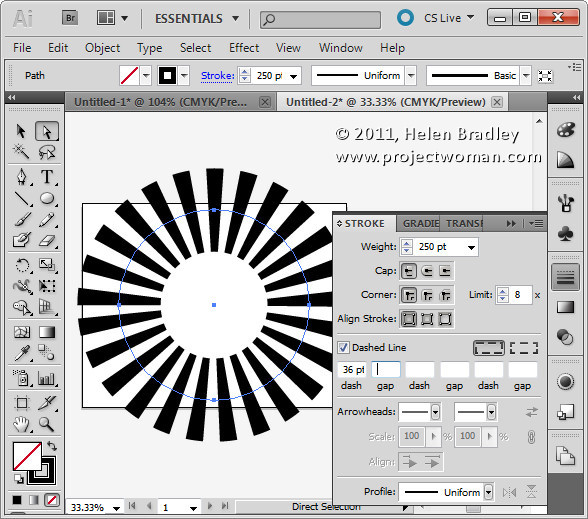
Choose Windows > Stroke to display the Stroke palette. Click the Dashed Line checkbox.
Here you determine the width of the rays and the gaps so don’t leave here till you have it right. Adjust the Weight value so you can see the rays – ignore the fact that they don’t meet in the middle but you will want to set a large enough value for weight that they come close to meeting – if you don’t the inside points will be difficult to select later on. Weight only affects the length of the rays and not their number or spacing.
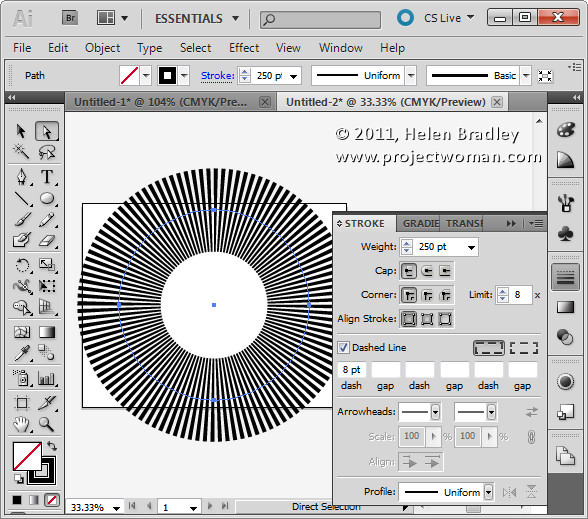
Set the Dash value to a value that gives you the number of rays you want. The larger the Dash value the smaller the number of rays.
This is a Dash of 36 pt:
This is a Dash of 8 pt:
Make sure that you have an even arrangement of rays around the circle and that two rays aren’t joined together or too close to each other – which can happen. If it does, try a slightly different value for the Dash – sometimes changing it by one or two points is all you need to even everything up.
If you want to adjust the spacing between the rays, enter a value for Gap – again, check that the rays look balanced before continuing. The larger the value of the Gap, the fewer the rays you will have.
Step 3
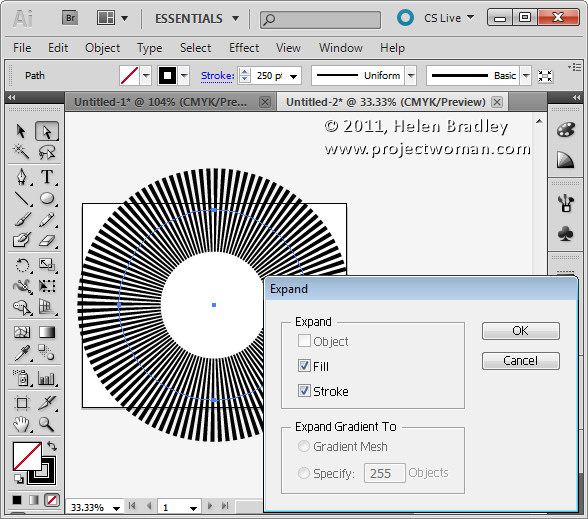
Now use the Selection tool (V) to select the Circle. Choose Object > Expand > Select Fill and Select the Stoke checkboxes and click Ok.
Now your vector shape is the rays themselves – not a stroked circle.
Step 4
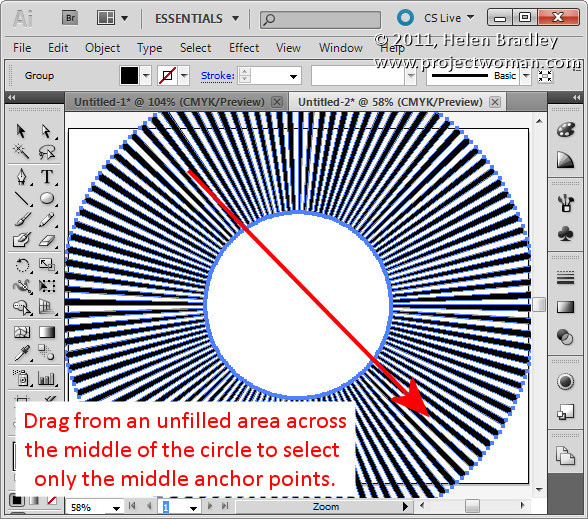
Click outside the shape to deselect it. Select the Direct Selection tool (A) and drag over all the inside anchors leaving the outside ones unselected. This is a little fiddly and you’ll find that the smaller the inside circle the easier it is to do.
If you have lots of narrow rays you may need to enlarge the Illustrator window and zoom in close to be able to start your selection not on a path.
Step 5
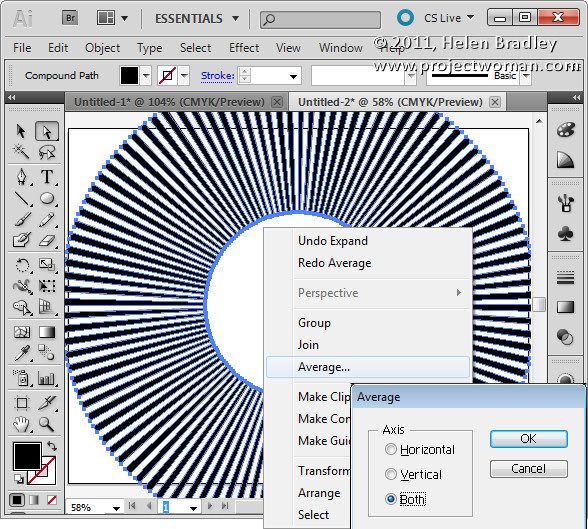
Right click your selection and choose Average > Both and click Ok. This positions all the anchor points at the center of the shape closing up the rays perfectly.
Step 6
Now you can select the shape and resize it.
You can change the fill color and add it as a symbol to the Symbol library by dragging and dropping it into the Symbol pane.
Step 7
While you’re on a roll, create a few more sunbursts with less or more rays that you can then add to the Symbols collection and then save as a Symbol set you can use any time.
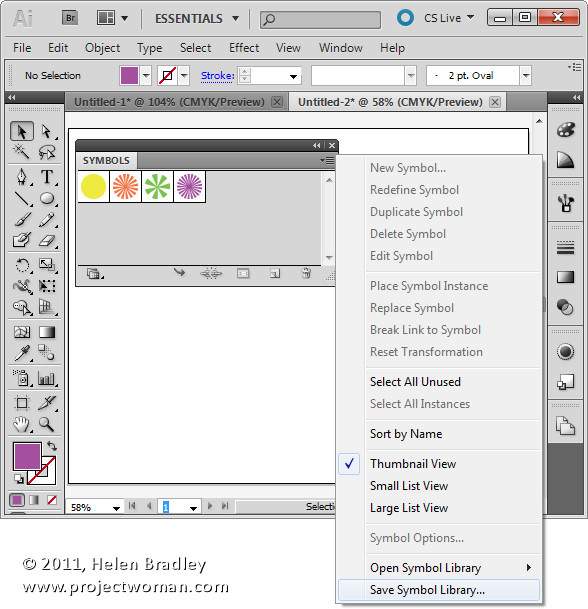
To save the Symbols, remove all but the symbols you just created from the Symbols pane by selecting them and drop them on the Delete Symbol icon.
Click the Symbol flyout menu and choose Save Symbol Library and save the symbols to a file on disk. In future you can select the same flyout menu on the Symbols pane and choose Open Symbol Library to import the symbols back into Illustrator so you can use them.
Step 8
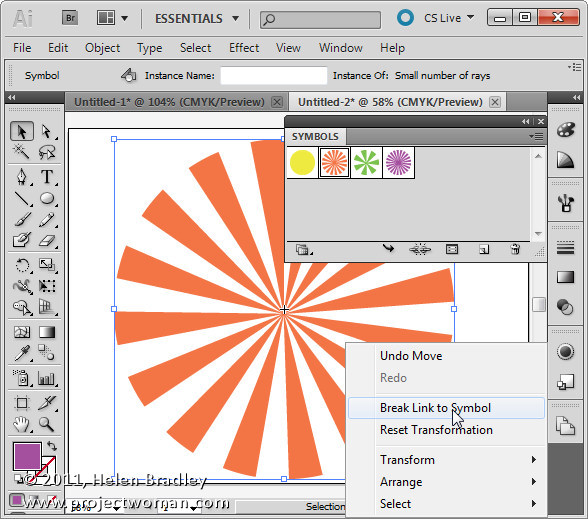
To use a sunburst symbol, drag it from the Symbol pane into the Artboard.
To recolor it, right click it and choose Break Link to Symbol, then select the shape and alter the Fill color and add a stroke color if desired. If you plan to crop the sunburst to the Artboard size following step 10 below, don’t recolor the shape right now.
Step 9
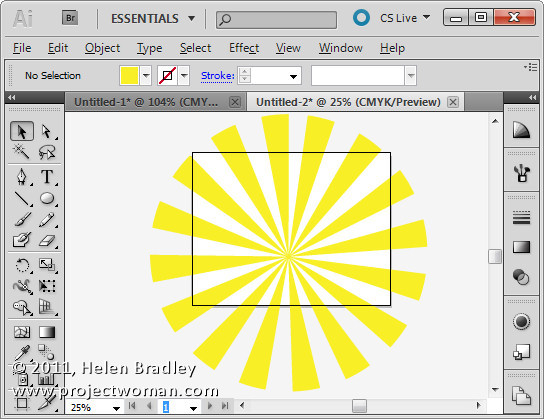
To trim the sunburst to the shape and size of the Artboard, first size it to fill the Artboard.
Step 10
Drag a rectangle over the Artboard to the exact size of the Artboard.
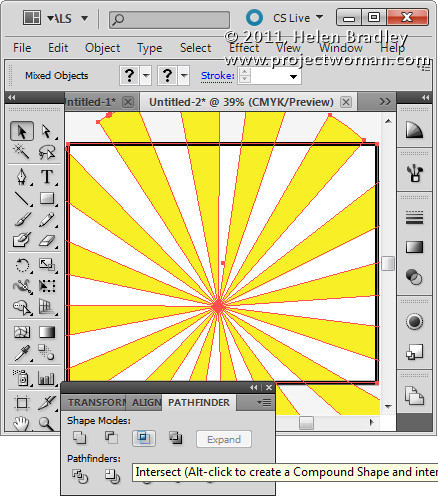
Select both the rectangle and the sunburst under it using the Selection tool (V).
Display the Pathfinder palette by choosing Window > Pathfinder and select the Intersect option.
Step 11
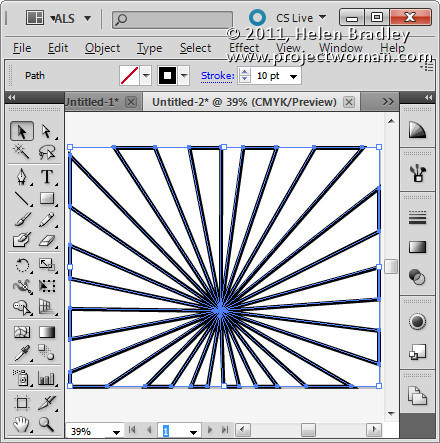
The sunburst will be cropped to the Artboard shape.
Step 12
You can now set its fill color and stroke to suit.



Nice post! thank u so much for sharing..
Thanks so much for sharing! It was just was I needed, very quick and easy!
i stuck at step 4, how to drag it ? do u have any video tutorial about this? huhu… thanks
icute – try click and drag over the middle of the circle.
Helen
Thanks so much! I didn’t realize it would be so easy to make..it’s perfect!
This would be great if my Illustrator were cooperating. For some reason when I go to Expand the circle to make the separate vectors, it just turns it into a large black donut.
I have everything set up correctly, no fill, black stroke, checked both boxes, but no. Hmm. Any ideas on why or what to fix?
I have exactly the same problem as Michelle: I go to expand and just get a big black donut. Anyone know why?
This was a great tutorial – a quick, easy, and flexible way of making rays! Thanks for sharing it!
This is great! I love your approach – it was so easy to get exactly what I wanted. And I’m an Illustrator neophyte. Thanks for sharing your knowledge.
This was exactly what I was looking for. It took me less than 5 minutes and it’s perfect. Thank you so much for taking the time to share..
That is incredibly clever! Thanks so much for sharing!
Author must not be using version CS5. On Step 3, I can’t select “Expand” because it’s blacked out. I followed all the steps to the letter and got stuck on step 3.
Scratch that. I re-did it and was able to do Step 3. Sorry.
Perfect. Everything in tutorial works to the “T.” Well done post!
hmmmm I have tried this over and over and I can’t seem to get Expand as an option. @ramon what did you do?
Jennyoooooo… I was having the same problem today and just figured it out (at least I figured out why I wasn’t able to select expand). On the stroke box, next to the dashed line checkbox, there are two options for gap widths and corners. The first one, which reads “Preserves exact gap and dash lengths” on mouseover, needs to be selected.
Tim, thank you so much for the tip! i was having the same problem so i followed what you suggested and it worked out! thanks again =)
Same problem as steve cx and michelle : (
I just found a solution. I started with the stroke aligned to the center but that didnt work so I tried align to outside. Then I did “object, expand appearance”. Success!
excellent post! thank you so much! so simple!!
This tutorial is great! Thank you so very much. A HUGE time saver and a really professional result. Top work
Nice Job! Thanks so much! So simple and very easy to follow! Saved me an hour today… I will never forget this method!
Great tutorial, thanks for sharing it. I appreciate it!
Great tutorial, very easy to follow and complete! Thank you so much for sharing 🙂
There’s a webapp for that: http://thoka.net/inkrays.html 😀
Thank you so much. This is an awesome little app.
cheers
Helen
Thank you so much! It was quite easy to follow.
how i make the rays i don’t got it..
Thanks so much!
This was soooo helpful and I learned a few new tricks at the same time! Thanks!
Thanks. Your guidance and tips are important and we appreciate your efforts for sharing this great information.