Format a drive for PC and Mac – Quick & Foolproof
In the last couple of years Apple broke the system that let you take a USB from a Mac to a PC and visa versa seamlessly. Now, it’s perilously easy to have a regular drive or a Flash drive that works fine on a PC but which isn’t recognized by a Mac. It’s also possible to happen the other way. So, if you’re faced with the issue of needing a drive that works on both, here’s what to do.
Firstly backup everything that was on the drive (you’re about to lose it all!).
Did you get that last step? Yup. Seriously. BACK IT UP!
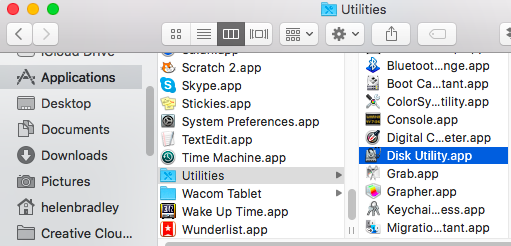
Now, put the drive in your Mac. The Mac is fussier than the PC so get it to do the work. It doesn’t matter if your drive is recognized by the Mac or not. Choose Applications > Utilities > Disk Utility.

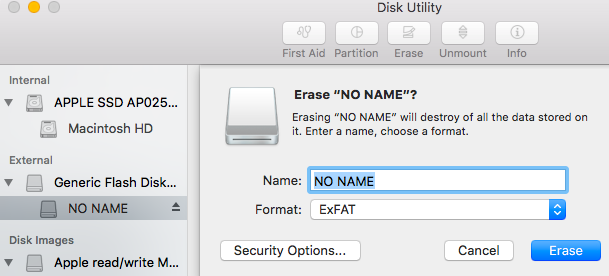
Wait until your drive appears in the External list (don’t touch the Internal drives).
Select your drive and click Erase.
Type a name for your Disk, from the Format dropdown list choose ExFAT and set the Scheme to Master Boot Record (if that is an option), and click Erase.

This erases and then formats the drive in a format that the PC can read.
Once it’s finished. Eject the drive and test it in your PC. I typically place a file on the drive using both the PC and the Mac (to check it writes ok) and then I open it on the other machine (to check it reads ok). If it works, you’re good to go!
NOTE: This is also the way you can erase everything from a USB drive on the Mac – often I find I have a drive that shows there is ‘nothing’ on it but which has part of the available space used up. Erase/format the drive fixes this quickly.

