Sunday, July 22nd, 2018

USB Drive that works on Mac and PC

Format a drive for PC and Mac – Quick & Foolproof

In the last couple of years Apple broke the system that let you take a USB from a Mac to a PC and visa versa seamlessly. Now, it’s perilously easy to have a regular drive or a Flash drive that works fine on a PC but which isn’t recognized by a Mac. It’s also possible to happen the other way. So, if you’re faced with the issue of needing a drive that works on both, here’s what to do.

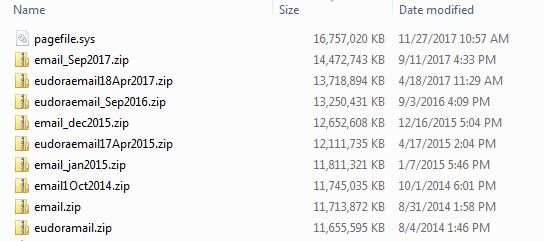
Firstly backup everything that was on the drive (you’re about to lose it all!).

Did you get that last step? Yup. Seriously. BACK IT UP!

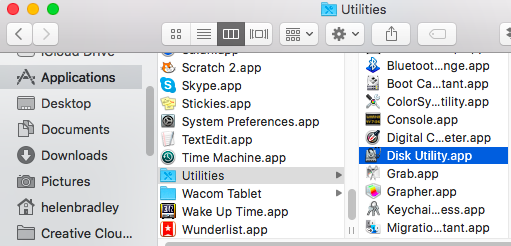
Now, put the drive in your Mac. The Mac is fussier than the PC so get it to do the work. It doesn’t matter if your drive is recognized by the Mac or not. Choose Applications > Utilities > Disk Utility.

Format USB drive for Mac and PC

Wait until your drive appears in the External list (don’t touch the Internal drives).

Select your drive and click Erase.

Type a name for your Disk, from the Format dropdown list choose ExFAT and set the Scheme to Master Boot Record (if that is an option), and click Erase.

Make USB drive compatible with PC and OSX Mac

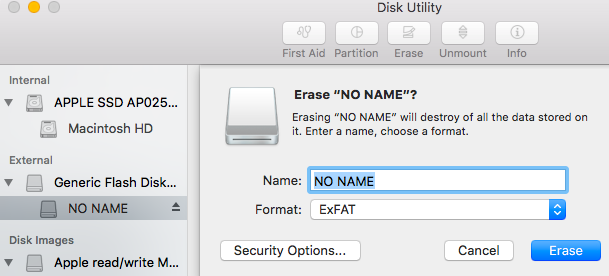
This erases and then formats the drive in a format that the PC can read.

Once it’s finished. Eject the drive and test it in your PC. I typically place a file on the drive using both the PC and the Mac (to check it writes ok) and then I open it on the other machine (to check it reads ok). If it works, you’re good to go!

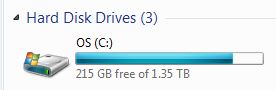
NOTE: This is also the way you can erase everything from a USB drive on the Mac – often I find I have a drive that shows there is ‘nothing’ on it but which has part of the available space used up. Erase/format the drive fixes this quickly.

Tuesday, December 5th, 2017

SAVE yourself daily FRUSTRATION – Start Task Manager with one click!

Quickly Launch Task Manager with one keyboard shortcut

I have been helping people fix computers that aren’t behaving and moving from an old computer to a new one. It seems like I am spending half my time launching the Task Manager to fix issues. Eventually it dawned on me that I can save myself a lot of messing around with pressing Control + Alt + Delete and selecting Start Task Manager by quickly going direct to the Task Manager. It’s simply a case of learning a new shortcut. Imagine that? One keystroke shortcut to get direct to the Task Manager.
So, here it is – remember and use it!

Launch Task Manager with a single keystroke
Simply press Control + Shift + Esc
Why not try it out now, practice it and you’ll seldom need to use Control + Alt + Delete ever again.

Monday, November 27th, 2017

Clean Up Time! How to find and remove big files

how to find your biggest files so you can delete them without needing extra software - windows quick and easy technique

Go from red to green – Find and Delete Big Files in Windows

I admit it – My computer is a huge mess of files. Which wouldn’t be so bad except that I have little or no room left on my hard drive – when I check it in my C: drive is red! So, I need to get rid of files by deleting them or moving them to an external backup.

All very well but I’ll get the best ‘bangs for my buck’ if I can find and manage the really big files. But how to do this and please don’t tell me I need to install a new program to do that! Well, luckily in Windows, you don’t.

Here’s how to find your biggest files:

  • -Press Windows key + F to launch Windows search dialog.
  • -In the top right corner type size:gigantic and press Enter
  • -Wait
  • -Wait some more

Windows-how-to-find-your-biggest-files-3
Because I don’t index my drive it takes a little while but the result is an ordered list of your biggest files from biggest to a little less big. You can now delete or move any files you no longer need. BUT beware! If you don’t know what a file is – DON’T delete it! If it is a Windows file you could wind up with a computer that no longer works.

I was really surprised what I found. Heaps and heaps of old backups that I make before I go on holidays each year and which were just sitting there. And a full 22Gb in a single screen recording that I had already edited and rendered and certainly did not need! In just a few minutes my disk is back to a happy green color and, once I’ve finished telling you all about my success, I’m off back to work.

search for and remove oversize files in Windows

Be careful, if you didn’t create a file, don’t delete it. Files like Pagefile.sys shown here belongs to Windows and SHOULD NOT BE DELETED.

Friday, May 29th, 2015

Print a List of Files in a Windows Folder

Learn how to quickly make a printable list of files in a folder (and how to import it into Excel)

Sometimes I need to get a list of files or folders inside another folder in Windows. I like to either print the results or take them to Excel to work on them. However, it isn’t self evident how to do this – there’s no print command in Windows Explorer that can do it for you. However, once you know how to do it, it’s easy to do.

Start by navigating to the folder whose contents you want to print. You want to have this folder visible in the right hand pane in Windows Explorer. Hold the Shift key as you right click this folder. A shortcut menu will appear, from it choose the Open Command Window here option.

This opens a MSDOS window inside the folder.

Now type this DOS command at the prompt and press Enter:

dir > filelist.txt

The name filelist.txt can really be any file name of your choice, I just like to use the .txt extension since its contents are plain text.

When the prompt reappears close the window.

If you now look inside this folder you will see a text file called filelist.txt. You can now print it by right clicking it and choose Print or double click to open it in Notepad and print it from there.


You can also open it in Excel and convert it to columns of text using the Text Import Wizard. The file is a fixed width file so it converts pretty easily into columns of text – you simply need to drag the lines in the preview to mark out how the text will convert to columns.


Then, when you are done, click Finish and you have the data in Excel – save it as an .xlsx file and you’re good to go.


Wednesday, April 15th, 2015

Add Mac Keyboard Icons to Word documents (and other things)

Find the Mac keyboard icons for the Control & Command keys

I had a problem today in that I was writing about the Mac but using a PC. I needed to type the character for the Command key on the Mac keyboard which, as you might know, is this cute twirly shape. But since I was working on a PC I didn’t have fonts which contained the character. After an hour or so of research, I found the character.

As luck would have it, it was where I should have looked to begin with, in my Wingdings font. To get it, in any document or any application that supports fonts, click to use the Wingdings font and type the lowercase z – voila – the Command key character.

So far, so good. But what about the other keys, like the Apple key and the Alt key on older keyboards? In the interests of helping you get everything you need in one post, if not in one font, here’s how to get hold of the characters for the Apple key and the Alt key:

Turns out the Alt key symbol isn’t as easy to find as it might be. Probably the quickest way to locate it is to download the free font Virtue from the ScooterGraphics site.

Once installed the font contains a range of characters including the Mac Alt key symbol and the Apple icon. To get the Alt key select the Virtue font and type Alt + 0221 on the keyboard. The Apple symbol is a little more difficult as it is a hex value so, switch to Virtue font, type F000 into a Word document and immediately (don’t press space) press Alt + X. This little bit of keyboard magic creates the little Apple logo for you. If you need it elsewhere, make it in Word and copy and paste it to the application you need to use it in.

Thursday, April 2nd, 2015

How to Open Winmail.dat files

Got a Winmail.dat file? Open it the easy way!

Winmail.dat is confusion in a very small package. It is a file attachment, usually from someone who uses Microsoft Outlook. They send you an attachment to an email and Outlook bundles it up in this little file that no other program can open. Handy isn’t it?

I am the kind of person who hates having to go back to someone and ask them to fix a problem however stupid it is. So, instead of sending the winmail2.dat file back where it came from, I sorted out how to open it.

Here’s the simple solution – head over to the site http://www.winmaildat.com and click Choose File to upload your winmail.dat file. Click Send File to send your file to the server which will then unlock the magic for you.

You will see a set of links for the things that were in the winmail.dat file so you can click to download those that you want.


Once you are done, you can click Delete to delete your files from the server. If you don’t – they are removed automatically after 2 hours.

The site is simple, it works and you don’t have to wait for someone to fix their Outlook so it stops doing this.

Friday, March 27th, 2015

Help! Excel Shows Columns as Numbers not Letters


What to do when Excel shows Column 1 not Column A

My Excel has been behaving stupidly lately. Instead of Column letters – A, B & C etc, the columns are numbered 1, 2, 3 and so on.

While I haven’t solved the fundamental problem I do have a short term solution. It all has to do with the Excel options. To change the column numbers back to letters chose File (the Office Button in Excel 2007) and choose Options > Formulas and disable the checkbox for R1C1 Reference Style.

On the Mac click Excel > Preferences > General and deselect the Use R1C1 Reference Style checkbox.

This setting kicks Excel back into the correct mode – much more to my taste!

Of course, if you prefer seeing numbers and not letters all you need to do is to click the checkbox and you are good to go!

Monday, June 9th, 2014

Find the Recycle bin in Windows

how to display recycle bin in windows

Help! My Recycle Bin just disappeared!

This is a major annoyance – your Recycle bin just ups and disappears from your Desktop. Well it’s easy to get back – when you know how.

Click the Start button and type Desktop Icons – wait as the search results appear. Click Show or hide common icons on the desktop to open the Desktop Icon Settings dialog.

Here you will find icons for common tools including the Recycle Bin. Click its checkbox to select it and click Ok to return it to the desktop. Notice too that you can add icons for My Computer, Your User Account files, Network and the Control Panel to your desktop  by simply clicking the appropriate checkboxes.


Sunday, April 20th, 2014

Create a new Default Custom Swatch in Illustrator CC

Learn how to quick start a new document with your preferred swatches in place automatically

By default Illustrator starts all new documents with a preset set of swatches in the Swatches palette. If you prefer, you can create your own custom set of default swatches, save them and have them show up when you start a new document. Here’s how:

Create a new document – the size you create it as being will be the default for all documents created based on this profile as will the other settings in the New dialog.

Now choose Window > Swatches and select all the swatches you don’t want and drag them onto the Trashcan icon to delete them.

Add all the swatches you do want to have available to the Swatches palette. If you want some colors to be global colors, select them, click the Swatch Options button and click Global.

You can add any type of swatch at this point including pattern, gradients and solid colors.

Then when you are done, choose File > Save As and save the file to one of these locations depending on your version of Illustrator and  your operating system:

On the Mac save the file to:


~/Library/Application Support/Adobe/Adobe Illustrator 17/en_US/New Document Profiles.

The tilde (~ ) indicates your hidden user library.
You can open it this way:
1 Launch Finder
2 Choose Go > Go to Folder
3 Type ~/Library and click Go
4 This opens the ~/Library folder and you can now navigate to the appropriate folder listed above.

In Windows 7:

First make sure you can see hidden folders and locate this folder (the exact folder structure may vary slightly but it should be pretty easy to find):

C:\Users\AppData\Roaming\Adobe\Illustrator 17 Settings\en_US\x64\New Document Profiles

To locate your c:\users\\AppData folder, launch Windows Explorer and type this in the address bar :
%USERPROFILE%\AppData
This automatically opens the AppData folder for you so you can now navigate to the desired folder as detailed above.

The name you give to your file is the name that the document profile will appear as in future so make it descriptive of the purpose of the document.

Once this is done, you can close the document.

In future you can open a new document based on this profile by choosing File > New and choose the document profile from the Profiles list.

When you do so, your swatches will appear automatically. You can have multiple custom profiles so create them for the tasks you do most often.

Helen Bradley

Helen Bradley

Monday, March 31st, 2014

Create Guides Accurately in Illustrator


image credit ©ezza116, istockphoto.com

Learn to place guides in Illustrator in the position you want them to appear

Sometimes the differences between Illustrator and Photoshop are really annoying. In Photoshop it is simple to place guides in exactly the position you want them to appear but in Illustrator it isn’t easy at all.

I want to create a square document with guides half way vertically and horizontally so, I’ll start with a new document of a fixed and known size such as 1000 x 1000.

Then choose View > Rulers > Show Rulers so you can see the rulers top and left. With the Selection tool selected, click and drag on the ruler and drag a guide into position. You probably won’t be able to get it exact but that’s ok for now. You can go ahead and drag a guide from the other ruler too.

Guides are, by default, locked so you need to unlock them to move them. Choose View > Guides > Lock Guides to disable the check mark. Now you can drag the guide into position. On the Tool options bar you will see values for X and Y. For the vertical guide, X should be half your document width – in my case 500 and for the horizontal guide the Y value should be 500.

If you open the Layer palette you will see that guides are objects in the current layer. This means that you can click on a guide to select it in the Layer palette and use the tools at the top of the screen to align the guide. So, clicking on it and choosing Horizontal Align Center will center the vertical guide and Vertical Align Center will center a Horizontal guide.

Once your guides are in position, choose View > Guides > Lock Guides to lock them so they won’t move. On this same submenu you can hide guides – this locks them when they are unhidden again or clear guides to remove them from the document entirely.


Other handy tricks include being able to create a vertical guide by dragging down from the top ruler  and hold Alt or Option to change if from horizontal to vertical.

You can make new guides (but not existing ones) snap to dividers on the rulers if you hold Shift as you draw them by dragging down from the ruler.
Helen Bradley

Helen Bradley

Page 1 of 212