Tuesday, July 12th, 2011

Structuring a Photoshop workflow with Configurator

In a previous post, I explained how to create panels for Photoshop using Configurator. This time I want to show you a way to structure panels as something more than just a place to put the tools you use most often.

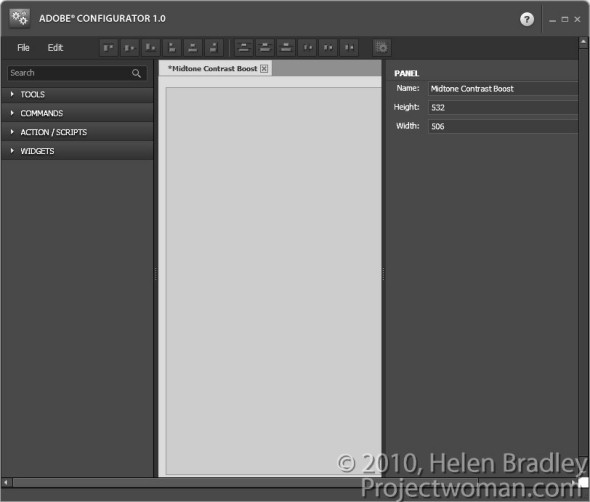
To follow along, you’ll need to download Adobe Configurator 1.0 if you’re using Photoshop CS4 or Adobe Configurator 2.0 if you’re using CS5. You can find both programs for downloading at http://labs.adobe.com/technologies/configurator/. Panels created using Configurator 1.0 only work in Photoshop CS4 so, if you’re using CS5, you must download the new Configurator 2.0.  To get started, launch Configurator and choose File > New Panel to create a new panel.

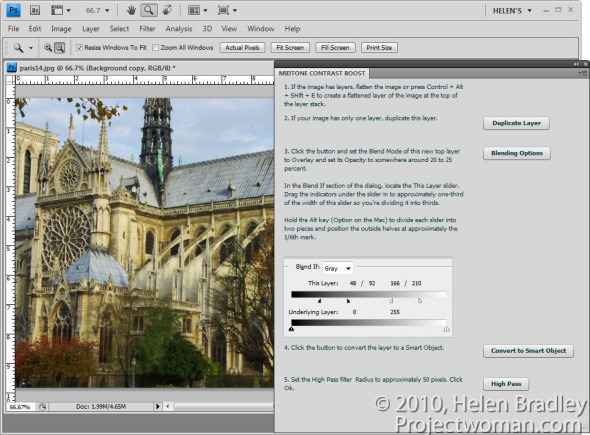
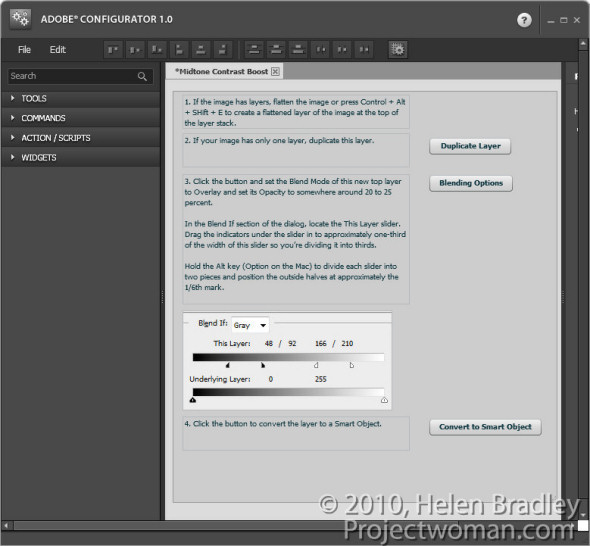
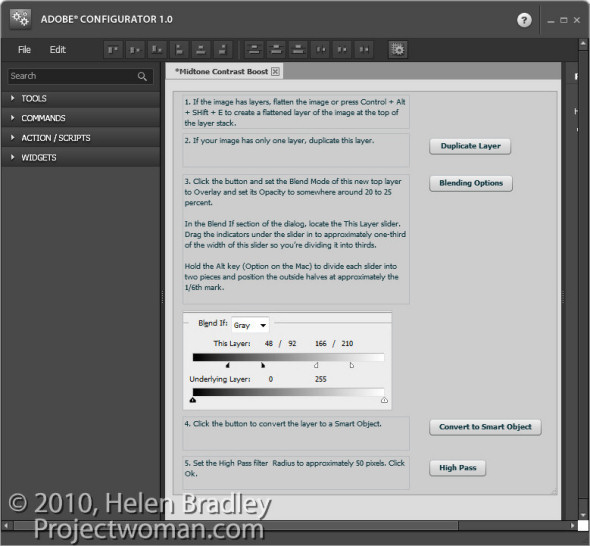
The panel I’ll show you how to create will step you through the process of enhancing midtone contrast in Photoshop that I discussed in a previous blog post. It will contain not only buttons that you press but also text that explains the workflow.  You can get the instructions for your panel from the steps in that post.

1          Set the panel title to read Midtone Contrast Boost and size the panel so it is quite large.

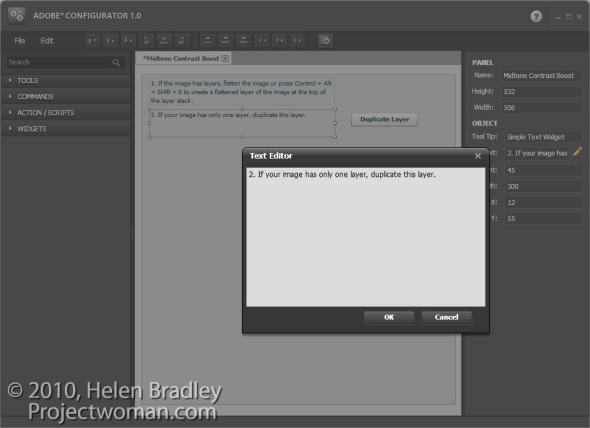
2 The first step in the midtone contrast workflow is to ensure that you have a flattened image or and, if not, you should flatten it. Open the Widgets area in Configurator and double click Simple Text to add a textbox to the panel.

Type number 1 and then the instructions for the first step into the text box.

Add a Simple Text box for the instructions for the second step. If you need to duplicate the background layer then this can be done using a button so add one to the panel by choosing Commands > Layer > New > Duplicate Layer/Group and drag the button onto the panel. Rename this button by typing a new entry in its caption property.

3 Add the instructions for the third step which are to adjust the opacity, blend mode and  blending options for the layer. This can all be done with one command so you can add a button to launch the Layer Style dialog at the Blending Options area. To find this button choose Layer > Layer Style > Blending Options and drag the button into position.

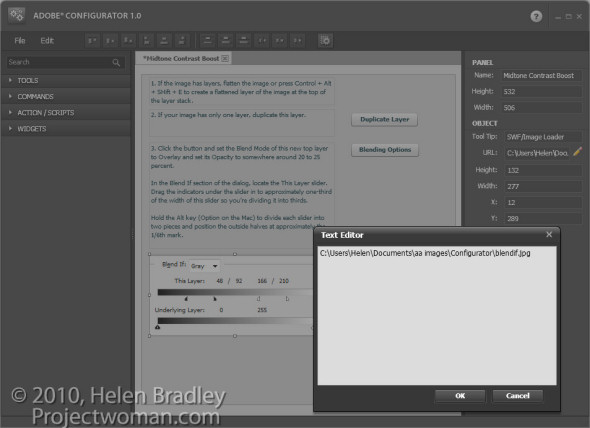
You can also add images to the panel illustrating crucial steps. For example, you could take a screen grab of the Blending Options dialog, crop it to show only the relevant portion of the dialog and save it as a JPG image. Make a note of the image’s width and height in pixels. To add the image to your panel, double click the SWF/Image Loader widget to add it. In the URL box, type the location of the image on your disk. Set the width and height of the Image Loader to match the width and height of the image and position the image in the panel.

4 The next step of the midtones contrast process is to convert the layer to a Smart Object. Add an explanation of this process to your panel and add a button to perform the task by choosing Commands > Layer > Smart Objects > Convert to Smart Object.

5 The next step is again a command, so choose Commands and then Filter > Other > High Pass and drag that command button into the panel. Add a textbox explaining this step.

To line everything up, select each of the textboxes in turn and select an appropriate alignment option from the toolbar.

Once you’ve completed your panel, save the design by choosing File > Save Panel. Saving the design means you can come back at a later date and alter the panel if required.

Export your panel to use in Photoshop by choosing File > Export Panel, select your Panels folder and click Ok.

When you next open Photoshop, you can load your panel by selecting Window > Extensions and click the panel’s name.

Panels like this, which step you through a process, are a handy way to document processes that you want to remember and use. They can also be shared with others as a learning tool.

6 Always test your panel once you have created it to make sure that it works as expected. If it needs to be changed, return to Adobe Configurator, open your saved panel file, make the changes, save it again and then re-export the panel. Back in Photoshop, close the panel and reopen it to get access to the changed form.

Helen Bradley

Saturday, July 9th, 2011

Copyright watermark your images in Lightroom 3

In Lightroom 3 Adobe built watermarking into the Export module (and it is available in the Print, Slideshow and Web modules as well).

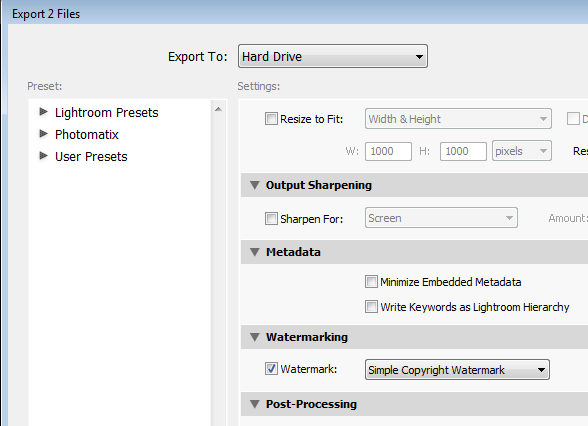
To watermark your images, select one or more images in the Library module, right click and choose Export > Export. In addition to choosing options such as the export location, file name and file type and sizing an image you will find the new watermarking option near the bottom of the dialog.

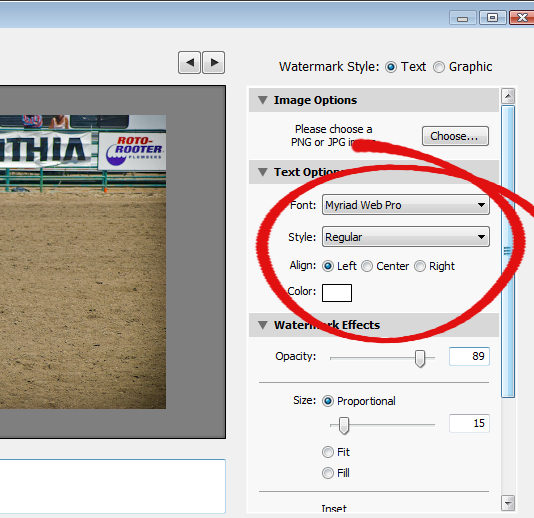
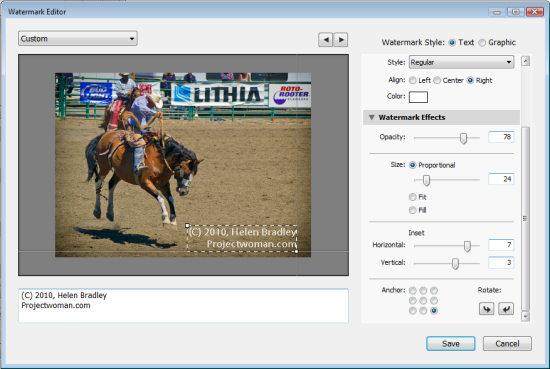
Enable the Watermark checkbox and from the dropdown list, select Edit Watermarks to display a watermark dialog. You can apply a text or a graphic watermark. For a text watermark, click the Text option button, then from the Text Options select your Font and Style.

Alignment controls the text alignment within the small box that it is placed inside so you will use this option if you have multiple lines of text. Color is the text color which you can select from a color picker – unfortunately there is no contrasting shadow added so you have to choose a text color that works on most images.

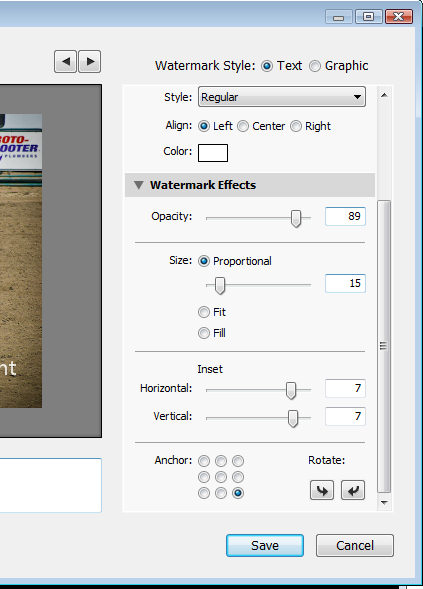
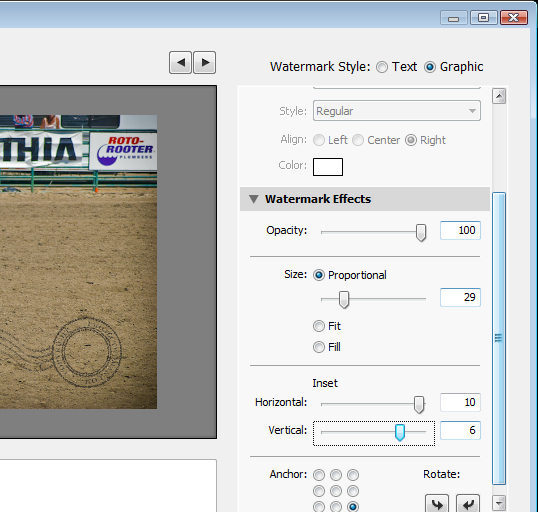
The Opacity setting adjusts the transparency of the copyright text and you can adjust this downwards to blend the copyright text in with the underlying image a little. Select Proportional size, Fit or Fill as desired. For my watermark I selected Proportional which is typically the option you will want to use.

The Anchor options allow you to place the copyright text within one of nine areas on the screen varying from top/left through center and to bottom/left.

Once you’ve selected the Anchor, adjust the Inset values to bring the text in from the vertical and horizontal margins so that it doesn’t sit at the very edge of the image.

You can rotate the text by clicking one of the Rotate options.

On the left of the dialog under your image is a text box with the word “copyright” in it. You can replace this with your own text – to create the copyright symbol type (C).

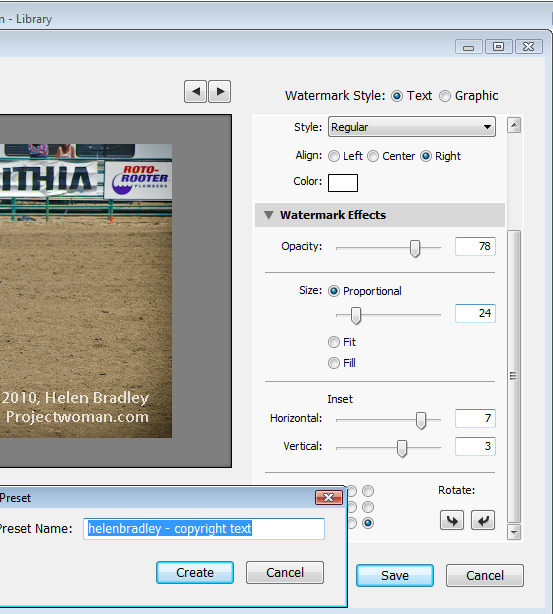
When you’re done, click Save and type a name to save the copyright data as a preset so you can use it again in the Export or any other module that supports watermarking of images.

If you are editing an existing watermark, click the down-pointing arrow in the top left of the dialog where it will show (edited) after the preset name and choose Update Preset or Save Current Settings as a New Preset depending on what you want to do.

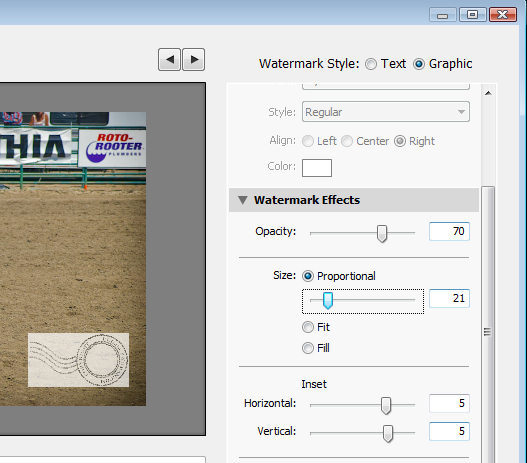
Instead of a text watermark, you can use an image you have created. To do this, enable the Image option at the top of the dialog and click to select the image to use.

A watermark saved as a JPG image will not be transparent so the watermark will appear as a solid rectangle on your image, as shown here.

If you want to have a transparent background around your watermark, create the watermark as a PNG image with transparency in Photoshop or another editor, and import that as your watermark.

When you export your images, your watermark will be automatically added to them.

These same watermark options are also available, for example, in the Flickr Publish Services so you can automatically watermark images as you upload them to your Flickr account.

Helen Bradley

Saturday, July 9th, 2011

Photoshop wizardry – create the Droste ‘frame in a frame’ effect

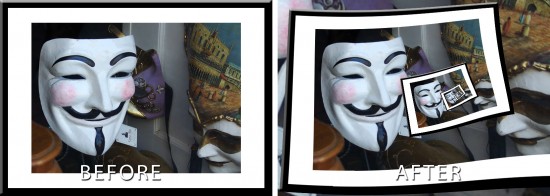
In previous posts I’ve introduced the Pixel Bender extension for Photoshop CS4 and CS5/5.5 and the Droste filter created by Tom Beddard. This post I’ll show you how to create the classic frame in a frame image effect using these tools.

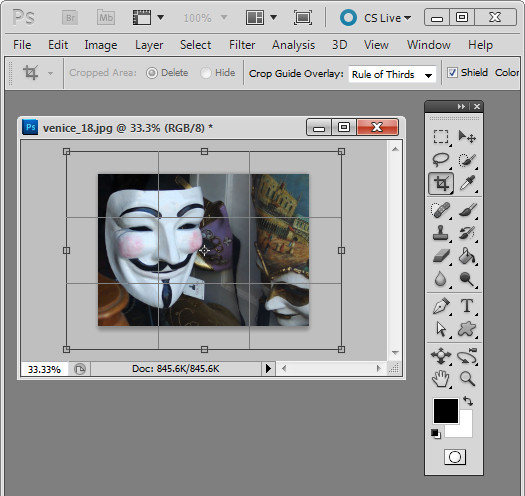
The critical part of this effect is getting the image right before you start. You need a framed image so start by opening an image to use. Add some white canvas around the flattened image by first setting the background color to White. Select the Crop tool and drag over the image. Let go the mouse button and then hold the Shift + Alt (Option) key as you drag outwards on a corner handle to add an extra canvas around the image.

Convert the background layer to a regular layer.

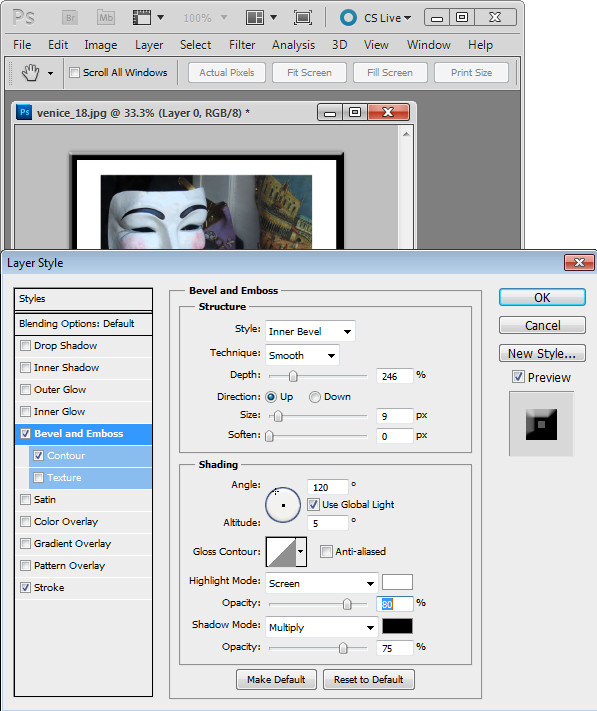
Now add a frame border. I did this using a Layer Style to add a black Stroke to the inside of the image and then I used Bevel and Emboss and Contour to make the frame more dimensional.

Check the image dimensions – they must be below 4096 x 4096 – so size the image down if it is too big. Flatten the image and save it as a .jpg image. Close and reopen the image.

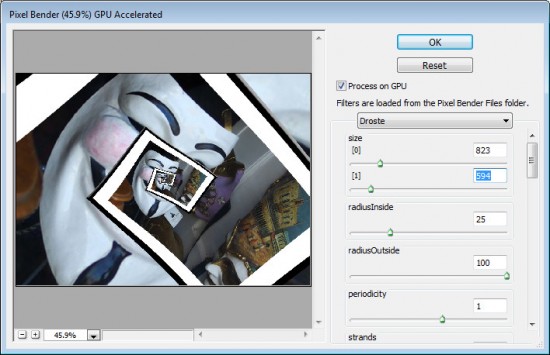
Now launch the Droste filter by choosing Filter > Pixel Bender > Pixel Bender Filter and select Droste.

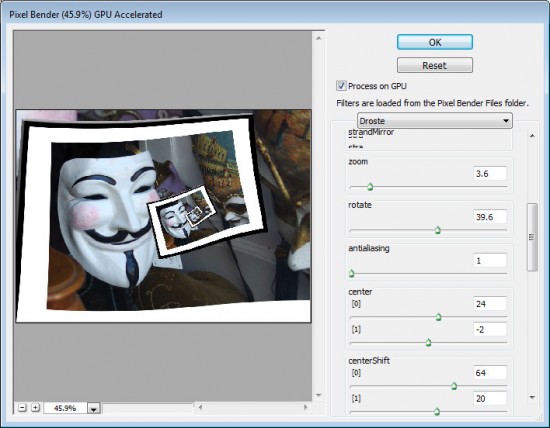
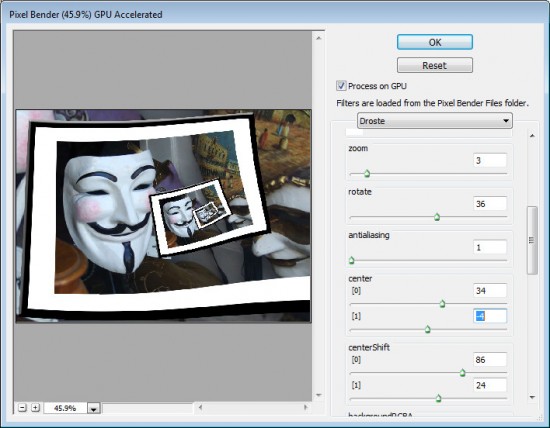
Hold Alt (Option) as you click on the Reset button and then set these values:

Set Size [0] and Size [1] to the dimensions of your image – width and height.

Adjust the CenterShift [0] and [1] values so that the part of the image you are most interested in seeing in the frame is where you want it in the effect – in my case I wanted the mask on the left but you may want the image in the center or on the right.

Adjust the Rotate slider to rotate the image so the frame is aligned as you want it to be. If you want the ‘frame’ to start other than where it appears, use the Zoom slider to move into the image – I did this so the composition would look better.

Adjust the Center [0] and [1] values to adjust the positioning of the effect in the image area.

Adjust the RadiusInside and RadiusOutside values to adjust the size of the image frame effect – in this case I wanted to have the main mask well outside the frame so it would be a focal point.

Finish off by fine tuning the values you have already set to ensure the best result. Click Ok to finish.

Helen Bradley

Wednesday, July 6th, 2011

Dreamweaver – Properties inspector missing buttons

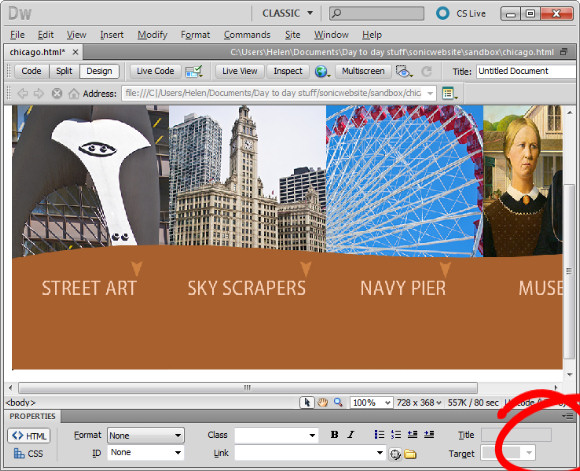
If you’re using Dreamweaver on a large monitor, you may encounter a difficulty with the Properties panel (Inspector) not showing all the icons you expect to see.

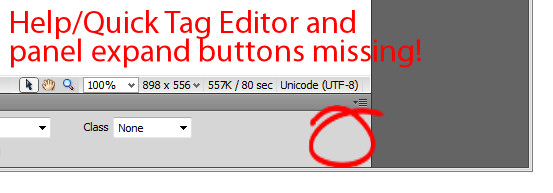
For example, in the image below the Quick Tag Editor, Help button and the Expand button are all missing from the Properties panel.

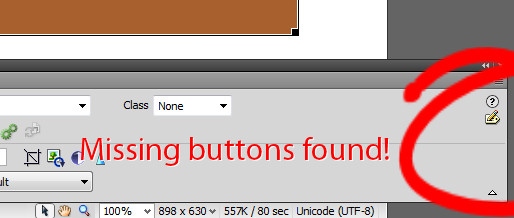
Only when the Dreamweaver window is expanded to a much larger size do these buttons appear.

So, unless you know what is happening you will find that key tools for working in Dreamweaver are missing. If you are creating an image map, for example, not being able to see to click the Expand button means all your Map tools are hidden.

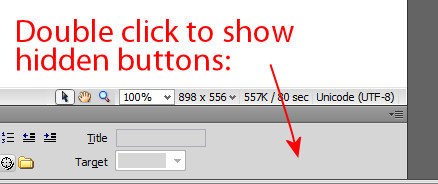
So, if you find the Expand button is missing on your Dreamweaver Properties panel you can do one of three things. Either make the Dreamweaver window very large so that you can see the Expand/Collapse icon or drag the Properties panel free of the Dreamweaver screen so it is no longer docked. As soon as it’s undocked the buttons appear again. Or… and this is a cool trick, double click anywhere in an empty space in the Properties panel and the hidden buttons appear.

Hiding buttons is REALLY ANNOYING behavior particularly when you know there’s an icon or feature that’s supposed to be on the Properties panel and it’s simply not appearing when it should.

Helen Bradley

Friday, July 1st, 2011

Outlook 2010: backup gets worse (if that’s possible)

If you thought Microsoft has, over the years, right royally messed up the process of backing up your Outlook PST files then the situation with Outlook 2010 has only got worse.

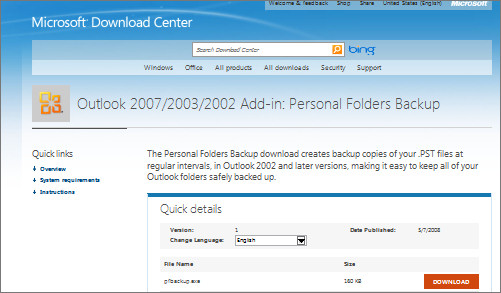
For Outlook 2002, 2003 and 2007 users Microsoft provided a Personal Folders Backup Tool that you could download from http://www.microsoft.com/download/en/details.aspx?displaylang=en&id=9003 which would install a backup routine into Outlook.

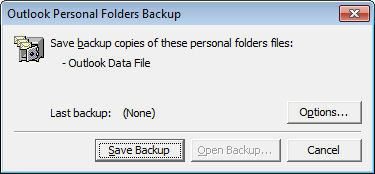
Having done this you could then select File > Backup to backup your PST file.

Over the years of course, this has prompted questions as to why the thing wasn’t built in to Outlook in the first place? It is a stupid and ill-considered omission in my book, but let’s put that aside for now because the problem only gets worse for Outlook 2010 users.

You see the Personal Folders Backup Add-In doesn’t work with Outlook 2010.

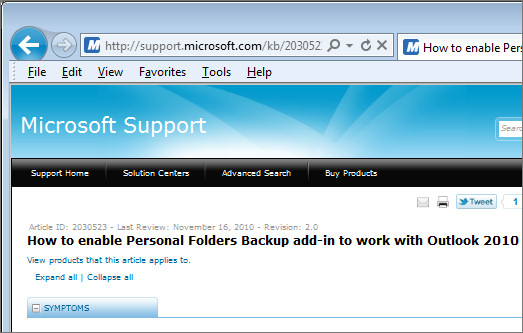
As I say repeatedly it’s Microsoft’s world and we just live in it. Microsoft knows that there’s a problem and explains that the failure of the add-in is due to the new fast shutdown functionality in Outlook. If you visit this website http://support.microsoft.com/kb/2030523 you can click the Fix It For Me link and Microsoft will fix the problem for you.

Don’t even bother asking why there is a problem in the first place. There should be (and it’s inexcusable that there is not)  a backup routine built in to Outlook to make it easy for you to backup your PST file.

Consider this – everything you receive or send via email is in that PST file – and that includes attachments! Lose it and you lose the lot. Worse still, there is a physical limit to its size – beyond around 2GB the thing can become horribly unstable. So you will need to back it up or risk losing it all if your computer crashes or the thing becomes corrupt.

So, if your using Outlook 2010, run (don’t walk) to this site: http://www.microsoft.com/download/en/details.aspx?displaylang=en&id=9003 and download and install the Personal Folders Back up tool for Outlook 2002, 2003 and 2007 (yep! I know you’re using Outlook 2010! Then go to this site: http://support.microsoft.com/kb/2030523 and run the Fix It Tool – you have to have the backup tool installed first.

If you don’t like clicking Fix It buttons then there’s a detailed explanation in that same Knowledge Base article explaining how to fix the problem manually – basically it’s a fairly simple registry fix.

Helen Bradley