Tuesday, October 16th, 2012

Install Picture Package in Photoshop CS6 – step by step

How to install Picture package into Photoshop CS6

Yes! It can be done! Don’t let anyone tell you it can’t.

Ok, so if you read some of the information that’s available on the web you’ll be lead to believe that, in Photoshop CS6 the Picture Package feature has at last been permanently removed from Photoshop and only the Contact Sheet feature is available.

You’ll also read that the Picture Package is not a supported plug-in. Well, it might not be supported but that doesn’t mean it doesn’t work. If you are a Windows user then it does work – in fact it works just fine. And thanks to J. J. Mack’s research here, step by step is how to put the Picture Package back in Photoshop CS6 for Windows.

Step 1

Download the Picture Package and Contact Sheet add-in for Photoshop CS5 from this location: http://www.adobe.com/support/downloads/detail.jsp?ftpID=4688. It is part of the Optional Plugins collection.

Step 2

Once you’ve downloaded the plug-in zip file, open it up because what you want is two parts of it. You want the appropriate ContactSheetII.8LI file and the layouts.

install picture package add in into Photoshop CS6

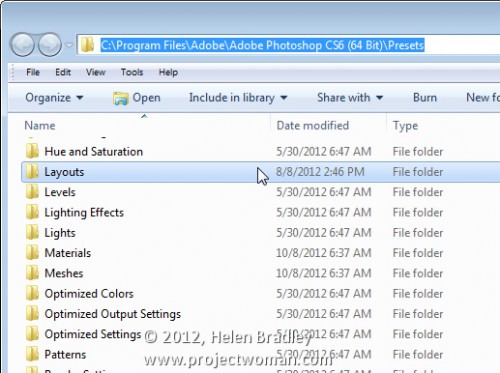
So, once you’ve unzipped the file use Windows Explorer to locate your Adobe folder – you will need the C:\Program Files\Adobe\Adobe Photoshop CS6 <64 bit or 32 bit>\Presets folder. Depending on whether you are using the 32 or 64 bit version of Photoshop, you will need to locate the correct folder. On my machine, I am using the 64 bit version of Photoshop so the folder is: C:\Program Files\Adobe\Adobe Photoshop CS6 (64 Bit)\Presets.

Put the folder of Layouts that were in the zip file into this folder – so you will now have a Presets\Layouts folder with a set of layouts in it.

Step 3

Locate your Adobe Photoshop \Required\Plug-Ins\Automate folder – the Required folder is at the same level as your Presets folder so, on my computer it is here:

C:\Program Files\Adobe\Adobe Photoshop CS6 (64 Bit)\Required\Plug-Ins\Automate

Into this folder copy the ContactSheetII.8LI file from the zip download.

Step 4

Once you’ve done this simply close and restart Photoshop.

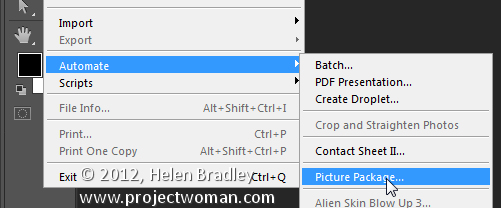
Choose File > Automate and you’ll see the Picture Package option.

You’ll also find that you have two Contact SheetII entries – you want to use the second one of these as this is the one that is installed with Photoshop CS6.


If desired you can use the Edit Menus feature to remove the unwanted entry from the Automate menu to make things neat and tidy.

Step 5

To run the Picture Package plug-in in Photoshop CS6, choose File > Automate > Picture Package. You can now proceed as you did with earlier versions. You can edit layouts, open layouts, you can click on an image to add it, you can go and add a file to the layout and basically do anything that you used to do with the Picture Package in any earlier version of Photoshop.

So when someone tries to tell you that Picture Package is not available in Photoshop CS6 feel free to send them here to prove that it can be done.

Helen Bradley

Wednesday, July 25th, 2012

Moo comes to Lightroom

Yeah! The folks at Moo have released a Lightroom plug in that makes it easier than ever to get photos to Moo.

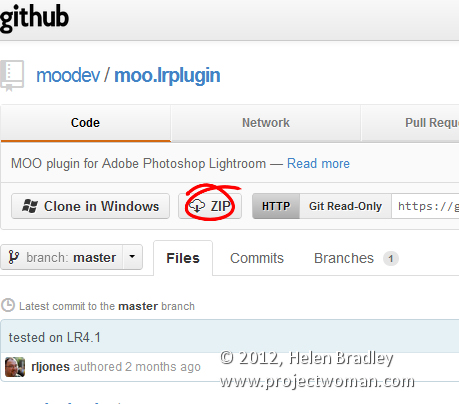
Visit this page and grab the zip file – click the Zip button to get it.

Unzip the contents and rename the folder moo.lrplugin

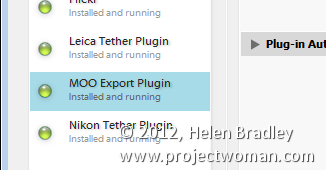
Then launch Lightroom and choose File > Plug-in Manager and grab the plug in folder. That’s all you need to do. It will be installed and ready to be used.

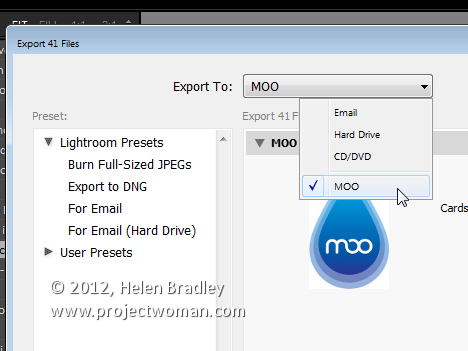
Just select the images to send to Moo, choose Export and select the Moo Export Plug-in from the Lightroom Presets in the Export dialog.

Helen Bradley

Saturday, March 10th, 2012

Pixel Bender Droste Filter video tutorial

I work for Practical Photoshop mag in the UK which is a totally cool job. One of the projects I did recently is creating a spiral image using the Droste filter for the Pixel Bender extension for Photoshop CS4 & CS5 – try saying that quickly 5 times!

The guys at the mag – Ben and James have added my video tutorial to the magazine’s YouTube channel. Here is the video in all its glory and I highly recommend you subscribe to the channel there are some terrific tutorials there (if I say so myself!):

Helen Bradley

Saturday, July 9th, 2011

Photoshop wizardry – create the Droste ‘frame in a frame’ effect

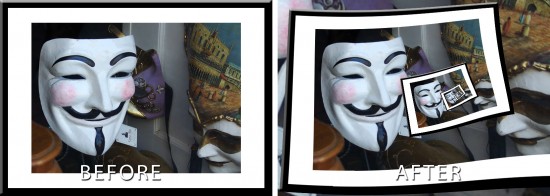
In previous posts I’ve introduced the Pixel Bender extension for Photoshop CS4 and CS5/5.5 and the Droste filter created by Tom Beddard. This post I’ll show you how to create the classic frame in a frame image effect using these tools.

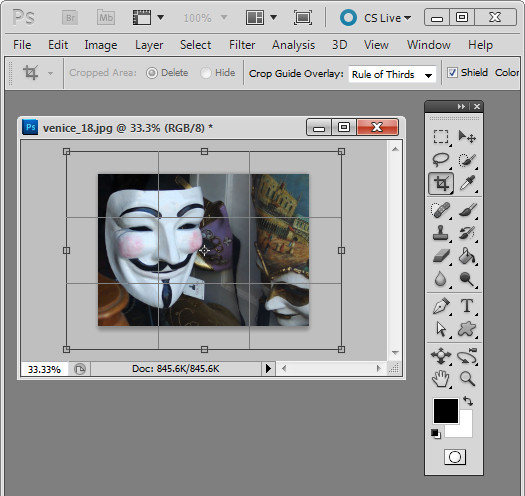
The critical part of this effect is getting the image right before you start. You need a framed image so start by opening an image to use. Add some white canvas around the flattened image by first setting the background color to White. Select the Crop tool and drag over the image. Let go the mouse button and then hold the Shift + Alt (Option) key as you drag outwards on a corner handle to add an extra canvas around the image.

Convert the background layer to a regular layer.

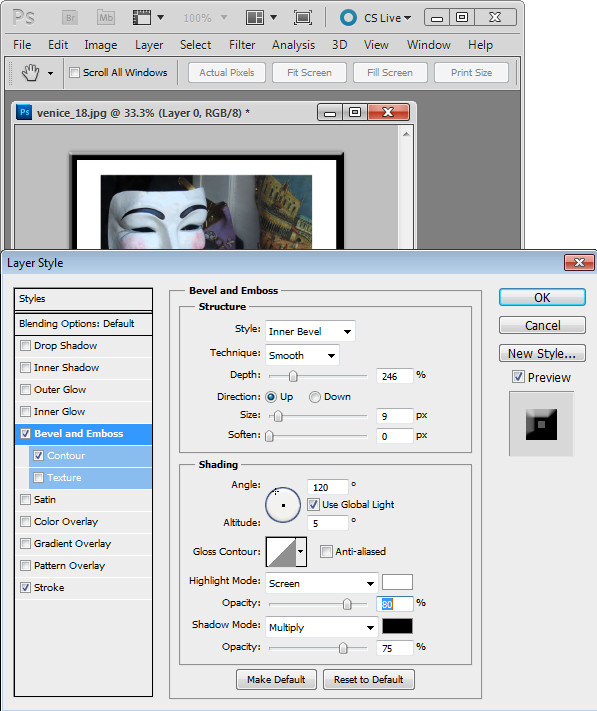
Now add a frame border. I did this using a Layer Style to add a black Stroke to the inside of the image and then I used Bevel and Emboss and Contour to make the frame more dimensional.

Check the image dimensions – they must be below 4096 x 4096 – so size the image down if it is too big. Flatten the image and save it as a .jpg image. Close and reopen the image.

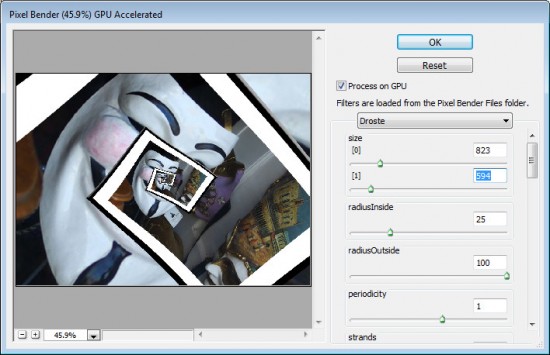
Now launch the Droste filter by choosing Filter > Pixel Bender > Pixel Bender Filter and select Droste.

Hold Alt (Option) as you click on the Reset button and then set these values:

Set Size [0] and Size [1] to the dimensions of your image – width and height.

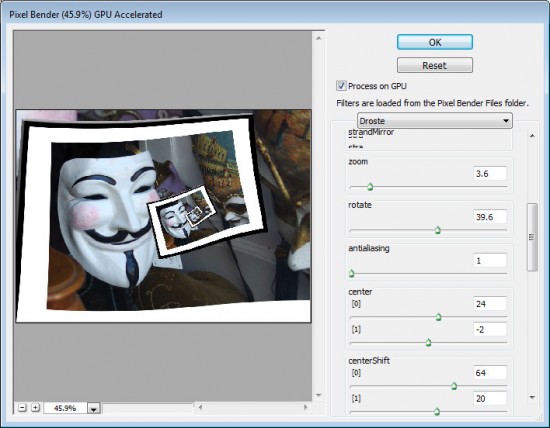
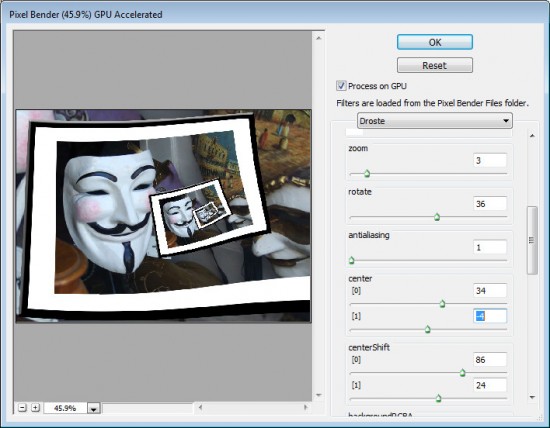
Adjust the CenterShift [0] and [1] values so that the part of the image you are most interested in seeing in the frame is where you want it in the effect – in my case I wanted the mask on the left but you may want the image in the center or on the right.

Adjust the Rotate slider to rotate the image so the frame is aligned as you want it to be. If you want the ‘frame’ to start other than where it appears, use the Zoom slider to move into the image – I did this so the composition would look better.

Adjust the Center [0] and [1] values to adjust the positioning of the effect in the image area.

Adjust the RadiusInside and RadiusOutside values to adjust the size of the image frame effect – in this case I wanted to have the main mask well outside the frame so it would be a focal point.

Finish off by fine tuning the values you have already set to ensure the best result. Click Ok to finish.

Helen Bradley

Sunday, June 5th, 2011

Install and use the Droste Filter in Photoshop CS4, CS5 & CS5.5

I an earlier blog post I introduced Pixel Bender a new extension for Photoshop CS4 and CS5 from Adobe Labs. In this month’s tutorial I’ll show you a great filter which lets you create a Droste effect with an image. The filter is free to download and once it is installed you can apply it from inside Pixel Bender. It was created by Tom Beddard who is author of a lot of really wonderful filters – you can see more of them here: http://www.adobe.com/cfusion/exchange/index.cfm?event=authorExtensions&authorid=14858639

The Droste effect is an image effect named after a Dutch cocoa company called Droste. In 1904 it produced packaging for its cocoa product showing a woman carrying a tray with a box of cocoa and a cup on it. A small version of the package appeared on the cocoa box on the tray and so on – each version of the image being successively smaller than the last.

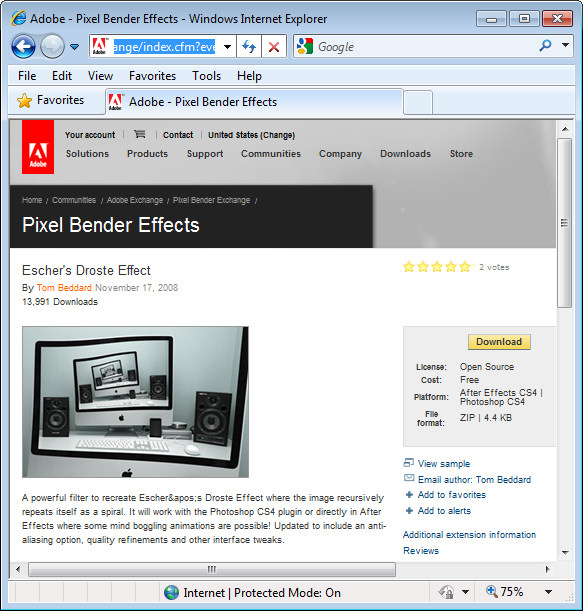
To create the Droste effect you must first have Pixel Bender installed so, if you don’t, visit my earlier post to learn where to find it and how to install it. Then, you’ll need to download the Droste filter from: http://tinyurl.com/pbdroste.

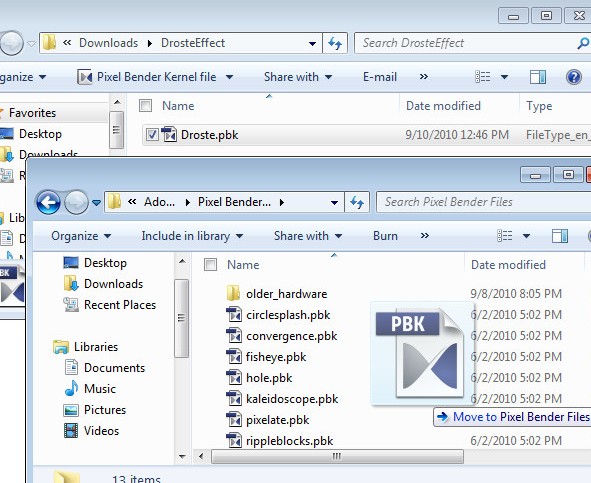
Unzip the folder and copy the .pbk file to your Program Files\Adobe\Adobe Photoshop CS5\Pixel Bender Files folder. Restart Photoshop and the Droste filter will be in place.


Start with an image that is square with some element of interest centered in the middle of the image. I chose a flower against a neutral background – start with something simple as you learn how the filter works – then plan to use a more complicated image later on.

Make a note of the size of the image by choosing Image > Image Size and write down the image width and height.

There is a physical limit to the file size of images you can use with Pixel Bender which is 4096 x 4096 so make sure your image is smaller than this. Even smaller images render faster.

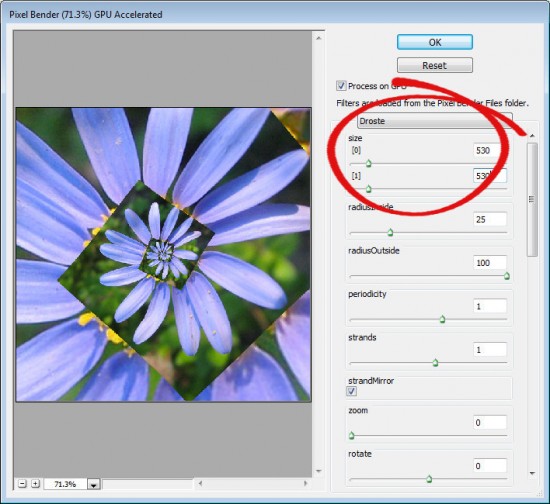
To run the filter, choose Filter > Pixel Bender > Pixel Bender Gallery and select Droste from the dropdown list. If you have used the filter previously, hold Alt (Option on the Mac) and click on the Reset button to reset the filter settings.

Set the Size [0] and Size [1] sliders to match the width and height of your image – my image is 530 x 530 pixels.

By default, you should see a typical Droste file image with straight edges.


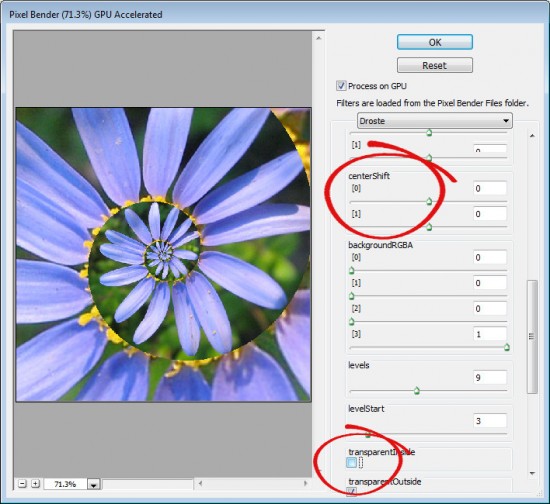
To turn the straight edges into a curved spiral, deselect the TransparentInside checkbox.

If the image is off center, the spiral will look askew at this point. To change the center point of the image and align it with the center of the spiral, adjust the centerShift [0] and [1] sliders – each of these operates in a different dimension. Adjust the center of the image until the spiral looks correct.

To adjust the center of the image itself, use the Center [0] and [1] sliders.

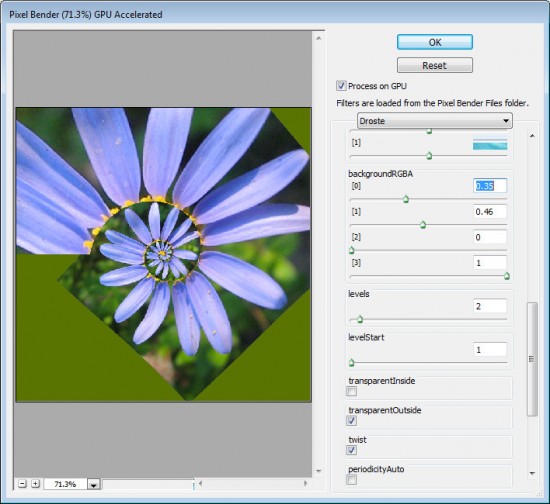
If you do not have an image spiral that completely fills the image area you will see some black background color outside the spiral. You can control the color used for this background by setting the BackgroundRGBA values. The [0] setting controls the Red value, [1] controls Green, [2] controls Blue and [3] controls the opacity of the background. The default is that all sliders are set to 0 and the Opacity slider to 1 which gives the black color. You can view the current background by setting Levels to 2 and the LevelsStart value to 1. Then create your own background color and, when you’re done, increase the Levels value to back up again to around 7.

To make the spiral tighter or looser, adjust the RadiusInside value. Set it to a very small value to get a small number of loops and to something like 50 to get one with lots of loops. The default setting is 25.

Decreasing the OutsideRadius twists the spiral more tightly. The default value of 100 makes the spiral looser.

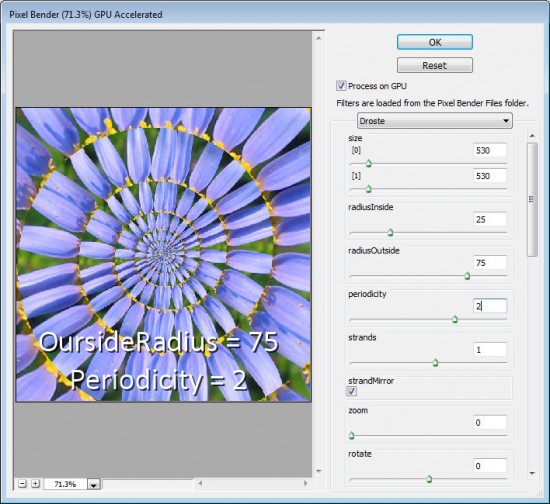
Periodicity is the number of times the image repeats in each loop of the spiral. If you set this to 2 the image will be repeated twice per spiral – the Default value is 1.

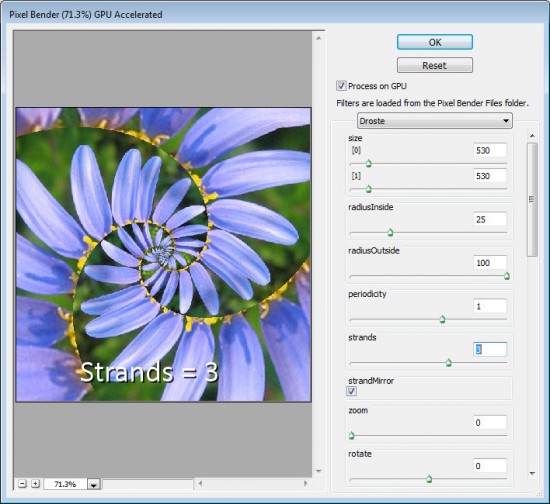
The Strands value sets the number of loops in the spiral. If you set this to 2 you will have two interlocking spirals and if you set it to three you’ll get three strands/spirals  and so on.

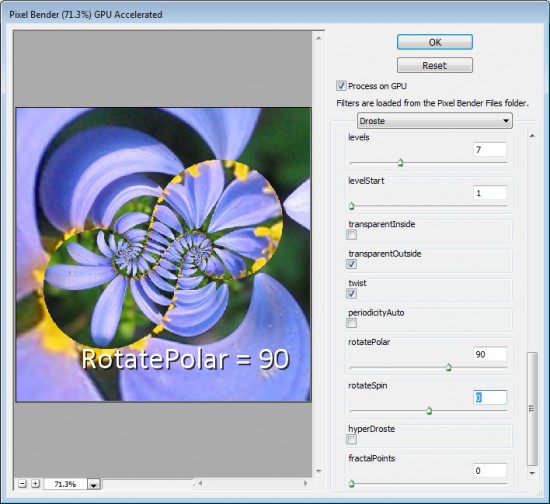
Other interesting effects include using the RotatePolar value. By setting it to, 90 as shown here you will get different spiral loops on the screen. Having done this, you can then select RotateSpin to adjust the effect.

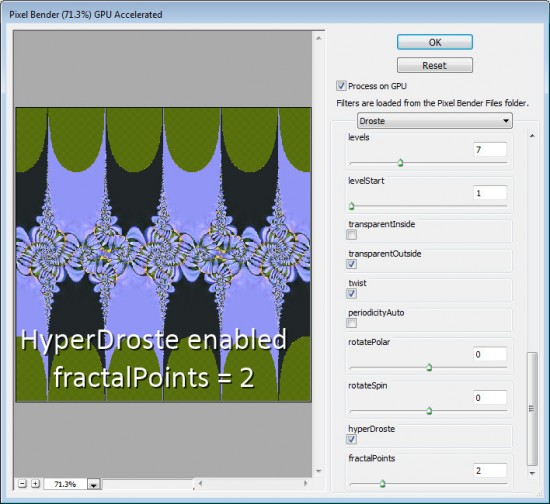
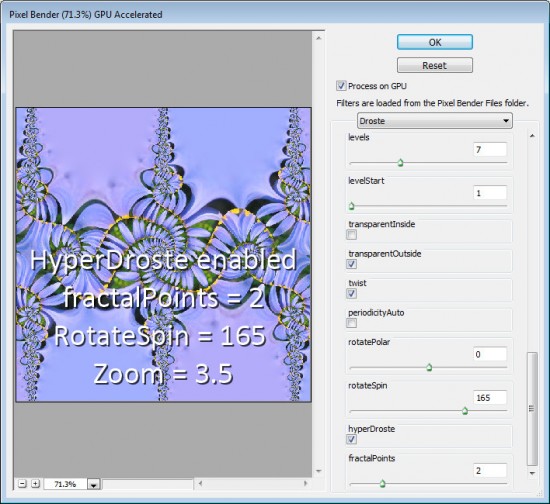
If you enable HyperDroste then adjust the FractalPoints value, you will create an image that is reminiscent of a fractal style image.

If desired adjust the Zoom value to zoom into the design.

Use RotateSpin and RotatePolar with FractalPoints and HyperDroste to fine tune the effect.

When you have a design you like, click Ok button to apply the Droste effect to your image.

Once you know how the controls in the Droste filter work you’re ready to apply it to a more complex image.

To get best results, start with a square image with something of interest in the center and make sure to set the image dimensions in the filter before working with the other sliders.


Helen Bradley

Sunday, June 20th, 2010

Lightroom to Flickr

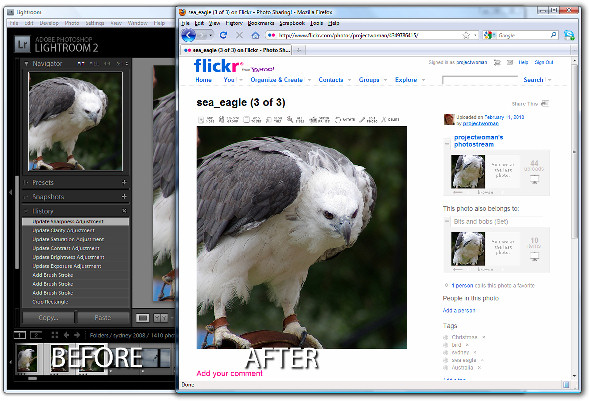
If you’re a keen photographer, chances are that you publish some of your photos to Flickr for sharing with friends and family. One of the disadvantages of Lightroom 2 is that it does not come with a built in tool for publishing direct to Flickr although this has been addressed in Lightroom 3 which does offer this ability.

There are, however, tools like Jeffrey Friedl’s Lightroom plug-in that you can use to do the job. Here’s how it works:

Step 1

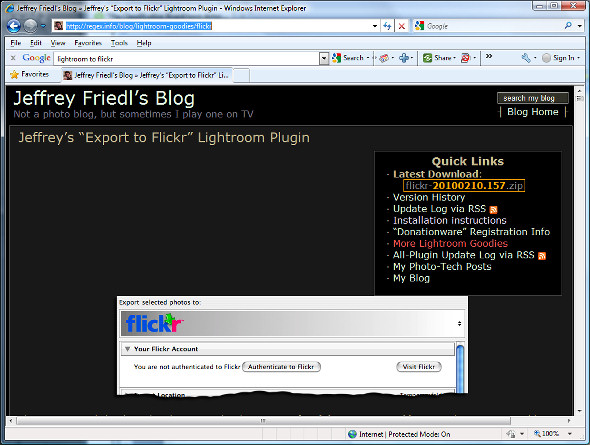
To download the tool, visit http://regex.info/blog/lightroom-goodies/flickr and locate the tool for your version of Lightroom. There are different downloads for Lightroom 1 and Lightroom 2 so get the right one.

Step 2

Download the zip file which, if you are using Lightroom 2 is via a link in the top right hand corner of the screen.

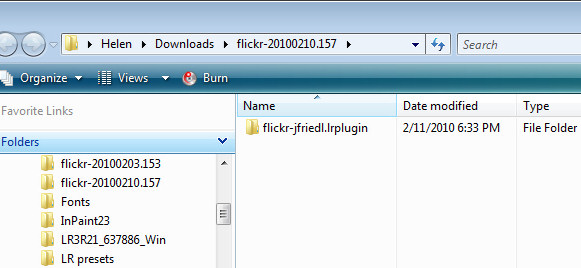
Unzip the downloaded file and, when you do, you will see a .LRPlugin folder inside the zip file.

You need the entire contents of this folder so drag and drop the entire folder from your Downloads folder into the place where you plan to keep it long term.

Lightroom isn’t fussy about where you place your plug-ins but it makes good sense to place them all in a central location where it is easy for you to find them. I suggest you place it nearby your Lightroom folder or in your Documents folder where it will be included in your regular system backup.

Step 3

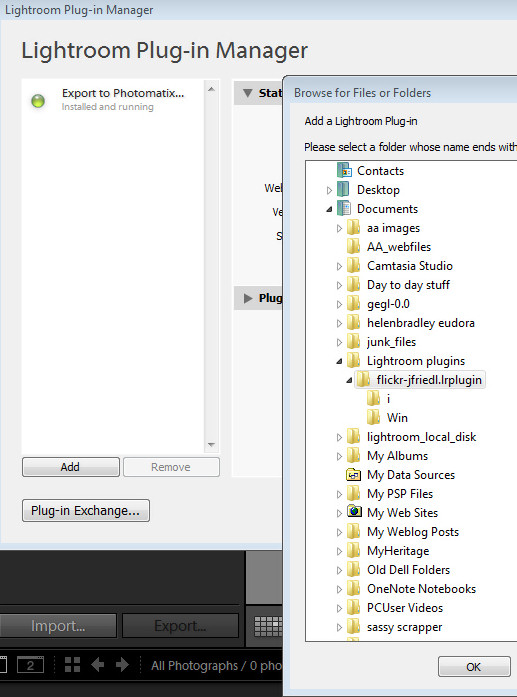
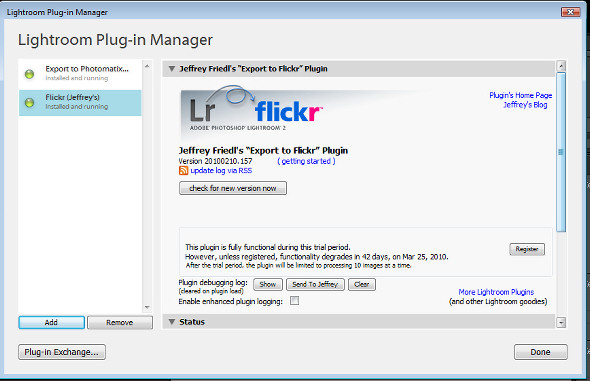
Now return to Lightroom and choose File > Plug-in Manager. This opens the Plug-in Manager dialog where you install your Lightroom plug-ins. Click Add and navigate to the folder that you stored the .lrplugin folder. Click the folder to select it and click Ok.

Click Update if prompted to update your catalog to support the plug-in. A dialog will appear with more instructions in it. Read the information and click Ok when you are done.
Step 4

The Plug-in will be listed in the plug-in list so click Done to exit the dialog.

Step 5

Now select a few images to upload to Flickr. Right click one of the selected images and choose Export > Export.

At the very top of the dialog you will see the Files on disk heading, click this panel and locate the Flickr (Jeffrey’s) option in the list.

Go ahead and (ignoring the Export Location settings) complete the other areas of the Export dialog as you would for any export task.

Pay particular attention to the file names, file format and quality because, when you click to Export the files they are sent direct to Flickr.

If you plan to resize the images select the Image Sizing options and choose the desired option.

Step 6

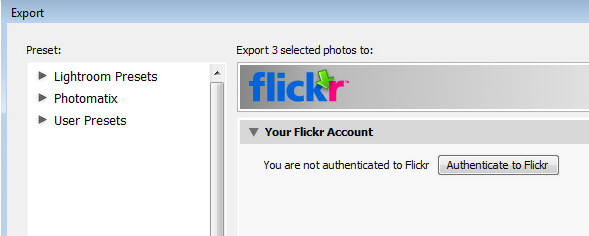
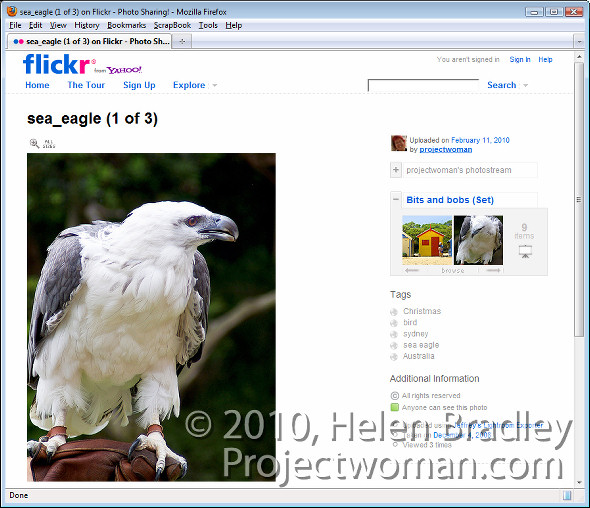
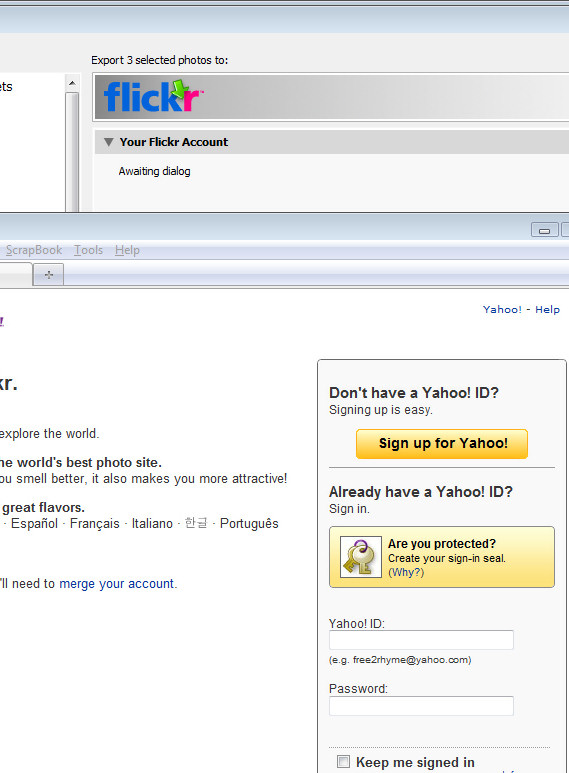
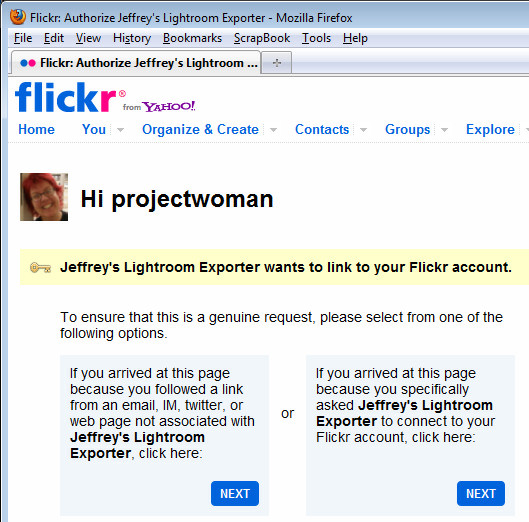
Click the Authenticate to Flickr button at the top of the dialog. You only need do this the first time you upload images. Your browser will open and you should sign in using your Flickr log-in and password.

Step 7

When prompted, click the second Next button to authenticate the connection then click Ok, I’ll authorize it if you are happy with the conditions displayed.

Once you have done this, close your browser, return to Lightroom and click the I’ve authenticated at Flickr.com button to confirm you have done so.

Step 8

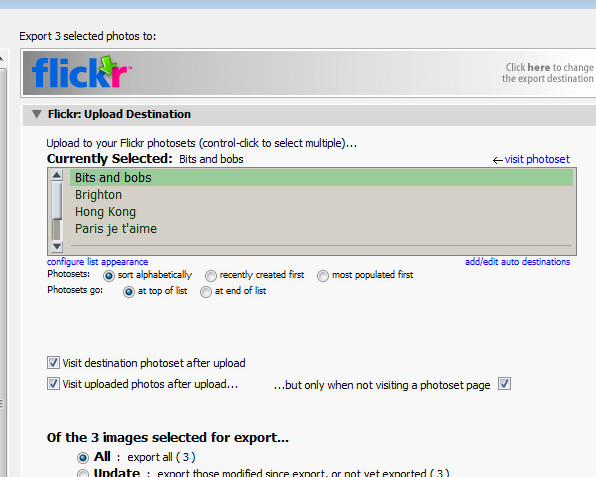
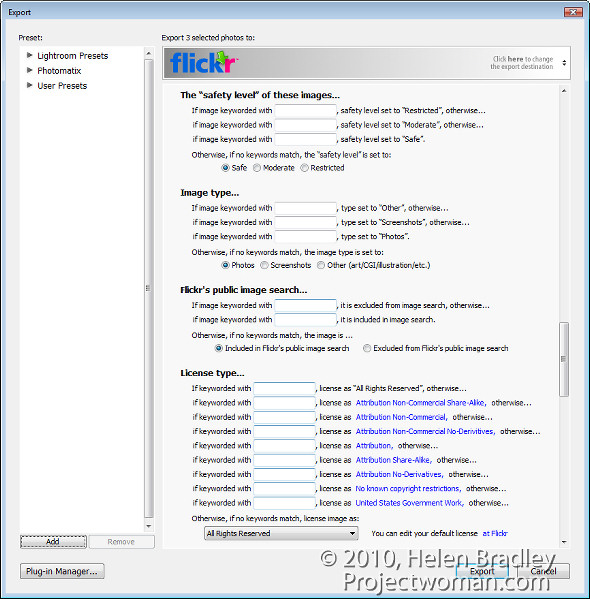
Once you are authenticated, additional options are available in the Export dialog. You can, for example, select the photosets for the images and ask to view the Flickr photoset when uploading is complete.
Step 9

You can also set Licence types for the images, add keywords and configure a range of options for uploading.
Step 10

When you are done, click the Export button to export your images to Flickr.

This Lightroom plug-in is, what is called, donation ware. It is functional for six week and then you’re asked to register and make a donation one cent is the minimum PayPal fee. If you don’t register then functionality is reduced to uploading ten images at a time.

This plug-in works well and, until you upgrade to Lightroom 3 it is a smart addition to your Lightroom toolkit. For my money it makes the upload process seamless. And, because it saves me an entire step by rolling Export from Lightroom and upload to Flickr into a single step it represents the difference between things being left on my to do list and tasks getting a big black line drawn through them – and I like that!

Helen Bradley