Saturday, December 29th, 2012

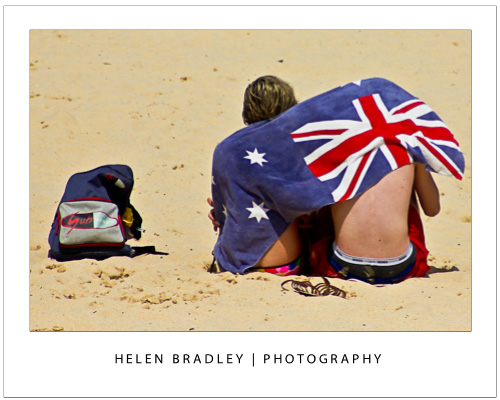
Photography tip of the day – Hand holding a lens

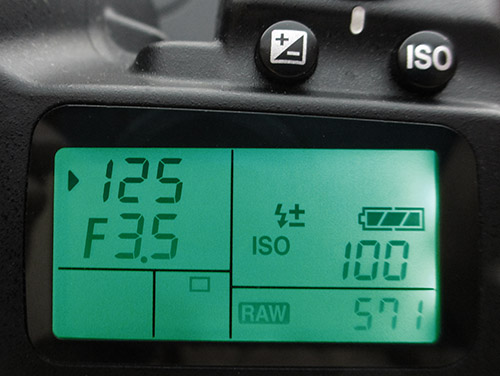
This simple calculation shows how slow you can shoot and still hand hold your lens

There are some simple calculations you can make to determine the optimal length of time you can hand hold a lens for.

This is important information to know because managing a 70-200mm lens at 70mm is very different to managing it at 200mm. Increasing the zoom reduces the length of time you can handhold the lens because any movement in the lens will be exaggerated at full zoom.

The rule of thumb for calculating the length of time to handhold a lens is to take the inverse of the focal length. So, with a 70-200mm lens at full zoom the calculation gives you a handhold time of 1/200 sec, at 70mm  it is 1/70 sec.

For a 70-300mm lens at full zoom, your limit is around 1/300 sec.

You can improve these times with Image Stabilization or anti shake features if they are built into your lens or camera but these values give you a rough guide to help you avoid capturing blurry photos.

Helen Bradley

Friday, December 28th, 2012

Why would you do that (Microsoft?)

Ok, I really really like the new Office 2013 suite. But there are always some things you don’t like and this one is a biggie. It is in Word 2013 and it’s not like I don’t like an added feature it is that Microsoft removed a feature I love and that I use every day.

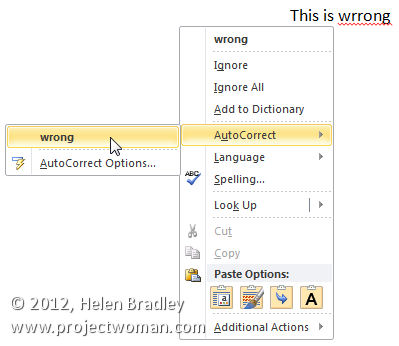
What is gone is the right click auto correct from the shortcut menu. In earlier versions of Word when you saw a spelling mistake indicated by a wiggly red line under a word you could right click and choose AutoCorrect and then select the correct spelling of the word. Word would then add this misspelling and the correction to its AutoCorrect list so that, in future, whenever you typed the word incorrectly Word would automatically fix it for you.

This right click feature has been removed from Word 2013 – Why? Who knows? It has to go down as one of the stupidest things that Microsoft has done – really there is no reasonable explanation for this feature being removed. It is totally frustrating not to have this feature on the right click menu.

If you need to use this feature you’ll need to make your own AutoCorrect list entry by choosing File > Options > Proofing > AutoCorrect options and enter the misspelling in the Replace list and the correct spelling in the With list. This is extremely inconvenient but it’s how Word 2013 now works – go figure! Thanks for the AutoCorrect love Microsoft – Not..

Helen Bradley

Monday, December 24th, 2012

Strip tags from code in Dreamweaver CS5 & CS6

Ok, confession time. Some of my websites still use FrontPage 2003 for the code. It isn’t pretty but it is one of those things that work and, if it isn’t broken, I don’t generally fix it.

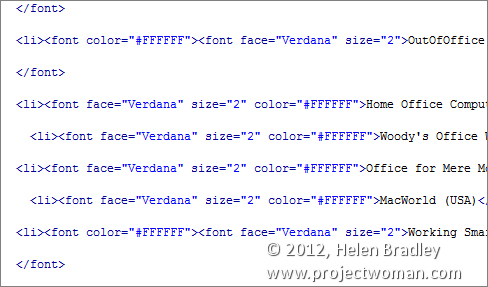
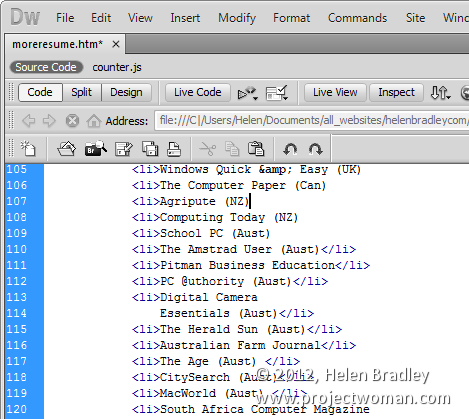
However today I headed over to helenbradley.com to give it a once over.  The problem was that I had seen in my stats that the PR company for a major software provider had trawled my site recently and when I looked at what they checked out I realized how out of date it all was.  So it was time for an update. Instead of FrontPage I grabbed all  the existing HTML and opened the  pages in Dreamweaver and let out one very big groan. They were full of font tags – nearly every piece of text had a font face, size and color associated with it.

The obvious solution was to make a site wide .css file and put all the formatting in there. Well that is dead easy but what about all the garbage in my code – how to get rid of that? The last thing I wanted to do was to select and delete it all one code at a time.

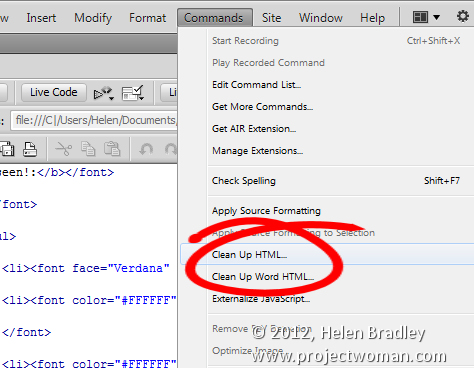
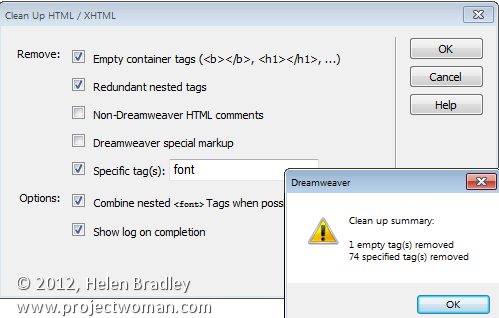
Turns out that Adobe had already thought of that and there is a command you can select to strip code. I chose Commands > Clean Up HTML and then selected the code to clean up.

As my code had too many Font codes in it I chose to specifically remove all of them too.

One  click and all the mess was gone leaving me with the content stripped of its formatting.

I created some CSS styles for the text formats to use in the external .css file, attached it to each page, applied the styles  to the text and  it was all fixed, tested and up.

Now that site is  officially FrontPage 2003 free and working just fine in  Dreamweaver. I have one more site to bring across and then I can say farewell to FrontPage!


Helen Bradley

Saturday, December 22nd, 2012

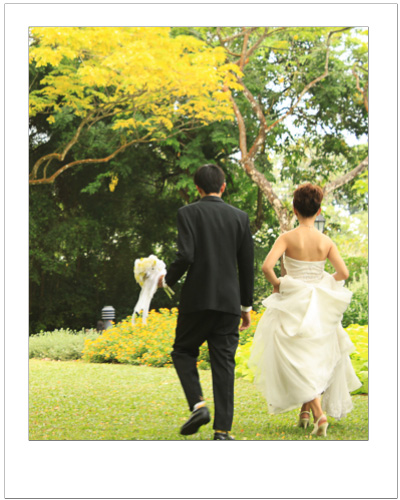
Wedding Photography – How to

 photo credit: arki www.sxc.hu

Here’s what to do when a friend asks you to photograph their wedding.

If you’re even a passable photographer, chances are that one day, someone will ask you to photograph their wedding. Before you take the plunge, here are some things to think about when shooting a big event like a wedding.

The demands of wedding photography

Photographing a wedding is different to just about any other photography you’ll do. You only get one chance at it and you run the risk of severely disappointing everyone if you don’t pull it off.
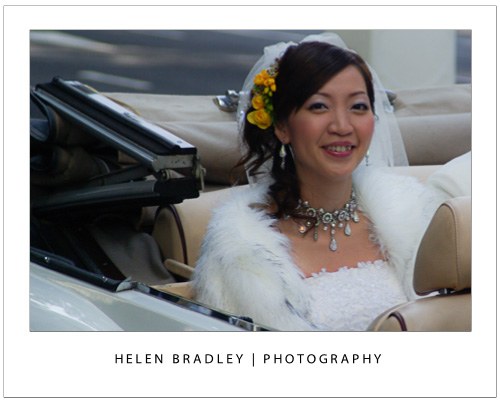
Wedding photography is a job that professional photographers charge a lot of money to do and, for good reason. So, it’s not a task you should take on lightly – if you really don’t feel up to the task say no rather than doing a bad job of it.

However, that said, it can be a rewarding experience if you get it right. And the key to getting it right is preparing well and having a well thought out and practiced plan.

Scoping the job

Talk to the bride and groom well before the wedding. Ask how many photographers there will be, if there are a few, determine who will be responsible for what so you aren’t tripping over each other on the day and missing out on key shots because you thought someone else was taking them.
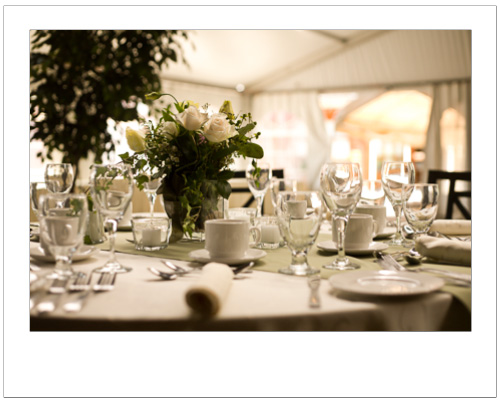
photo credit: Mike Clarke
Wedding photography involves photographing everything from reception guests to decorated tables.

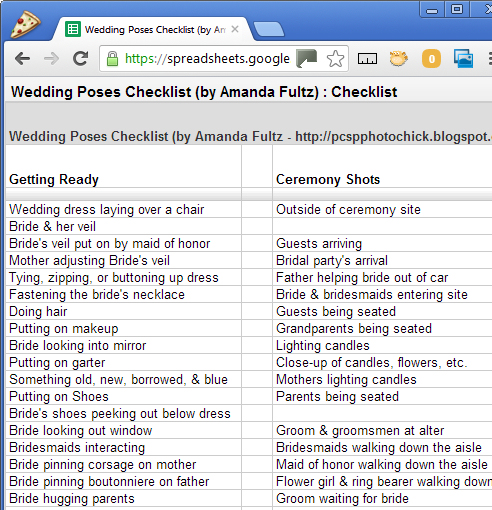
Make a list of the photographs that the couple want taken. Have a detailed checklist printed up with the images they want you to capture. If you order this in the approximate order of the ceremony and reception it will be easier to make sure you get everything you need.

There are some good web sites that have information on wedding photo lists including this one: http://spreadsheets.google.com/pub?key=ppuF_0dv6H8zTjdPjs4D4MQ
Enlist the help of a skilled assistant. You need someone to help you organise group pictures and run around getting batteries and holding things for you. Your assistant can also double check to make sure you don’t miss any photos on your list.

Before the wedding visit the locations that will be used such as the church and the venue for the reception. Check these at around the same time of the day as the wedding will take place so you can get an idea as to what lighting will be available.
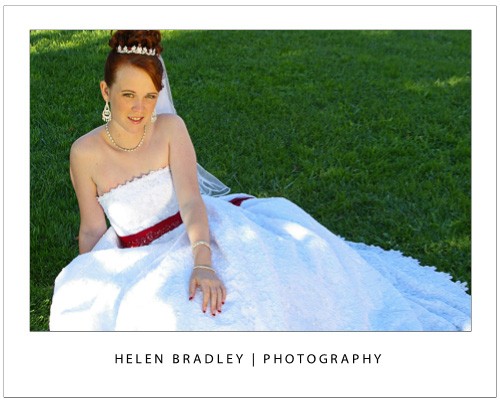
Finding a location in the shade saves the effort of having to diffuse the sunlight when it is very bright.

If possible, place your assistant where the bride and groom will stand and shoot some sample images to check the lighting and your camera settings.
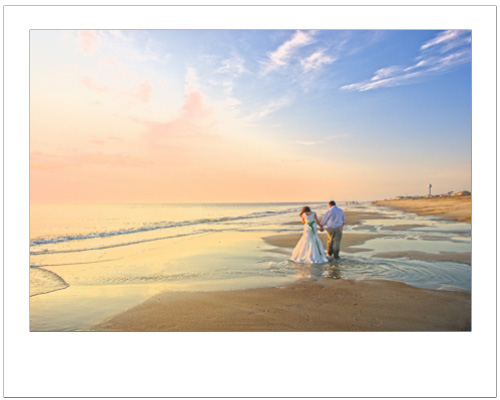
Photo credit: theswedish www.sxc.hu

Also check locations inside the church and the reception venue where you can take photos, particularly places with clean or interesting backgrounds. If you can’t find clean backgrounds to work with, plan to use a wide aperture lens so the background won’t be in focus.

If you’re not able to use a flash such as in a church, you will need to use a fast lens and you will need to know how to use it before the day. If you don’t have a lens, consider borrowing or renting one but test it thoroughly before the big day.

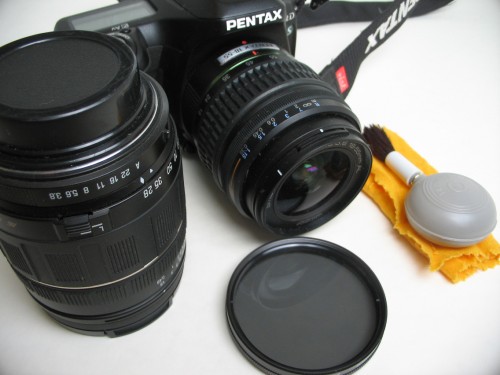
You need to be very familiar with how it performs and how to configure it for best results. However, that said, avoid changing lenses too often as you risk getting dust into the camera which can ruin your photos or cause you a lot of work cleaning them up.
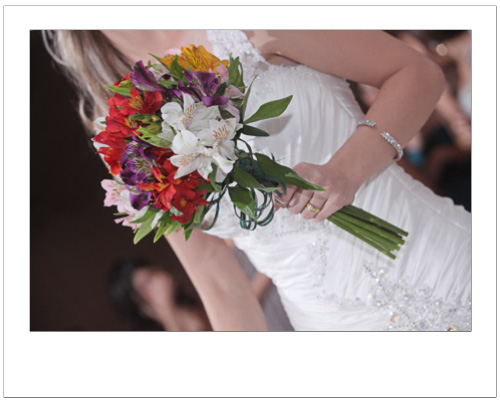
Photo credit: www.sxc.hu

Checklist of kit

Make a checklist of the kit that you will need. This includes cameras, batteries, memory cards, tripod, computer, diffusers and so on. If you will be shooting out of doors a diffuser will help to control bright light and your assistant can hold it for you.

If you’re shooting indoors you’ll need an off-camera flash if not a special lighting rig. Make sure that both you and your assistant know how to use every piece of equipment. A second camera body is essential as a backup if something happens to your main camera.
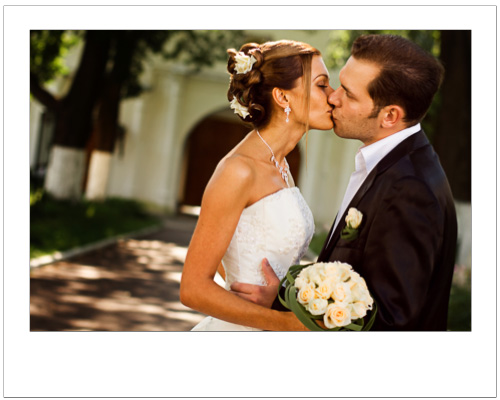
photo credit: Alexey Ivanov

A large aperture lens throws the background into soft focus minimising its impact.

Photographers are never late!

Arrive in plenty of time to set up before the wedding. In many cases you will be expected to photograph the bride as she and her attendants get ready and leave her house.

You may also be asked to photograph the groom and his groomsmen before the ceremony. Make sure you have scouted an appropriate location and you have sufficient time to do everything required of you.

If you’re the sole photographer, don’t expect to see any of the ceremony or to enjoy the reception – you’ll be working pretty much full time capturing images. Carry plenty of bottled water if it is a hot day and some energy bars too.

At the reception, move around the guests capturing a good range of photographs both candid and posed images as well as small detail images such as those of the table settings and the cake and so on.

Check your camera settings regularly throughout the day and every time you change locations. Check the camera’s white balance setting, check the image size and compression and exposure compensation and ISO to make sure nothing has altered.

If possible, shoot RAW and process the images into JPEGs later on. Take lots of photos – it’s too late at the end of the day to realise you should have shot more ‘film’. Count on taking anywhere between 500-1000 photos so you have plenty of images to choose from. Avoid setting any fancy in camera settings and shoot in colour knowing you can always convert to black and white later on.
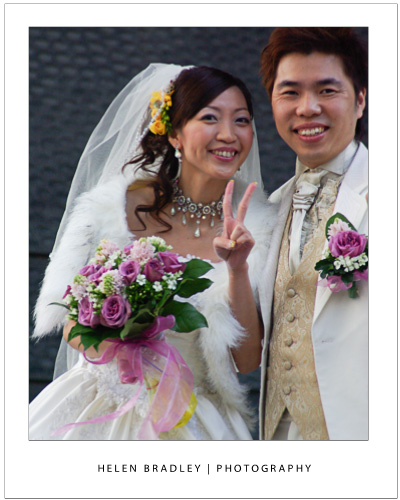
Post Processing

After the wedding download all the photos to your computer and, if possible, don’t delete them from the camera cards until you have them checked and backed up. If you are giving the photos to the bride so she can print her own album, you should still perform some basic image editing tasks.

Check each image and only give the bride the best of them culling the bad ones. If the images need lightening or contrast enhancement, do this. Rotate the photos so they are so all in the correct rotation, and crop away any obvious problems.

Burn the images to a DVD and make a backup copy of these disks too. Do this before removing the images from your PC or from the original memory cards, if possible just to be safe.

If you’re well prepared and focused on the task at hand you have a good chance of doing a good job.

Helen Bradley

Tuesday, December 18th, 2012

Photoshop – Make more canvas

One of the issues that I’ve had with painting on the iPad is I quite often run into the top of the canvas leaving the image no breathing space.

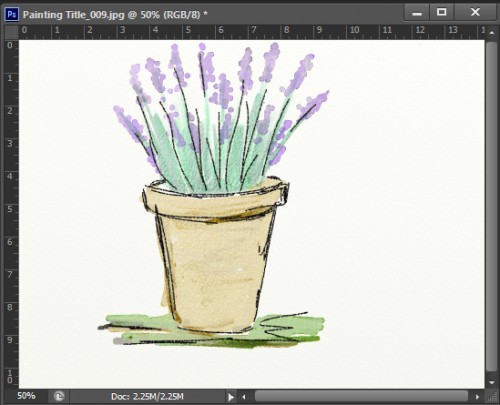
For example this image created in Art Rage tips the top of the canvas with plenty of spare room at the bottom.

The simplest solution is to email the image to myself on my desktop computer and then open the image in Photoshop.

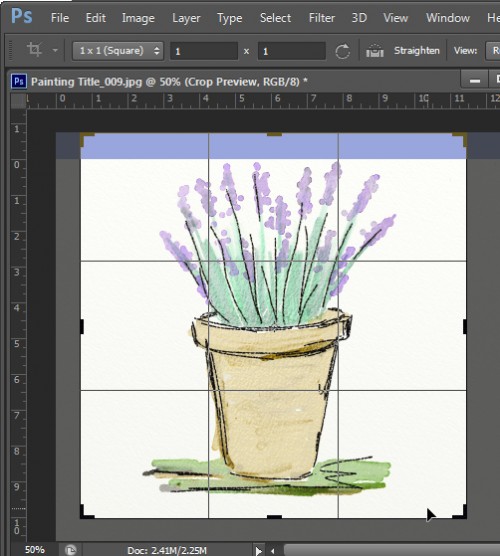
To begin I cropped this image to a 1 x 1 ratio by clicking the Crop Tool, set the ratio to 1 x 1 and then drag on the image. Once I let go the Crop Tool I can then drag outwards on it to add some extra canvas at the top of the image.

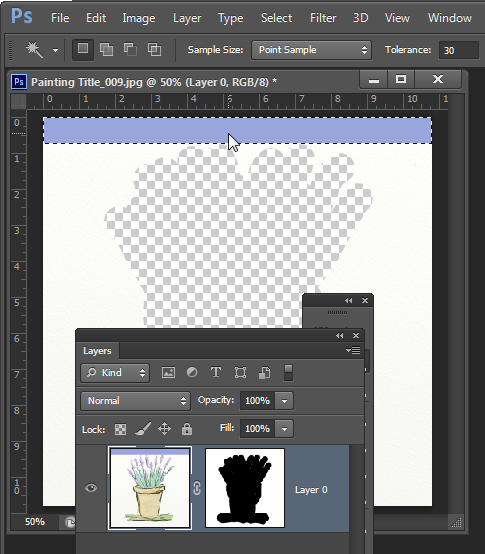
Right now I’m looking for a smart crop plus some extra room at the top that I will fill with canvas shortly. So the blue area in this image is the bit I need to “manufacture” to get the result I want.

Once the image is cropped I’m ready to get rid of the blue and create some canvas from it.

One issue with this particular image is that the canvas itself has a texture in it so just filling it with white or a plain color won’t work.

So, with the Layers palette visible I’ll click on the Add Layer Mask icon to add a layer mask to the background.

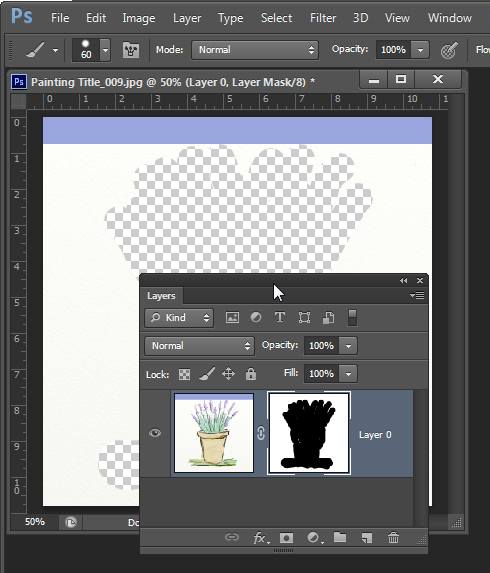
Then I select black as my foreground color, a solid round brush with a hard edge and with the mask targeted I’ll paint out the entire painting, leaving only the textured canvas visible. It’s really important to get rid of all the original painting.

Because this is just a mask the image hasn’t actually been removed, it’s just been hidden for now. Grab the Magic Wand Tool, click on the image layer itself and make a selection of the area you want to remove.

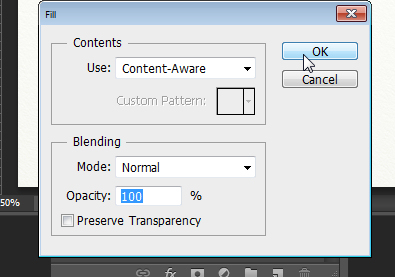
To fill it with texture, choose Edit > Fill, set the Use list to Content Aware and click Ok.

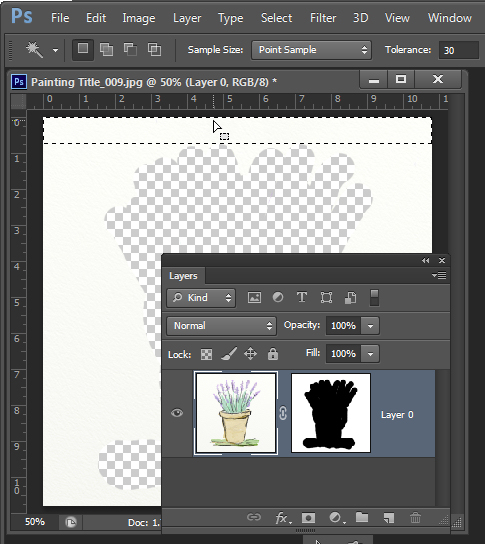
The colored area will be removed and will be replaced with a texture matching the remainder of the image.

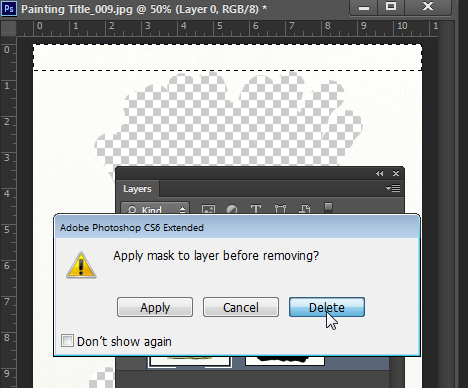
To finish, drag the Layer Mask onto the trashcan. When asked whether you want to apply the mask before removing click Delete and the mask will be removed leaving the image in place.

Choose Select > Deselect to remove the selection and then save the image.

Helen Bradley
Tuesday, December 18th, 2012

Trevor’s Quick Word Tip – Quick Bold, Italics and Underline

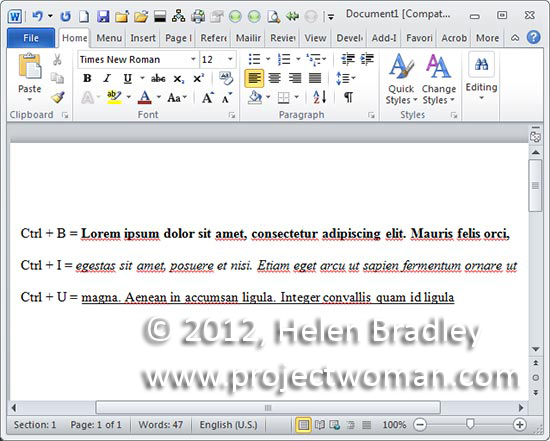
When you want some text to stand out by being bolded you can press Ctrl + B and then type the text. To turn bolding off, press Ctrl + B again. This also works to bold already typed text – select the text and press Ctrl + B to bold it. The keyboard shortcut Ctrl + I can be used to italicize text and use Ctrl + U to underline it.

Helen Bradley
Friday, December 14th, 2012

Research and Fact Checking with Google Docs

Google Docs has a handy research tool built right into the page that utilizes Google’s massive information database. It can provide a useful catalogue of information on almost any topic.

To open the Research module, go to Tools > Research. Alternatively, you can highlight some text from your document, right click, and select Research ‘[your text]’ from the context window. This will automatically research the highlighted text.

If your topic has any specially indexed information, it will be shown in a summary at the top of your results. It may also show relevant images and published papers on the topic. When Google has exhausted all the information it can find itself, it will simply display a list of search results. Yet these results also contain a useful set of tools unique to the Research module: Preview, Insert Link, and Cite.

Preview provides a quick look at the web page to help you determine if it will actually be useful to you. Insert Link automatically creates a link to the web page in your document. If you used highlighted text to open the Research module, it will turn that text into your link. Cite creates a neat citation for that web page, which is in MLA format by default.

If we take a look at the main page of the Research module again, we’ll find search filters for different needs.

Everything provides the results we initially saw, with as much information as Google could provide. Images narrows your search to just that, a sidebar of topical images which can be easily dragged and dropped into your document. Scholar provides a list of published research papers for your topic, although it does not provide direct links to those papers. These can be easily cited the same way web links can.

Quotes provides a list of relevant quotes which can also be inserted into your paper. Google also highlights the most famous quotes for you. Dictionary provides a fast and light way to check words’ definitions. Finally, Personal simply shows any files you already have on your Google account that fit the query.

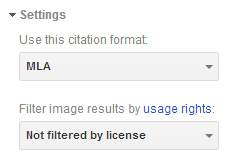
You can also make two important changes in the Settings dropdown menu. The citation format can be swapped between MLA, APA, and Chicago, depending on your need. If you’re using your document for commercial purposes, or if you simply hate unlicensed imagery, you can filter your image search results to show only those which grant a commercial licence.

Overall, the Research module is an excellent tool to help you quickly collect information and content for your document and is worth checking out.

Helen Bradley

Friday, December 14th, 2012

Summer (down under) Travel Photography Checklist

Travel to the beach and cooler climates with a camera requires planning and forethought.

It used to be that travelling with a camera was as simple as tossing it into your bag and driving via the camera store for a few rolls of film on your way to the airport. Not any more. While you won’t need film when travelling with a digital camera the entire process is more complex than it used to be and good preparation is the key to having everything available when you need it.

Charge up

The first thing you’ll need is plenty of batteries and a charger. Digital cameras consume batteries at an alarming rate and buying disposable batteries is false economy. Instead, invest in a charger and rechargeable batteries. Depending on how much photography you plan to do, I recommend three sets of batteries – one in the camera, a spare in your bag and one set back at the hotel charging.

If your camera takes regular size AAA batteries by all means use disposable batteries in an emergency but they’re not a long term solution. Make sure your charger has the right plug and voltage rating for where you’re headed – for example, while the USA uses two or three prong 110 volt plugs, the plugs and voltages in Europe and the rest of the world all differ.

Read the Manual

While I don’t recommend a camera manual for light reading, it’s worth taking if you have room. On holidays you often have free time you don’t have at home and it’s a good time to read up on what your camera can do and to experiment with camera settings to take some interesting and varied shots.

Filters and Lenses

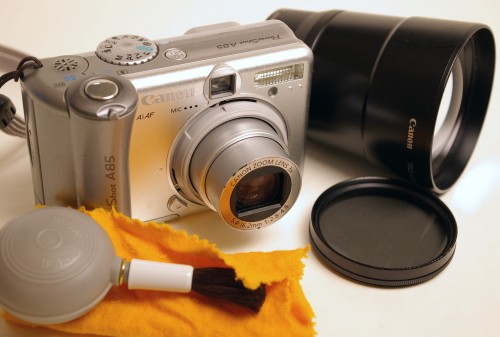
If you have specialist filters like a polarizing filter, take that with you – the filter reduces glare and will give you vivid blue skies and is a must for summer shooting.

Pack a special lens cleaning cloth to clean your camera’s lens if it gets dust or sand on it. Never use your beach towel or tee shirt – these can scratch the lens and keep your lens cloth in a sealed bag to keep it clean. A small brush also works to dust off the lens.

Storage Cards

Depending on how many photos you think you will shoot and how long you are travelling for you may need a two or more storage cards on which to store your photos. I generally pack 5-8 cards of various sizes which will see me through a couple of days photographing. Your camera will show you how many photos will fit on your card – when you turn it on this number will be displayed.

Use this as a guide to determine if you’ll need more space. If you carry multiple cards, make sure you have the containers for them – they are easily damaged if you don’t take care of them.

Lug the Laptop

I find that for a long weekend, multiple cards are easier to carry than a laptop computer to download photos onto but as soon as I travel for more than a week, a computer is a necessity. In addition, with a computer, I can burn photos to a DVD or onto a second drive so I have a backup.

Remember that your computer will require a charger as well and you’ll need the cable to connect your camera to your computer. If you find yourself short on space on your camera card, check the photos you’ve taken and delete any that aren’t worth keeping.

Carry cases

Take a carry case or camera bag for your camera and store it in the bag when it’s not in use. Always make sure your camera has its wrist strap attached and hold it carefully so you don’t lose or drop it.

If you’ll spend time on the beach a zip lock plastic bag will keep the sand out of the camera and a small ice chest or cooler will keep the camera cool while you play – put the ice in your drinks and the camera in the cooler!

Protect against loss

It’s also a good idea to put your name and address on your camera – if it does go missing it has a chance of being returned if you do this. I use the StuffBak service to label all my electronics.

Test before you leave home

Before you leave home, test everything to make sure it works. On holiday is not the time to discover you don’t know how to download photos from your camera or that the cable you bought doesn’t work!

Also check that the DVDs and external drives you’re planning to use to burn a copy of your photos work with your computer. Make sure you have empty space on your computer for storing your images too.

Before you leave, download and delete all the photos from your camera’s card and start with an empty card and freshly charged batteries. Pack everything carefully, remember the sunscreen and a hat, cancel the paper delivery and have a great holiday!


This handy checklist from http://projectwoman.com/2009/12/10-things-for-your-camera-bag.html will help you pack:

10 things you should always have with you

3 sets of batteries – one in the camera, one in the charger and one in your pocket

Batterycharger and a power cable suitable for use wherever you’re travelling

Spare memory stick or smart card for extra storage on the road

Cooler in which to place the camera to keep it cool in the sun (leave the ice behind)

Polarising filter to suppress reflected light for more colour in your images

Tripod for capturing macro images and for longer exposure shots

Camera manual to refer to if you have questions that you can’t resolve

Lens cleaning cloths, cleaning fluid and a brush to blow dust from the lens

A variety of lenses including a macro lens if your camera takes interchangeable lenses

Underwater camera housing for your digital so you can take it swimming with you

Helen Bradley

Friday, December 14th, 2012

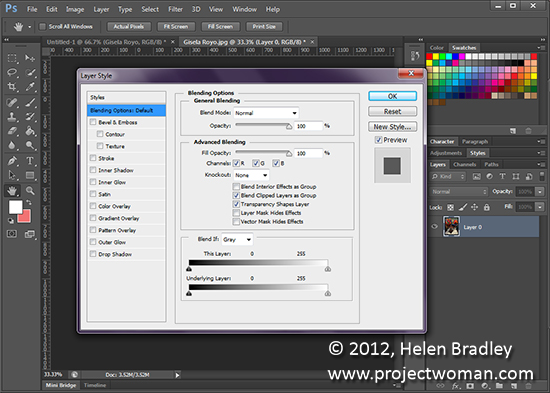
Trevor’s Quick Photoshop Tip – Layer Style

Double click a layer’s thumbnail in the Layer palette to open the Layer Style dialog. Here you can add a style such as a pattern overlay or drop shadow to your layer.

Helen Bradley

Wednesday, December 12th, 2012

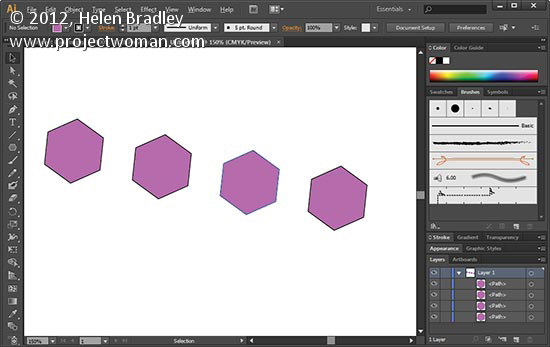
Trevor’s Quick Illustrator Tip – Duplicate, Drag, and repeat

When you need to make a duplicate of an object without copying and pasting it you can do so. With the object selected hold down Alt as you click and drag to where you want the copied object to go. To do it again without having to click and drag, press Ctrl + D on a PC or Command + D on a Mac – it’s the command to repeat the previous action. Repeat as often as required.

Helen Bradley

Page 1 of 3123