One of the issues that I’ve had with painting on the iPad is I quite often run into the top of the canvas leaving the image no breathing space.
For example this image created in Art Rage tips the top of the canvas with plenty of spare room at the bottom.

The simplest solution is to email the image to myself on my desktop computer and then open the image in Photoshop.
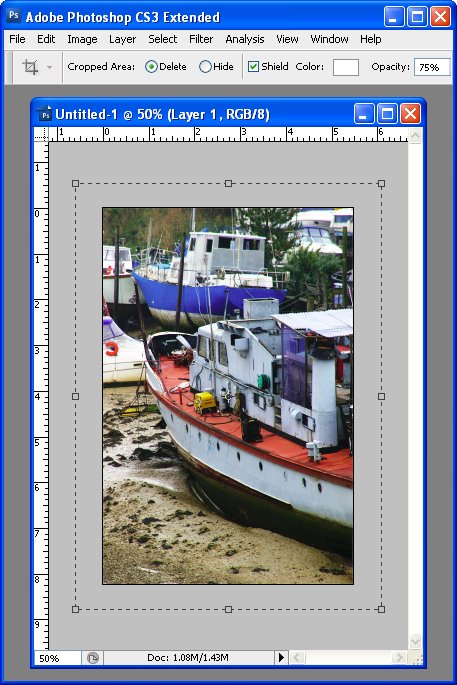
To begin I cropped this image to a 1 x 1 ratio by clicking the Crop Tool, set the ratio to 1 x 1 and then drag on the image. Once I let go the Crop Tool I can then drag outwards on it to add some extra canvas at the top of the image.
Right now I’m looking for a smart crop plus some extra room at the top that I will fill with canvas shortly. So the blue area in this image is the bit I need to “manufacture” to get the result I want.

Once the image is cropped I’m ready to get rid of the blue and create some canvas from it.
One issue with this particular image is that the canvas itself has a texture in it so just filling it with white or a plain color won’t work.
So, with the Layers palette visible I’ll click on the Add Layer Mask icon to add a layer mask to the background.
Then I select black as my foreground color, a solid round brush with a hard edge and with the mask targeted I’ll paint out the entire painting, leaving only the textured canvas visible. It’s really important to get rid of all the original painting.

Because this is just a mask the image hasn’t actually been removed, it’s just been hidden for now. Grab the Magic Wand Tool, click on the image layer itself and make a selection of the area you want to remove.

To fill it with texture, choose Edit > Fill, set the Use list to Content Aware and click Ok.

The colored area will be removed and will be replaced with a texture matching the remainder of the image.

To finish, drag the Layer Mask onto the trashcan. When asked whether you want to apply the mask before removing click Delete and the mask will be removed leaving the image in place.

Choose Select > Deselect to remove the selection and then save the image.