One of the hardest things for a new Lightroom user to work out how to perform is a simple image resizing. Look as hard as you like and there simply isn’t a resize menu command. There is, of course, a way to resize images and it is done as you Export them from Lightroom which makes sense when you know how Lightroom works but if you’re a new user it’s just plain confusing.
So, here’s how to batch resize in Lightroom:
Step 1
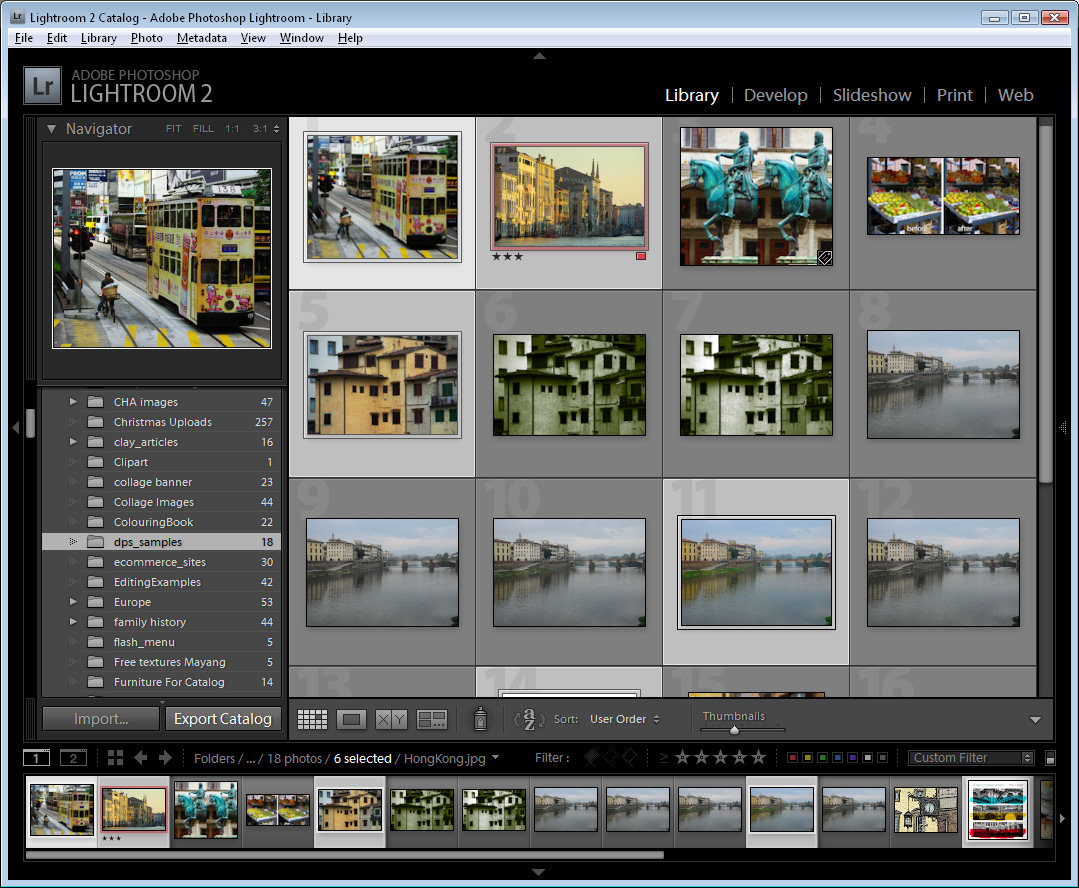
Select the Library module and select the images to export. Choose File > Export.
Step 2
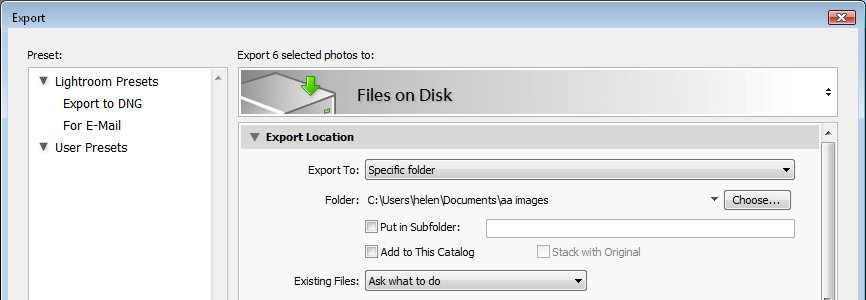
The Export dialog gives you a series of choices for the exported images. Start by selecting where the exported images should be stored. Choose either a specific folder or the same folder that the originals are stored in.
To place the images in a subfolder of your chosen folder, select Put in Subfolder and type the name of a new subfolder to create. If you want the exported images to be available in Lightroom, select the Add to This Catalog checkbox. From the Existing Files dropdown list, choose what to do if files of the same name appear already in the selected folder.
Step 3
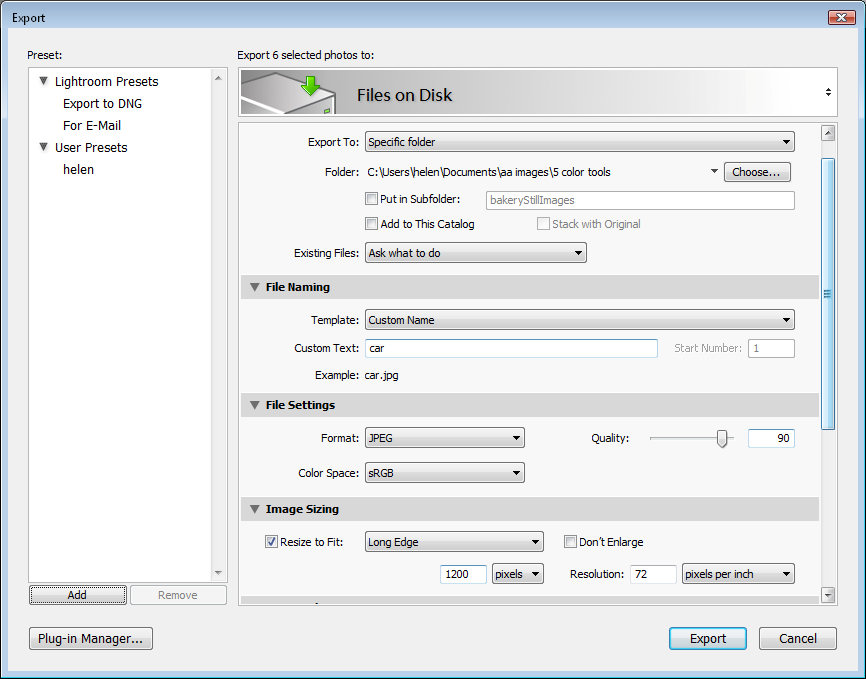
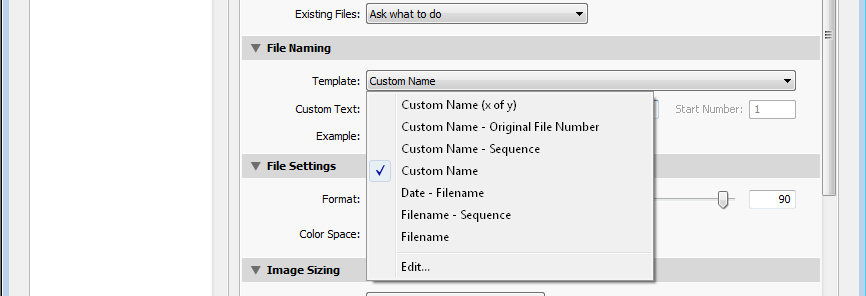
From the File Naming options select what you want your files to be named.
For example, selecting Filename will give the files the same name as the original images. Custom name – Sequence lets you give the files a custom name and Lightroom will add a sequential number to each file. Type the Custom Name in the Custom Text box.
You can also select Edit from the dropdown list and create your own file naming template.

Step 4
In the File Settings area, select the export format such as JPEG for the web and the Quality – the higher the quality, the larger the file size.
In the Color Space area choose sRGB for the web.

Step 5
In the Image Sizing area set the file size and resolution. So you can, for example set the Resolution to 72 pixels per inch for the Web or 300 ppi for printing.
To size the images, enable the Resize to Fit checkbox. By selecting Dimensions you can set the final dimensions for each image such as 800 x 1200 and the images will be sized as close to this as they can be given their current aspect ratio. They won’t be larger than this and one measurement at least will be 800 or 1200. Lightroom does this regardless of whether the images are in Portrait or Landscape orientation so portrait and landscape images will end up the same sizes.
If you select Width & Height you can set the longest dimensions of each image in each direction. All images will be sized so their Width is no larger than the value you set and their Height is no larger than the value you set – the same width and height values are applied to portrait and landscape images so a Width of 400 and Height of 600 will give a larger portrait image than it will a landscape one because the landscape image can’t be wider than 400, forcing its height to much less than this.
The Long Edge and Short Edge options let you set the maximum length of the long or short edge of a photo – so Portrait and Landscape images are treated alike here.
If you enable the Don’t Enlarge checkbox you could have images much smaller than your selected dimensions if the originals are already under the selected size.
Step 6
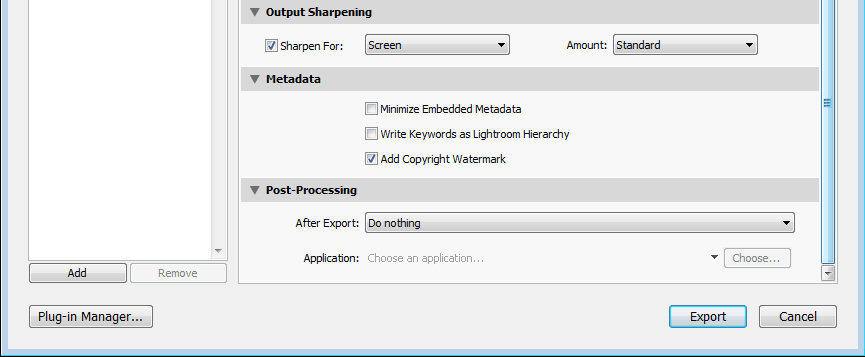
You can apply sharpening by selecting the Sharpen For checkbox from the Output Sharpening options and select to sharpen for Screen, for example, and set a Low, Standard or High Value of sharpening.
In the Metadata area, select to add metadata if desired and from the Post-Processing options select what to do with the images afterwards, for example you could open the images direct in Photoshop or in an alternate editor or another application or show them in Windows Explorer.
When you’re done with the selections, click Export and the selected images will be exported.
Step 7
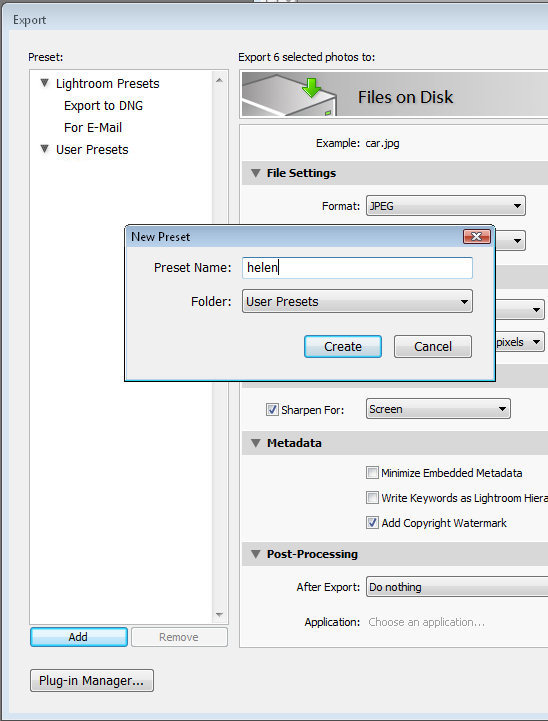
If you’ll use these settings again, save them to use next time by clicking the Add button at the foot of the Preset list, type a name for the preset, select the folder to add the preset to or just leave it set to User Presets and click Create.
In future, you can return to the Export dialog and select these options by clicking the Preset name. You can still make changes to the settings, if desired, and export a new set of images.