Thursday, February 28th, 2013

HDR Presets in Lightroom


Processing an image with HDR presets in Lightroom

As I mentioned in a previous post I am loving working with Trey Ratcliff’s HDR Presets for Lightroom. These presets really rock and for more than just images with great skies.

I have been sorting through a few thousand images I shot in Norway, Sweden and the UK last year and just seeing what is there. I tripped across these two images yesterday and something about them just screamed HDR.

This is the result and I have to say, these images totally rock. In the first, the intensity of the scene is enhanced by the  HDR treatment – it makes this back alley really come to life.

In the lead image for this post, repeated here, I saw something in the HDR version I missed in the original – the guy’s reflection in the window. I  checked back at the original – the reflection is there but it’s not obvious. In this version it is unmistakable and it takes the image from ho hum to wow – it makes it so much more than it was as an unprocessed image.

Now, as with all Lightroom presets there is nothing in the presets that you could not achieve if you adjusted the sliders in Lightroom yourself. However,  these presets are single click fixes – they are quick to apply and they are great.

For me they’ve been an eyeopener and they are helping me to see my images in an entirely new light.


Helen Bradley

Wednesday, February 27th, 2013

Shake Up Windows

See how to minimize everything on your screen except what you are working on

This tip falls into the category of WTF? Who knew this? I certainly didn’t until I fell over it the other day. It’s a tip for Windows 7 and 8 for hiding everything on the desktop except what you are working on.

Grab the title bar of the current window with your mouse and give it a good shake. When you do, everything that was open except what you are working on disappears and you’re left with just the current window.

Do it again and everything comes back in the position it was in. It’s not a tip that will save you a lot of time, but it works and it’s fun to do – at least the first few times.

Helen Bradley

Saturday, February 23rd, 2013

Correcting Perspective in Photoshop and Photoshop Elements

Sometimes you’ll capture an image that should be rectangular but is anything but. In this example I shot an image of a 6 x 6 inch sheet of paper for a project. The aim at the time was to have a reference image before the project was shipped.

Later I found I need to do more with the image and because it had been shot so casually the proportions were all wrong and the image does not look like a square sheet of paper. I also no longer have the project so reshooting is out of the question.

Luckily Photoshop and Photoshop Elements both share a similar tool for adjusting perspective which will go a long way towards fixing an image like this.

To do this choose Filter > Lens Correction in Photoshop and then click the Custom tab to access the custom tools. In Photoshop Elements choose Filter > Correct Camera Distortion.

Make sure the Show Grid option is checked and you may want to adjust the grid size so it is useful for determining the straightness of the edges in the image.

The Vertical Perspective adjustment will fix this image’s perspective problems so drag it to the left to increase the width at the top of the image to adjust for the incorrect perspective.

When you do this you may notice that the image has some geometric distortion. In this case it’s barrel distortion and the edges of the subject are billowed out.

To remove this adjust the Remove Distortion slider to counteract the distortion. It won’t be possible to get it perfect but it will be possible to reduce it to acceptable levels.

In this same dialog you may occasionally want to adjust the Vignetting slider if your lens causes dark vignettes in the corners of the image. In most cases you will drag to the right to slightly lighten the edges of the image.

Once you’re done click Ok to return to Photoshop.

The only problem that cannot be fixed in the lens correction filter is the one that would stretch the image so the subject looks closer to its original proportions which are of a 6 x 6 inch page.

For this you’ll need to click the Move tool and drag up or down on the image to stretch it.

If you need to stretch the image beyond the current image canvas dimensions, do so and confirm the change. Then choose Image > Reveal All to reveal the area of the image off the side of the canvas. While the final image isn’t perfect it looks a lot better than the original.

This same tool can be used to adjust perspective on buildings which show a keystoning effect where the building appears to be narrower at the top than at its base.

Helen Bradley

Thursday, February 21st, 2013

Google Docs: Data Validation

Google Docs has the ability to use data validation to automate and manage data entry into cells in a spreadsheet. One way to do this is to limit the data that can be entered into a cell to a selection from a list that you create.

To see this at work, open an existing spreadsheet or create a new one. Select the cells into which the data will go and choose Data > Validation. From the Criteria dropdown list, select Items From a List and then click Enter List Items. Type each item for your list into the box separating entries from each other with a comma. Make sure the “Show list of items in a drop-down menu” is checked and if you don’t want a user to select anything that’s not in the list, then disable the “Allow invalid data, but show warning” checkbox. Click Save to save the validation options.


Now, when you enter data into any of the cells in the range you have configured this data validation rule for, you will see a dropdown indicator appear to the right of the cell. Click this and you can select an item from the list that is displayed below the cell. This data is entered into the cell in the same way as any data would be entered so you can, for example, use it in calculations by referring to the cell contents. In the example worksheet shown, a formula is used the cells in column C to calculate the converted value by checking what currency has been chosen and then multiplying the value in column A by the appropriate conversion rate.

It’s also possible to use other validation options using the Data Validation dialog. You can limit a cell entry to a number which meets certain criteria or to a text entry that contains or does not contain certain text or which is a valid email address or URL. You can also require that a date is entered within a certain range of dates or before or after another date.

You can force a user to comply with the data validation rules that you have created or allow them to enter an “invalid” value but warn them that they are about to enter data that doesn’t comply with the rule.

These data validation tools available in Google Docs are similar to those that you’ll find in other spreadsheet applications such as Excel.

Helen Bradley

Wednesday, February 20th, 2013

OmniSketch Mirror Drawing Video Tutorial

In this video I demonstrate having a little fun in the iPad app OmniSketch, which lets you create tons of funky and interesting brushes.

Transcript: 

I’m Helen Bradley. Welcome to this video tutorial on creating a mirror drawing in OmniSketch on the iPad. If you followed my previous tutorial you know how to create this sort of Seurat background. Now we’re going to create some hearts.

So the first thing I’m going to do is select here and click this box here that has lines through it. This means that we’re going to start drawing four things at once and then I’m going to select a brush to use. So I’m going to start with probably this second brush in the top row and we’ll just see how we go. I’m going to choose a sort of red pink because I think I’m going to make some red pink hearts here, okay. And now I’m going to start drawing and you can see that I’m actually drawing all four at the one time.

Now everything is a bit light here so let’s go and see. Let’s increase the width and fiddle with the adjustments. So you can see now that I can get a heavier rendition of these hearts. So I’m going to change brushes and see if we can’t find some brushes that will go down a bit more quickly. Okay, the opacity is really low on that. The width is really low. Let’s go and get some change of color. You can see how these brushes all paint very, very differently. OmniSketch would be probably one of my favorite applications simply because it’s just totally funky. You can get some really, really interesting effects with it. And it’s the kind of application that you can play with for hours.

So I’m just trying to give you a look at – ohhh. Okay, probably not the bubbles. I’m trying to give you a look at some of these different brushes. But let’s just undo that one and let’s go and get a different brush. Okay, this one is pretty good. And for all these brushes you can adjust their opacity and width. And of course you want to keep changing your colors as you work so that you get some interesting designs happening. And I want to fill this one in pretty fast so this is usually a pretty good filler tool. And let’s make it pretty wide and let’s start filling it in. Of course we can always go back to our Seurat dots which are the dots that we used to create the background. I don’t want them to be very wide but you can slowly just draw in this area. And of course I can draw in any one of these and right now I’m working in the top left corner. But I can change and draw on any one of these that I like because wherever you’re drawing you’re just repeating all the way around the image.

So I just kind of work and build up, that was not a happy brush. If you make a mistake just tap Undo and wait as it undoes. It’s probably a little bit delayed here because I’m screen recording at the same time. I’m just going to change the color and yes, let’s just dial down the width on this brush. This is a really nice little brush. And I tend to use it a bit but sparingly because it does really, really funky things so I’m going to see. Sometimes it’s really not clear what adjustment does but varying it just has an interesting effect. I think I need this to be wider and certainly adjustment is going to help me here with this brush. This is really a nice little brush. I think I’m going to darken it up and use it quite a bit for my heart here.

So I’m just looking at building up an overall heart shape. And let’s go back to this brush and I think it’s a small width. I’m just testing this one here. We’ll just undo it. This is a brush I like to use at the very end because it has this really nice little spiky effect. So sometimes I’ll use it for sort of like the star effect because if you just tap you can get this like star happening on your heart shape. So let’s call that good for now. You can obviously work on something similar yourself.

Let’s have a look at what I’ve done in the past. I’m just going to save this and we’ll go back and have a look at some of the hearts that I’ve created previously. This is one of the hearts and it has that same effect down the side. Let’s just open this up. I’m not quite sure why it’s upside down but let’s just go with it. It’s got those little edges around it.

Here’s another set of hearts. This has been drawn on a white background but again it’s had these black hairs around it. Now I’m thinking with the black hairs I might have erased in the middle here as I was working after I did the black hairs. But this mirror drawing is really interesting. You can get some really, really nice effects with it. So there’s a little bit of an introduction to the wonders of OmniSketch on the iPad. And as I’ve said it’s probably one of my favorite applications for drawing because you get these wonderful, wonderful brushes to play around with. I’m Helen Bradley.

Thank you for joining me for this video tutorial. Look out for more iPad tutorials as well as Photoshop, Illustrator, Lightroom, Photoshop Elements on my YouTube channel. And visit projectwoman.com for more tips, tricks and tutorials. And please subscribe to my YouTube channel and Like the video if you liked it. Thank you.

Helen Bradley

Tuesday, February 19th, 2013

Photoshop Masks 101

When it comes to fixing images in Photoshop or Photoshop Elements the ability to use masks to do your edits is invaluable. By using a mask instead of, for example, the Eraser you get an edit which can be changed or even removed any time in the future.

However masks aren’t easy to use or even understand when you first get started. In fact they can be downright scary. To help you get started here is a quick and easy technique that can be achieved using masks. Doing it will show you a situation in which a mask is a good editing choice. You will see how to add a mask to a layer and how to use it to edit the image. By the end of the process you will be on your way to understanding how to use masks in your photo editing workflow.

The effect that I’ll be creating is one that you see in a lot of wedding albums and advertisements. It is an element of color in an otherwise black and white image. It can be achieved using masks and that’s what we’ll do here.

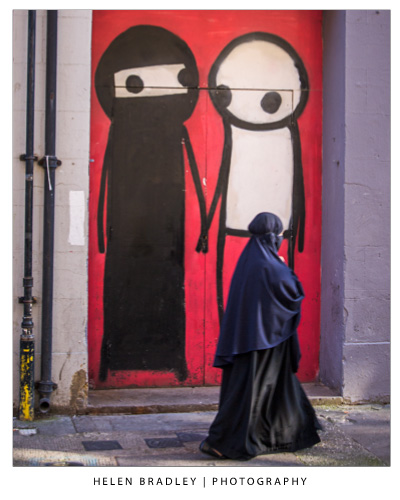
Start by opening an image that has some colorful element of interest that you can show in color while you turn the remainder of the image into black and white. Here I’ll turn this graffiti image black and white and leave the bike in color.

Make sure your Layers palette is visible. If not, choose Window > Layers to display it.

Right click the Background layer in the Layers palette and choose Duplicate Layer and click Ok. This makes a duplicate of the image layer.

With this layer selected, choose Image > Adjustments > Desaturate to turn the image into black and white.

Notice that the Layer palette contains a black and white layer and a color layer. The black and white layer is at the top of the stack which is why you are seeing a black and white image.

At this point we’ll add the mask so we can use it to bring back the color in a specific are of the image. To do this with the Background Copy layer still selected choose Layer > Layer Mask > Reveal All.

This adds a white filled layer mask to the layer – notice the white box which appears in the layer palette next to the image thumbnail – that’s the mask.

A word about masks

Right now all you need to know about masks is that you can paint on them with black, white or shades of gray.

When you paint with white on a mask you reveal any content on the current layer – in our case that is the black and white layer.

If you paint with black you’ll reveal the content on the layer below the current layer – in this case the color layer. You might like to think of it as poking a hole in the top layer so that you can see part of the layer below.

If you paint with a shade of gray you’ll be seeing part of the layer below and part of the current layer. The hole that you’re punching through the top layer will be semitransparent.

Bring back the color

To work on this image, select the brush tool and select a small brush with a hardness of around 75%. Make sure black is set as the foreground color and click on the white mask thumbnail in the Layers palette to target the mask. It should have a border around it as in this image:

Now paint on the photo over the areas that you want to bring back color in. Instead of seeing black paint on your image as you might expect to see, you will see the color coming back.

Look at the mask thumbnail in the Layers palette and notice it has some black markings in it where you painted on the image.

If you make a mistake and paint back too much color, switch the paint color so that you are painting with white and paint out the areas that you want to return to black and white.

Oops!

If you are working with a mask and find that the brush is painting black or white paint on your image it is because the image thumbnail is selected in the Layers palette and not the mask thumbnail. When you select the mask thumbnail it will have a small white border around it so you can tell it is active and selected.

The benefit of using a mask for this type of effect is that you can paint the effect on or off the image as desired. This gives you a lot more flexibility in editing your image. While this is a very simple example it does give you a starting point for learning to use masks in your photo editing.

When you save this photo, save it as a psd format file if you want to be able to come back later and adjust the mask – the psd format saves layers and layer masks.

If you are familiar with using Adjustment Layers in Photoshop you could apply this effect using an adjustment layer to desaturate the image and paint on the Adjustment Layer’s mask to bring the detail back. If you are not familiar with using Adjustment Layers then the process that I have outlined will give you the same results but just a different way of achieving it.

Helen Bradley

Friday, February 15th, 2013

Setup and Wait – the secret of great shots

Often the secret to a great shot is to stop and wait

I shot this image in London recently. I had stopped at a busy street corner waiting for the lights to change and I saw a double decker bus go past and I caught the reflection in the front window. It was bright and colorful – but before I could do anything the bus motored past.

I had a choice, keep walking or stop and wait. I waited. I stood on that street corner waiting for the next double decker bus to come past in a position where the reflection hit the window nicely and without any distracting vehicles between the bus and me. I also wanted a clean bus so the window would reflect well.

It took a while and I shot quite a few buses until I got this shot. It’s a lucky shot in part because I saw the possibilities, the rest of the shot is pure patience – waiting long enough for the situation to occur again.

Do you stop and wait for things to happen or do you just keep moving on?

Helen Bradley

Tuesday, February 12th, 2013

Get Your Tweets now – how to download your tweets


Download a history of your Twitter Tweets today!

I could really do with a file of my tweets. It will help me to schedule future tweets by being able to recycle some of the best of our old ones. Luckily, recently, Twitter began offering this as an option. If you want to, you can download an entire file of your tweets from the first of them that you made.

To do this, log in to Twitter and go to your Settings, click Edit Profile and then click Account. Scroll to the bottom. There you will find a button Request Your Archive that you can press to get your tweets.

Wait and in a few hours and you’ll be emailed a link to download your entire archive.

This comes as a zip file which you must first unzip. There is an index.html file in the zip that you can run to view all your tweets in a browser interface. There are also other files containing them – such as a series of .csv files one for each month that you can open in Excel.


It’s a great way to get a permanent record of your tweets it you need it.

Helen Bradley

Monday, February 11th, 2013

Are you lucky or do you make your luck? Brick Lane street art

Are you lucky or do you make your luck – photographing street art in Brick Lane, London

I have been going back over some images I shot in Brick Lane area in London recently. Brick Lane if you don’t know it is probably one of the best known areas in London for graffiti and street art and I spent an entire day there and didn’t cover all of it by any means. It is a fantastic area of London as it quite ethnically diverse with graffiti artists existing alongside members of the local  Bangladeshi-Sylheti community.

The art here is amazing and very diverse. It varies from stencil and sticker art to full size painted images. I met one of the local artists Stik when I was there. Someone knew him and saw me photographing his work and introduced me which was amazing. I also managed, later in the day, to get the image below of one of Stik’s pieces of work.

This is where I ponder the luck or make your luck question. This image has an element of the unusual  – there weren’t many women around the street and few in traditional clothing so that was unusual and that she walked past this particular piece of art the moment I was standing there – well that was very serendipitous. But lucky? I’m not sure. I think to an extent as photographers we make our luck when we open our eyes.

You see – cool stuff is all around but you have to see it and you have to be there with a camera in hand and that isn’t lucky – that’s work. You carry a camera through days of taking ho hum shots and getting rained on and seeing nothing that works for you and then occasionally you are rewarded with a result you’ve earned through . I think this image was, in many ways, earned. So too was the one above. I saw the art and then the bike and then I had my picture.


Helen Bradley

Friday, February 8th, 2013

Free Valentine’s Day Bunting Brushes for Photoshop


Just in time for Valentine’s Day is a fresh batch of heart-warming love-themed bunting brushes. The brushes are all hand drawn, making them perfect adornments on your card for that special someone.  They are free to download and all licensing information is included, so don’t miss out!

Download 9 Free Valentine’s Bunting Brushes Here!

Helen Bradley

Page 1 of 212