Tuesday, December 18th, 2012

Photoshop – Make more canvas

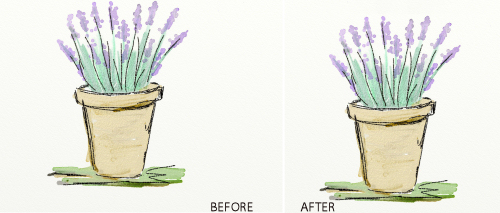
One of the issues that I’ve had with painting on the iPad is I quite often run into the top of the canvas leaving the image no breathing space.

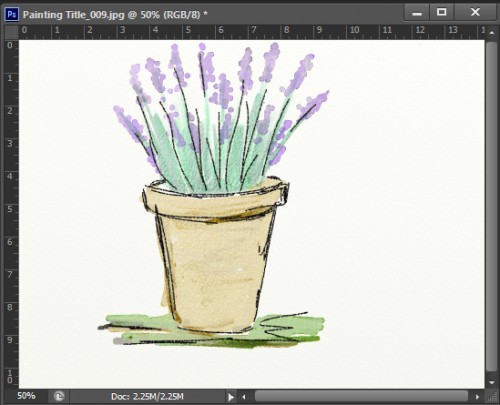
For example this image created in Art Rage tips the top of the canvas with plenty of spare room at the bottom.

The simplest solution is to email the image to myself on my desktop computer and then open the image in Photoshop.

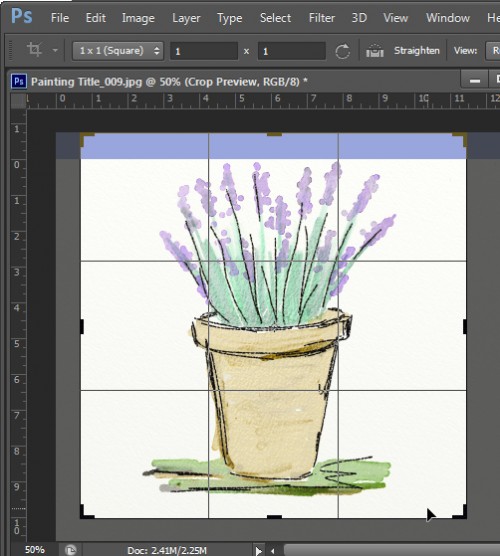
To begin I cropped this image to a 1 x 1 ratio by clicking the Crop Tool, set the ratio to 1 x 1 and then drag on the image. Once I let go the Crop Tool I can then drag outwards on it to add some extra canvas at the top of the image.

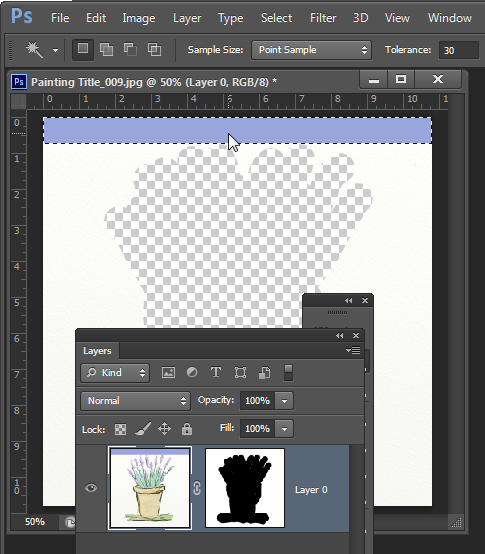
Right now I’m looking for a smart crop plus some extra room at the top that I will fill with canvas shortly. So the blue area in this image is the bit I need to “manufacture” to get the result I want.

Once the image is cropped I’m ready to get rid of the blue and create some canvas from it.

One issue with this particular image is that the canvas itself has a texture in it so just filling it with white or a plain color won’t work.

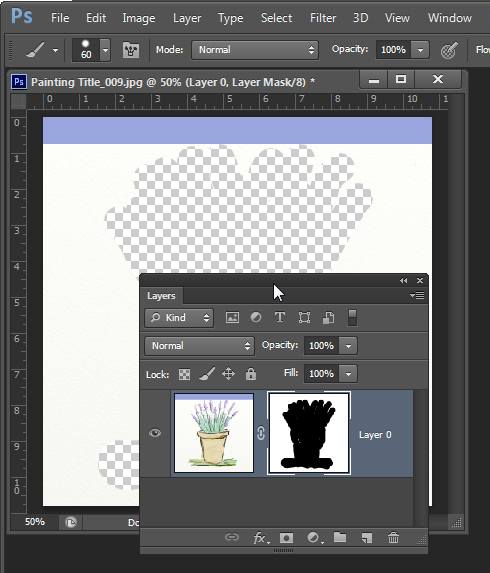
So, with the Layers palette visible I’ll click on the Add Layer Mask icon to add a layer mask to the background.

Then I select black as my foreground color, a solid round brush with a hard edge and with the mask targeted I’ll paint out the entire painting, leaving only the textured canvas visible. It’s really important to get rid of all the original painting.

Because this is just a mask the image hasn’t actually been removed, it’s just been hidden for now. Grab the Magic Wand Tool, click on the image layer itself and make a selection of the area you want to remove.

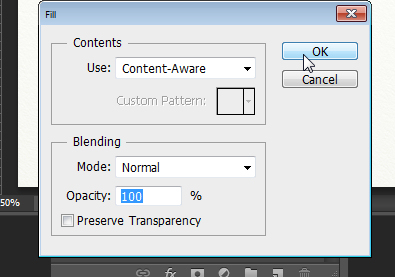
To fill it with texture, choose Edit > Fill, set the Use list to Content Aware and click Ok.

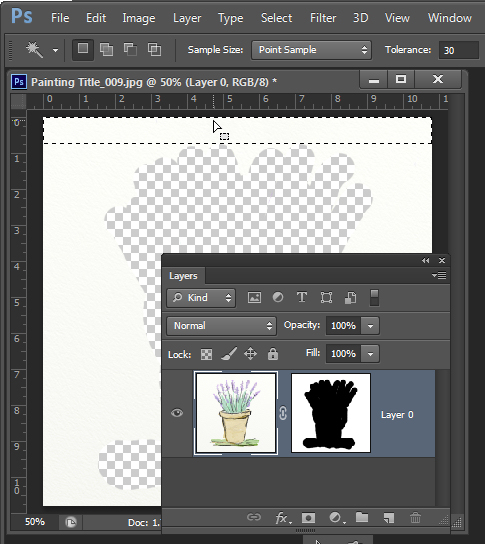
The colored area will be removed and will be replaced with a texture matching the remainder of the image.

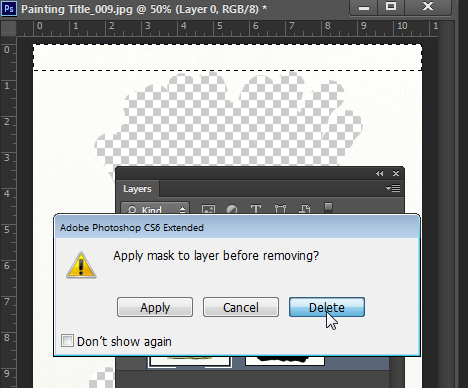
To finish, drag the Layer Mask onto the trashcan. When asked whether you want to apply the mask before removing click Delete and the mask will be removed leaving the image in place.

Choose Select > Deselect to remove the selection and then save the image.

Helen Bradley

Friday, January 27th, 2012

Smarter Content Aware Fill

If you’re like me, you’ve tried out the new Content Aware Fill feature in Photoshop CS5 and you’ve been left just a little bit disappointed.

What Content Aware Fill does is to replace unwanted areas of an image in a smart way. It can reduce the amount of time you spend working with the Clone Stamp and other fixing tools when you have something you need to get rid of in an image. However, where the Content Aware Fill feature appears to fail is when you want to remove a large portion of an image – those very times you wish it would work perfectly.

Well, last week I learned a cool technique to use with Content Aware Fill that solves these problems, thanks to Adobe’s Bryan Hughes. So here’s a way to make Content Aware Fill behave a whole lot smarter.

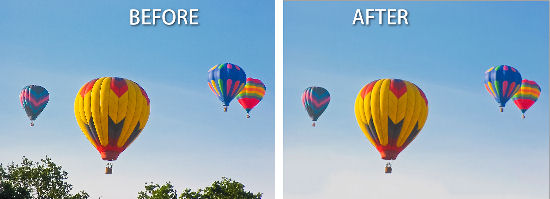
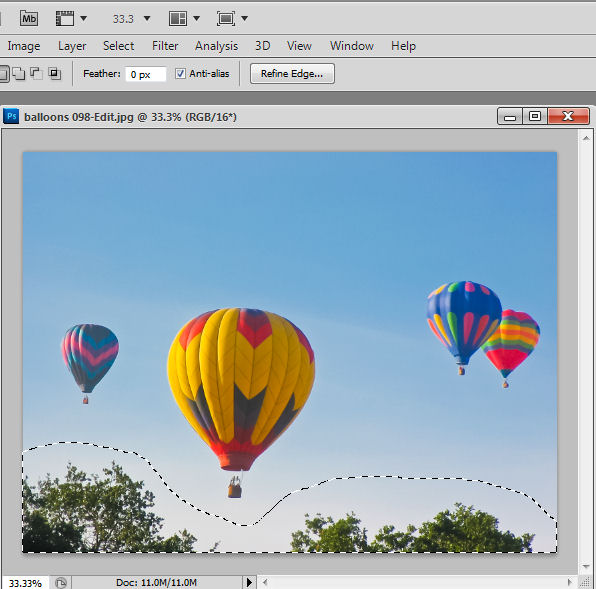
In this balloon image, if I want to remove the trees at the bottom of the image, I would make a selection around them with, for example, the Lasso tool.

Then, in Photoshop CS5 – even though the bottom layer of the image is a Background layer I would press Delete to open the Fill dialog. Here I can choose Use: Content Aware Fill and press Enter to have Photoshop remove the trees for me.

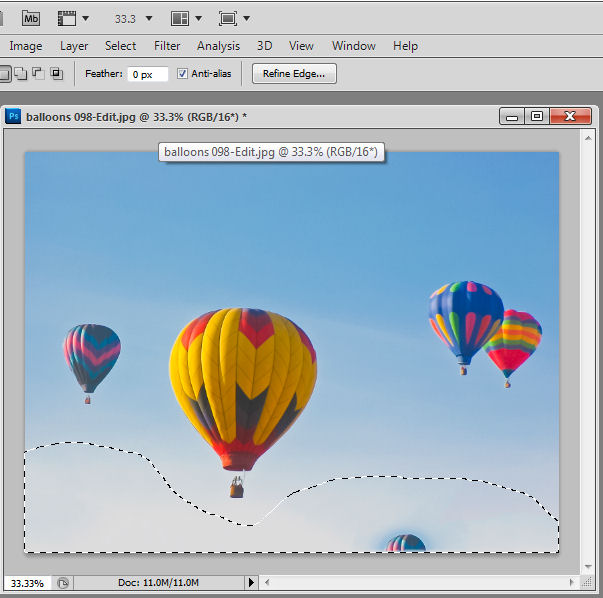
The problem is, that as often as not, part of one or more balloons will appear in the filled area. What I want is blue sky and not balloons. I could repeat the “Select and Delete” process until the image looks as I want it to but there is an alternative way to use the Content Aware fill feature. This way of working is great when you are trying to remove a large object and where there is not a lot of clean image data for Photoshop to use to do the fill with.

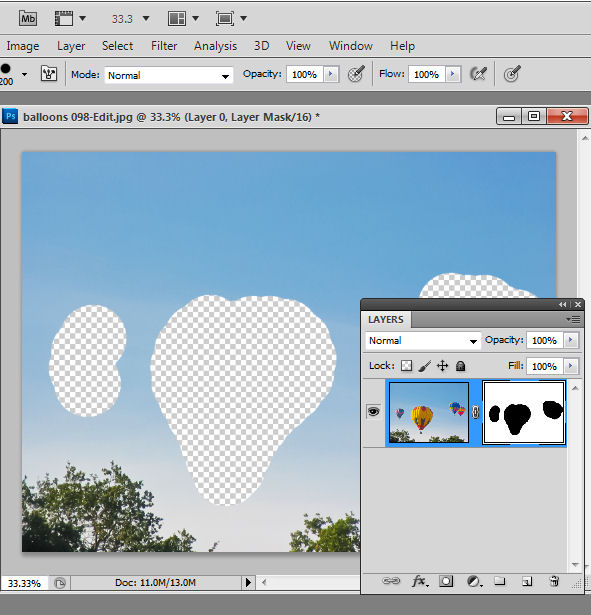
This solution involves removing any part of the image I don’t want the content aware fill feature to use – here that is the balloons – temporarily leaving only the content I want it to use – here that is blue sky. To do this I converted the background layer to a regular layer by double clicking it and pressing Enter.

Then I added a layer mask using Layer > Layer Mask > Reveal All and painted on the mask in black to remove the balloons – a hard edge brush is a good choice here.

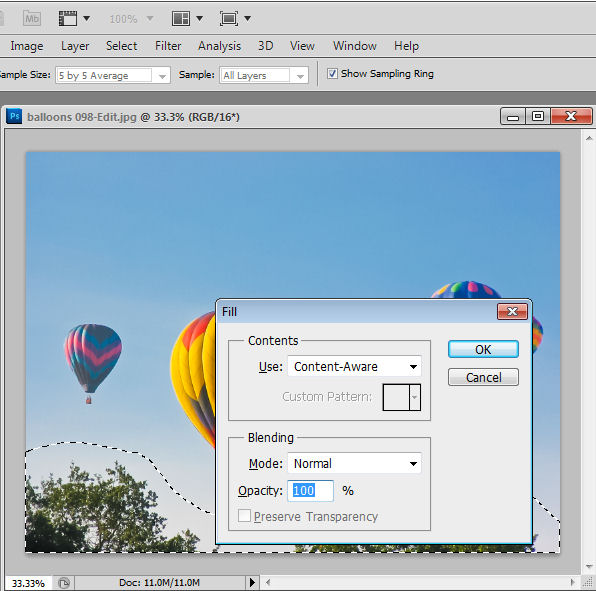
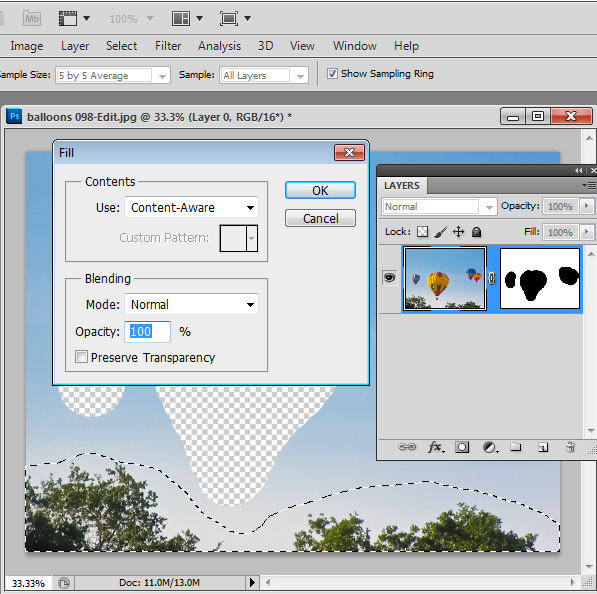
Now I’ve reselected the image – not the mask – and made a selection around the trees again using the Lasso tool. Pressing Delete this time won’t work – it just deletes the selection so, instead, I need to press Shift + F5 or choose Edit > Fill to open the Fill dialog. Make sure that Use: is set to Content Aware and click Ok.

This time Photoshop uses only the visible content to fill the area and because the balloons aren’t visible they aren’t used to fill the area when the trees are removed.

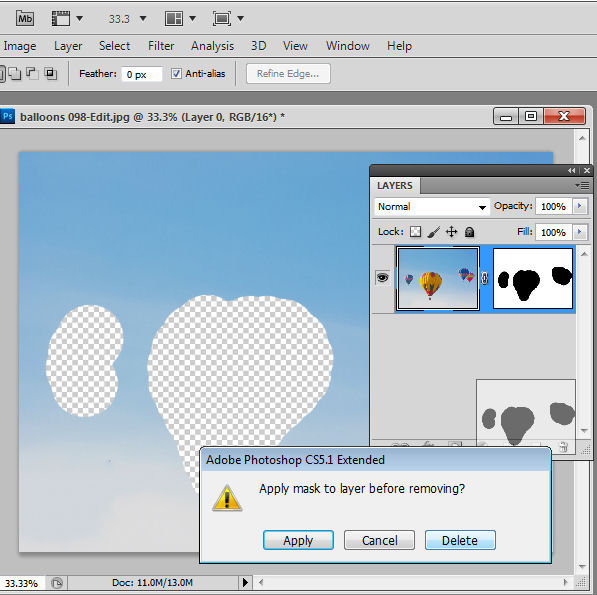
Once you are done, you can bring back the balloons by dragging and dropping the layer mask into the trashcan – select Delete when prompted so you remove the mask – don’t apply it.

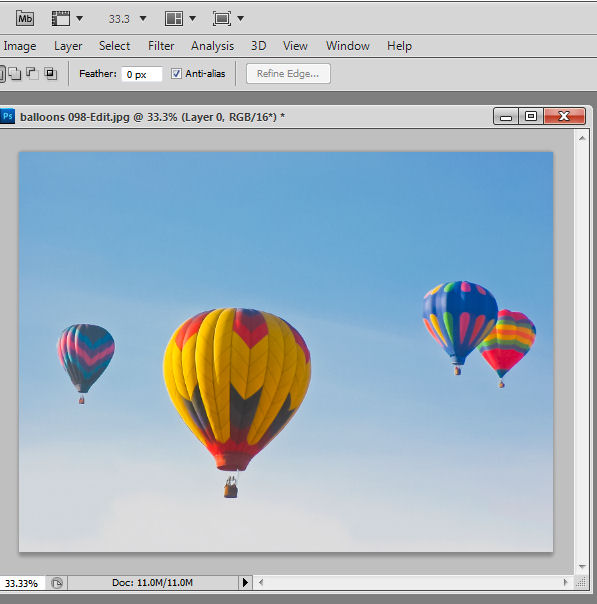
Now the content aware fill tool works as you would expect it to – allowing you to remove large portions of an image and have the area filled in an intelligent way.

Helen Bradley