photo credit: arki www.sxc.hu
Here’s what to do when a friend asks you to photograph their wedding.
If you’re even a passable photographer, chances are that one day, someone will ask you to photograph their wedding. Before you take the plunge, here are some things to think about when shooting a big event like a wedding.
The demands of wedding photography
Photographing a wedding is different to just about any other photography you’ll do. You only get one chance at it and you run the risk of severely disappointing everyone if you don’t pull it off.
Wedding photography is a job that professional photographers charge a lot of money to do and, for good reason. So, it’s not a task you should take on lightly – if you really don’t feel up to the task say no rather than doing a bad job of it.
However, that said, it can be a rewarding experience if you get it right. And the key to getting it right is preparing well and having a well thought out and practiced plan.
Scoping the job
Talk to the bride and groom well before the wedding. Ask how many photographers there will be, if there are a few, determine who will be responsible for what so you aren’t tripping over each other on the day and missing out on key shots because you thought someone else was taking them.
photo credit: Mike Clarke
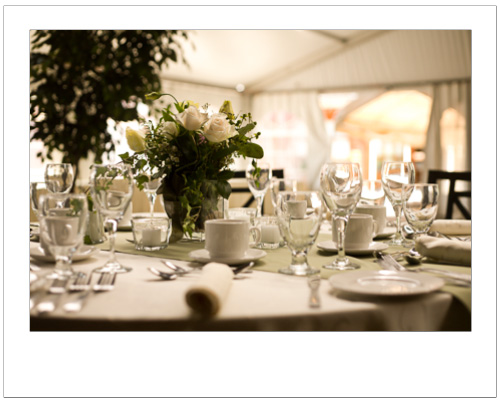
Wedding photography involves photographing everything from reception guests to decorated tables.
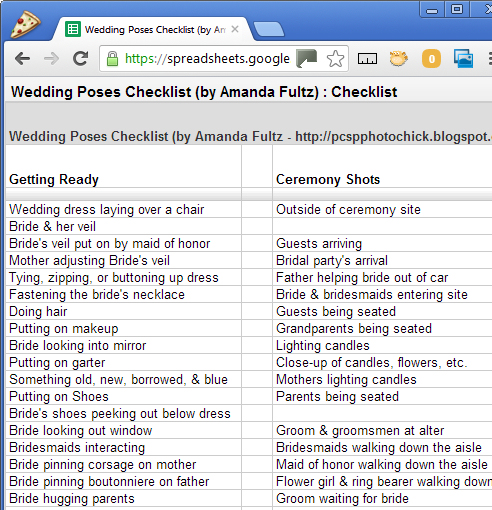
Make a list of the photographs that the couple want taken. Have a detailed checklist printed up with the images they want you to capture. If you order this in the approximate order of the ceremony and reception it will be easier to make sure you get everything you need.
There are some good web sites that have information on wedding photo lists including this one: http://spreadsheets.google.com/pub?key=ppuF_0dv6H8zTjdPjs4D4MQ
Enlist the help of a skilled assistant. You need someone to help you organise group pictures and run around getting batteries and holding things for you. Your assistant can also double check to make sure you don’t miss any photos on your list.
Before the wedding visit the locations that will be used such as the church and the venue for the reception. Check these at around the same time of the day as the wedding will take place so you can get an idea as to what lighting will be available.
Finding a location in the shade saves the effort of having to diffuse the sunlight when it is very bright.
If possible, place your assistant where the bride and groom will stand and shoot some sample images to check the lighting and your camera settings.
Photo credit: theswedish www.sxc.hu
Also check locations inside the church and the reception venue where you can take photos, particularly places with clean or interesting backgrounds. If you can’t find clean backgrounds to work with, plan to use a wide aperture lens so the background won’t be in focus.
If you’re not able to use a flash such as in a church, you will need to use a fast lens and you will need to know how to use it before the day. If you don’t have a lens, consider borrowing or renting one but test it thoroughly before the big day.
You need to be very familiar with how it performs and how to configure it for best results. However, that said, avoid changing lenses too often as you risk getting dust into the camera which can ruin your photos or cause you a lot of work cleaning them up.
Photo credit: www.sxc.hu
Checklist of kit
Make a checklist of the kit that you will need. This includes cameras, batteries, memory cards, tripod, computer, diffusers and so on. If you will be shooting out of doors a diffuser will help to control bright light and your assistant can hold it for you.
If you’re shooting indoors you’ll need an off-camera flash if not a special lighting rig. Make sure that both you and your assistant know how to use every piece of equipment. A second camera body is essential as a backup if something happens to your main camera.
photo credit: Alexey Ivanov
A large aperture lens throws the background into soft focus minimising its impact.
Photographers are never late!
Arrive in plenty of time to set up before the wedding. In many cases you will be expected to photograph the bride as she and her attendants get ready and leave her house.
You may also be asked to photograph the groom and his groomsmen before the ceremony. Make sure you have scouted an appropriate location and you have sufficient time to do everything required of you.
If you’re the sole photographer, don’t expect to see any of the ceremony or to enjoy the reception – you’ll be working pretty much full time capturing images. Carry plenty of bottled water if it is a hot day and some energy bars too.
At the reception, move around the guests capturing a good range of photographs both candid and posed images as well as small detail images such as those of the table settings and the cake and so on.
Check your camera settings regularly throughout the day and every time you change locations. Check the camera’s white balance setting, check the image size and compression and exposure compensation and ISO to make sure nothing has altered.
If possible, shoot RAW and process the images into JPEGs later on. Take lots of photos – it’s too late at the end of the day to realise you should have shot more ‘film’. Count on taking anywhere between 500-1000 photos so you have plenty of images to choose from. Avoid setting any fancy in camera settings and shoot in colour knowing you can always convert to black and white later on.
Post Processing
After the wedding download all the photos to your computer and, if possible, don’t delete them from the camera cards until you have them checked and backed up. If you are giving the photos to the bride so she can print her own album, you should still perform some basic image editing tasks.
Check each image and only give the bride the best of them culling the bad ones. If the images need lightening or contrast enhancement, do this. Rotate the photos so they are so all in the correct rotation, and crop away any obvious problems.
Burn the images to a DVD and make a backup copy of these disks too. Do this before removing the images from your PC or from the original memory cards, if possible just to be safe.
If you’re well prepared and focused on the task at hand you have a good chance of doing a good job.


