Monday, December 24th, 2012

Strip tags from code in Dreamweaver CS5 & CS6

Ok, confession time. Some of my websites still use FrontPage 2003 for the code. It isn’t pretty but it is one of those things that work and, if it isn’t broken, I don’t generally fix it.

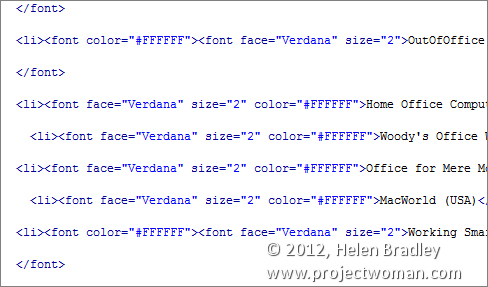
However today I headed over to helenbradley.com to give it a once over.  The problem was that I had seen in my stats that the PR company for a major software provider had trawled my site recently and when I looked at what they checked out I realized how out of date it all was.  So it was time for an update. Instead of FrontPage I grabbed all  the existing HTML and opened the  pages in Dreamweaver and let out one very big groan. They were full of font tags – nearly every piece of text had a font face, size and color associated with it.

The obvious solution was to make a site wide .css file and put all the formatting in there. Well that is dead easy but what about all the garbage in my code – how to get rid of that? The last thing I wanted to do was to select and delete it all one code at a time.

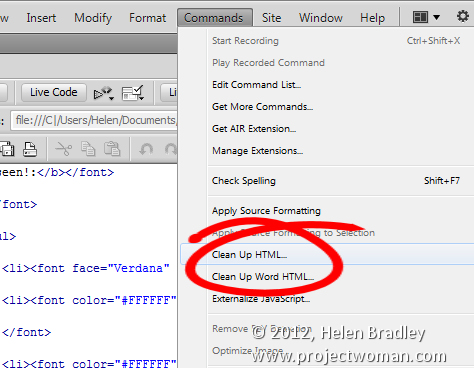
Turns out that Adobe had already thought of that and there is a command you can select to strip code. I chose Commands > Clean Up HTML and then selected the code to clean up.

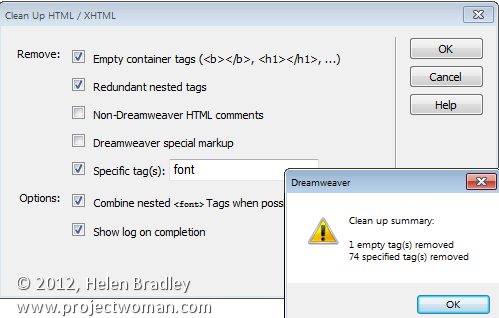
As my code had too many Font codes in it I chose to specifically remove all of them too.

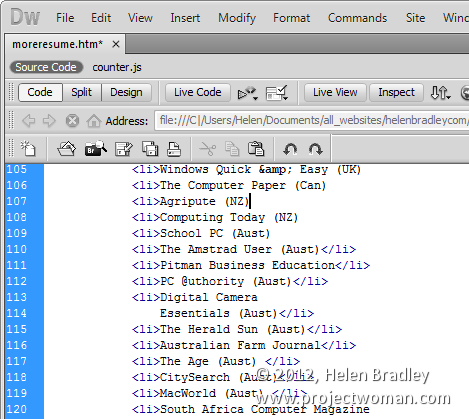
One  click and all the mess was gone leaving me with the content stripped of its formatting.

I created some CSS styles for the text formats to use in the external .css file, attached it to each page, applied the styles  to the text and  it was all fixed, tested and up.

Now that site is  officially FrontPage 2003 free and working just fine in  Dreamweaver. I have one more site to bring across and then I can say farewell to FrontPage!


Helen Bradley

Monday, July 16th, 2012

Why downsizing in Dreamweaver destroys images, and how to avoid this


In the images above, you can see that the image on the right looks appalling in comparison with that on the left.

The two images are the same size but the one on the left was scaled down from a large size in Photoshop and the one on the right was scaled down by downsizing it in Dreamweaver.

The results are a great example of why you should never downsize an image in a web editor instead of a graphics program! The resized version on the right is downright nasty in comparison to the one on the left.

If you need to scale down your images – these were reduced from 2,376 x 2,376 pixels in size to 300 x 300 – then it’s vital that you use a proper tool to do so.

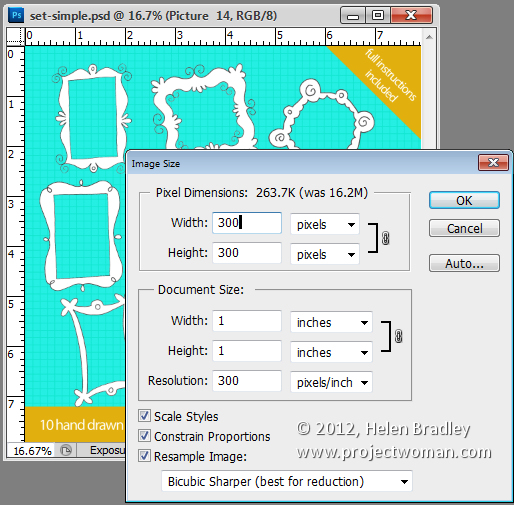
Photoshop has an image resize tool which you can get to by choosing Image > Image Size. Type the width and height of the finished image and then from the Resample image dropdown list select Bicubic Sharper (Best for Reduction). If you compare the results with different settings, you’ll see that the Bicubic Sharper typically gives the best result for downsizing images.


When you use this option the resulting images look as good downsized as they do on the screen in front of you.

Downsize them, save them and then import them into Dreamweaver and use them at that size. You will love your images a lot better when you do this.

Helen Bradley

Monday, June 25th, 2012

Dreamweaver to Photoshop


While Dreamweaver has some rudimentary tools for photo editing, if you want to do some real image editing, you’re better advised to take the image to a photo editor to do so.

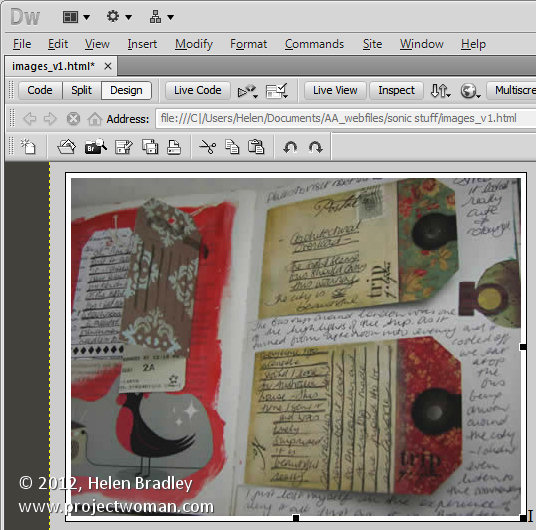
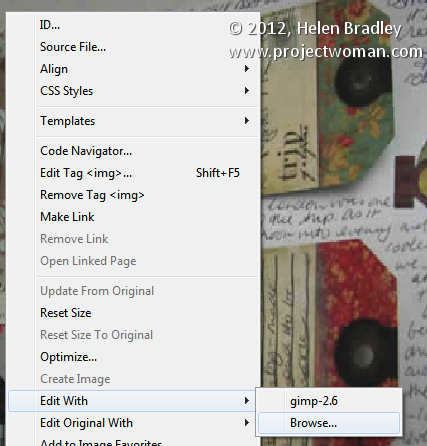
From Dreamweaver you can send an image to Photoshop by right clicking it and choosing Edit With > and choose the image editor to use from the list. If Photoshop is not in the list you can browse to find it, if desired.


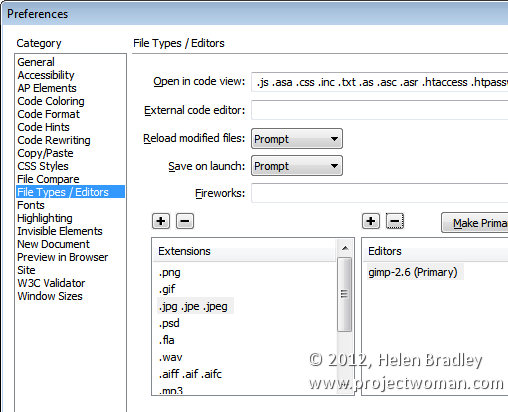
However, it’s better still to add Photoshop permanently to the list and to do this, choose Edit > Preferences > File Types/Editors and in the Extensions list, select the file extension to set the external editor for. In most cases you will be choosing .jpg .jpe .jpeg.


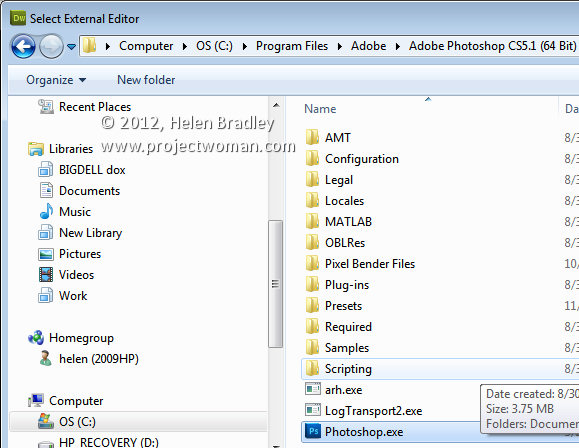
In the Editors box, click the plus (+) symbol above the box and browse to find the executable file for your version of Photoshop (or another program if desired). In most cases this will be in your C:\Program Files or C:\Program Files (x86) folder.


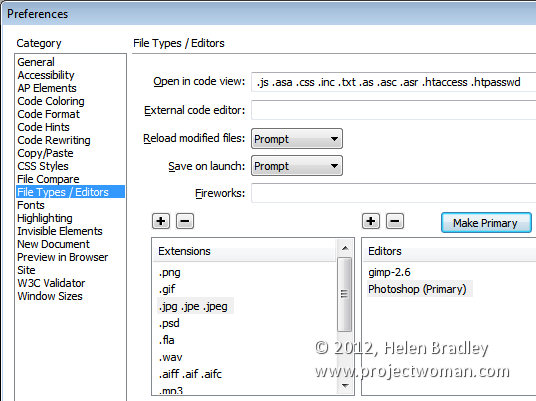
You can make an editor the primary one by selecting it in the list and choose Make Primary and then click Ok.


Next time you choose Edit With, you’ll be able to choose Photoshop and the image will be passed from Dreamweaver to Photoshop – if Photoshop isn’t open it will be opened automatically for you.

Helen Bradley

Thursday, June 21st, 2012

Resize Images in Dreamweaver


If you don’t pre-prepare your images before adding them to a page in Dreamweaver, you’ll need to resize them in the program.

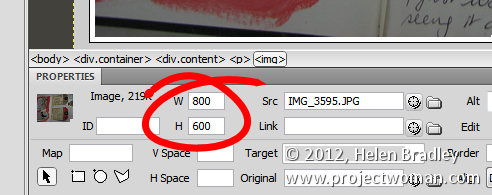
If you click an image and check the Properties panel, you’ll encounter your first problem. The selectors that let you adjust the Width and Height of the image do not do so proportionally so it’s perilously easy to skew your images out of alignment.


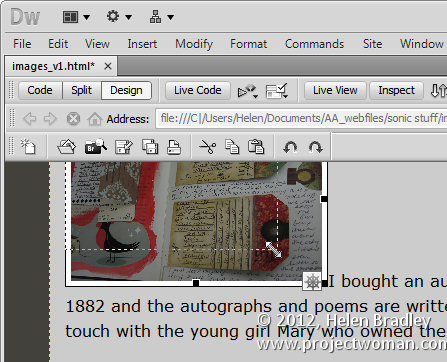
One alternative for resizing an image is to click the image and use the sizing handles to resize it. Hold the Shift key as you do this to scale the image in proportion.


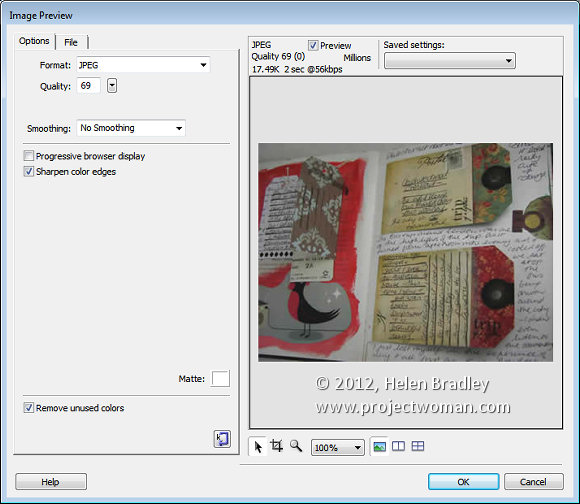
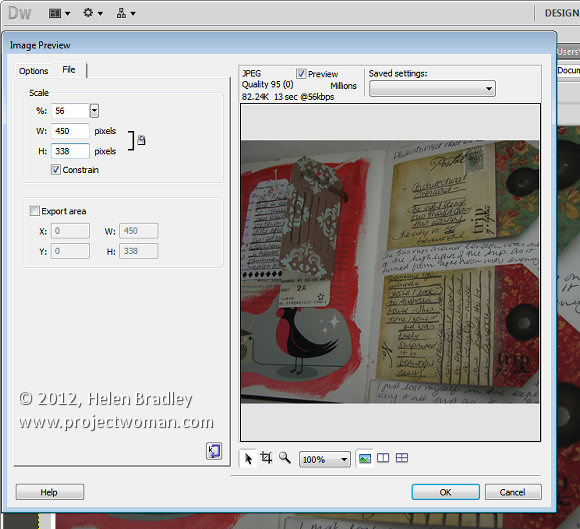
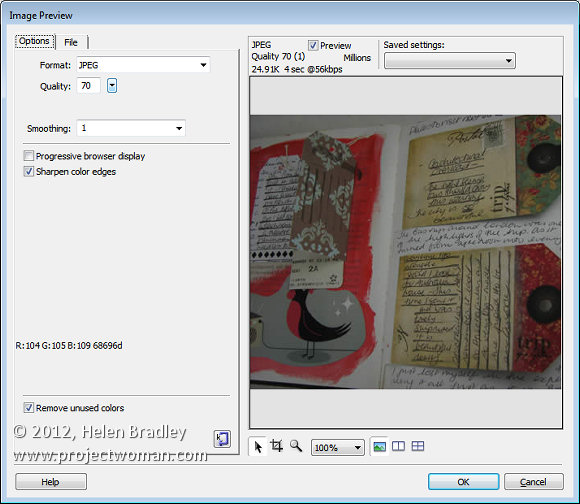
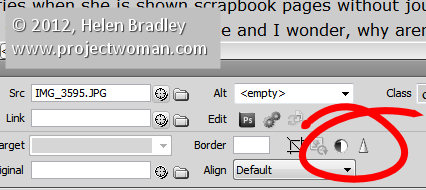
There is also another way and that is to click the image and choose Commands > Optimize Image. This is the same dialog as you get if you click the image and click the Edit Image settings button in the Properties tab (it’s just difficult to work out what button this is because it is so tiny). This opens the Image Preview window.


Click the File tab and you can scale the image to a fixed percentage or check the Constrain checkbox and adjust either the width or the height and both will be adjusted automatically in proportion.

Under the image are tools for moving around the image in the dialog, cropping it, zooming in and out of it and setting a magnification for viewing it in the dialog.

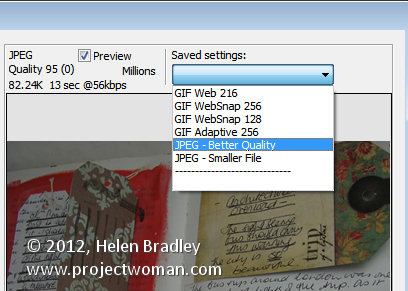
From the Saved Settings dropdown list you can select an optimization setting for your file, if you select JPEG – Smaller File the image will be saved as a low quality JPG. JPEG – Better Quality will result in a better quality but overall larger size file. For photos always select a JPG option and never GIF.


With the Preview enabled you can read off how long it will take to download the image at the currently selected quality at a 56kbps download rate.

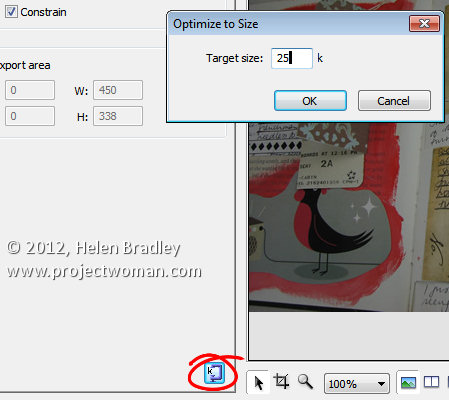
There is also a button in the bottom right of the left hand panel that allows you to optimize to a fixed size. Click it and you can set a target size for your image such as 20kb, click Ok and the image quality will be adjusted to give you file that is no larger than the size requested.


In the Options tab you can select to sharpen the color edges if desired. When you’re done, click Ok to configure the changes for your image.


Other image options include Brightness and Contrast and Sharpening both of which you can select by clicking the respective Brightness and Contrast, and Sharpen buttons in the Properties panel.


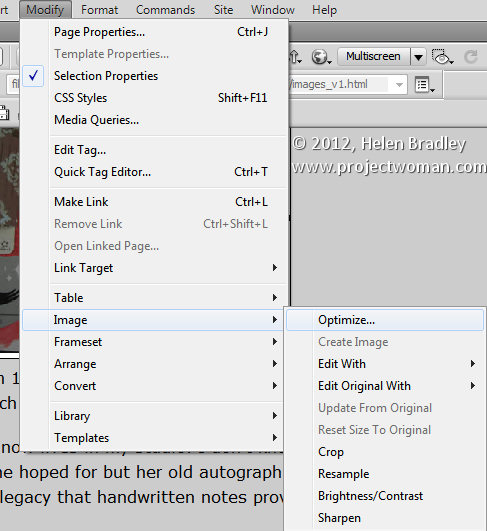
These options can also all be found by clicking Modify > Image. Here are options for optimizing the image, editing with an external editor, editing the original with an external editor, cropping, brightening, adjusting contrast, resampling and sharpening the image.


Helen Bradley

Wednesday, July 6th, 2011

Dreamweaver – Properties inspector missing buttons

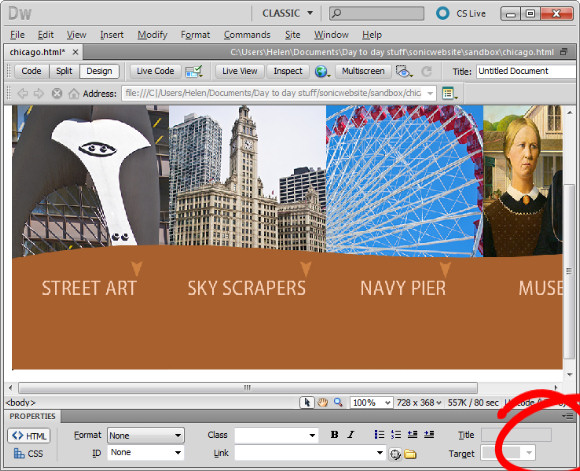
If you’re using Dreamweaver on a large monitor, you may encounter a difficulty with the Properties panel (Inspector) not showing all the icons you expect to see.

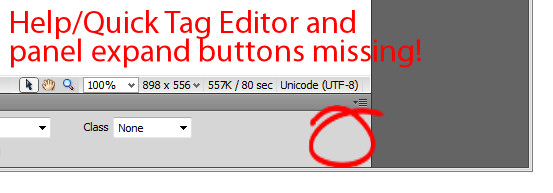
For example, in the image below the Quick Tag Editor, Help button and the Expand button are all missing from the Properties panel.

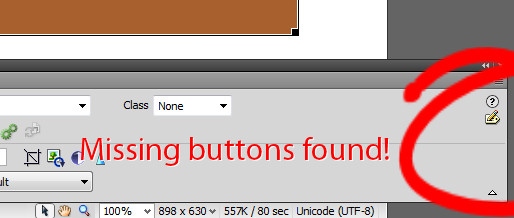
Only when the Dreamweaver window is expanded to a much larger size do these buttons appear.

So, unless you know what is happening you will find that key tools for working in Dreamweaver are missing. If you are creating an image map, for example, not being able to see to click the Expand button means all your Map tools are hidden.

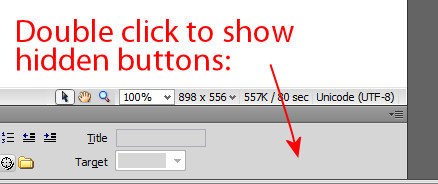
So, if you find the Expand button is missing on your Dreamweaver Properties panel you can do one of three things. Either make the Dreamweaver window very large so that you can see the Expand/Collapse icon or drag the Properties panel free of the Dreamweaver screen so it is no longer docked. As soon as it’s undocked the buttons appear again. Or… and this is a cool trick, double click anywhere in an empty space in the Properties panel and the hidden buttons appear.

Hiding buttons is REALLY ANNOYING behavior particularly when you know there’s an icon or feature that’s supposed to be on the Properties panel and it’s simply not appearing when it should.

Helen Bradley