Saturday, July 5th, 2014

Lightroom – Hand Tint a Photo Effect

Create an Old Time Hand Tint Effect to a Photo in Lightroom

Learn how to apply an old time hand tint effect to a photo in Lightroom. You will see how to convert the image to black and white and then how to color it using the  Adjustment Brush. This technique can be applied to a range of images and the effect works well when you want a hand tinted look for your photo.

Helen Bradley

Saturday, March 1st, 2014

Create a Graffiti Wall Effect in Photoshop

Learn to paint graffiti without a risk of being arrested

See how easy it is to create a graffiti effect on a wall in Photoshop. The video shows you how to use a graffiti font to create graffiti writing and how to use styles and colors to format the test to make it look like real graffiti. Then see how to use the Vanishing point filter to place the graffiti text onto a wall in a photo. Finish the effect by blending the text with brushes, blend modes and textures all created using layers and masks so that the effect can be edited in future.

Helen Bradley

Thursday, November 28th, 2013

Rev Up Your Photo workflow – Part 3 – Organizing, Fixing and Sharing images

In this final part of our workflow series we look at organizing and selecting images, fixing and sharing them.


Organizing and selecting images

Once you’ve imported your images, you’ll need to determine which of those you want to work with and which you will not. For this you will need to use a system that is supported by your software – it needs to be quick and easy to use so you can quickly identify the best of your photos.

If you have already backed up your images, you may determine that your master file of images will contain only the best of the images, so you might give a low rating or mark as reject any images that you don’t want to keep so you can later find and delete them. Whatever the case, you need to determine what your process is going to be and then work within this process to get the task done as quickly as possible.

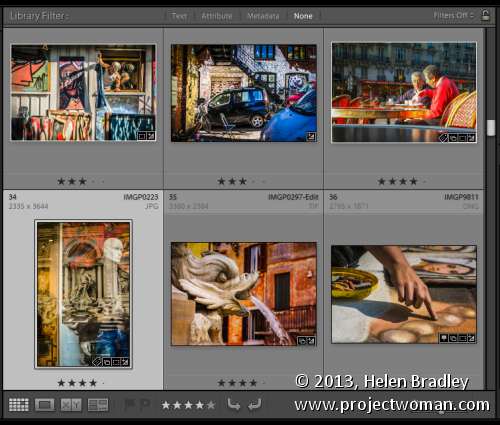
For example, in Lightroom you can use the flag feature to pick or reject images as you move through them – you can do this using the letters P and X. If you use Reject (X) for images you want to delete you can later choose Photo > Delete Rejected Photos to remove them. Then you might work through the picked images and allocate a star rating to them to indicate their relative value.

In Bridge you have various options for managing images and one is to select a folder of images and choose View > Review Mode to view the images in review mode. Here you can drag and drop images from the panel to select or reject them. As you rotate around the images only those you haven’t dropped off the screen will be left in this view. This feature allows you to quickly move through your images, previewing them at a good size and determining which you want to keep or reject.
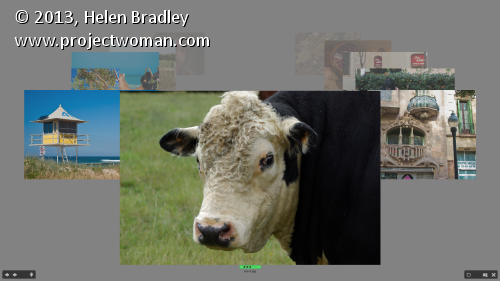
Depending how you are working, when you exit the view the images you had visible will be selected. If they are the worst images you can now delete them. If they are the best, you can, while still in Review Mode click the New Collection button in the bottom right of the screen and create a new collection for them. Back in Bridge you can right click the selected images and chose Label and then add a label or star rating to them.

In other programs such as Photoshop Elements and Picasa, you can apply star ratings to your images – in Photoshop Elements you can use 1-5 stars and in Picasa just a single star. In Picasa, click on an image or select multiple images and click the star button in the middle bottom of the Library window. When you apply a single star to an image in Picasa you can filter out only those starred images later on by clicking the star icon at the top of the program window.


Fixing Images

In many programs, you can apply basic fixes to multiple images at a time. For example, in Lightroom’s Library module if you are in Grid view you can select a series of images and apply one of a range of fixes to the images from the options in the Quick Develop panel. The Auto-Tone option, for example, automatically adjusts every image that you have selected with the appropriate fix for that image’s particular needs. You can also adjust the relative Exposure and Brightness and the White Balance.

In Photoshop Elements, you can select multiple images and click the Fix panel. Click Auto Smart Fix and the selected images will all have a basic fix applied to them. Here too you can choose Auto Color, Auto Levels, Auto Contrast or Auto Sharpen.

In Picasa, you can select an image and double click it to move to the edit module. When you have fixed the image you can choose Edit > Copy All Effects and then move back to the Library view. Select one or more images to apply these same changes to and choose Edit > Paste All Effects. The changes that you made to the first image will be pasted onto the other images.

Sharing images

When it comes to sharing your images some programs include built in tools that let you upload images direct to sharing sites from within the program. These integrated tools save you time – you don’t have to export the images and then upload and you can do it all in one step.

Lightroom, for example, is integrated with Facebook, Flickr and SmugMug allowing you to connect direct to your accounts with those services and upload images direct from inside Lightroom. If you are working in Picasa, you can upload direct to your web albums and you can send an image to your blog. In Photoshop Elements, you can share images in a number of ways including Flickr, Facebook and SmugMug.
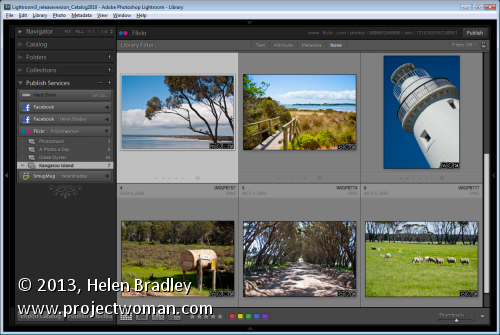
 

In some cases, you may need a plug-in to integrate your software with an online site. For example the Picasa2Flickr plug-in for Picasa lets you send images direct from Picasa to Flickr. You’ll find this at http://picasa2flickr.sourceforge.net/index.html.

If you cannot link your software direct with a sharing site, look out for a download from your sharing site that lets you upload bulk images at a time such as one of the Flickr tools. While these aren’t a single step solution they can save time when you have a lot of images to upload and, if you make sure to include captions, titles and keywords in your editing program you can save having to do this when the images have been uploaded.

When it comes to managing your images, in most cases you have a choice of workflows – one that gets things done and one that gets things done efficiently and effectively. If you design a workflow that does things more quickly and more efficiently, you’ll get your shoots processed much faster and you can get back to taking more great photos.


Helen Bradley

Monday, November 18th, 2013

Rev Up Your Photo workflow

Learn some tips and techniques to speed up your photo workflow.

When you return from a shoot or vacation with hundreds, if not thousands, of photos you need a smart workflow in place to process them. The more effective your workflow is, the less time you’ll waste on processing your images and the quicker you can get back to shooting. In this column, I’ll show you some techniques to use to streamline your workflow from downloading your images to adding metadata and keywords and then fixing and sharing the best of them.

Downloading

Before you begin to download any images from your camera you need a plan for storing and working on them. You should have a plan for how you will organize your images and how you will name your folders and whether the images will be renamed or not.

When it comes to structuring a system, be aware that what works best for someone else may not work best for you. You need to develop a system that you understand and that you can work with. Once you have a plan, it will help to write it down so you have a step by step process for working with the images from any shoot at any time. Any software that you use today or in future should be chosen so it supports this workflow.

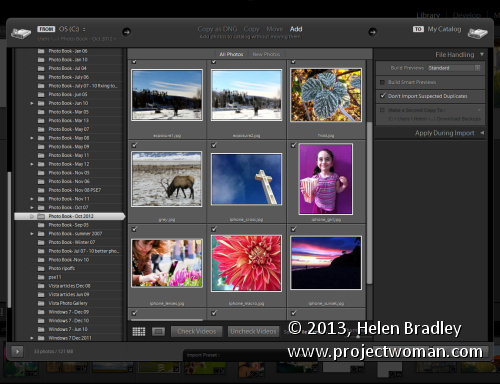
Start by downloading images from your camera cards. How you do this can impact how easy it is to do other things later on. For example, if you’re using Lightroom and you have multiple cards from a shoot, you might consider downloading all the images from all your cards into one folder on your computer before importing the images into Lightroom. This way you will have all the images in the Current/Previous Import folder in your Catalog panel allowing you to isolate all these images to deal with them as a group.

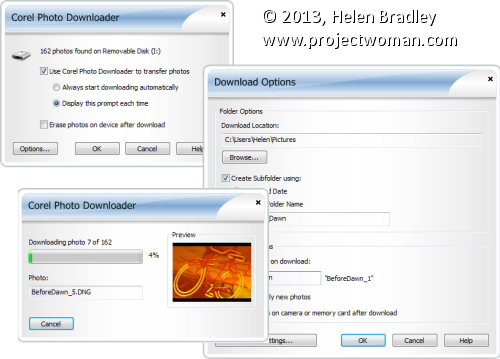
In any application you will need to set the import dialog so that the downloaded images are handled in accordance with your image handling workflow. Programs like Photoshop Elements include a special photo downloader and if you accept its download defaults then your images will be stored subfolders by date. If this isn’t what you want to happen you need to change the settings before downloading so you don’t have to fix the problems later.

So, in Photoshop Elements Photo Downloader dialog, select the source location for your images and the place to store them in. While the default is your My Pictures folder you can change this as necessary. Select a subfolder for the images and then determine how to name this – either by date or a custom name. If your workflow calls for your images to be renamed then you can do so as you import them – there are options in this dialog to name files by date, or to apply a custom name and sequence number.

Taking the time to not only get your images into the right place the first time and to rename them on import will save you hours of work later on.

In addition, in Photoshop Elements for example, if you select the Advanced dialog, you can add creator and copyright metadata to the images as you import them – something that you can’t do later on. This Advanced dialog is the same dialog that you would use if you are importing images via Adobe Bridge but in the case of Bridge it is possible to edit and add metadata  later on.

Whichever program you are using, check the program’s import options carefully to see what features it includes for renaming files, organizing images into folders, applying simple fixes and adding metadata as you import the images. Anything that can be done automatically as you import your images will save time later on.

Making backups

If you store all your images on just one disk there is a risk that you will lose them if your disk crashes or something happens to your computer. As a precaution and as part of your import process, and before you do anything more to your images, you should create at least one backup copy of them.

Some programs like Lightroom make this easy to do. In Lightroom’s Import dialog you can chose to backup your images to a second location as part of the import process. This is only the case if you choose Copy, Move or Copy as DNG as the import option, if you choose Add this option is not available. In the File Handling panel is a checkbox you can select to make a second copy of the images to a different location.

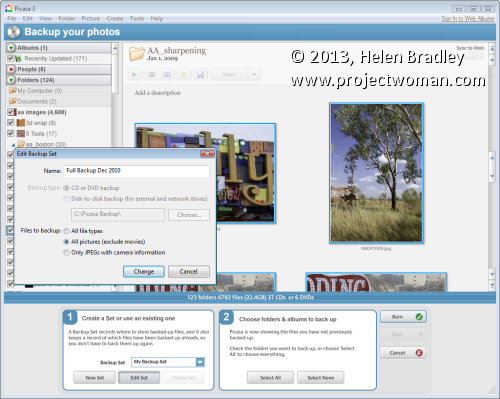
In other programs, you may need to back up the images manually. For example, in Picasa you can select the images to back up and choose Tools > Back Up Pictures. This opens up a set of step-by-step panels from which you will first select a Backup set or create a new one. The you can choose the folders or albums to back up and then click to Burn these to a series of CDs or DVDs or copy to an external or network drive.

A  benefit of using this Picasa backup tool is that it will take note of which files you have backed up so that you won’t have to back them up again. This will reduce the time involved in backing up new downloads in future and will save you unnecessary duplication of effort.

Whatever your program offers, backing up is a task that should be done routinely whenever you download your images so you’ll be protected if your computer crashes or if you make mistakes while editing and need to restore an image from the backed up version.


In the next part of this series: Keywording and Copyright Metadata

Helen Bradley

Wednesday, March 13th, 2013

Updated review – Photoshop Express for the iPad

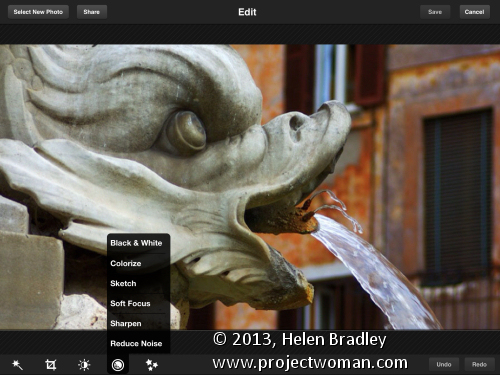
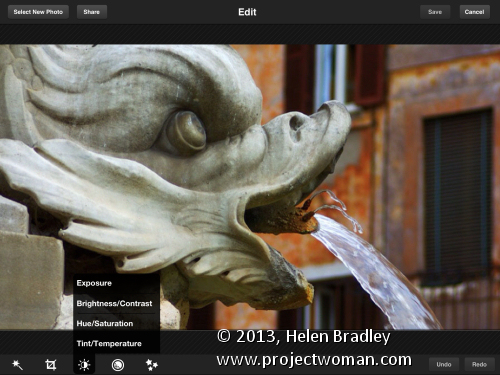
I’ve been revisiting some of the apps I’ve previously reviewed to see what changes have been made to them recently and how they have developed. One of these apps is Adobe Photoshop Express for the iPad. This app is free but it does have some in app purchases – one of which – the Camera pack that includes Noise removal – you can safely ignore. I think it is expensive and not worth the $4.99 that Adobe charges for it. However, ymmv.

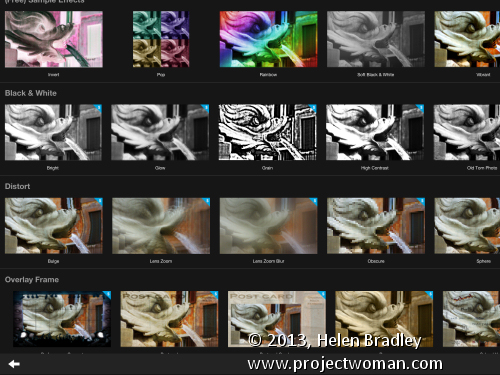
The free Effects in Photoshop Express are pretty limited and there are just nine of them so unless you buy the add on Effect Pack ($2.99) you won’t have a lot of creative options. That said, the Effect Pack has a lot of fun effects in it. You could get access to similar effects for free in other apps, but if you want everything in one place you might consider this pack worth shelling out for. There is also a Border pack for 99¢.

Like many free apps the add on borders and effects are shown in the app so you can see them but not use them unless you buy them. You can’t hide them either so this might be a bit off putting – personally I’d rather not see what I don’t own, but that’s my take on it.

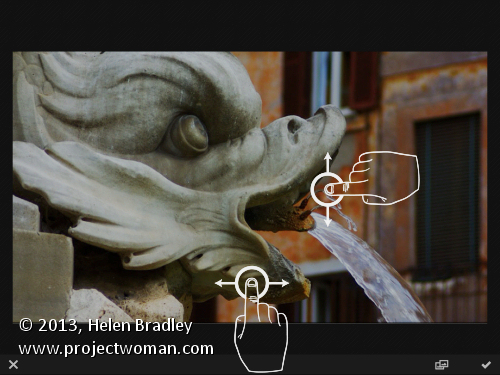
One change to the app that I like is the on screen prompts showing you how to use the app. This was a huge complaint that I had initially with the app as it had no indication as to how you made your adjustments. I thought at the time that this made it very hard for inexperienced users to use the app as it wasn’t clear how to do so. In a free tool aimed at beginner users I thought this was inexcusable.

Now the first time you choose an option like Brightness and Contrast an overlay appears showing you how to adjust these options. It’s much less confusing and a whole lot easier to work with. So much so that I’d wholeheartedly recommend this app for beginner to intermediate users.

In Photoshop Express you can edit images from your Camera Roll or capture images using the app. What you cannot do is upload images to Adobe Revel – the new online replacement for photoshop.com (and which was previously called Adobe Carousel – have I confused you yet?). You can also not download images from Adobe Revel to edit them in the app. Since Adobe owns all these sites and apps it would be nice if all its apps and storage locations talked to each other instead of operating in isolation.

Other changes I noticed is that the feature for adding effects and borders has been revamped allowing you to see the full range of effects and borders in one large screen already in place on a small version of your images. Those that are not enabled have a blue mark on the corner and there is a shopping cart link in the bottom right of the screen that you can use to buy add on packs, if desired.

So far as sharing is concerned, Photoshop Express is light on options when compared with some other apps. You can share to Facebook, Twitter, Tumblr and email images but that is all. You can also save images to your Camera Roll.

In all, the changes to Adobe Photoshop Express are welcome and make the app a lot more usable for its target audience. I now actually like this app and would heartily recommend it particularly for beginner to intermediate users looking for a simple and easy to use photo fixing tool.

Helen Bradley

Monday, July 16th, 2012

Why downsizing in Dreamweaver destroys images, and how to avoid this


In the images above, you can see that the image on the right looks appalling in comparison with that on the left.

The two images are the same size but the one on the left was scaled down from a large size in Photoshop and the one on the right was scaled down by downsizing it in Dreamweaver.

The results are a great example of why you should never downsize an image in a web editor instead of a graphics program! The resized version on the right is downright nasty in comparison to the one on the left.

If you need to scale down your images – these were reduced from 2,376 x 2,376 pixels in size to 300 x 300 – then it’s vital that you use a proper tool to do so.

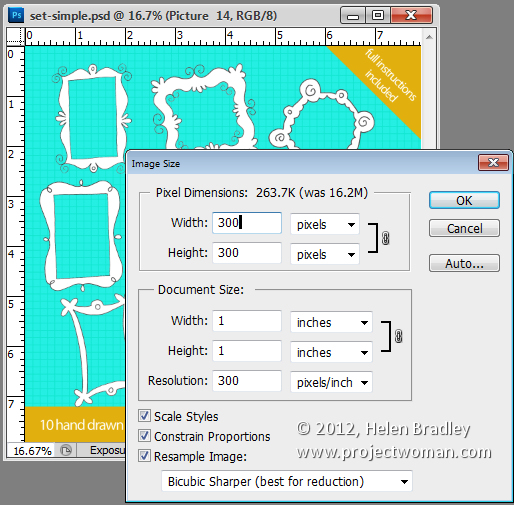
Photoshop has an image resize tool which you can get to by choosing Image > Image Size. Type the width and height of the finished image and then from the Resample image dropdown list select Bicubic Sharper (Best for Reduction). If you compare the results with different settings, you’ll see that the Bicubic Sharper typically gives the best result for downsizing images.


When you use this option the resulting images look as good downsized as they do on the screen in front of you.

Downsize them, save them and then import them into Dreamweaver and use them at that size. You will love your images a lot better when you do this.

Helen Bradley
Thursday, July 5th, 2012

Trevor’s tip of the Week – One image, two Windows

(photo by: Belovodchenko Anton)

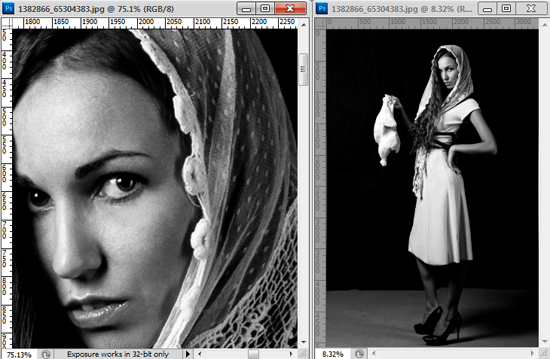
When doing detailed work, such as sharpening or color correction, on an image it’s important to see how your changes affect the whole image.  You can do this by having the same image appear in two separate windows.  All you need to do is select an image, go to Window > Arrange, and there will be a New Window for <image name> option at the bottom of the drop down menu.  Click to select it and you now have the same image in two windows that you can size and edit separately.

Helen Bradley
Friday, June 29th, 2012

Anchor an Object with a Shadow in Photoshop


When you add an object to another scene you will typically want to anchor it using a shadow.

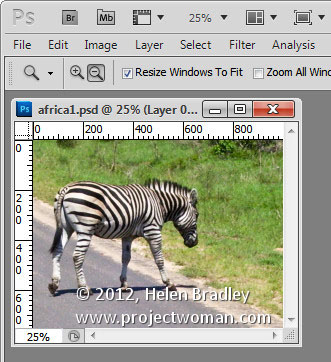
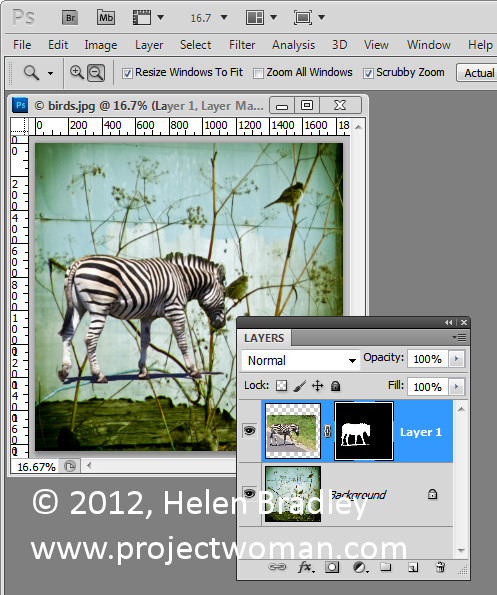
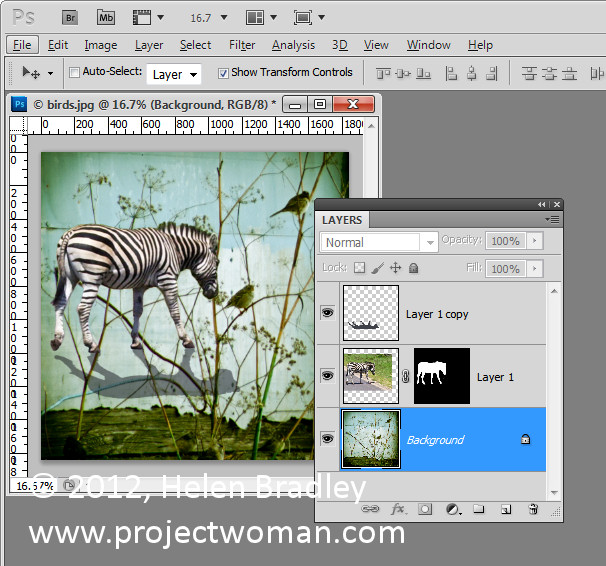
Here I have an image of a zebra that I want to incorporate in a larger image.


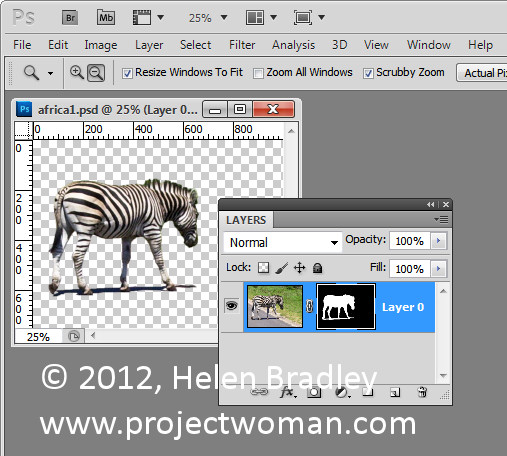
I masked out the zebra to add it to the image and included its own shadow with it.


In place, the result is less than satisfactory.


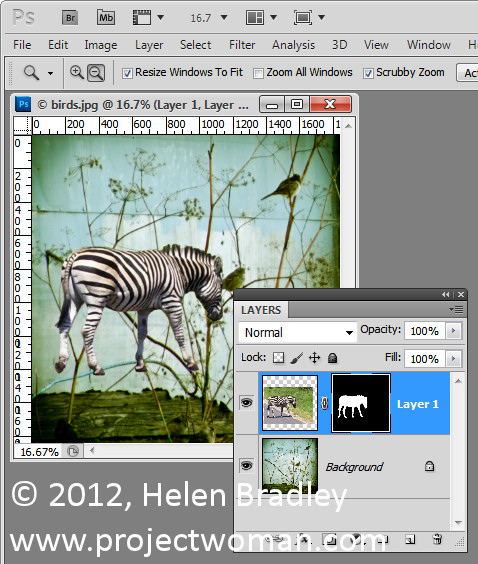
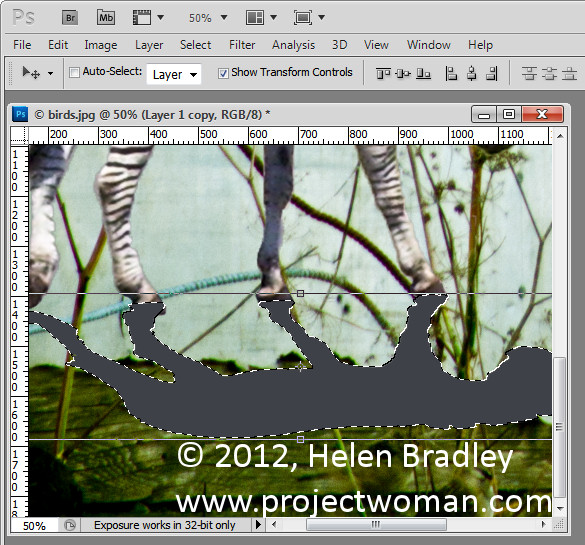
I would prefer to create my own shadow so the first thing to do is to remove the shadow that I brought in with the zebra which can be done by simply masking it out. With a mask you’ll paint on with white to reveal the layer it is attached to and in black to conceal it. In this case I want to paint in black to remove the shadow.


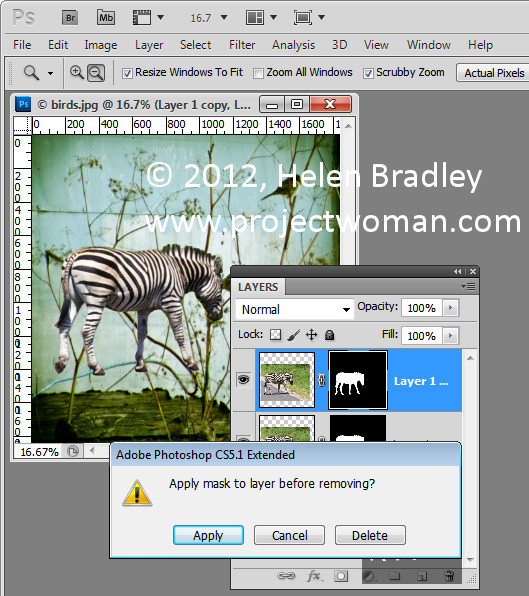
Once this is done I duplicated the zebra layer to create a second version of it and then dragged this layer’s mask into the trashcan. When you do this you’ll be asked if you want to apply the mask before removing it, and I clicked Apply to do this. This puts one version of the zebra by itself on a layer.


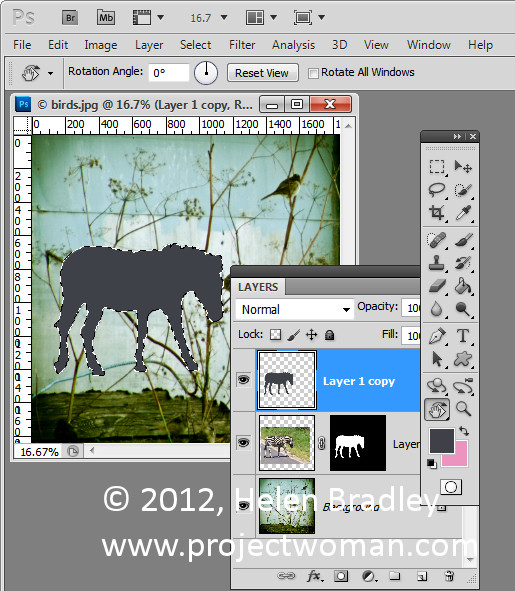
Now Ctrl + Click on the layer thumbnail for the zebra layer to select it. Press Delete to delete the zebra but to leave the selection intact. You’ll still see the zebra but you’re seeing the one from the layer below not the one you just isolated. Make sure that black or a dark gray is selected as the foreground color and press Alt + Backspace to fill the shape with the black color.


Target the Move tool and click on the shape. Choose Edit > Transform > Flip Vertical to turn the shadow upside down and then drag it into position. You will need it to line up correctly with the feet of the animal or with the base of the object that you’re trying to put into the image. In this case it didn’t line up exactly and needed to be rotated to the correct angle. Drag it into position and you can then shrink the shadow by dragging on the sizing handle to make it smaller.

You can also hold the Ctrl key as you drag on the corner handles to skew the shadow into shape. When you’re done, click to confirm the transformation. You can still continue to work on the shadow after this if necessary.


For example, you can also use Edit > Transform > Warp if you really need to bend the shadow into position. If the animal’s feet are on the ground the shadow should be attached to the bottom of the foot. Legs that are in the air like the rear leg of this zebra can be left floating.

Another tool that can be used is the Puppet Warp tool if you are using Photoshop CS5. You can also use the Liquify filter and use the Forward Warp tool to push the shadow around so that it matches the feet.

When you’re done blend the shadow into the underlying image using a blend mode. Modes such as Multiply and Overlay are good choices. Reduce the Opacity of the shadow layer until you get a blending of the shadow into the underlying image.

To move the shadow and the animal together make sure that you select both layers in the layer palette before moving them so that the two travel in unison.


For this image I finished off by cropping the image to remove the bottom part of it leaving just the zebra on the blue background.

Helen Bradley
Monday, June 25th, 2012

Dreamweaver to Photoshop


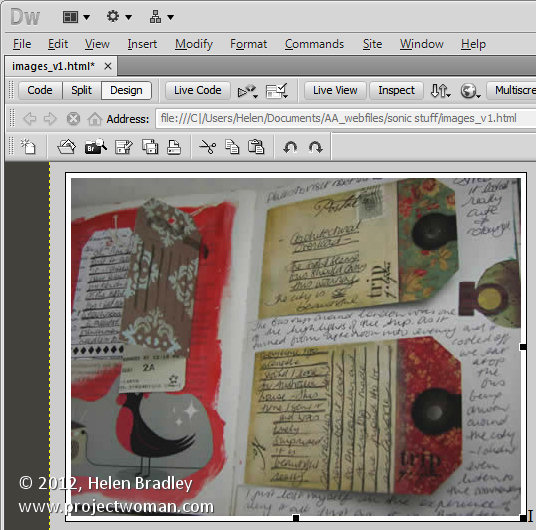
While Dreamweaver has some rudimentary tools for photo editing, if you want to do some real image editing, you’re better advised to take the image to a photo editor to do so.

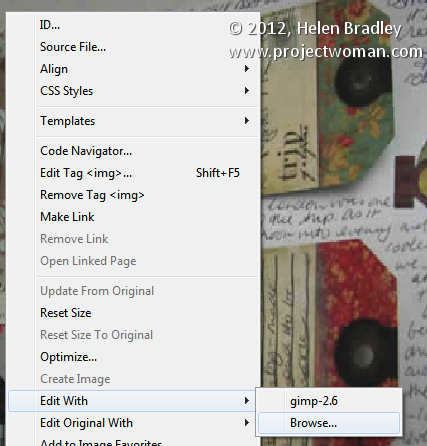
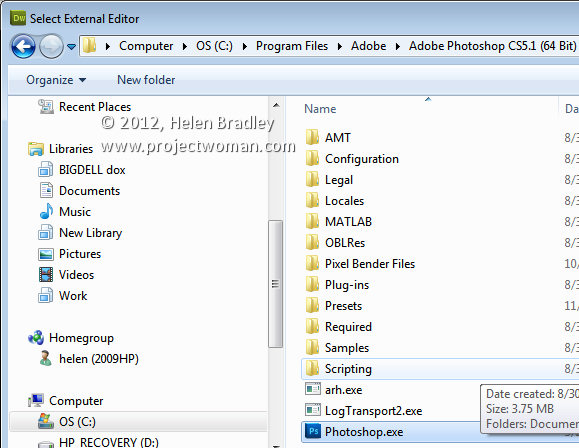
From Dreamweaver you can send an image to Photoshop by right clicking it and choosing Edit With > and choose the image editor to use from the list. If Photoshop is not in the list you can browse to find it, if desired.


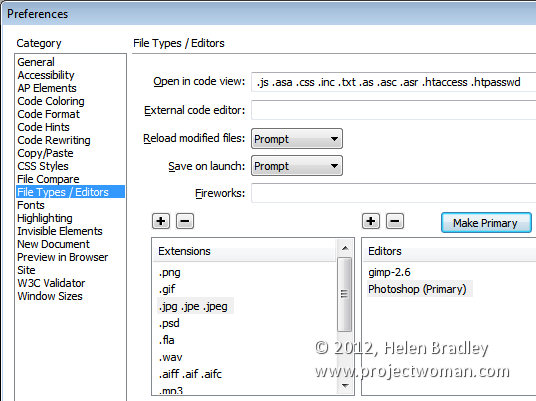
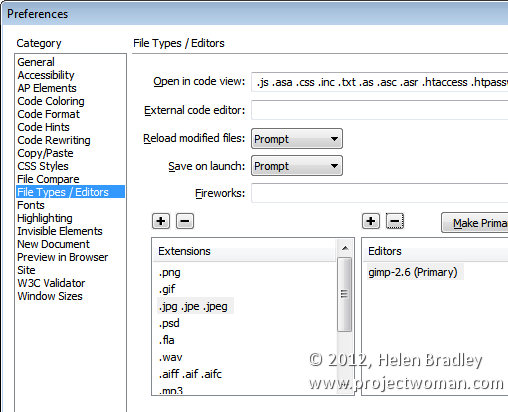
However, it’s better still to add Photoshop permanently to the list and to do this, choose Edit > Preferences > File Types/Editors and in the Extensions list, select the file extension to set the external editor for. In most cases you will be choosing .jpg .jpe .jpeg.


In the Editors box, click the plus (+) symbol above the box and browse to find the executable file for your version of Photoshop (or another program if desired). In most cases this will be in your C:\Program Files or C:\Program Files (x86) folder.


You can make an editor the primary one by selecting it in the list and choose Make Primary and then click Ok.


Next time you choose Edit With, you’ll be able to choose Photoshop and the image will be passed from Dreamweaver to Photoshop – if Photoshop isn’t open it will be opened automatically for you.

Helen Bradley
Tuesday, June 19th, 2012

Transparency and the Gimp


One of the most confusing things for Photoshop users will be the concept of a transparent layer in Gimp.

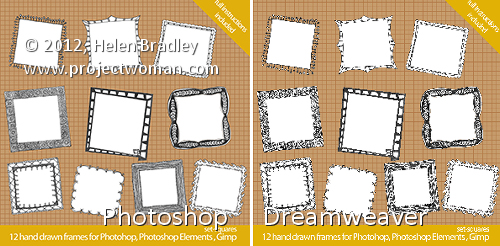
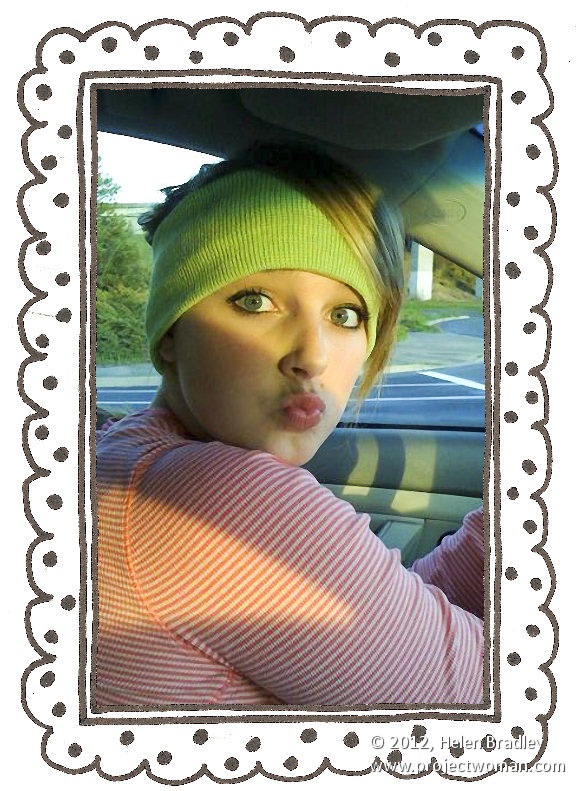
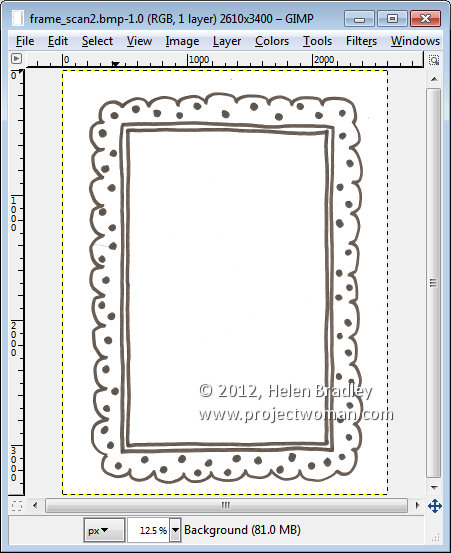
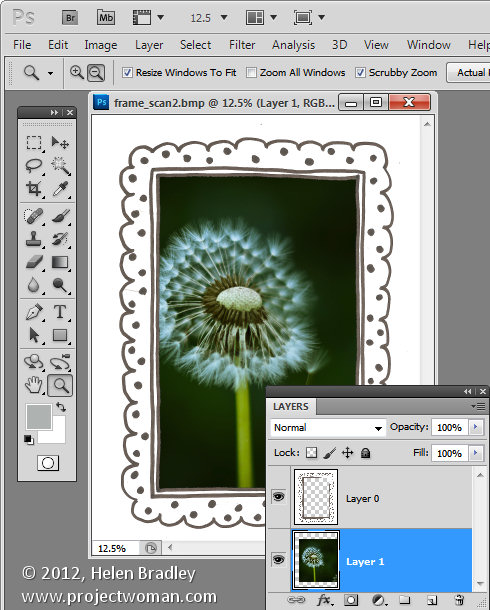
Consider the situation where you open an image such as this hand drawn frame here. The image is a BMP image and what I want to do is grab the middle out of the frame so that I can put something behind it.


If this were Photoshop, I would convert the background layer to a regular layer by double clicking on it and press Ok. Then I would target the Magic Wand tool and click in the middle of the frame to select the middle area then press Delete to make it transparent so I can drop an image in behind it.


If you try this process in Gimp, all you get is an extreme level of frustration as nothing seems to work. Select and delete does absolutely nothing !

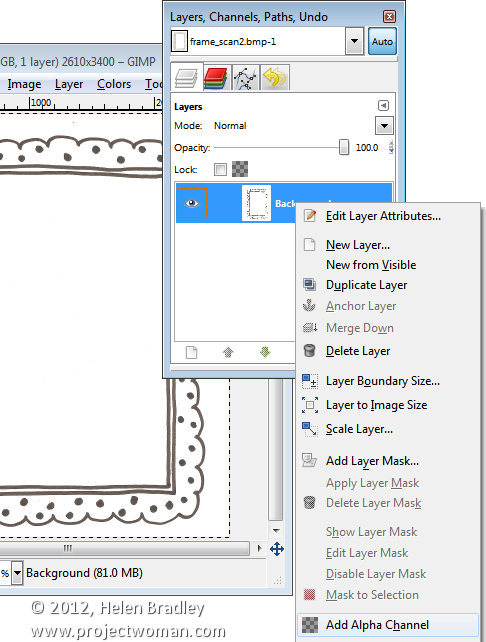
Here’s the solution. With the layer with the image on it selected, right click and choose Add alpha channel. This then allows you to select an area on the image using the Fuzzy Select tool, and press the Delete button. Then choose Select none and you will have a transparent middle to your image. It’s an easy process once you understand what’s happening but an extremely frustration one until you do.


Helen Bradley
Page 1 of 212