In this final part of our workflow series we look at organizing and selecting images, fixing and sharing them.
Organizing and selecting images
Once you’ve imported your images, you’ll need to determine which of those you want to work with and which you will not. For this you will need to use a system that is supported by your software – it needs to be quick and easy to use so you can quickly identify the best of your photos.
If you have already backed up your images, you may determine that your master file of images will contain only the best of the images, so you might give a low rating or mark as reject any images that you don’t want to keep so you can later find and delete them. Whatever the case, you need to determine what your process is going to be and then work within this process to get the task done as quickly as possible.
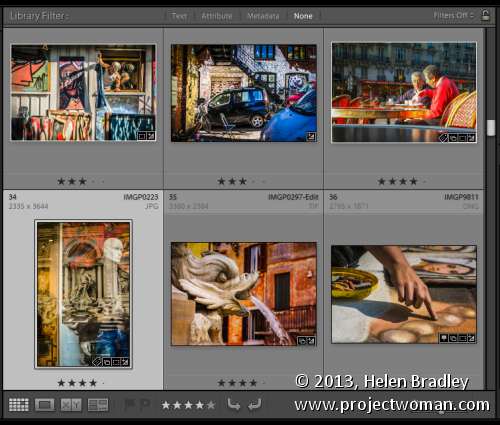
For example, in Lightroom you can use the flag feature to pick or reject images as you move through them – you can do this using the letters P and X. If you use Reject (X) for images you want to delete you can later choose Photo > Delete Rejected Photos to remove them. Then you might work through the picked images and allocate a star rating to them to indicate their relative value.
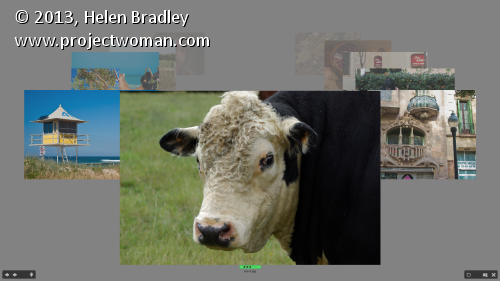
In Bridge you have various options for managing images and one is to select a folder of images and choose View > Review Mode to view the images in review mode. Here you can drag and drop images from the panel to select or reject them. As you rotate around the images only those you haven’t dropped off the screen will be left in this view. This feature allows you to quickly move through your images, previewing them at a good size and determining which you want to keep or reject.
Depending how you are working, when you exit the view the images you had visible will be selected. If they are the worst images you can now delete them. If they are the best, you can, while still in Review Mode click the New Collection button in the bottom right of the screen and create a new collection for them. Back in Bridge you can right click the selected images and chose Label and then add a label or star rating to them.
In other programs such as Photoshop Elements and Picasa, you can apply star ratings to your images – in Photoshop Elements you can use 1-5 stars and in Picasa just a single star. In Picasa, click on an image or select multiple images and click the star button in the middle bottom of the Library window. When you apply a single star to an image in Picasa you can filter out only those starred images later on by clicking the star icon at the top of the program window.
Fixing Images
In many programs, you can apply basic fixes to multiple images at a time. For example, in Lightroom’s Library module if you are in Grid view you can select a series of images and apply one of a range of fixes to the images from the options in the Quick Develop panel. The Auto-Tone option, for example, automatically adjusts every image that you have selected with the appropriate fix for that image’s particular needs. You can also adjust the relative Exposure and Brightness and the White Balance.
In Photoshop Elements, you can select multiple images and click the Fix panel. Click Auto Smart Fix and the selected images will all have a basic fix applied to them. Here too you can choose Auto Color, Auto Levels, Auto Contrast or Auto Sharpen.
In Picasa, you can select an image and double click it to move to the edit module. When you have fixed the image you can choose Edit > Copy All Effects and then move back to the Library view. Select one or more images to apply these same changes to and choose Edit > Paste All Effects. The changes that you made to the first image will be pasted onto the other images.
Sharing images
When it comes to sharing your images some programs include built in tools that let you upload images direct to sharing sites from within the program. These integrated tools save you time – you don’t have to export the images and then upload and you can do it all in one step.
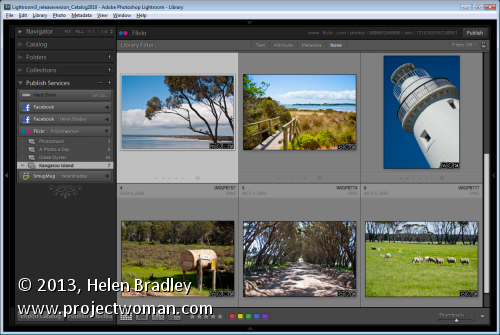
Lightroom, for example, is integrated with Facebook, Flickr and SmugMug allowing you to connect direct to your accounts with those services and upload images direct from inside Lightroom. If you are working in Picasa, you can upload direct to your web albums and you can send an image to your blog. In Photoshop Elements, you can share images in a number of ways including Flickr, Facebook and SmugMug.
In some cases, you may need a plug-in to integrate your software with an online site. For example the Picasa2Flickr plug-in for Picasa lets you send images direct from Picasa to Flickr. You’ll find this at http://picasa2flickr.sourceforge.net/index.html.
If you cannot link your software direct with a sharing site, look out for a download from your sharing site that lets you upload bulk images at a time such as one of the Flickr tools. While these aren’t a single step solution they can save time when you have a lot of images to upload and, if you make sure to include captions, titles and keywords in your editing program you can save having to do this when the images have been uploaded.
When it comes to managing your images, in most cases you have a choice of workflows – one that gets things done and one that gets things done efficiently and effectively. If you design a workflow that does things more quickly and more efficiently, you’ll get your shoots processed much faster and you can get back to taking more great photos.




Wednesday, October 16th, 2013
A Comment on Comments
Sometimes you’ll want to add a comment to a piece of text but not so that it actually appears in the text.
For example you may want to ask someone else who is working on the document with you a question about something mentioned in the text or you may want to remind yourself to check the source of a quote you have used. The best choice for this task is Word’s Comment option. Select the text to attach the comment to and select Review > New Comment. A comment box will open to the side of the document with your initials and a comment number in brackets (eg [HB1]).
If your initials or name are incorrect, alter them by selecting File > Options > General and changing the Username and Initials text boxes.
If you’re viewing a document which contains a number of comments you can move from one to the next quickly by using the Previous and Next. Use the Delete Comment button to delete a comment, leaving the text it’s attached to intact – right clicking a comment and selecting Delete Comment works the same way. You can edit the text in a comment simply by selecting the comment and typing.
You can choose to print with or without comments by selecting the print range dropdown menu under print settings and checking or unchecking Print Markup.
Using comments is particularly useful when you’re working on a document with someone else as they effectively allow you to ‘carry on a conversation’ about the document.
Helen Bradley
Labels: comments, markup, Office, print, review, Word
Categories:office
posted by Helen Bradley @ 9:00 amNo Comments links to this post