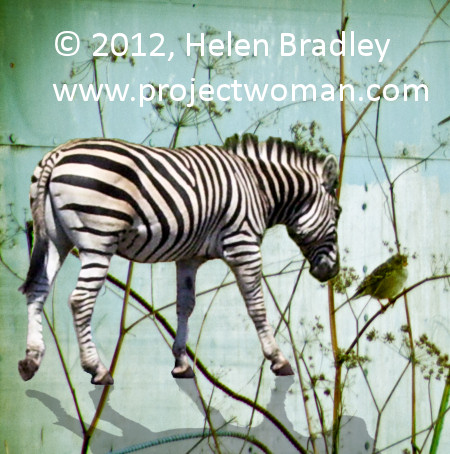
When you add an object to another scene you will typically want to anchor it using a shadow.
Here I have an image of a zebra that I want to incorporate in a larger image.
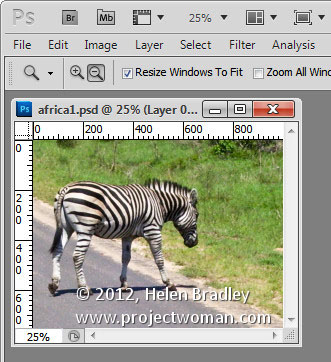
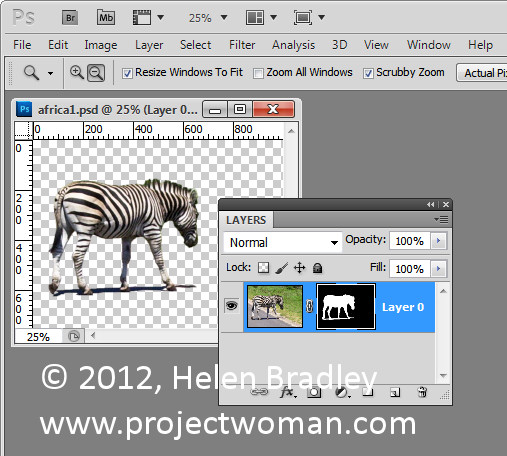
I masked out the zebra to add it to the image and included its own shadow with it.
In place, the result is less than satisfactory.
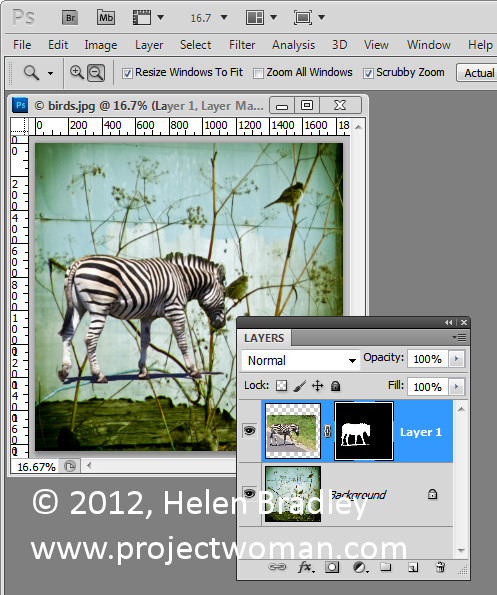
I would prefer to create my own shadow so the first thing to do is to remove the shadow that I brought in with the zebra which can be done by simply masking it out. With a mask you’ll paint on with white to reveal the layer it is attached to and in black to conceal it. In this case I want to paint in black to remove the shadow.
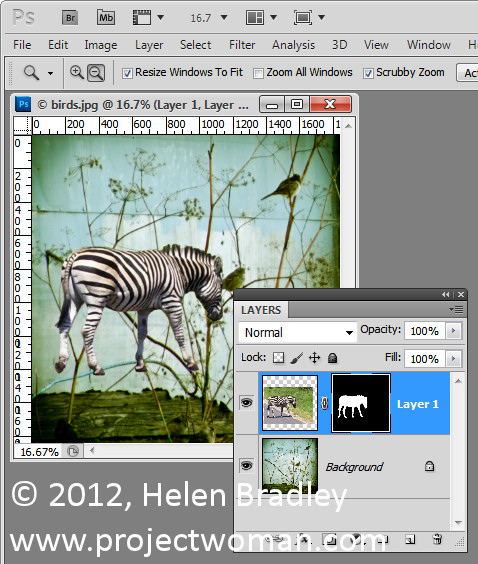
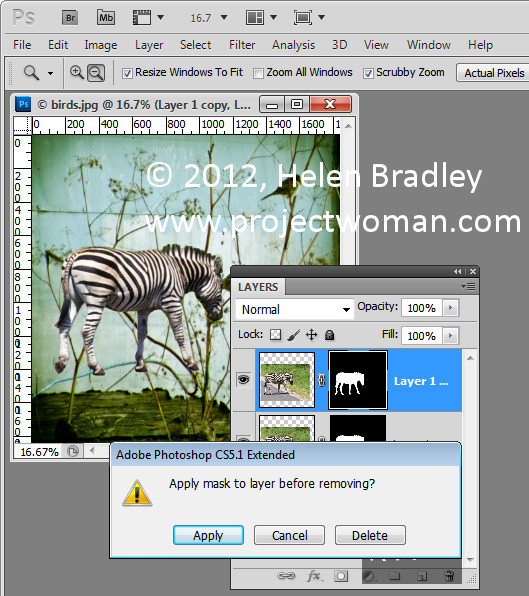
Once this is done I duplicated the zebra layer to create a second version of it and then dragged this layer’s mask into the trashcan. When you do this you’ll be asked if you want to apply the mask before removing it, and I clicked Apply to do this. This puts one version of the zebra by itself on a layer.
Now Ctrl + Click on the layer thumbnail for the zebra layer to select it. Press Delete to delete the zebra but to leave the selection intact. You’ll still see the zebra but you’re seeing the one from the layer below not the one you just isolated. Make sure that black or a dark gray is selected as the foreground color and press Alt + Backspace to fill the shape with the black color.
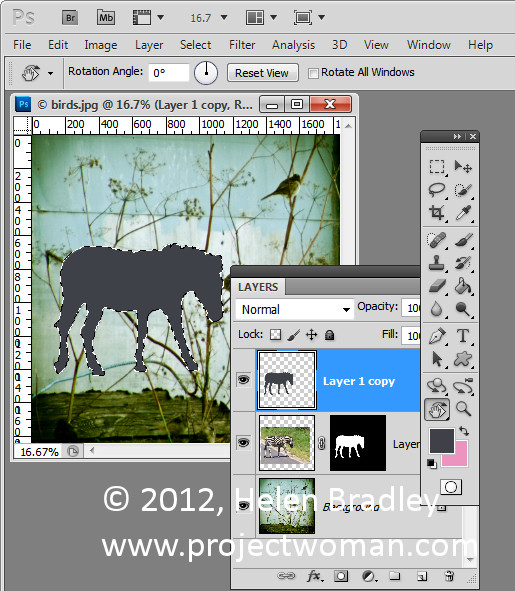
Target the Move tool and click on the shape. Choose Edit > Transform > Flip Vertical to turn the shadow upside down and then drag it into position. You will need it to line up correctly with the feet of the animal or with the base of the object that you’re trying to put into the image. In this case it didn’t line up exactly and needed to be rotated to the correct angle. Drag it into position and you can then shrink the shadow by dragging on the sizing handle to make it smaller.
You can also hold the Ctrl key as you drag on the corner handles to skew the shadow into shape. When you’re done, click to confirm the transformation. You can still continue to work on the shadow after this if necessary.
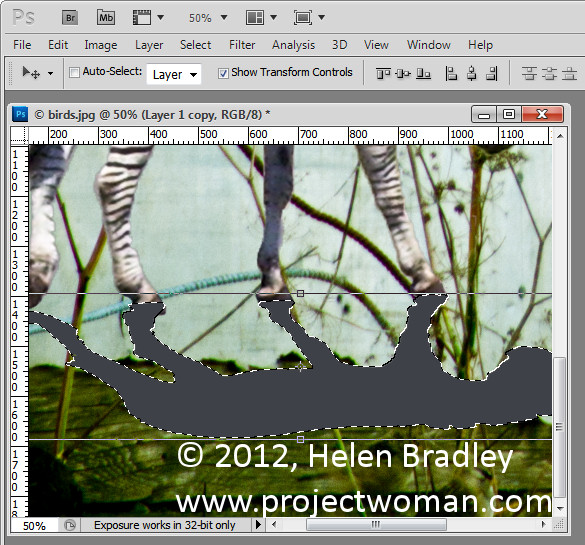
For example, you can also use Edit > Transform > Warp if you really need to bend the shadow into position. If the animal’s feet are on the ground the shadow should be attached to the bottom of the foot. Legs that are in the air like the rear leg of this zebra can be left floating.
Another tool that can be used is the Puppet Warp tool if you are using Photoshop CS5. You can also use the Liquify filter and use the Forward Warp tool to push the shadow around so that it matches the feet.
When you’re done blend the shadow into the underlying image using a blend mode. Modes such as Multiply and Overlay are good choices. Reduce the Opacity of the shadow layer until you get a blending of the shadow into the underlying image.
To move the shadow and the animal together make sure that you select both layers in the layer palette before moving them so that the two travel in unison.
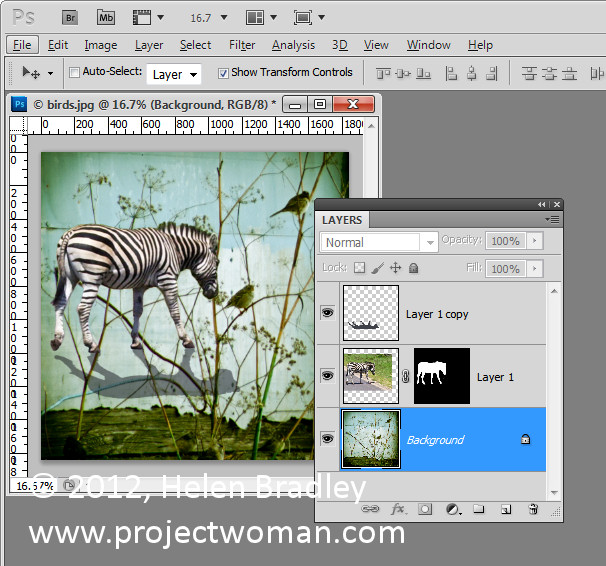
For this image I finished off by cropping the image to remove the bottom part of it leaving just the zebra on the blue background.


There’s noticeably a bundle to know about this. I assume you made sure good points in options also.