Wednesday, November 7th, 2012

Trevor’s Quick Illustrator Tip – Fit to Window

Photo by: StillSearc via sxc.hu

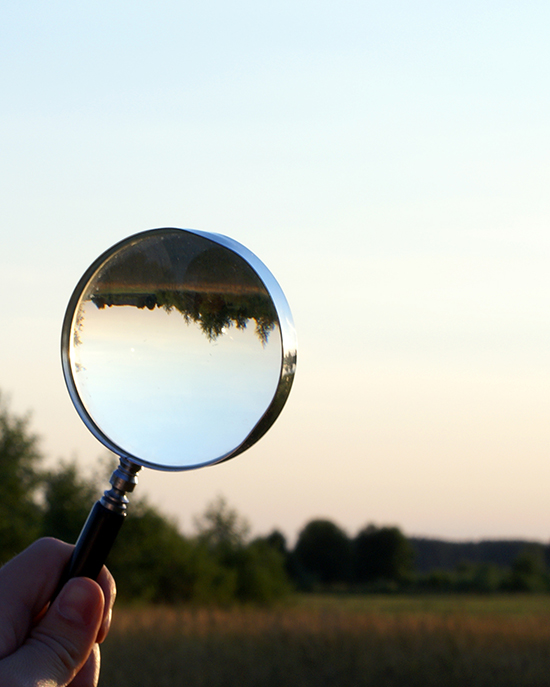
Want to get a complete view of the document you are working on?  To fit the entire document to the current window size, double-click the Hand tool. You can also press Ctrl + 0(zero) on a PC or Command + 0 (zero) on a Mac.

Helen Bradley

Tuesday, November 6th, 2012

Trevor’s Quick Excel Tip – Select Everything

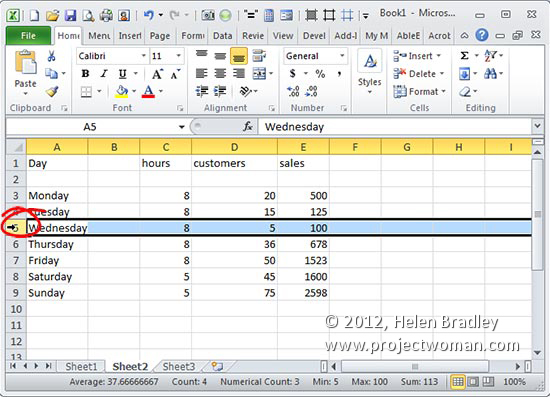
To select an entire row or column in an Excel worksheet, click the column letter or the row number. To select multiple columns or multiple rows click and drag over the column letters or row numbers to select. To select the entire worksheet, click the empty box at the intersection of the Rows and Columns in the top left of the worksheet.

Helen Bradley

Friday, November 2nd, 2012

Trevor’s Quick Photoshop Tip – Shortcut key to your Photoshop Preferences

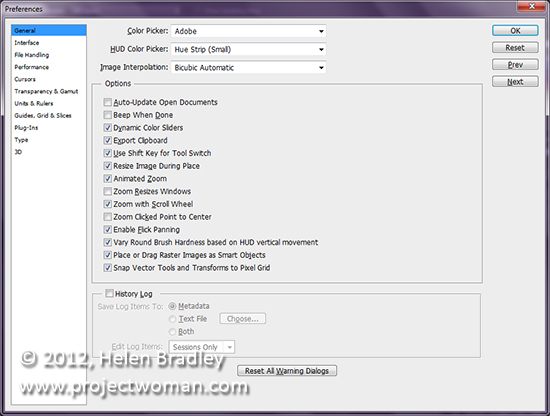
It’s a good idea to configure your Photoshop preferences so the program works as you want it to. So, after installing Photoshop check your preferences and change any that you need to set by pressing the shortcut keystroke Ctrl + K on a PC and Command + K on a Mac. Bonus tip – it works with Illustrator too!

Helen Bradley

Wednesday, October 31st, 2012

Trevor’s Quick Illustrator Tip – Quick Close

Photo by: salssa via sxc.hu

You can close the current document you are working on to clean up your work area, by pressing Ctrl + W on a PC and Command + W on a Mac. If you haven’t saved the image you’ll be prompted to do so before it closes.

Helen Bradley

Tuesday, October 30th, 2012

7 Camera Settings for Capturing Better Photos

Whether you are using a Point and Shoot or a DSLR camera here are seven camera settings that will help you capture better photos:

Tip 1 – Adjust for light

Most digital cameras, in particular SLRs, let you select ISO film equivalencies. Choose 100 – 200 sensitivity for photographing in bright light conditions and use 400 – 800 when there is less light.  In very poor light you can capture at 3200 – 6400 or higher but you will find that, as a result, there will be more film grain visible in the final image a a result.

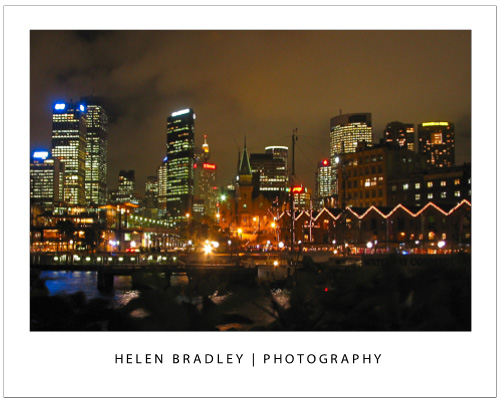
To capture an image like this at night you should have an ISO setting of at least 800 -1600 or higher and a tripod to steady the camera.
Tip 2 – Choose your mode

Most cameras, in particular point and shoot cameras have settings for portrait, landscape, night shooting, sports, etc. Choose the correct mode for the type of conditions and the camera will automatically configure the ideal settings to ensure the best shots in the available light conditions.

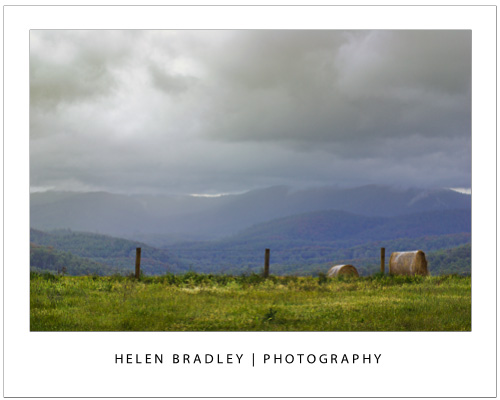
For an image like this choose Landscape mode so it is all in focus.
Tip 3 – Depth of field

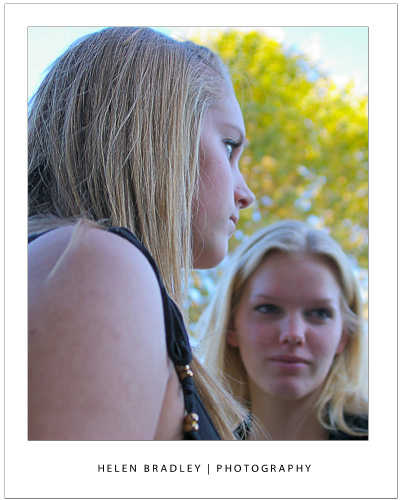
Use your camera’s Aperture Priority setting and set the aperture to a small f stop such as 2.8 to capture photographs with an interesting depth of field. Focus the camera on the object to appear in focus and, when you do, objects in front and behind this object will appear pleasingly out of focus.

Here I focused on the girl in front with a very small f stop and she is in focus – the girl facing us is not.
Tip 4 – Axe the digital zoom

Of the two types of digital camera zoom, which you will find in both point and shoot cameras and camera phones only Optical Zoom is a true zoom . If your camera offers digital zoom it is best to disable it or avoid using it. Digital zoom merely increases the size of the image captured and crops away the area not required. Optical zoom actually zooms into the scene to capture it at full size.


Tip 5 – Adjust exposure

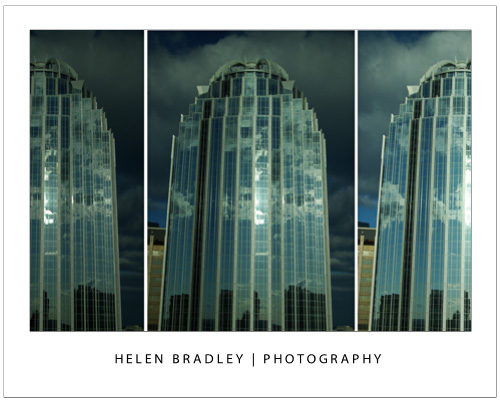
Avoid over or under exposed photos using your camera’s exposure compensation settings. These can usually be adjusted to somewhere between -2 to +2EV. To lighten a shot use + values and to darken one, use – values.

Here is the same Boston building captured at -2, 0 and +2 exposure – the one on the right is the better exposed shot.
Tip 6 – Set the correct White balance

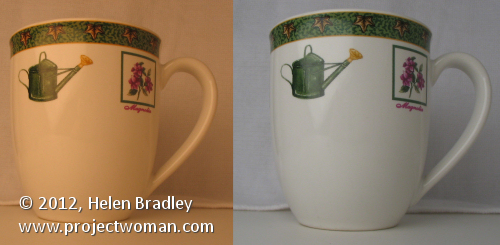
Different light sources throw different color casts onto your photos. For instance, inside lighting such as florescent and tungsten globes will throw blue/green or orange tints onto your image. When shooting indoors without a flash, set the white balance mode to match the light source, to remove any undesirable color cast.

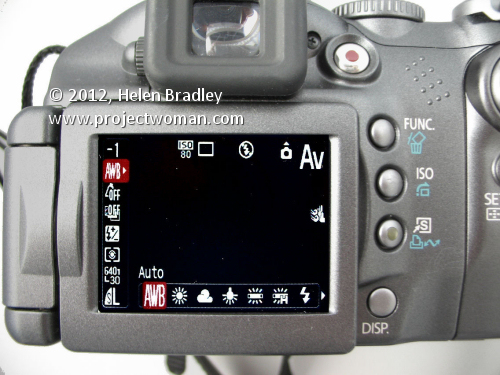
This camera is set to an ISO of 80 (suitable for a very bright day) and AWB – Auto White Balance – this  means the camera will adjust the white balance – not good for indoor shooting but should be fine out of doors in full sun.
 

The image on the left was shot in tungsten light with no white balance adjustment. The one on the right was shot in the same position but with white balance set to tungsten light – the color is much improved.


Tip 7 – Set the Flash

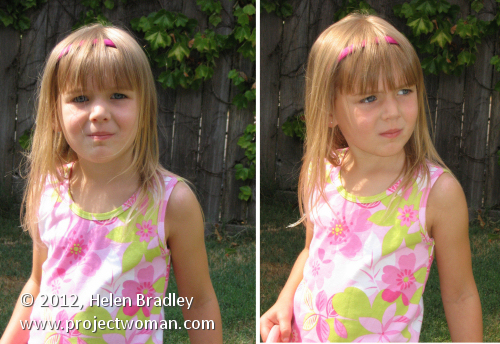
Use your flash when capturing portraits on a very bright day. While it may seem counter productive, the flash will light your subject’s face and avoid the deep shadows that the overhead sun will cast on their face.

On the left the little girl is captured with no flash and over head sun. On the right I fired the flash and her face and clothes are more evenly lit.
 

Helen Bradley
Friday, October 26th, 2012

Trevor’s Quick Photoshop tip – Zoom with your scroll wheel

 photo by: Cierpki via sxc.hu

Do you want to fluidly zoom in and out of your project with the scroll wheel of your mouse? Well you’re in luck because in Photoshop this can be activated in Preferences. To go to your General Preferences, press Ctrl + K on a PC and Command + K on a Mac and check the Zoom with Scroll Wheel checkbox and press OK. Now you can zoom in and out of your images using just your mouse.

Helen Bradley

Thursday, October 25th, 2012

Droste Effect in Photoshop

Create the Droste Effect in Photoshop CS4 or CS5 or CS5.5 (not supported in CS6). Uses Bender and the Droste Filter.

Check out all our tutorials on our YouTube channel.

Complete transcript of this video:

Hello, I’m Helen Bradley. Welcome to this video tutorial. I’m going to show you here how to create the Droste effect using Pixel Bender in Photoshop. Now you need Photoshop CS4, CS5 or CS5.5. This does not work at the time of recording with Photoshop CS6. Before we start creating the Droste effect let’s have a look and see what it is that we’re trying to achieve. And this is the Droste effect that we’re going to create. And you can see it’s just a set of repeating images inside of each other. They’re actually based on a cocoa company’s advertisement. Their box had the cocoa packet being repeated within itself. And it’s been named the Droste effect because of that. Now we’re going to do it using Pixel Bender which is not being supported in Photoshop CS6. And in the description of this video on YouTube you’ll find that there is details about where you can get Pixel Bender and how to install it. So I’m assuming that you’re working with Photoshop CS4, CS5 or CS5.5 and that you have Pixel Bender installed and the Droste filter installed. So let’s get going with this. Let’s just put this image aside and we’ll go and get our original image. As I said it works particularly well when you have somebody off center so let’s just zoom out of this image a little bit. And the first thing we’re going to do is to add some extra area around the image. And I’m going to do this using the crop tool. So I’m going to select the crop tool, select over the image and then hold Alt or Option and then just drag out to create some extra canvas around the area of this image and just click the checkmark here. Now the canvas has come in with the current background color which has suited me really well because that gives me a white edge. Let’s flip these colors around and let’s go and do the same thing. Again, Alt or Option, and this time I’m only going to add a very small black canvas. Now you can do this any way you like. I just want to do it the quickest way possible. So now we have an image that is a black and white frame around our image. We’re going to go and see just how big this image is, reading it off with Image, Image Size. And the image is 1,076 by 905. Now this is an important because the filter needs to know this. So you’ll want to write this down. And we’re ready to get started with the filter. So we’re going to choose Filter and then Pixel Bender and then Pixel Bender Gallery. Now we already have the Droste filter selected. If you haven’t used this filter before you’ll probably have something like Cassini so you’ll just want to go down and select Droste. And this is the Droste effect. And we’re just going to first of all regardless of what it looks like here we’re going to start with entering the values that we read off for the size of the image. So it’s 1,076 by 905. And then we’ll adjust things like the radius inside and radius outside when we actually need to. We’re going to leave strands ate 1 and periodicity at 1. Strands and periodicity are the number of times that this will rotate. So if we send it up to 2 you’ll see that we get something that’s actually got two rotations. We don’t want that for this effect. We really only want one. And periodicity at 1 is fine too. The zoom is going to allow us to zoom in or out of this image. And at the moment we’re just going to leave zoom all the way out. Center is going to center the image itself. So when I drag on this the image rolls over, not the center of the actual portion of the image that we’re working with. You can see that if I just center shift I’m getting a very different effect on the image. Now center shift is something that I typically will adjust because I want to make sure that she is sitting opposite the image and the image is not actually over the top of her which it would be here. I’m going to adjust the rotation because at the moment it’s rotated at an angle and I really want it straight. So I’m going to rotate it a bit so that she is straight up and down. And having done that I want to bring the center of the image down. So I’m just going to adjust the vertical and perhaps also the horizontal so that I get the effect that I’m looking for. And I can combine that with zoom. Background RGBA is just the background of the image if this were showing any background, which it’s not. And levels and levels start you just don’t need to be working with at all. Transparent inside just makes it circular so we don’t want to use that. There’s really nothing below these settings that we’ve been working with that we really even want to see. So let’s just check and make sure that we’re getting the result that we want. Perhaps adjust these radius values to get a bigger image. And I’m thinking I like that a bit better, straighten it up with the rotate, perhaps move the center a little bit. And when we’re happy with the result that we’ve got, we’re just going to click Ok. And there’s our finished Droste effect. If we added some more levels we would see some more repeats in here. You can see that the repeats have sort of stopped. So we could go back and add more levels and that would give us a better result. Let’s just go and do that because all our settings will be still in place. And so what we’ll do is we’ll just increase the number of levels here and click Ok. And that’s giving us more repeats in the image here. But there’s the Droste effect filter created using the Pixel Bender plug-in in Photoshop CS4, CS5 and CS5.5. I’m Helen Bradley. Thank you for joining me for this video tutorial. If you liked this video please give it a thumbs up in YouTube. You’ll find more video tutorials on my YouTube channel and look out at projectwoman.com for more tutorials and articles on Photoshop, Illustrator and Lightroom.

Helen Bradley

Wednesday, October 24th, 2012

5 Quick Tips to Improve your Photography Today!

If you want to add a quick boost to your photos, follow these five tips to take better photos today… and everyday!

Tip 1 – Get close to your subject

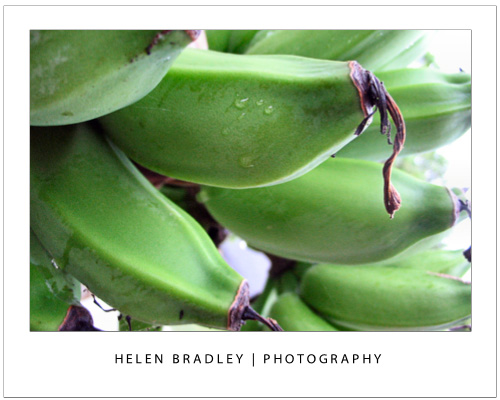
The single simplest way to improve your photographs is to move physically closer to what you are photographing. If you can’t get physically closer then zoom in close using your camera’s zoom.

This image was captured from the verandah of a house in the tropics so it was possible to walk up very close to the clump of bananas on the palm.


Tip 2 – Capture Close ups with Macro

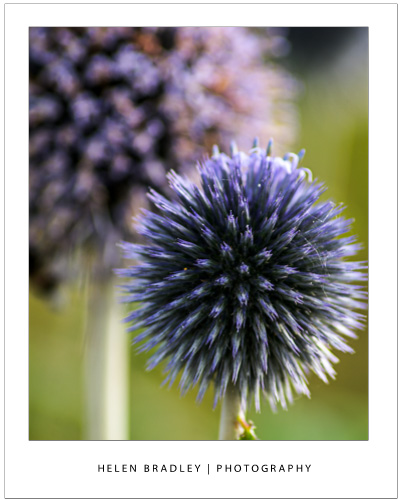
When shooting an object close up, set your camera to its Macro setting which is indicated by a small flower – you can set it using either a setting on the camera itself or from inside its menus. Zoom all the way back out (macro and zoom don’t mix) and check that the camera is able to focus on what you’re shooting – if not, move further back a little and try again. Most cameras can capture shots using macro mode as close as a few inches from the object.

This flower was captured with a macro setting – one side benefit of this is that the background is thrown out of focus showing an attractive shallow depth of field.

Tip 3 – Follow the Rule of thirds

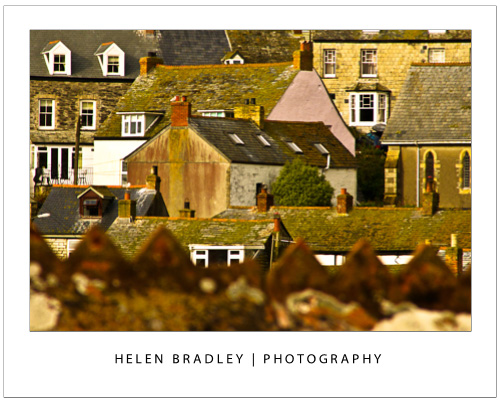
The rule of thirds is a tool for creating a dynamic composition for your image. To apply it, draw an imaginary tic-tack-toe board over the scene you see in the  camera’s LCD screen or the viewfinder before you take the shot. Position the subject of the image along a horizontal a vertical line or at the  intersection of the lines. This ensures, for example, that the  horizon appears across the top or bottom third of an image and never right in the middle.

In this image the out of focus wall in the foreground is along the bottom line of the imaginary tic-tac-toe board.

Tip 4 – Capture from an Unusual Angle

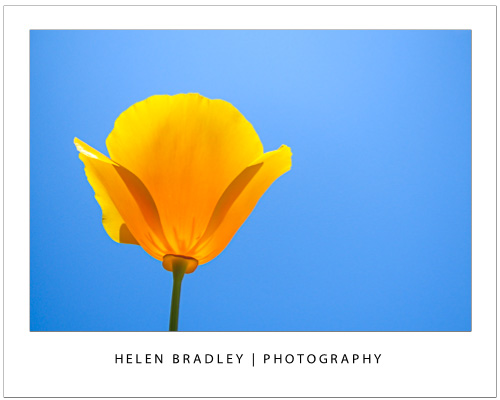
Look for different angles to shoot from. Take a portrait  from a vantage point high above the person and look for different angles when photographing classic buildings so you  capture photographs that aren’t the same as everyone else’s.

In this image the camera was positioned under the flower and facing the sky and the translucency of the flower shows beautifully.

Tip 5 – Respect the “no flash” zone

The effective radius of your camera’s flash is around 9-12 feet so it won’t work in a sporting stadium at night. Instead use a long exposure time and mount the camera to a tripod.

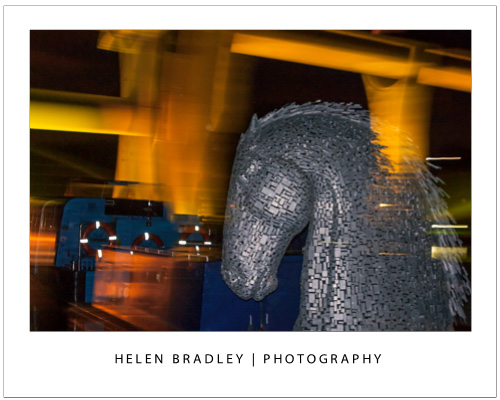
In the image below the short radius of the flash has lit the statue which is close to the camera. A long exposure has captured the light on the structure behind. Read this post to discover how setting a curtain flash lets you combine both flash and long exposures.


Helen Bradley

Wednesday, October 24th, 2012

Trevor’s Quick Illustrator Tip – Simple Zoom

Photo By: Joana Croft
It’s true you can press Ctrl + + and Ctrl + – to zoom in and out on a PC or Command + + and command – on a Mac, but I find this tricky to do on a small keyboard such as the one on my laptop. If you have a mouse with a scroll wheel you can hold the Alt key and scroll up to zoom in or scroll down to zoom out. This works no matter which tool is selected at the time. The tool you were working with gets targeted again when you release the Alt key. I find this an easier way to zoom in and out when I am working on an image.

Helen Bradley

Tuesday, October 23rd, 2012

Trevor’s Quick Word Tip – Setting your Preferences

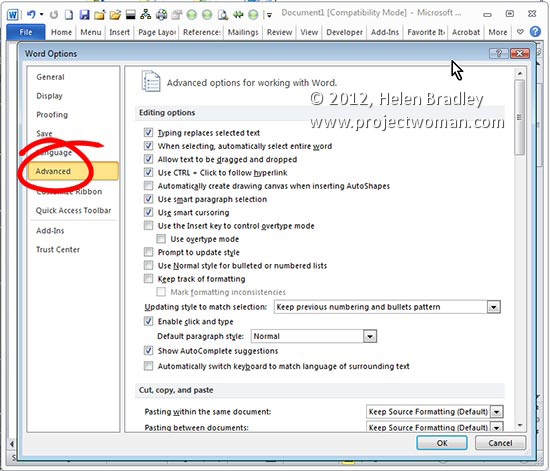
It’s generally a great idea to go through Word and set it up for your own personal working style.  Head to the preference area by clicking File > Options (Office button > Word Options in Word 2007) and click Advanced. Here you can set preferences for Editing, Printing, Display and so on to make Word work the way you want it to.

Helen Bradley