Sunday, December 9th, 2012

Create an HTML web gallery in Lightroom

With the increasing popularity of the iPad and iPhone it’s no longer appropriate for most of us to create Flash based web galleries – they just can’t be easily viewed on these devices. If you want almost everyone to be able to see your galleries then you need to create them as HTML galleries and not Flash.

Lightroom has a range of HTML Templates you can use to create a reasonable looking gallery in a very short time.

To make your web gallery in Lightroom start by placing your images in a Collection. This makes it easier for you to work with the images and you can save the gallery so you can edit it in future if needed.

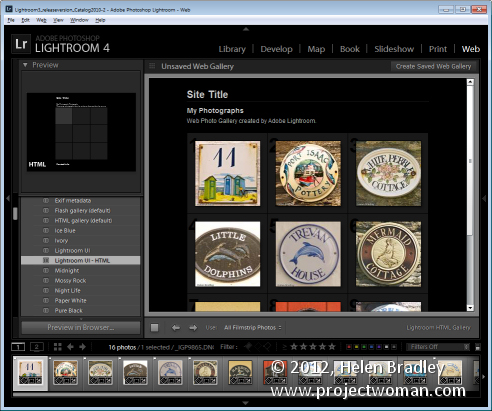
Select your Collection and switch to the Web module. From the Layout Style options, you can select Lightroom HTML gallery or, easier still, from the Template Browser panel on the left of the screen, select a gallery that is HTML based. If you look in the preview area the HTML gallery templates all have the letters HTML in their bottom left corner. Select a template to use.

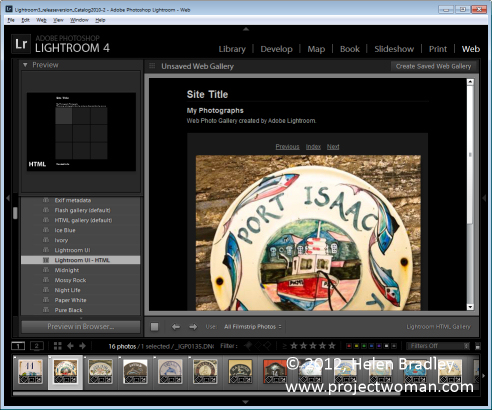
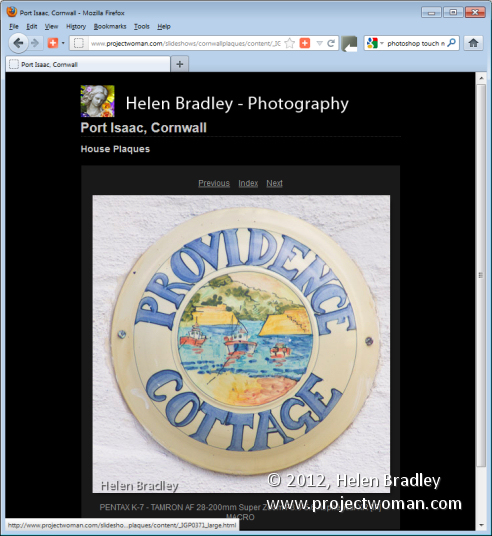
From the toolbar (press T if it isn’t visible), choose All Filmstrip Photos if you have a Collection selected and this will add all the images to your gallery. What you see on the screen in the editing area is a live version of your web gallery. You can click on any image to view it as it will look on the web.

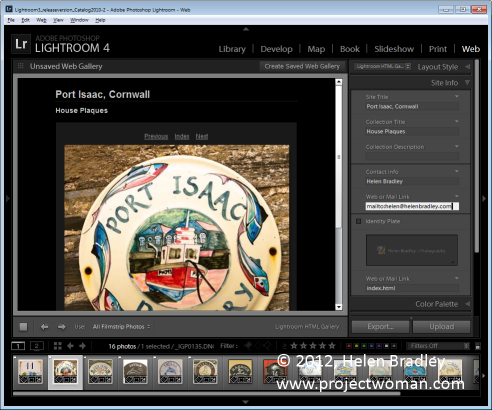
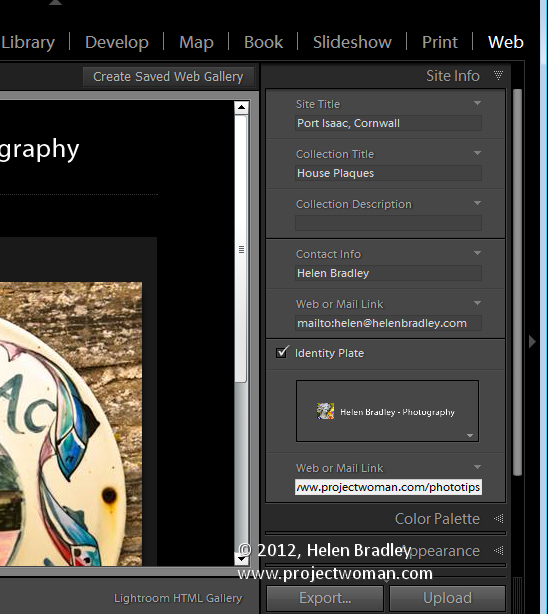
Open the Site Info panel and type a Site Title, a Collection Title and a Collection Description. If you don’t want to use all of these simply delete the placeholder text for those items you don’t want to use and the space they take up in the template will be freed for use for your images.

For the Contact Info, type your contact name if desired and then complete the Web Or Mail Link and this will be linked automatically to the contact name in the web gallery.

You can add an identity plate to the gallery, if desired, it will sit above the Site Title. You can link it back to your site if desired by completing the Web or Mail Link box.

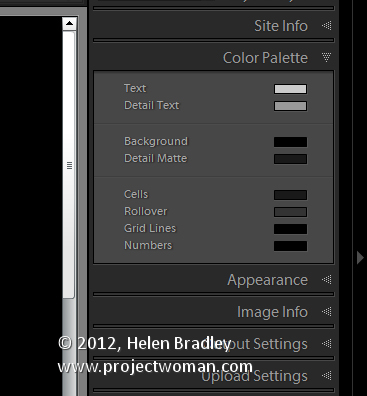
The Color Palette options let you change the colors for the various elements in the website template.

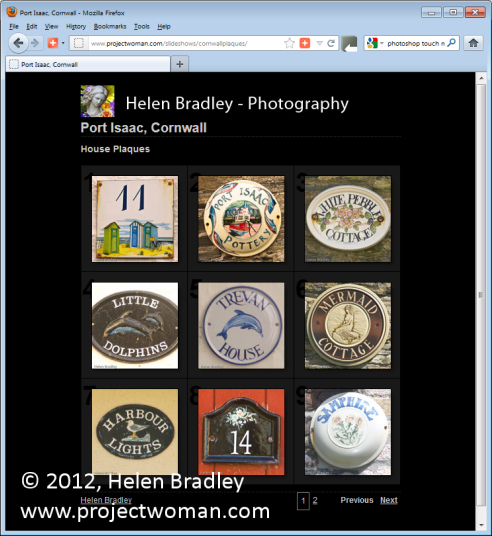
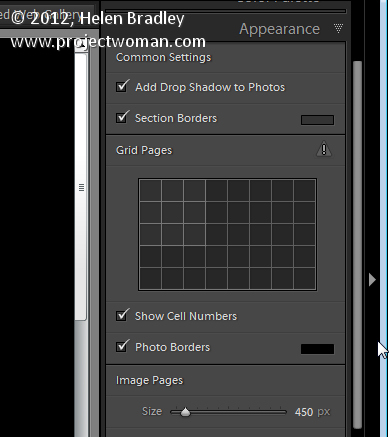
In the Appearance panel you can set the thumbnail image grid size – it defaults to 3 x 3 and cannot be any smaller but it can be considerably larger. If you want to show cell numbers over the images you can do so – this is useful when you need to give viewers an easy way to identify images they like. Images are numbered sequentially and if you have multiple pages the images on the second page continue sequentially from the numbering from the first page.

You can control the size of the full size image on the Image Page by adjusting the Size slider. You can also add Photo Borders to the images in the Image Pages. Note that the Appearance panel is divided into Common Settings, Grid Pages and Image Pages allowing you to make change that effect the entire gallery, only the grid pages or only the image pages.

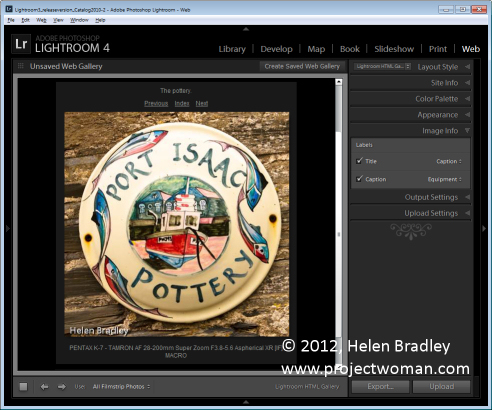
In the Image Info panel you can select to add labels to your images. These appear on the Image Page only. You can select a Title which appears above the image and a Caption which appears below the image. For each you can source the text from the image metadata and there is no reason why you can’t set the Title to be the Caption metadata and the Caption to be your Equipment metadata, for example.

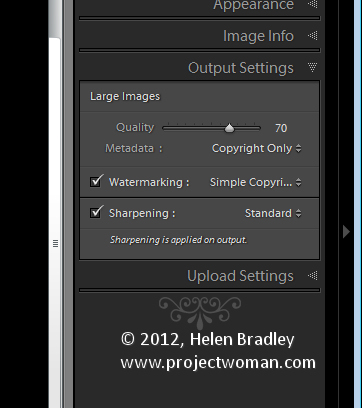
In Output Settings select the quality of the larger size JPG images – 0 is low quality and 100 is high quality. If you want to include Metadata with the image select what to include – your choices are Copyright Only or All.

Also add a Watermark if desired. If you select to add a watermark, you’ll see it on the image page and the index pages so you can check to see that it’s what you want.

Select whether or not to sharpen the images – this sharpening is only applied as the images are output so you won’t see it on the screen. If you’re unsure what to use, enable Sharpening and set it to Standard.

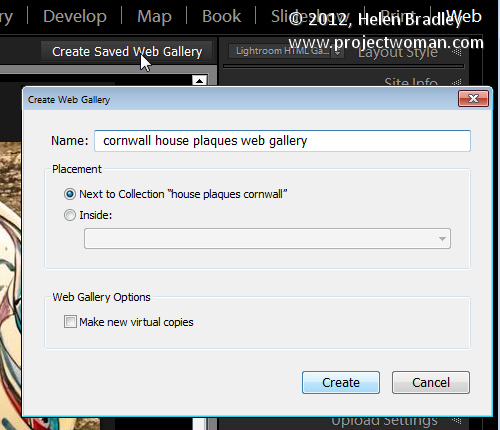
When you’re done, click Create Saved Web Gallery – this is a new option in Lightroom 4 and it appears to the top right of the main editing area. Type a name for your web gallery and click Create. Doing this ensures that the gallery is saved and once you have done this, Lightroom will track your changes from now on.

In future you can come back to the web gallery by clicking the special collection that Lightroom creates for you.

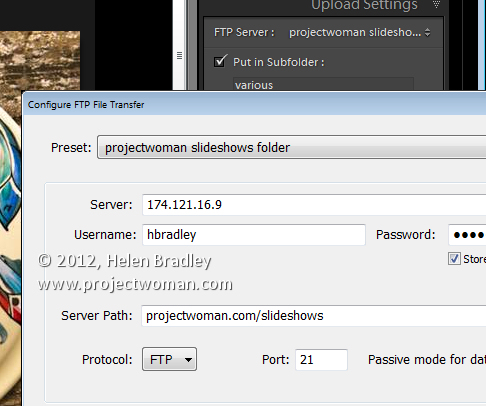
If you want to upload your gallery to the web later on, click Export to export it to disk. Otherwise you can upload it direct to your website by selecting the Upload Settings panel and configure your FTP server. For this, you’ll need your server details, user name and password. You’ll also need the server path although you can click Browse to browse your server to find it if desired. Type a subfolder in which to place the gallery – you’ll need to do this if you plan to have multiple galleries in the server folder you are using. Each gallery needs to be placed in a different subfolder or it will overwrite the previously uploaded gallery.

When you have everything configured click Upload to render the gallery images, create the necessary html code and upload it all automatically to your server.

The HTML galleries in Lightroom aren’t the best looking galleries in town but having a gallery accessible to almost any device is definitely and incentive to use them in place of Flash galleries.

Helen Bradley

Wednesday, October 24th, 2012

5 Quick Tips to Improve your Photography Today!

If you want to add a quick boost to your photos, follow these five tips to take better photos today… and everyday!

Tip 1 – Get close to your subject

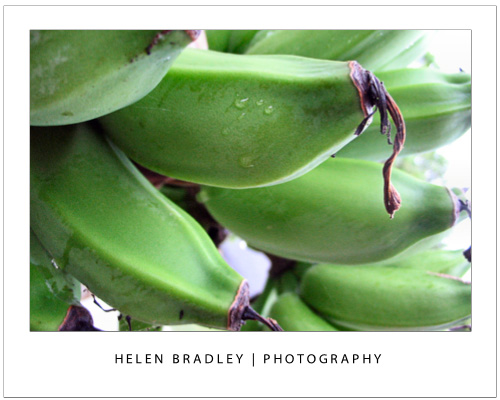
The single simplest way to improve your photographs is to move physically closer to what you are photographing. If you can’t get physically closer then zoom in close using your camera’s zoom.

This image was captured from the verandah of a house in the tropics so it was possible to walk up very close to the clump of bananas on the palm.


Tip 2 – Capture Close ups with Macro

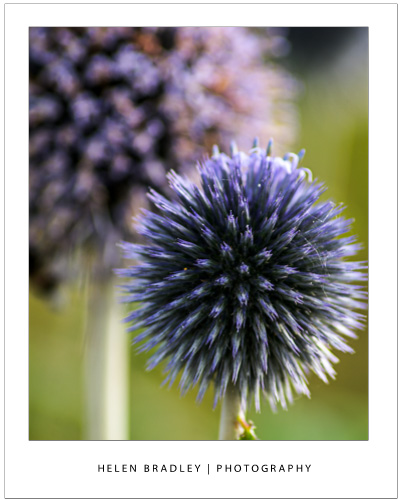
When shooting an object close up, set your camera to its Macro setting which is indicated by a small flower – you can set it using either a setting on the camera itself or from inside its menus. Zoom all the way back out (macro and zoom don’t mix) and check that the camera is able to focus on what you’re shooting – if not, move further back a little and try again. Most cameras can capture shots using macro mode as close as a few inches from the object.

This flower was captured with a macro setting – one side benefit of this is that the background is thrown out of focus showing an attractive shallow depth of field.

Tip 3 – Follow the Rule of thirds

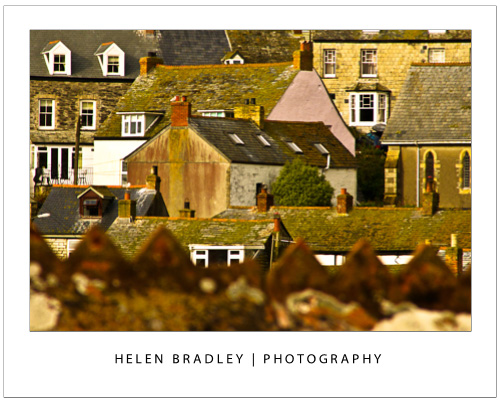
The rule of thirds is a tool for creating a dynamic composition for your image. To apply it, draw an imaginary tic-tack-toe board over the scene you see in the  camera’s LCD screen or the viewfinder before you take the shot. Position the subject of the image along a horizontal a vertical line or at the  intersection of the lines. This ensures, for example, that the  horizon appears across the top or bottom third of an image and never right in the middle.

In this image the out of focus wall in the foreground is along the bottom line of the imaginary tic-tac-toe board.

Tip 4 – Capture from an Unusual Angle

Look for different angles to shoot from. Take a portrait  from a vantage point high above the person and look for different angles when photographing classic buildings so you  capture photographs that aren’t the same as everyone else’s.

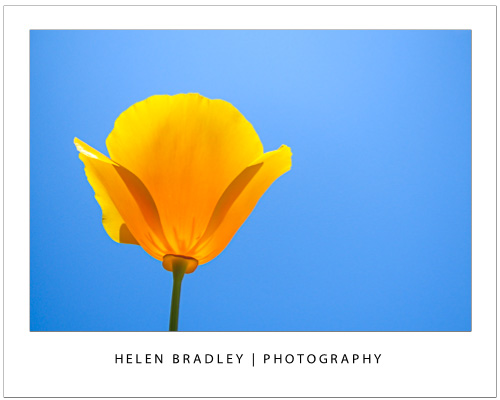
In this image the camera was positioned under the flower and facing the sky and the translucency of the flower shows beautifully.

Tip 5 – Respect the “no flash” zone

The effective radius of your camera’s flash is around 9-12 feet so it won’t work in a sporting stadium at night. Instead use a long exposure time and mount the camera to a tripod.

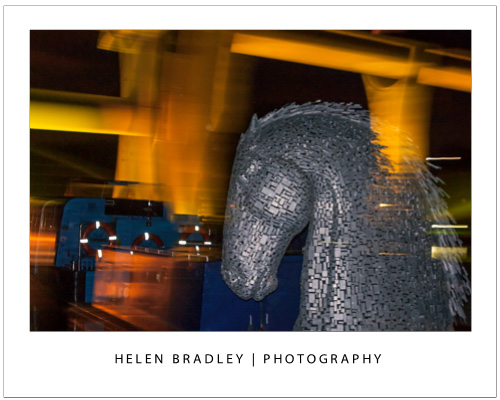
In the image below the short radius of the flash has lit the statue which is close to the camera. A long exposure has captured the light on the structure behind. Read this post to discover how setting a curtain flash lets you combine both flash and long exposures.


Helen Bradley

Tuesday, February 28th, 2012

Shoot right at night – Tip #3 – Set a high ISO

While a flash is handy for taking snapshots of friends, it’s useless when the subject is more than about 10-15 feet away as this is the range of a typical flash. It also makes it impossible to shoot candid images.

So, the best solution to shooting at night is to turn the flash off – before you head out, make sure you know how to disable the camera’s flash so it doesn’t fire.

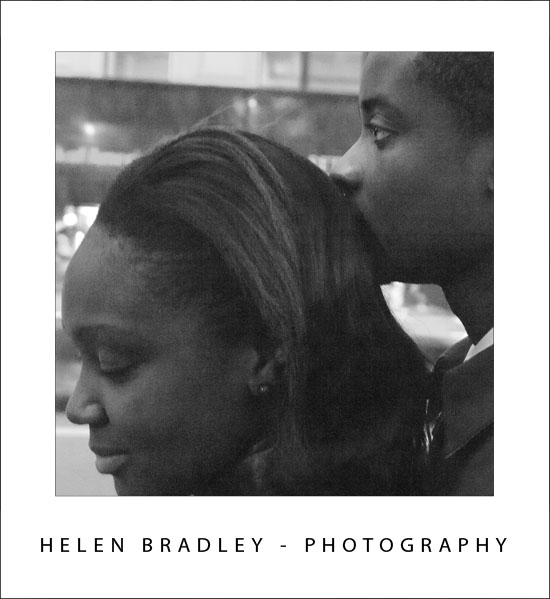
If your camera lets you do so, set the ISO equivalent to use for capturing the shot, increase this at night to 1600 or more. In the shot above the ISO was 6400, the image is grainy but a flash would have disturbed the couple and that would have spoiled the candid moment.

The shots will be more grainy – like film, shots taken at higher ISO levels are more grainy even when shot digitally. However, grain is not a ‘bad thing’ and night time images can look particularly interesting when the film grain is obvious.

Helen Bradley

Sunday, June 28th, 2009

Take your photography up a notch


Owning a digital camera isn’t a panacea for taking bad photos. In fact, all too often, having a digital camera means you take many more bad photos – you just don’t pay to have them printed. Take a quick look through the photos you’ve taken recently and see how many great photos you’ve taken compared with how many you’re disappointed with.

If you’re erring on the side of having too many photos in the not so good category, then read on! This month I have some great tips for taking much better photos and they’re simple solutions that don’t need special tools or expensive cameras. In fact they’re techniques that are guaranteed to take anyone’s photography up a notch.

Cut the clutter
When your photos are marred by untidy backgrounds and general clutter, there are two simple solutions. One is to move closer. Most people shoot from way too far away from their subjects so it’s inevitable that there will be other extraneous detail in the shot. You can tell if you’re standing too far away if you look at the photos you take and identify how much of the surface area of the photo the subjects take up. If it’s less than 50% you’re not getting close enough.

Next time you’re about to take a photo, take one good big step towards your subject and check the LCD screen. Mentally calculate how much of the photo area is covered by the subject, if it’s not at least half, then take another step and check again. At the same time, ensure that the scenery behind your subject is attractive. If not, move yourself or the subject until you have a more attractive background (or move in closer still), and then take your shot.


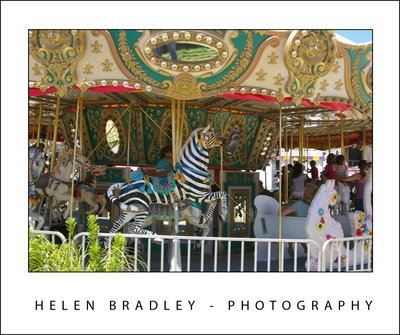
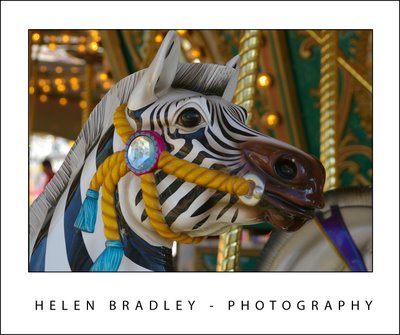
Getting in close to this carousel turns the shot from ho-hum into wonderful.

No more blur
Blur in photos is great when you want it and disastrous when you don’t. When you want a sharp, clear photo and all you’re getting is blur, there are some things to check. One is that you’re not too close to your subject. Your camera’s manual will tell you the ideal range at which the camera can focus – if you’re closer than recommended then your photos will be blurry. The solution is to move further away from your subject so the lens can focus or switch to macro mode. Macro mode is indicated by a small flower icon and it is used for close up photography. Again, check your camera’s manual to see just how close you can be to your subject in macro mode – you will find this is usually a minimum of around 5cm. When using macro mode, zoom out (not in) as the camera generally won’t focus in macro mode if you’re using the zoom at the same time.

If the blur cannot be attributed to being too close, it might be caused by camera movement. When taking a shot, hold the camera in both hands and brace yourself. Take a breath, push the shutter release half way down to allow the camera to focus on the subject. Then push the shutter release the remainder of the way down to take the shot before breathing out again. Taking and holding a breath will avoid a lot of camera movement and pressing the shutter release half down gives the camera’s auto-focus mechanism time to focus correctly before you take the shot.


The camera moved a little as this shot was taken resulting in a slight blur.

When your subject is moving, taking a sharp picture is more difficult than when it is stationary. In this situation, switch the camera to sports mode so the shot will be captured faster and so there is less chance of the movement causing a blurry shot. It will also help if you adjust your placement so the movement is occurring towards you and not across the path of the shot. Of course, in some situations this is not possible, for example, standing in front of horses racing around a track is generally not possible, however it will give a clearer shot!

Too much light or too little
When your photos are repeatedly too light or too dark, adjusting the camera’s exposure may help. To do this, check your camera’s manual to see if it has an exposure compensation option. Generally you can adjust the exposure up or down by approximately 2 stops – these are marked -2, -1, 0, 1 and 2 on a scale. Zero is the value that is used by default and, to get a darker image, set the value towards the negative, generally around minus one third to minus half a stop is sufficient. On the other hand if your shots are too dark, adjust the setting to a positive value of around one third or one half. Exposure compensation settings are often lost when you turn off your camera so you should check it each time just in case.


If you’re shooting in bright daylight, and particularly if you are shooting portraits or a person standing in front of a scene, use the forced or fill flash setting on your camera. This forces the flash to fire in circumstances that it would generally not be required. The flash will light the person’s face and give a much nicer portrait shot and the background will still be captured just fine too.

Helen Bradley