Monday, July 8th, 2013

Photoshop Tip – Fixing Images with Contrast Masks

Use Contrast Masks to Fix Images Simply

Many of the fixes we commonly apply to images come from darkroom processes. Contrast masking is one of those fixes and it can be used to fix an image which is under or over exposed.

Contrast masking is a relatively simple process and it can work wonders with your images. I like it because it generally doesn’t require you to make selections and there is a lot to like about fixes that don’t involve selections.

Here’s how to use Contrast Masking to fix an under exposed image:

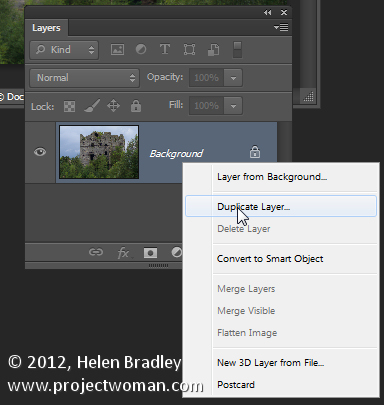
Open your image and duplicate the background layer. Target this duplicate layer in the Layers palette.


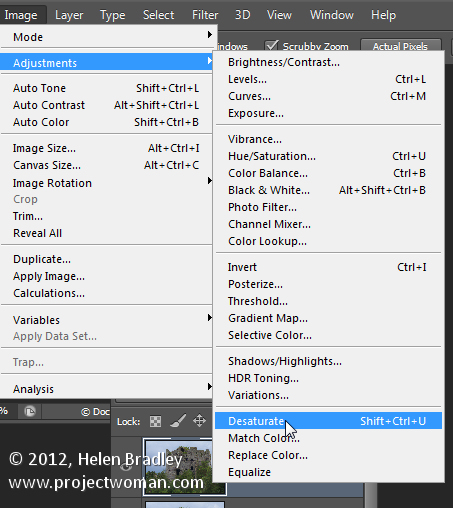
Desaturate this layer by choosing Image > Adjustments > Desaturate. Right now the default convert to black and white is just fine.


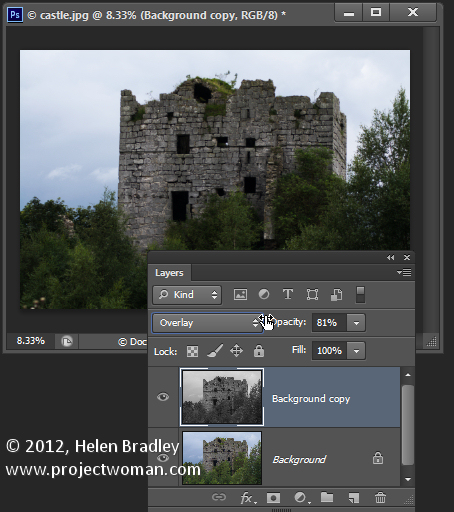
Alter the blend mode of this layer to Overlay.


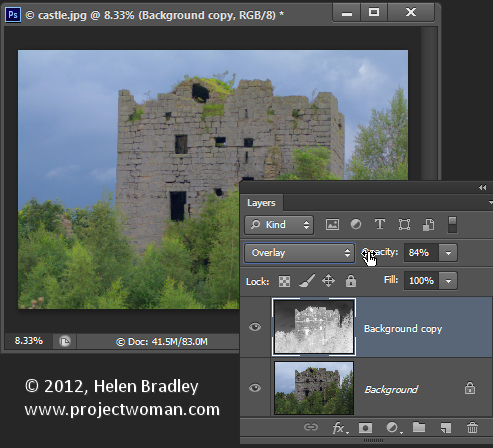
To invert this black and white layer choose Image > Adjustments > Invert – this gives a negative of the image.
Adjust the layer opacity to suit.


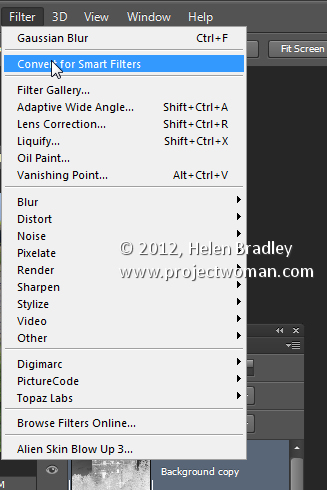
Convert the top layer to a Smart Object by choosing Filter > Convert for Smart Filters.

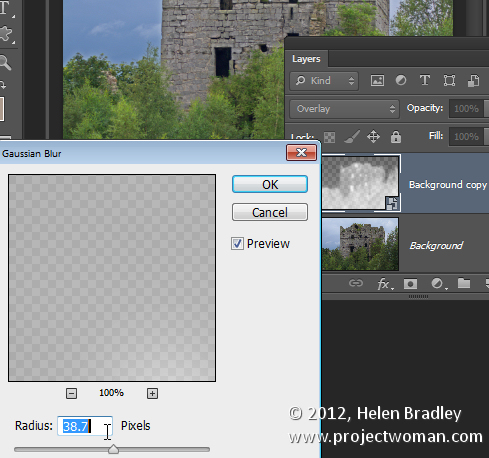
Now blur this layer by choosing Filter > Blur > Gaussian Blur. Adjust the Radius to adds some sharpening back to the image. Check the preview to get the best result for the image.

Helen Bradley

Wednesday, June 19th, 2013

Lightroom Tip – Faux Orton Effect

Create the Orton Effect in Lightroom with the Clarity Slider

The Orton Effect is named after photographer Michael Orton. This process results in a somewhat surreal image which has a slightly out-of-focus look while retaining lots of edge detail.

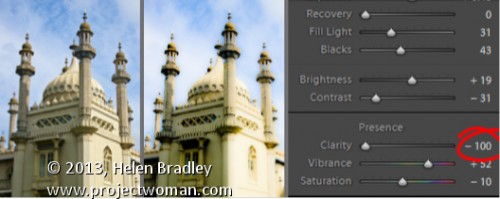
You can quickly give an image a faux Orton look using the Clarity slider in Lightroom. All you need to do is drag the Clarity slider to the left close to -100 and then, increase the Blacks in the image to an higher than usual value.

Of course there is a lot more to the Orton effect than this but this gives you a good start and, for many images, may be all you really need.

Helen Bradley

Saturday, December 26th, 2009

Christmas festivities

This Christmas Santa gave me a wonderful Holga camera but we didn’t realize it was going to use 120 film so were were forced back to the digital world for Christmas photos. No great hardship resulted however, as I got a chance to head out the door with my trusty 50mm f/1.4 portrait lens – an ideal lens for low light photography – you simply don’t have to worry about light with this lens – it shoots fast in just about any situation. And, because it is f/1.4 it has a tiny point of focus when you shoot close up. You get photos that have a small area in focus and everything else is wonderfully blurred. You can ignore messy backgrounds – they simply don’t show up.

I totally love this lens and today, thanks to some totally wonderful food cooked by friends Mindy and Frank, I came home with wonderful presents, a stomach aching from great food and a fist full of food images to celebrate the day. The secret of the photos is to get close enough that you fill the viewfinder with the food but not so close that the lens won’t focus. Make sure the focus is exactly where you want it and go for it…

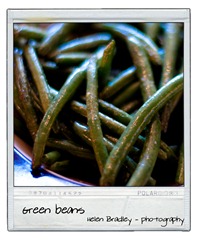
beans

ambrosia'


cranberries

drink


meat

pineapple


  potatoesvegetqables


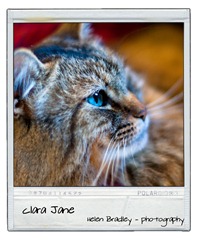
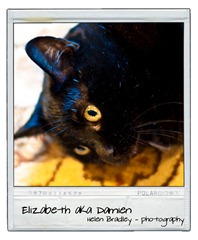
And here are Mindy and Frank’s wonderful cats..

clara

elizabeth


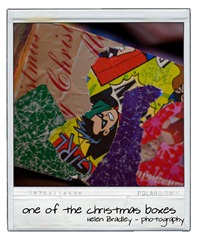
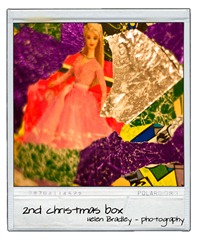
And, because it is Christmas, here are photos of the cool boxes we have used for years for present exchanges between houses… each time a box goes from one house to the other, for birthdays, Christmas and Hanukkah some of the papers we use to wrap are torn and glued to the box. There are 12 years of friendship and gifts celebrated with each box. There are Barbies, X-Men, Hanukkah stars and Christmas trees – there are M & M stickers and so much more in the memories the boxes contain…

boxes

boxes2


And one photo of some of the funky presents. I have to explain that the snowman makes appropriate Christmas noises and poops candy into his hat – as for the rest of the presents, most defy explanation… sorry, but you really had to be there…

gifts 


Happy Christmas to you and yours..

Helen Bradley

Monday, October 26th, 2009

Freeze the action


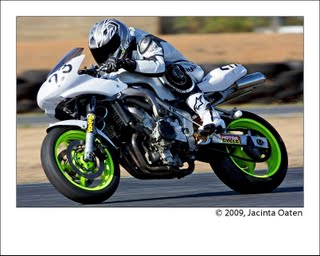
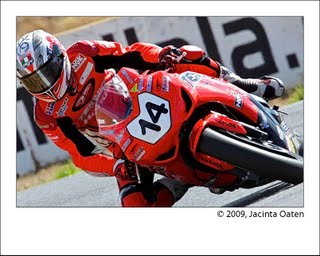
Whether you’re taking photos of a football match, motorbike racing or the kids riding their bicycles, you’ll find yourself trying to capture movement. Photographing moving objects can be tricky but there are some simple techniques you can use to make it more likely that your photos will be successful.

Plan your approach
Before you begin shooting find a good place to shoot from. Get to the event early so you have time to look around for a good position to stand. If you have a telephoto lens, a position in the stands at the races or football will let you get close to the action even when you’re far away and you can get good shots over the heads of the crowd. Alternately, get right down to the boundary fence for a different perspective of the action.

Anticipate the action and be ready to shoot it. Point the camera to where you think something will happen and press the camera shutter half down to focus the shot and wait. When the action comes into the frame, press the rest of the way to take the shot. If your camera has a sports mode – it is generally indicated by a running figure – use that. Sports mode reduces the time it takes to capture a shot by increasing the amount of light coming into the camera. The faster the shot is captured, the less the subject moves while the shutter is open and the less blurry they’ll be.

For most sports there are times that can be considered high action – a player about to take a high mark, a goalie trying to save a goal in soccer or horses jumping from the starting gates. Anticipating these events and capturing them can give great results.


15 year old sports photographer Jacinta Oaten used a combination of anticipation, great location, large aperture and fast shutter speed to get the wonderful shots featured in this post.

To blur or not to blur
Blur should not be seen as a bad or undesirable thing. By shooting at a slower speed and allowing the background to be well focused and the subject slightly blurred you can get an impression of action in your shots. To slow your camera down so you can blur the action, choose Landscape mode or, if your camera is manually adjustable, slow the speed down for example to around 1/15 th of a second.

To reduce blur in a shot, use the fastest speed setting of which your camera is capable. If this doesn’t work, follow your moving subject with the camera. Stand still and point towards the subject and start moving the camera to match their movement. Shooting as the camera is moving along with the subject results in the subject being focused and the background blurred. Again, you will have a pleasing sense of movement in your shot.


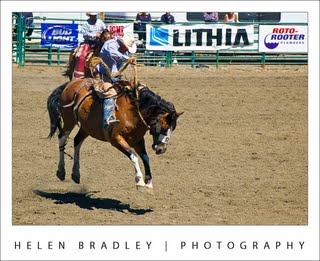
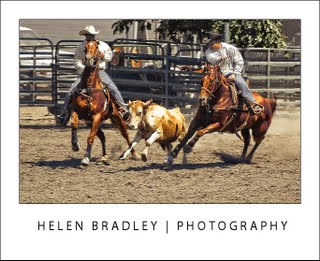
To capture the action at the rodeo I used burst shooting mode to maximize the chance of getting a good shot.

Your camera’s burst shooting mode is also handy at capturing action. In this you’re your camera takes a series of shots in a short time interval. Instead of having one shot, you now have six or nine taken in very short succession. In some cases these shots are smaller in size than regular shots so, before using this mode, ensure your camera is set to capture at its highest resolution and to store at the lowest compression so you ensure these shots are the best they can be. However, the very speed of capturing the shots makes it more likely you will get a shot you like from those you’ve taken.

Look around you
When shooting action scenes, don’t focus entirely on the action and miss out on the stories that happen behind the scenes. Often people sitting in the crowd will make a good shot, so when someone is about to kick for a goal, turn around from your position on the boundary fence and shoot the crowd’s reactions to the kick. Look for other scenes that are compelling such as the athlete’s reactions at the end of the race or a bored official reading a book with action taking place all around.


Finding a good position to shoot from and anticipating the shot can give some great results.

Know your camera
The high point of a game when your favourite player is about to shoot for goal is not a good time to realise you don’t know how to operate your camera. Before you pack your camera for an event, spend time familiarizing yourself with its settings. Know how to find and use the various camera modes and practice following motion – taking shots of cars driving down the street is a good way to do this. Check your camera’s settings to make sure you’re taking the quality shots you think you are and check that the compression format being used is acceptable. If you’re using a camera with a small number of megapixels (3 or less), buy a big storage card so you can shoot at the highest quality and lowest compression possible.

If you’re using a digital camera, take plenty of shots and delete the ones that didn’t work out later on. Consider any space left on your camera card at the end of the day as being a wasted opportunity to try your new skills.

Helen Bradley

Sunday, June 28th, 2009

Take your photography up a notch


Owning a digital camera isn’t a panacea for taking bad photos. In fact, all too often, having a digital camera means you take many more bad photos – you just don’t pay to have them printed. Take a quick look through the photos you’ve taken recently and see how many great photos you’ve taken compared with how many you’re disappointed with.

If you’re erring on the side of having too many photos in the not so good category, then read on! This month I have some great tips for taking much better photos and they’re simple solutions that don’t need special tools or expensive cameras. In fact they’re techniques that are guaranteed to take anyone’s photography up a notch.

Cut the clutter
When your photos are marred by untidy backgrounds and general clutter, there are two simple solutions. One is to move closer. Most people shoot from way too far away from their subjects so it’s inevitable that there will be other extraneous detail in the shot. You can tell if you’re standing too far away if you look at the photos you take and identify how much of the surface area of the photo the subjects take up. If it’s less than 50% you’re not getting close enough.

Next time you’re about to take a photo, take one good big step towards your subject and check the LCD screen. Mentally calculate how much of the photo area is covered by the subject, if it’s not at least half, then take another step and check again. At the same time, ensure that the scenery behind your subject is attractive. If not, move yourself or the subject until you have a more attractive background (or move in closer still), and then take your shot.
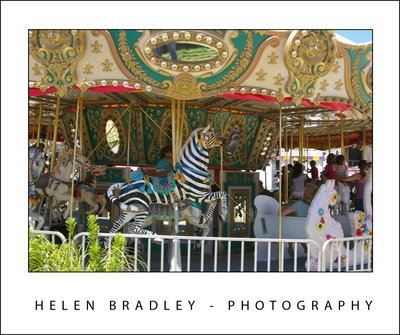
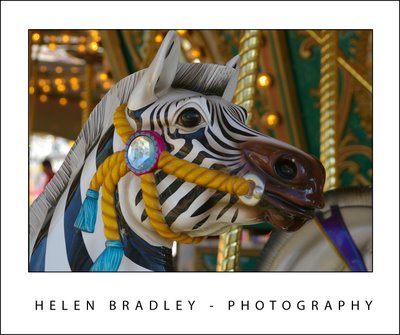
Getting in close to this carousel turns the shot from ho-hum into wonderful.

No more blur
Blur in photos is great when you want it and disastrous when you don’t. When you want a sharp, clear photo and all you’re getting is blur, there are some things to check. One is that you’re not too close to your subject. Your camera’s manual will tell you the ideal range at which the camera can focus – if you’re closer than recommended then your photos will be blurry. The solution is to move further away from your subject so the lens can focus or switch to macro mode. Macro mode is indicated by a small flower icon and it is used for close up photography. Again, check your camera’s manual to see just how close you can be to your subject in macro mode – you will find this is usually a minimum of around 5cm. When using macro mode, zoom out (not in) as the camera generally won’t focus in macro mode if you’re using the zoom at the same time.

If the blur cannot be attributed to being too close, it might be caused by camera movement. When taking a shot, hold the camera in both hands and brace yourself. Take a breath, push the shutter release half way down to allow the camera to focus on the subject. Then push the shutter release the remainder of the way down to take the shot before breathing out again. Taking and holding a breath will avoid a lot of camera movement and pressing the shutter release half down gives the camera’s auto-focus mechanism time to focus correctly before you take the shot.
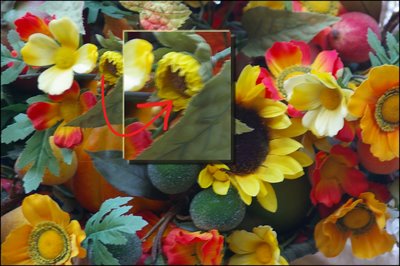

The camera moved a little as this shot was taken resulting in a slight blur.

When your subject is moving, taking a sharp picture is more difficult than when it is stationary. In this situation, switch the camera to sports mode so the shot will be captured faster and so there is less chance of the movement causing a blurry shot. It will also help if you adjust your placement so the movement is occurring towards you and not across the path of the shot. Of course, in some situations this is not possible, for example, standing in front of horses racing around a track is generally not possible, however it will give a clearer shot!

Too much light or too little
When your photos are repeatedly too light or too dark, adjusting the camera’s exposure may help. To do this, check your camera’s manual to see if it has an exposure compensation option. Generally you can adjust the exposure up or down by approximately 2 stops – these are marked -2, -1, 0, 1 and 2 on a scale. Zero is the value that is used by default and, to get a darker image, set the value towards the negative, generally around minus one third to minus half a stop is sufficient. On the other hand if your shots are too dark, adjust the setting to a positive value of around one third or one half. Exposure compensation settings are often lost when you turn off your camera so you should check it each time just in case.
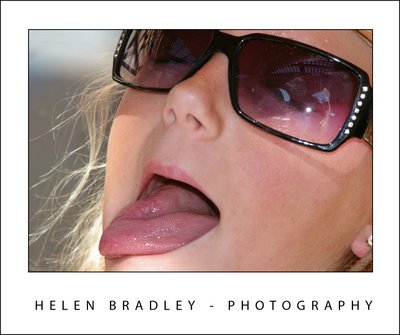

If you’re shooting in bright daylight, and particularly if you are shooting portraits or a person standing in front of a scene, use the forced or fill flash setting on your camera. This forces the flash to fire in circumstances that it would generally not be required. The flash will light the person’s face and give a much nicer portrait shot and the background will still be captured just fine too.

Helen Bradley