Monday, July 8th, 2013

Use Contrast Masks to Fix Images Simply
Many of the fixes we commonly apply to images come from darkroom processes. Contrast masking is one of those fixes and it can be used to fix an image which is under or over exposed.
Contrast masking is a relatively simple process and it can work wonders with your images. I like it because it generally doesn’t require you to make selections and there is a lot to like about fixes that don’t involve selections.
Here’s how to use Contrast Masking to fix an under exposed image:
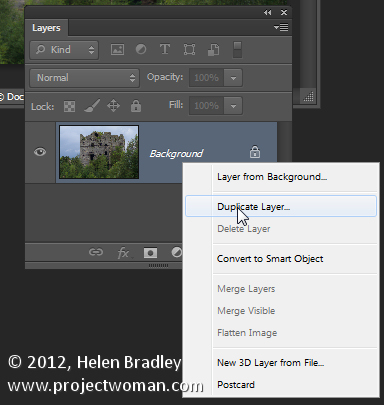
Open your image and duplicate the background layer. Target this duplicate layer in the Layers palette.
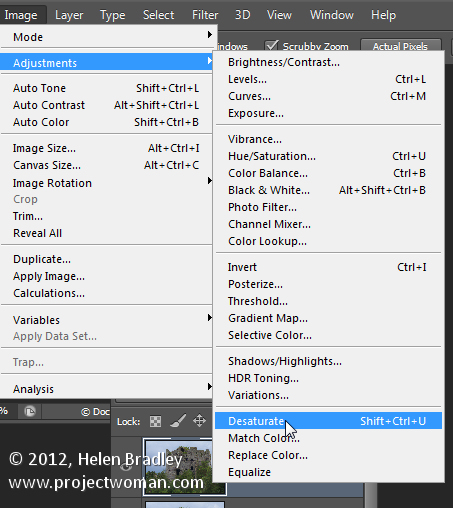
Desaturate this layer by choosing Image > Adjustments > Desaturate. Right now the default convert to black and white is just fine.
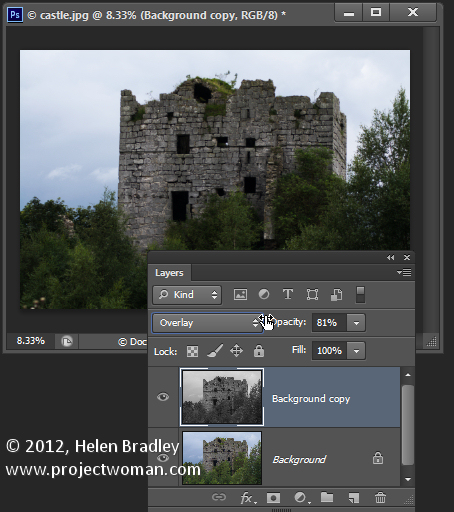
Alter the blend mode of this layer to Overlay.
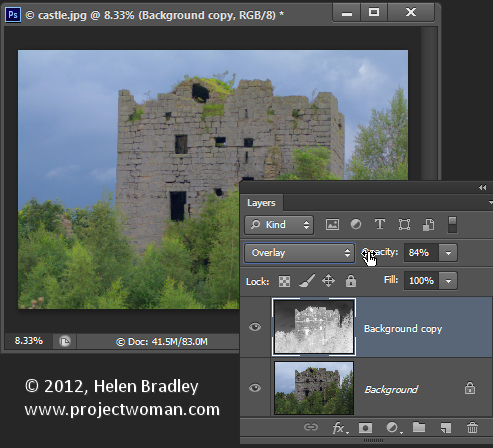
To invert this black and white layer choose Image > Adjustments > Invert – this gives a negative of the image.
Adjust the layer opacity to suit.
Convert the top layer to a Smart Object by choosing Filter > Convert for Smart Filters.
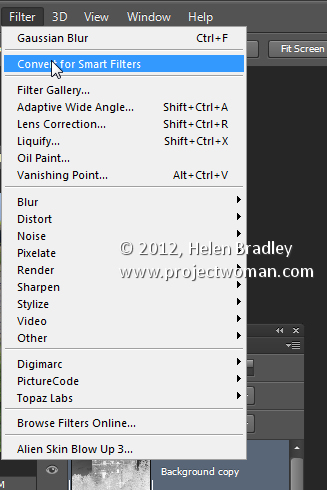
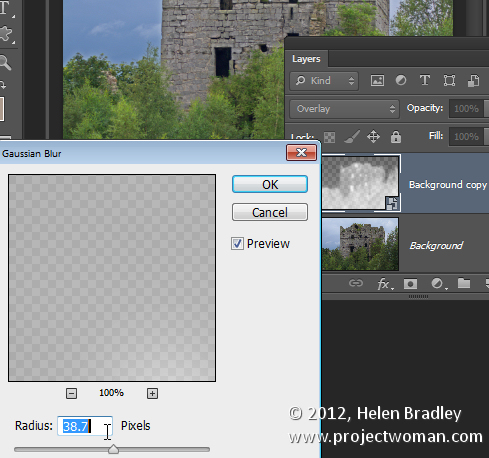
Now blur this layer by choosing Filter > Blur > Gaussian Blur. Adjust the Radius to adds some sharpening back to the image. Check the preview to get the best result for the image.
Helen Bradley
Labels: adjust, blend, blur, contrast, contrast mask, darkroom, desaturate, filter, fix, invert, layer, mask, opacity, overexposed, overlay, Photoshop, Sharpen, tip, trick, Tutorial, underexposed
Categories:photoshop
posted by Helen Bradley @ 9:10 amNo Comments links to this post
Monday, August 2nd, 2010
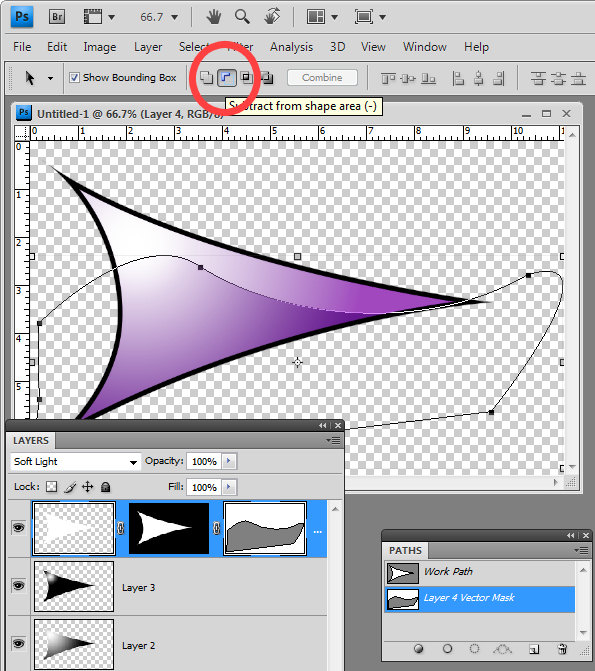 When you use a Vector Mask in Photoshop you can use the pen tool to create your path. All you need to do is to close the path and you will have a custom editable vector mask. However, if your mask is white where it should be not be selected and you need to invert it you need to invert the path.
To do this, click the Path Selection tool and target the Vector Mask and click on your path. On the tool options bar you will see an icon called Subtract From Shape Area – click it and the path will be inverted so anything which was masked before will not be now and vice versa.
Helen Bradley
Labels: invert, mask, path, Photoshop
Categories:Uncategorized
posted by Helen Bradley @ 10:01 amNo Comments links to this post
Thursday, March 11th, 2010
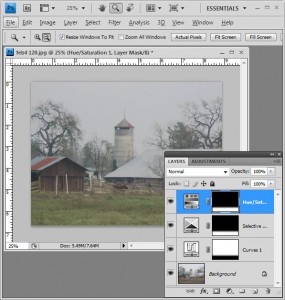
This is totally cool. I was playing around in Photoshop the other night and needed to duplicate a mask and then invert it. I remember that you can copy a mask using two fingers and the mouse button so that means it’s some combination of the Control, Alt and Shift keys – that’s all you really need to remember – the rest is experimentation.
Well, I did the two finger drag using Shift and Alt and this must be a keystroke combination I haven’t used before because lo and behold! it not only copies the mask but it inverts it too!
So, to copy a mask, drag it using Control + Alt (Command + Option on the Mac). To copy and invert the mask, Shift + Alt (Shift + Option on the Mac).
Helen Bradley
Labels: copy, invert, masks, Photoshop
Categories:Uncategorized
posted by Helen Bradley @ 4:10 pm4 Comments links to this post


