Thursday, August 22nd, 2013

Lightroom Tip – Sharpen only the edges in the image

How to use the Masking Slider to limit image sharpening to only the edges in the image

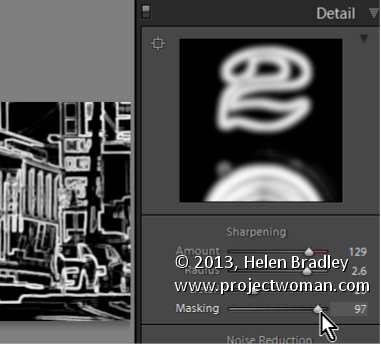
The Masking slider in the Lightroom Detail panel allows you to control the areas of the image that are sharpened and those that are not.

Hold Alt (Option on the Mac) as you drag on the Masking slider. As you do you will see a black and white overlay on the image. The areas that are black are not sharpened, those that are white are sharpened. The farther you drag to the right the more the sharpening is limited to just the edges in the image where you want it to be applied to.

Drag on the slider to control just how much of the image you want to have sharpened. When you’re done, adjust the Amount to a value that makes sense for the image.

Helen Bradley

Sunday, August 11th, 2013

Lightroom Tip – Preparing to Sharpen an Image

How to prepare your image for sharpening so you can make a good adjustment

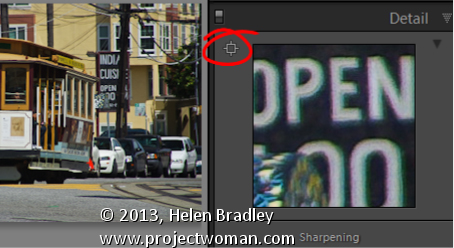
To sharpen an image, first make sure that the main image is visible at a 1:1 ratio in size so you can see the resulting sharpening effect more clearly.

To control what appears in the Preview window, click the indicator in the top left of the Detail panel and click an area of the image to preview. Choose a good position on the image as a preview – something that needs to be good and sharp.

You can also click on the image in the Preview – click once to see the preview filled with the image and again to zoom into the image.

Drag the image in the Preview window to see different parts of it.

Helen Bradley

Monday, July 8th, 2013

Photoshop Tip – Fixing Images with Contrast Masks

Use Contrast Masks to Fix Images Simply

Many of the fixes we commonly apply to images come from darkroom processes. Contrast masking is one of those fixes and it can be used to fix an image which is under or over exposed.

Contrast masking is a relatively simple process and it can work wonders with your images. I like it because it generally doesn’t require you to make selections and there is a lot to like about fixes that don’t involve selections.

Here’s how to use Contrast Masking to fix an under exposed image:

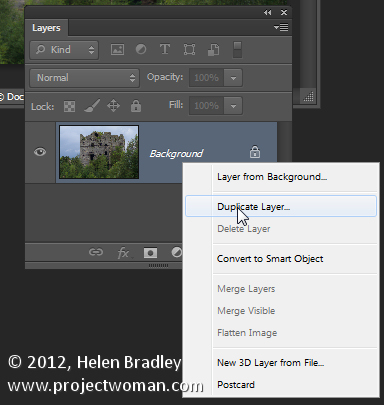
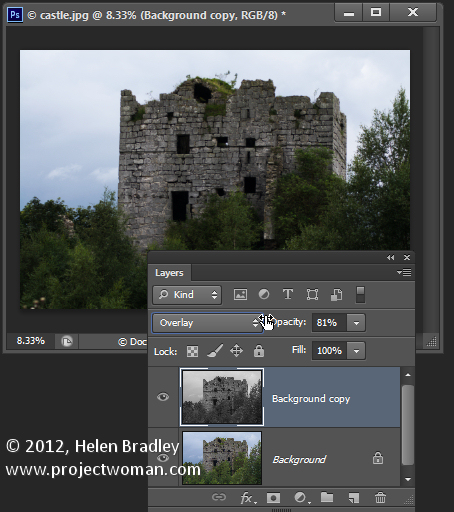
Open your image and duplicate the background layer. Target this duplicate layer in the Layers palette.


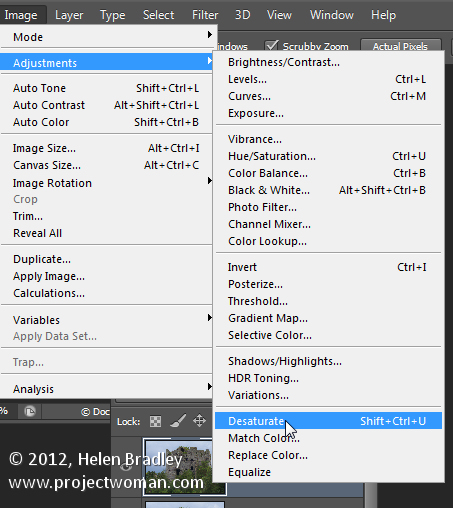
Desaturate this layer by choosing Image > Adjustments > Desaturate. Right now the default convert to black and white is just fine.


Alter the blend mode of this layer to Overlay.


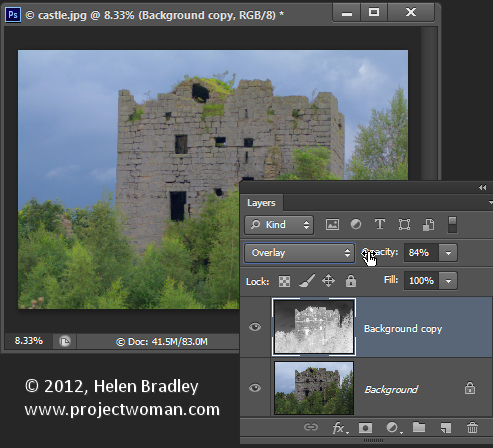
To invert this black and white layer choose Image > Adjustments > Invert – this gives a negative of the image.
Adjust the layer opacity to suit.


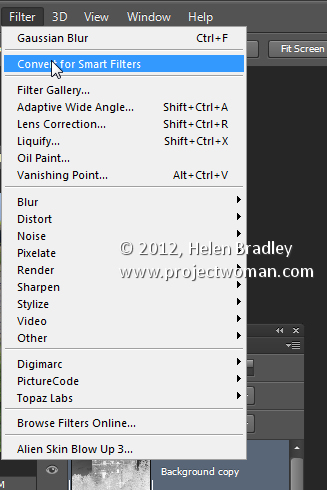
Convert the top layer to a Smart Object by choosing Filter > Convert for Smart Filters.

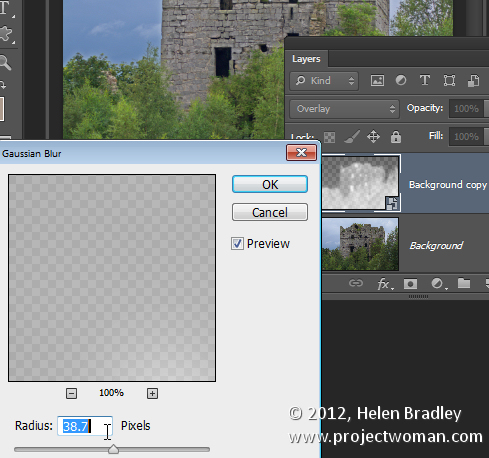
Now blur this layer by choosing Filter > Blur > Gaussian Blur. Adjust the Radius to adds some sharpening back to the image. Check the preview to get the best result for the image.

Helen Bradley

Thursday, January 20th, 2011

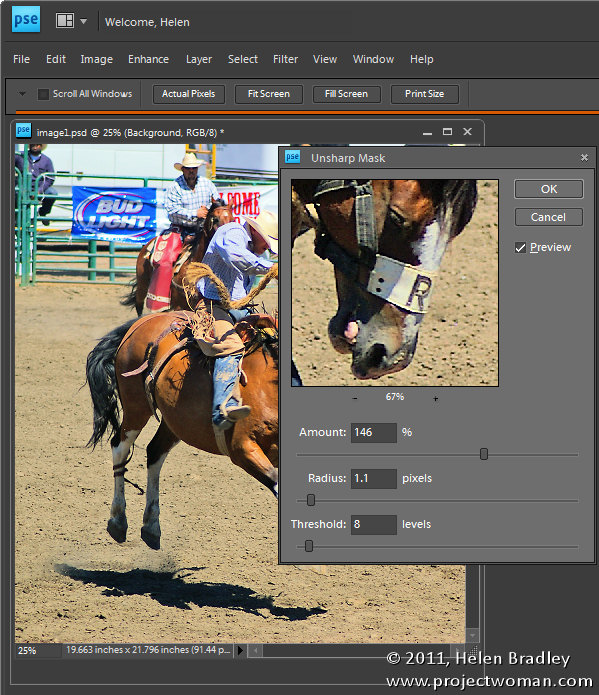
Step 13 – Simple Photoediting workflow – Sharpen the image

When you have finished working on an image you should sharpen it to make the edges in the image look crisper so that they look better when printed on paper and displayed on the screen.

In Photoshop Elements, choose Enhance > Unsharp Mask and set the Radius to around 1.0 – 2.0 pixels. Select a low Threshold value of somewhere between 3 and 10 and adjust the Amount as required.

You will require a higher level of sharpening for images that you will print than you need for display on your computer screen or on the web, for example.

Use the Preview option to check the before and after results of sharpening to ensure you are getting the desired result. You should see the sharpening effect clearly at 100% view, but you should avoid making  visible halos around the edges in your image.

If your image was a little soft and lacking sharp focus before you begin, use a larger Radius value for the sharpening.

If you have been creating layers as you fix your image you must apply sharpening to a flattened version of the image, so choose Layer > Merge Visible to do this.

Other stories in this Simple Photo- Editing Workflow series:

Step 12 – Major Surgery

Step 11 – Getting to black and white

Step 10 – Fixing Redeye

Step 9 – Fixing Imperfections

Step 8 – Fix Skin tones

Step 7 – Fix Color problems

Step 6 – Fix muddy images

Step 5 – Fixing under and overexposed images

Step 4 – Straighten

Step 3 – Crop an image

Step 2 – Make a duplicate

Step 1 – Assess the image

Helen Bradley