Sunday, August 11th, 2013

How to prepare your image for sharpening so you can make a good adjustment
To sharpen an image, first make sure that the main image is visible at a 1:1 ratio in size so you can see the resulting sharpening effect more clearly.
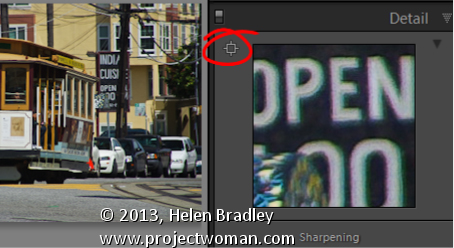
To control what appears in the Preview window, click the indicator in the top left of the Detail panel and click an area of the image to preview. Choose a good position on the image as a preview – something that needs to be good and sharp.
You can also click on the image in the Preview – click once to see the preview filled with the image and again to zoom into the image.
Drag the image in the Preview window to see different parts of it.
Helen Bradley
Labels: 1:1, Detail Panel, Develop, Develop Module, effect, Lightroom, Photoshop, preview, Sharpen, sharpening in lightroom, tip, trick, Tutorial
Categories:Lightroom, photoshop
posted by Helen Bradley @ 6:21 amNo Comments links to this post
Sunday, April 14th, 2013

Area Picker – Viewing a Preview Image when sharpening
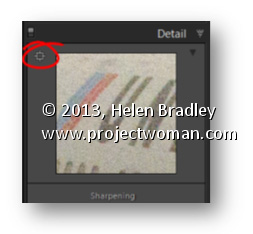
The Detail panel of the Develop module in Lightroom contains the features you need to sharpen an image. In this panel is a small square icon with lines radiating from it. Click this once and now hover over an area in the larger image. As you do this you will see that area of the image appears in the preview panel at 100% magnification. Use this tool to click on an area of interest in the image that you can view in the preview area so you can see how the sharpening is being applied.
If minor adjustment is required, drag the preview image in the preview area with your mouse to fine tune its placement.
Helen Bradley
Labels: 1:1, 100%, area, area picker, detail, Detail Panel, Develop Module, Lightroom, picker, preview, preview image, Sharpening, tip
Categories:Lightroom, photoshop
posted by Helen Bradley @ 10:34 amNo Comments links to this post
Wednesday, April 10th, 2013

Learn how to find your way around in Lightroom panels by Expanding and Collapsing its disclosure Triangles
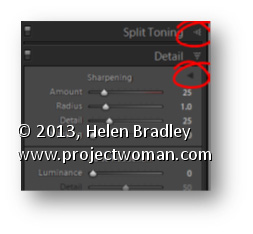
Throughout Lightroom small disclosure triangles appear in various places – click on these to display or hide that feature.
In the image, you would open the Split Toning panel by clicking on the topmost disclosure triangle.
Click the second marked triangle in the Detail panel to display the Sharpening preview window.
Look out for these triangles as they are often difficult to see but they can be used to hide and reveal important panels and other program features.
Helen Bradley
Labels: Collapse, Collapsing, Detail Panel, disclosure, display, Expand, Hide, Lightroom, panel, tip, Triangle
Categories:Lightroom, photoshop
posted by Helen Bradley @ 10:21 amNo Comments links to this post


