Monday, July 15th, 2013

Blackest of Blacks and Lightest of Lights
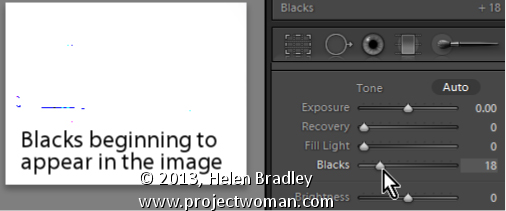
When you’re printing, you’ll want a good range of tones across your image from the blackest of blacks to the lightest of lights. Use the Blacks adjustment slider to ensure that you will have some black tones.
To see the blacks in the image, hold the Alt key (Option on the Mac) as you drag on the Blacks slider and stop when you see the first few colored pixels appear on the screen
Helen Bradley
Labels: adjust, Alt, Blacks, dark, Develop, Develop Module, image, key, light, Lightroom, option, pixel, slider, tone, white
Categories:Lightroom, photoshop
posted by Helen Bradley @ 7:47 amNo Comments links to this post
Wednesday, June 19th, 2013

Create the Orton Effect in Lightroom with the Clarity Slider
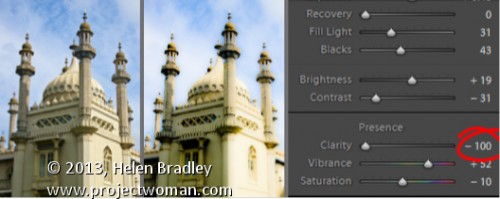
The Orton Effect is named after photographer Michael Orton. This process results in a somewhat surreal image which has a slightly out-of-focus look while retaining lots of edge detail.
You can quickly give an image a faux Orton look using the Clarity slider in Lightroom. All you need to do is drag the Clarity slider to the left close to -100 and then, increase the Blacks in the image to an higher than usual value.
Of course there is a lot more to the Orton effect than this but this gives you a good start and, for many images, may be all you really need.
Helen Bradley
Labels: -, 100%, Blacks, blur, clarity, detail, Develop, Develop Module, edge, effect, faux, focus, image, Lightroom, negative, orton, out, out of focus, Photoshop, slider, surreal
Categories:Lightroom, photoshop
posted by Helen Bradley @ 6:15 amNo Comments links to this post


