Tuesday, June 19th, 2012

Transparency and the Gimp


One of the most confusing things for Photoshop users will be the concept of a transparent layer in Gimp.

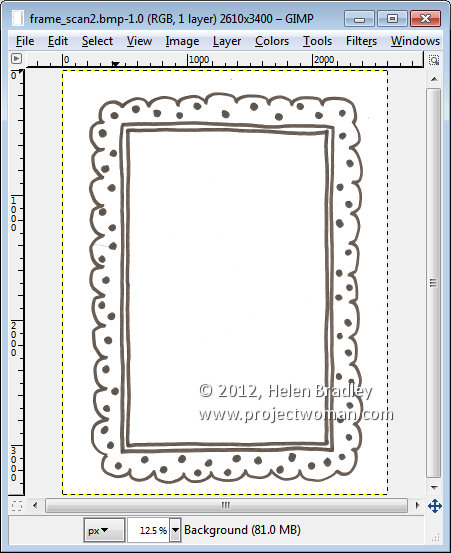
Consider the situation where you open an image such as this hand drawn frame here. The image is a BMP image and what I want to do is grab the middle out of the frame so that I can put something behind it.


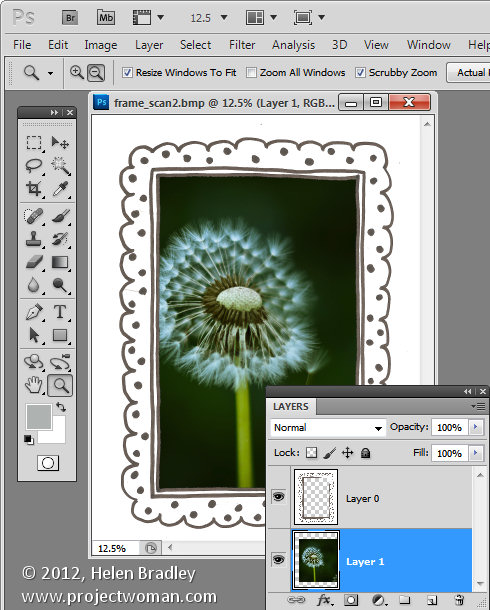
If this were Photoshop, I would convert the background layer to a regular layer by double clicking on it and press Ok. Then I would target the Magic Wand tool and click in the middle of the frame to select the middle area then press Delete to make it transparent so I can drop an image in behind it.


If you try this process in Gimp, all you get is an extreme level of frustration as nothing seems to work. Select and delete does absolutely nothing !

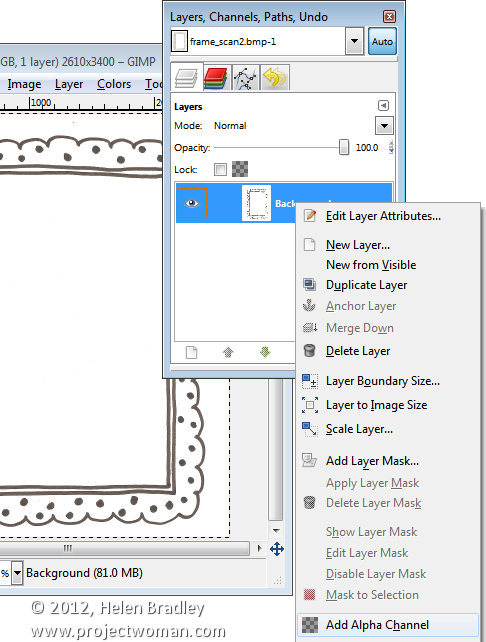
Here’s the solution. With the layer with the image on it selected, right click and choose Add alpha channel. This then allows you to select an area on the image using the Fuzzy Select tool, and press the Delete button. Then choose Select none and you will have a transparent middle to your image. It’s an easy process once you understand what’s happening but an extremely frustration one until you do.


Helen Bradley

Thursday, June 14th, 2012

Shoot right at night – Tip #9 Shoot from Hotel Windows

If you’re travelling for work or pleasure, ask for a room on a high floor in the hotel and shoot the night skies from your hotel window. There’s always something of interest happening in the streets below even if you have a totally awful view in daytime, the nightlights can offer photographic opportunities you don’t get in the daytime.

When you’re shooting from a hotel or office window at night, turn out the room lights so you minimise the reflections in the glass. Look for interesting buildings and light effects, jam your lens up against the window and start shooting. A table or windowsill can be used to steady the camera for long exposures too.

Helen Bradley

Sunday, June 3rd, 2012

Edit and Create on the go with Adobe Photoshop Touch

By Helen Bradley

On Monday, Adobe launched its Photoshop Touch application for the iPad. This long sought after app runs on the iPad 2, and not on the iPad 1, and it requires that you have iOS 5 installed. The app costs $9.99 which is at the high end of the price range for photo-editing apps in general but Photoshop Touch seems to have got the feature set about right so most people will probably consider it worth the money.

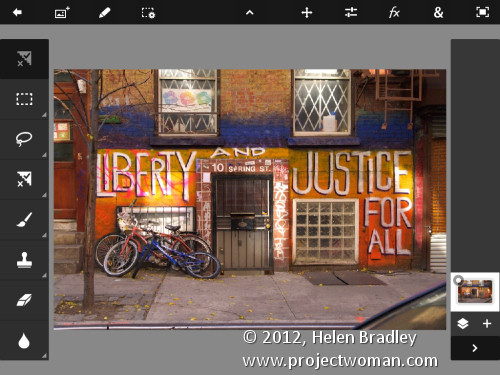
I use the iPad a lot for working with photos I’ve shot using a digital SLR camera in raw and which I’ve resized, converted to jpeg and downloaded to the iPad. Those images I have on the iPad are there because they are funky or because they lend themselves to some artistic play. So, I looked at Photoshop Touch in this light – I wanted to see if it would be part of my iPad image creative workflow. For heavy duty work, Photoshop and Lightroom will remain my tools of trade.

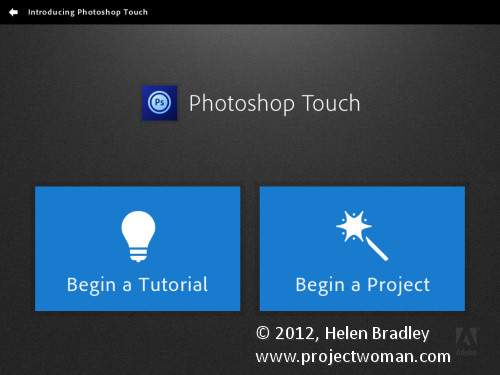
When you launch Photoshop Touch you get two options, viewing the tutorials or doing some work.

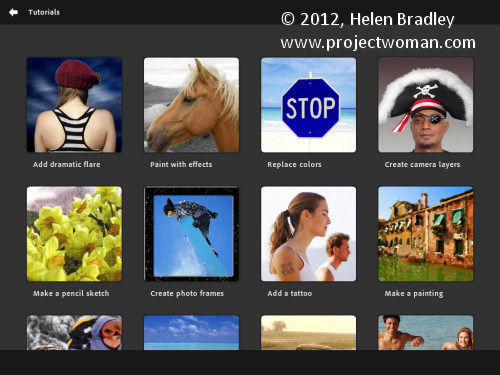
There are 10 tutorials that you can work through each of them is project based so you learn the program by learning a technique not by learning how individual tools work. These are text and image tutorials and not video ones, but they are interactive so you can learn as you go.

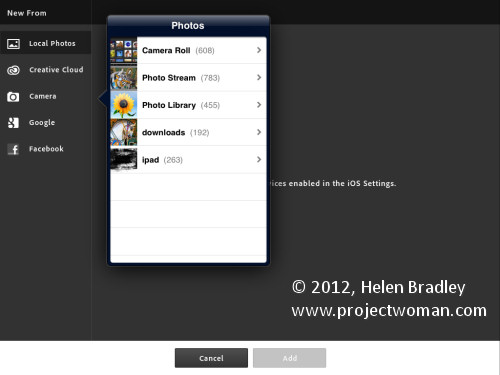
The second option is Begin a Project which is where I’ll start. You get the choice of adding an image from your iPad, the Adobe Creative Cloud, the Camera, Google or Facebook. I chose Local Photos then the Photo Library and an image from my iPad.

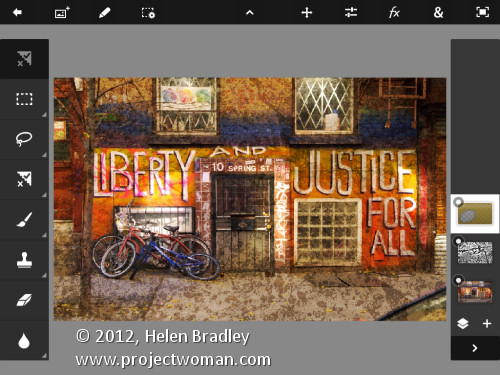
In the main editing area you’ll find the tools on the left, layers on the right and menus across the top. The program pays lip service only to Photoshop.  Some icons are familiar but others are more iPad than Photoshop so Photoshop users may find it a bit confusing where iPad artists will find it more familiar.

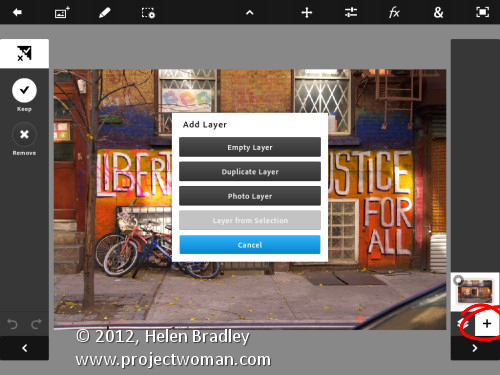
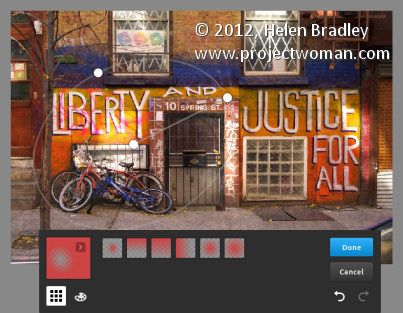
You can add multiple images and multiple layers. I wanted to texture this image so I clicked the Add Layer button and selected Photo Layer.

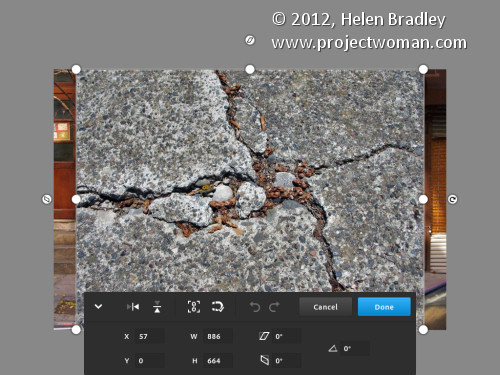
Once you select a second photo you get to size it as you import it – you can also rotate, flip or skew it too. Click Done to proceed to the editing area.

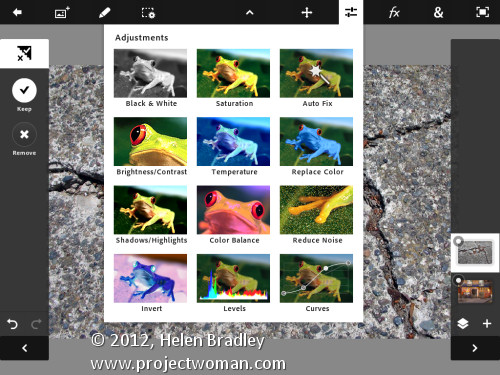
Now, with the layer selected, you can apply adjustments to it.

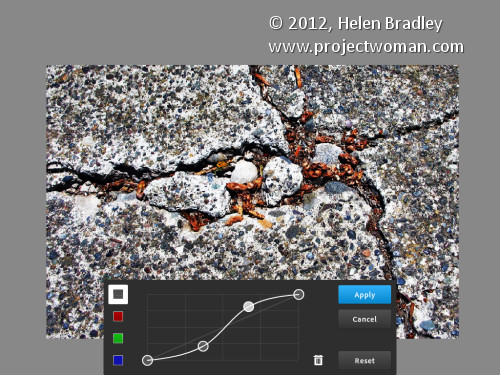
I chose Curves as this was a texture and I wanted more contrast. There are no adjustment layers so the Curves adjustment is being applied just to the targeted (top) layer. As you can see, you can adjust the RGB composite channel or the individual red, green and blue channels.

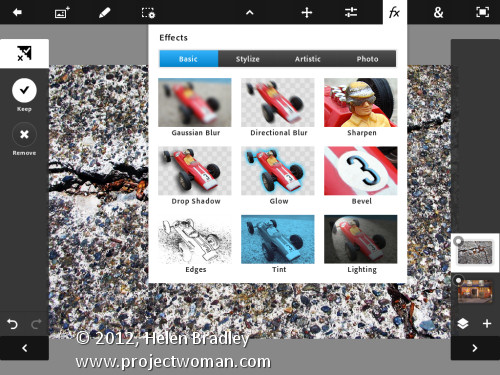
With the texture layer still targeted you can apply a filter to it by clicking the FX button. There is a range of filters including Basic, Stylize, Artistic and Photo. Some add things like drop shadows, blurs and glows and others are more artistic.

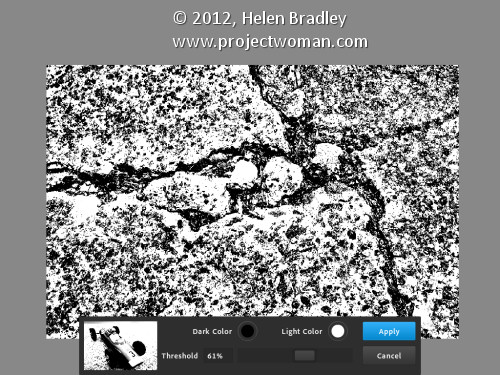
I chose Stylize > Old Photo, configured the settings and tapped Apply. Unlike Photoshop where the foreground and background colors need to be selected before you run a filter, here you can select the colors to use in the filter settings – this really is a feature that Photoshop should have.

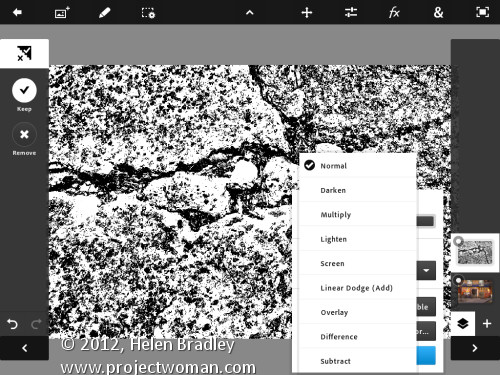
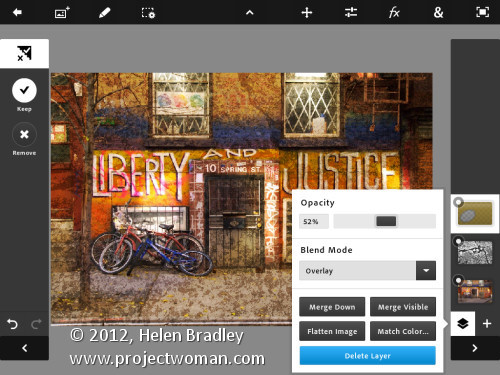
To blend the layers you click the Layer icon and you get a choice of blend modes and the chance to adjust the layer opacity.

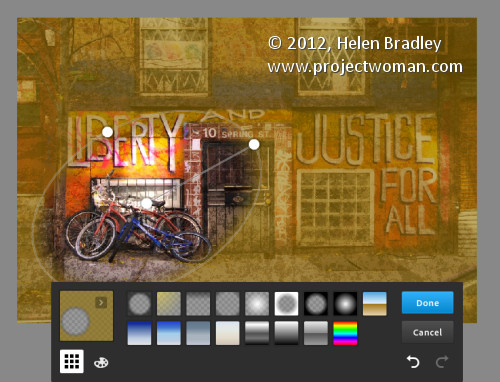
There are no masks but you can use a gradient to fade the effect – when you do the gradient is applied to the layer and you can only undo it by tapping Undo – you can’t go back and edit it.

You can also add a new Empty Layer and fill it with a gradient.

And then blend it using a layer blend mode as I have done here.

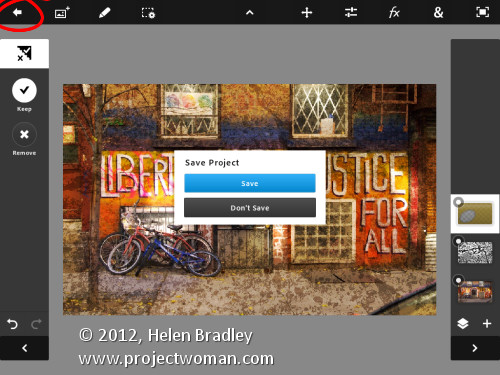
I finished by cropping the image and then saving it.

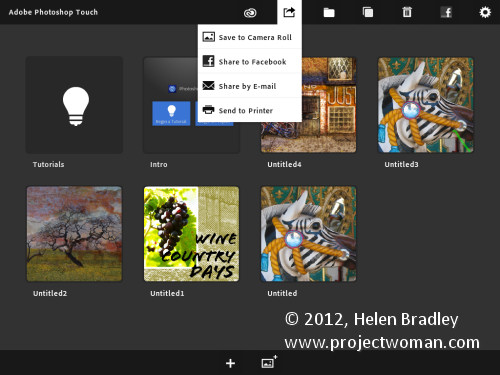
You can then email it or send it to the Camera Roll or upload the project to the Adobe Creative Cloud so you can access them from there.

There are limits to Photoshop Touch and one is the 1600 x 1600 pixel image size limit. The text tools are rudimentary and, as a long time Photoshop user, I’d like to see editable masks and editable text. That said, for fixing photos and tinkering with creative projects this program is a welcome addition to the Adobe family.

This app will appeal to a range of users. There are plenty of basic tools that are easy to use but also some more advanced features for working with images. The Scribble Extract tool does a reasonable job of extracting a subject from a background and you can tinker with gradients and fades to get some interesting effects. You don’t need to know how to use Photoshop to use the app but your knowledge won’t go astray.

Helen Bradley

Monday, May 7th, 2012

Crop to fixed ratio in Photoshop

By Helen Bradley

If you’ve ever tried to crop an image to a fixed ratio in Photoshop you may have run up against an issue. There is, it appears, no option for cropping to a fixed ratio such as 4 x 6, 5 x 7 or even 1 x 1. You can crop to fixed sizes like 4in x 6in and you can set a resolution for the image but you can’t on the face of it just crop to a simple 1 x 1 without specifying a unit of measure. Here I’ll show you how to do this, but first things first…

The risk you run if you don’t watch how your settings are configured and if you don’t watch what you enter in the dialogs, is that Photoshop will not only crop, but also determine the units of measure and resample the image for you.

Default Settings

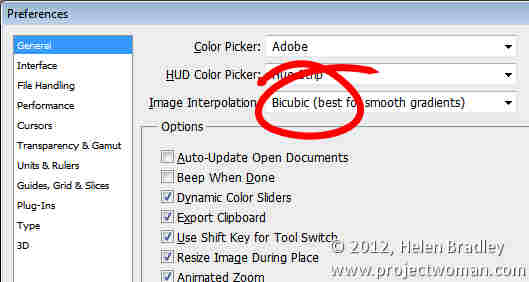
The default units of measure and the default resampling method are set in the program preferences which you can locate by choosing Edit > Preferences > General (Photoshop > Preferences > General) and then read the image interpolation method being used. In this set up it is set to Bicubic:

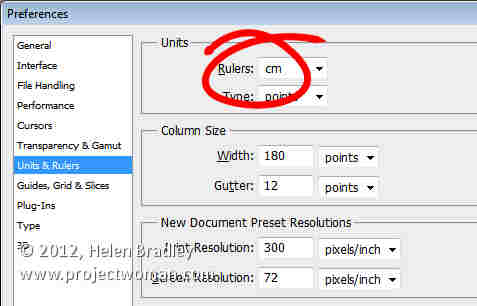
The default units of measure are set in the Units & Rulers options or the Panel options for the Info Palette as the ruler measurements:

If you type a number in the Width and Height boxes when you select the Crop tool in Photoshop then the default units of measure are used unless you also type the desired units of measure. This might not sound like it is a problem but if the default units of measure are pixels and you type 6 x 4 and have the Resolution set to 300 dpi you might end up with a very small size image indeed!

It is not possible to type a number in the Width or Height box for the Crop tool without a unit of measure being applied to it. So, what do you do if you want a 1 x 1 ratio crop not a 1 in x 1 in image?

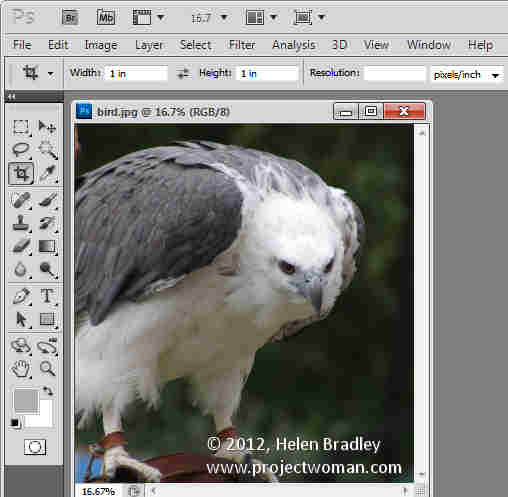
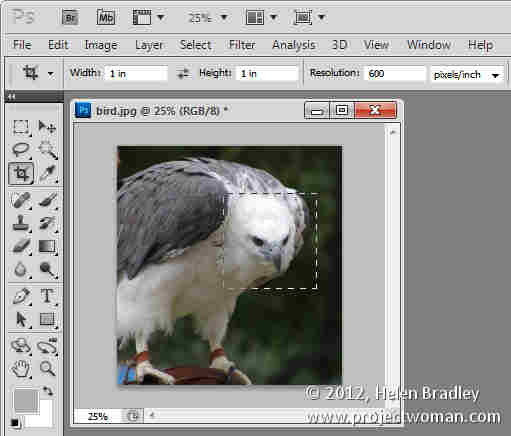
The solution is to type 1in or 1cm in each the Width and Height boxes and ignore the units of measure. Then, remove anything from the Resolution box. When Photoshop is told to crop to a fixed size/ratio and is not told the Resolution to use it crops to the size requested, it doesn’t resample the image, and it simply adjusts the Resolution of the final image to suit the image. It might sound weird but it works to let you crop to a fixed ratio. The problem is of course, that the resulting resolution can be very large indeed.

Here I cropped this image to 1 in x 1 in with no resolution set:

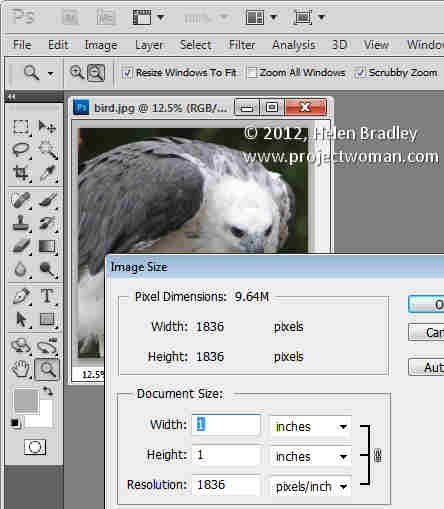
Here are the final image dimensions – the size is 1 x 1 but the resolution is very large:

Change Resolution but not Size

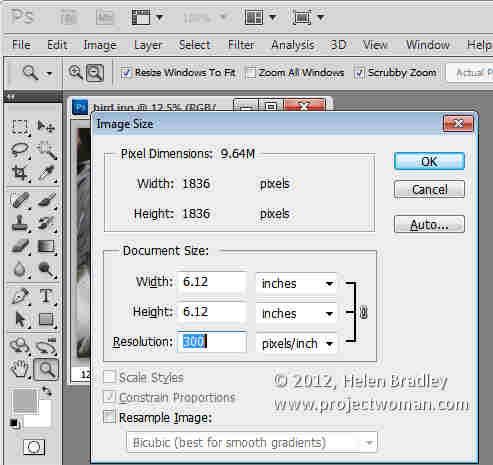
If the resolution of the image is important to you then you can change it by choosing Image > Image Size, disable the Resample checkbox and set the desired Resolution and click Ok to adjust this. This resizes the image to the chosen resolution but does not resample it in the process.

Crop and Resample

On the other hand, if you set a width and height for the image in the Crop tool options and if you set a resolution, Photoshop will crop the image to that size and resolution.

If the image is very large and the desired size is comparatively small then Photoshop will downsize the image and in the process resample the image. If there are insufficient pixels in the image to crop to the desired size and resolution, Photoshop will upsize the image resampling it as it does so.

An Alternate Method

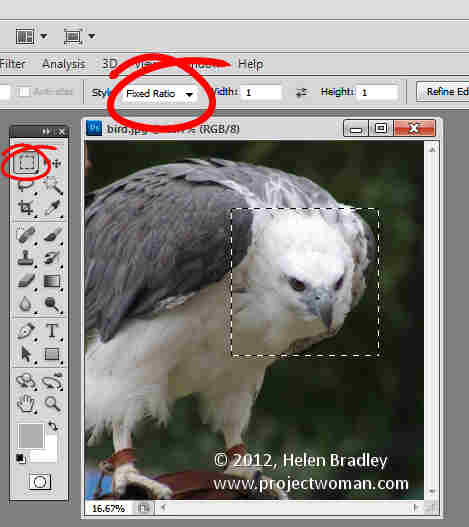
There is an alternative method that lets you crop to a fixed ratio without altering image resolution. It is a little longer but it works well and is bypasses the crop tool entirely. Instead, target the Rectangular Marquee tool and select Fixed Ratio from the Style list and then set the Width and Height as values without measurements. Select the area to keep – if necessary, hold the Space Bar as you are drawing the shape to move it to a new position.

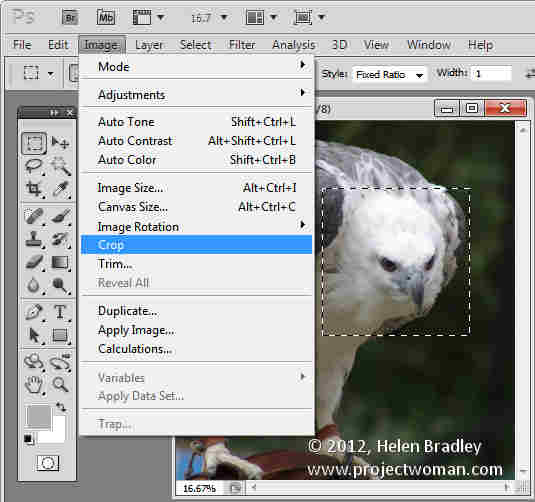
When you ‘re done choose Image > Crop to crop it.

Next time you need to crop to a fixed aspect ratio, one of these methods will ensure you get the result you expect.

Helen Bradley

Wednesday, May 2nd, 2012

Office 2010 – how to save files as templates

Each of the Office applications allows you to configure a look for a document, spreadsheet, publication or presentation and then save it as a template so that you can reuse it anytime.

Templates in PowerPoint 2010

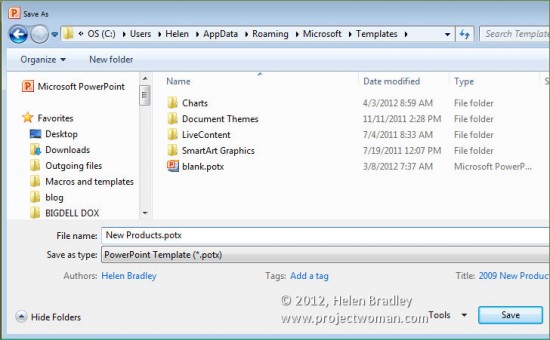
In PowerPoint you’ll create your presentation and then save it using File > Save As and select from the Save As Type list choose PowerPoint Template (*.potx). Give your presentation template a name and click Save.

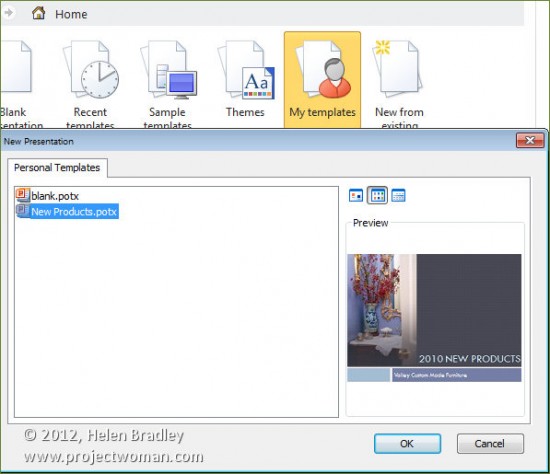
In future you can locate this presentation by choosing File > New > My Templates and click on the template to use it as the basis of a new document.

Templates in Word 2010

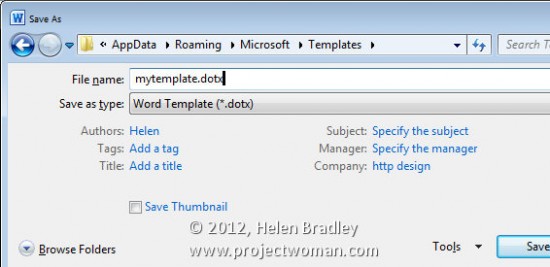
In Microsoft Word choose File > Save As and from the Save As Type dropdown list choose Word Template (*.dotx). In the top left of the dialog click the Templates option to make sure that the template will be stored in the correct location and give the template a name.

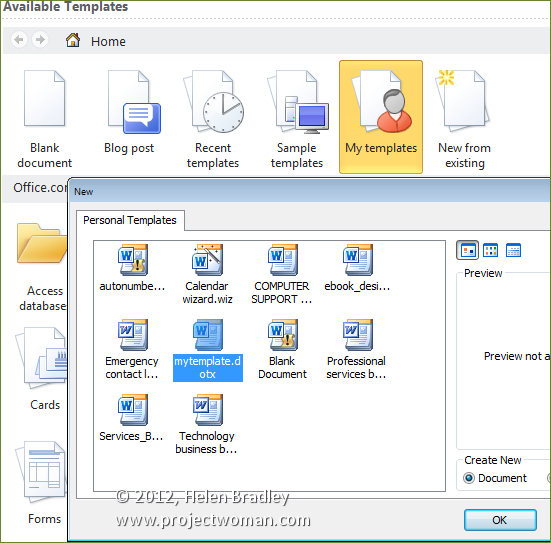
In future choose File > New > My Templates and select the template to use.

Templates in Excel 2010

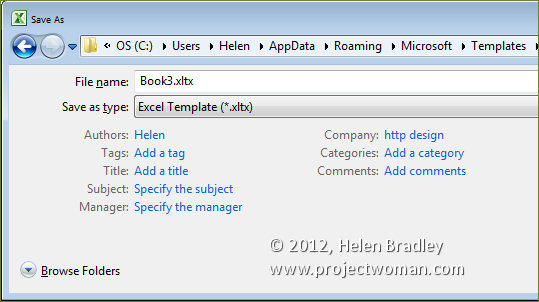
In Microsoft Excel, you can save the look of your document so that it can be used as the basis of a new document by choosing File > Save as and choose Excel Template (*.xltx ) as the file type. Type a name and save the template file.

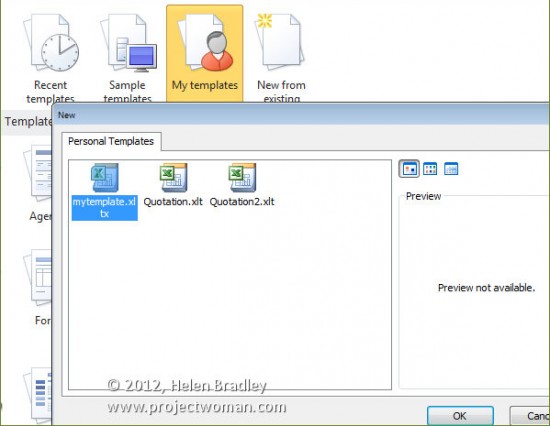
In future you can base a new worksheet on this template by choosing File > New > My Templates and select it from the Personal Templates list.

Templates in Publisher 2010

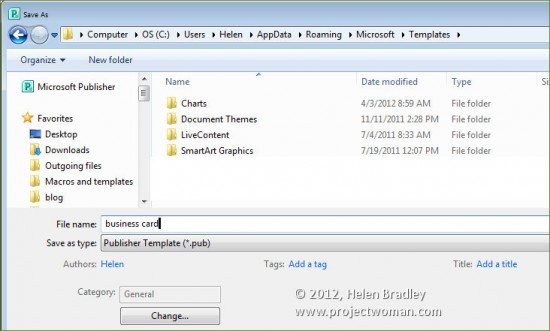
In Publisher you’ll choose File > Save As and then select Publisher Template (*.pub). Type a name for the template and click Save.

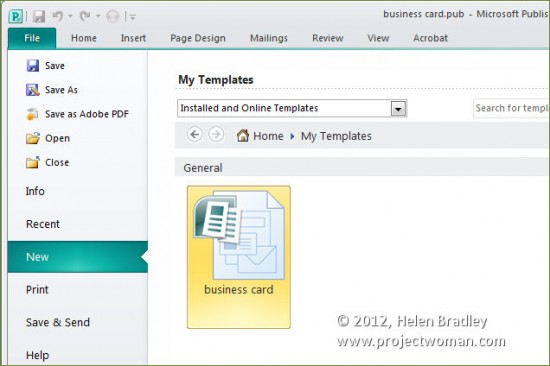
In future you can access this template by choosing File > New > My Templates, select the template and click Create. You may need to close and reopen your software before the new templates are available.

Helen Bradley

Thursday, April 26th, 2012

Harness the power of Business Information sets in Publisher


Publisher’s Business Information Sets make it easy to populate documents with information about people and businesses. You only need type the text once and you’ll know it is always  correct wherever it happens to be used.

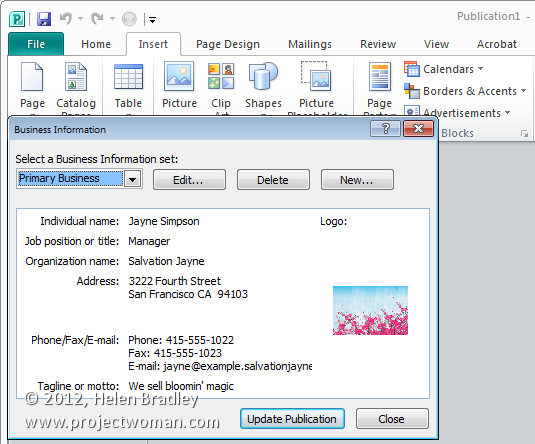
To use these sets, in Microsoft Publisher use File > Info and select the Edit Business Information. Here you can view the information sets that you have available. While they’re called Home/Family, Other Organization, Primary and Secondary Business, you can make them anything you want them to be.

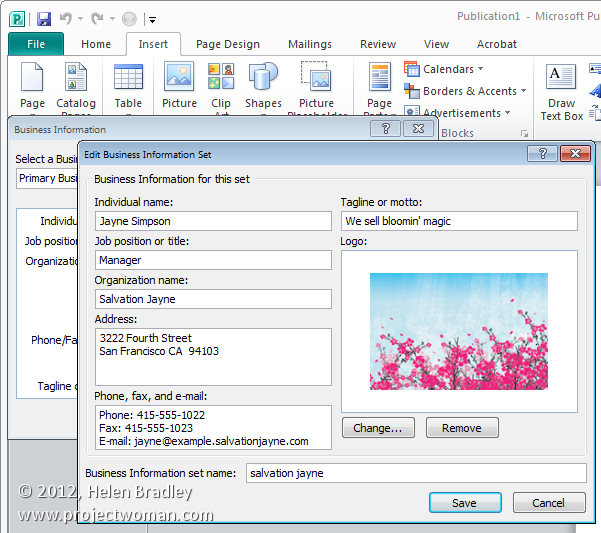
So select an option and click Edit. Enter the information for your business including the person’s name, address and information. Click Add Logo to add a your company logo.

You can also type a new set name in the set name box. By adding to the business information sets details you use frequently, you can use this information in any document later on such as business cards and brochures.

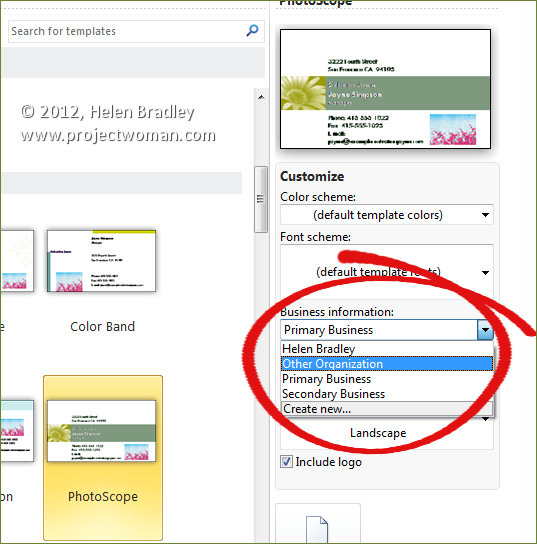
To do this, select the business card template to use and then select the business information set to use with it. You can choose to include your logo or not as circumstances demand. Click Create and the business card will be created for you with all the details already in place.

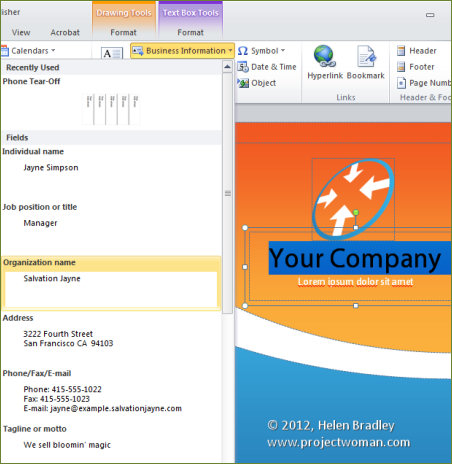
You can also use business information in regular documents by choosing Insert and then from the Business Information dropdown list select the items that you want to use in a document. For example, you can drag and drop telephone information into any document from the business information set.

You can also change the business information in a document. So, if you’ve created a business card and want to do the same thing for another person for whom you have a business information set  created, just choose File > Info > Edit Business Information and select the set to use and click Update Publication. This allows you to quickly change information in documents and create flyers for multiple businesses or business cards from multiple people.

Helen Bradley

Friday, April 20th, 2012

Must know Windows 8 keystrokes

Windows 8 makes a lot of use of keystrokes –  more use than other versions of Windows ever has. Here is a list of handy keystrokes, you won’t use all of them but some are totally awesome for getting around. My fave? This week it is Windows + E! yeah instant access to My Computer – you gotta love it!

Windows key              display the Start menu

Windows + tab           display the task switching panel

Windows + C              reveal Charms

Windows + D              switch to the desktop

Windows + M             switch to the Desktop

Windows + H              Share charm

Windows + I               Settings charm

Windows + K               Devices charm

Windows + L              Lock the screen

Windows + P             shows second monitor options

Windows + Z              display an app’s application bar

Windows + T              Cycle through small images of open apps – press Enter to switch

Windows + Q             Open Metro search charm

Alt + Tab                    Cycle through open apps

Windows + , (comma) Show desktop (temporarily)

Right click an application window                 reveal the application bar

Windows + PrtSc        Capture a picture and save it to the Pictures folder

Windows + Space       change input language and keyboard

Windows + R                          Display the Run dialog

Windows + T                          Cycle through programs on the taskbar

Windows + F                          Find other computers on your network

Windows + E                          Open Windows Explorer and show My Computer

Windows + left arrow             Dock a desktop app to the left of the screen

Windows + right arrow           Dock a desktop app to the right of the screen

Windows + Shift + Up arrow maximize desktop app’s height (width is unchanged)

Windows + Shift + Down arrow        restore/minimize desktop app’s height (width is unchanged)

Windows + 1 (or 2, 3…)         Launch or switch to the application at this position on the taskbar

Windows + Shift + 1 (or 2, 3…)        Launch a new instance of the application at this position on the taskbar

Windows + + (plus)                Magnifier – zoom in

Windows + – (minus)              Magnifier – zoom out

Helen Bradley

Monday, April 16th, 2012

Making Groups in Windows 8

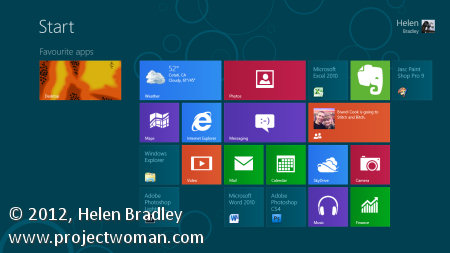
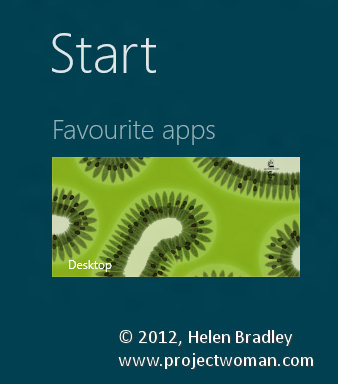
In Windows 8 Metro you can name groups of tiles so they have headings on the Start screen and you can drag groups around. Pity that nothing on the screen makes it clear that this is something you can do.

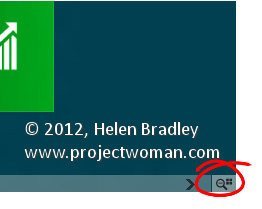
To do this, first use the semantic zoom to shrink the start menu tiles so they are very small.

step 1

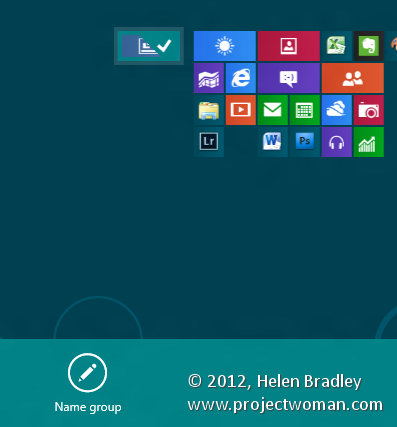
Then right click a tile in the group of tiles you want to name.

step 2

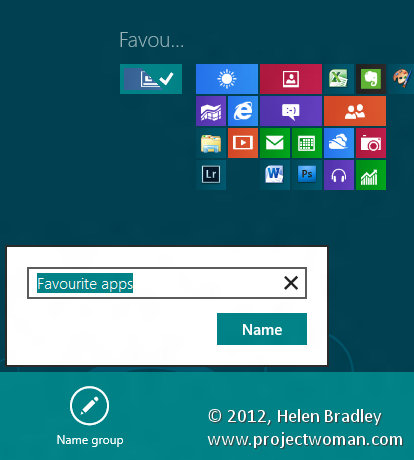
A dialog pops up where you can type the group name. This only appears when you are zoomed out making it hard to find.

step 3

When you’re done, zoom out and you’ll see the group named. You can now drag and drop tiles into the group to help keep things nicely organized on the Windows 8 Metro Start screen.


Helen Bradley

Friday, March 30th, 2012

Print Contact Sheets in Lightroom

By Helen Bradley

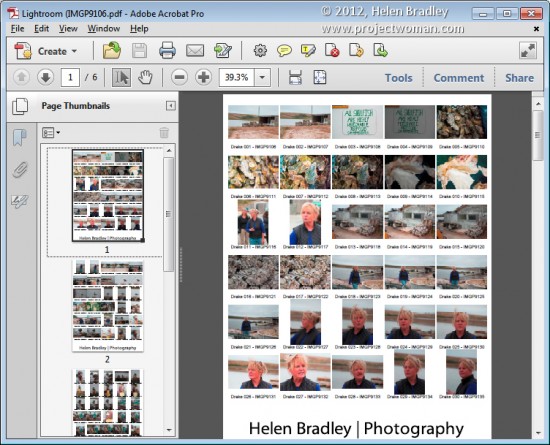
Historically a contact sheet was a page of images each printed at the same size as the film negative – they were used as a reference for the images on the film roll. They were called contact sheets because the film was placed in close contact with the paper when printing them.

These days the term contact sheet loosely means an arrangement of multiple, small, same size images on a single page usually with some identifying information such as the image filename placed under the image. The purpose is to provide reference to a larger number of images. You may print them to keep or give to a client as a catalog of the images from a shoot, for example.

You can create a contact sheet inside Lightroom and here’s how to do it:

Select a template

Start by selecting the folder or the collection that contains the images that you want to add to the contact sheet.

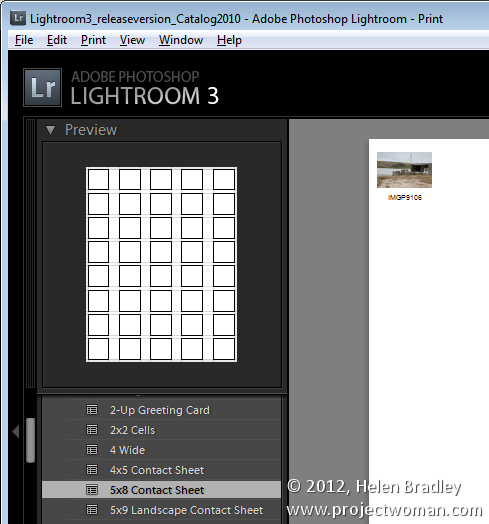
Launch the Print module and, from the Template Browser, select one of the contact sheet options. There are a few grid layouts including two with square image cells – a 4 x 8, and a 5 x 8. There are two with landscape orientation cells – one 5 x 9, and one 5 x 11.

I chose the 5 x  8 one.
Set up the print job

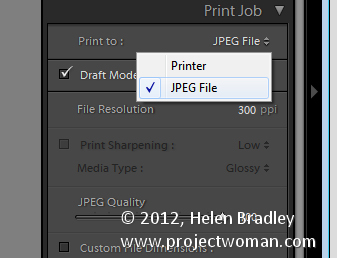
If you plan to ‘print’ the contact sheet to a jpg file, from the Print Job panel on the right of the screen, choose Print to JPG File. As contact sheets are just that – a contact sheet and not full scale images – select to use Draft Mode Printing to speed up their creation.

The page dimensions will be preset for 8.5 x 11in. You can set your own Custom File Dimensions but increasing the size of the page simply changes the page size not the size of the cells – you have to adjust them separately.
Adding images

If you have only one image selected in the Filmstrip then the contact sheet will only display one image.

You’ll need to select all the images on the filmstrip to add them to the contact sheet. To do this, either click on the first image and Shift + Click on the last or select All Filmstrip Photos from the Use: list on the toolbar. If the Toolbar is not visible, press T to display it. You can also select Flagged photos, if desired.

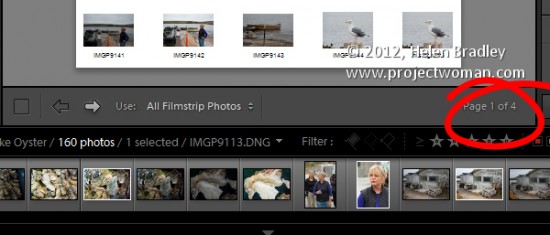
The Toolbar shows you how many pages you will use and you can click the arrow keys on the toolbar to navigate the pages.
Add image captions

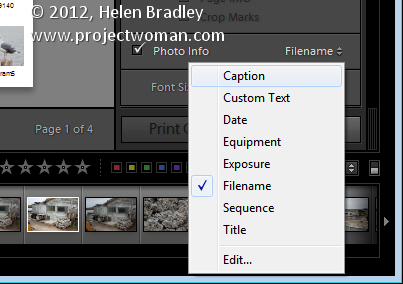
To add information below the images, from the Page panel on the right, select the Photo Info checkbox and choose the field to display. You can use one of the preset options such as Caption, Date, or Filename or click Edit to create your own field.
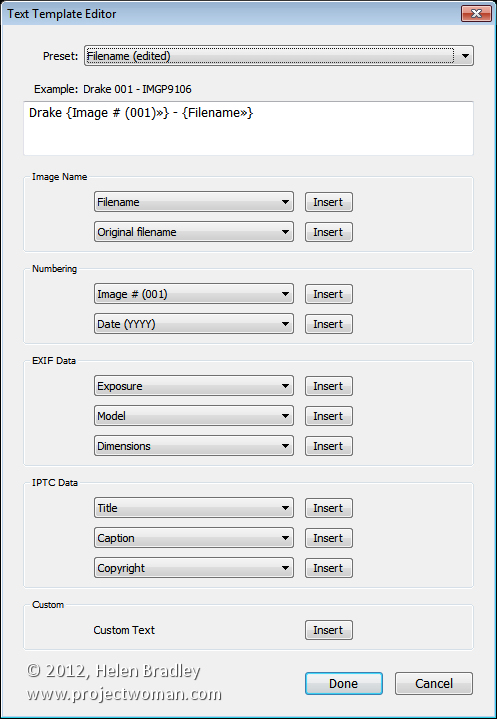
In the Text Template Editor, you can access to fields such as the filename, a sequential numbering or date as well as EXIF and IPTC data. You can also type your own custom text to create detailed photo info to add to the contact sheet. Here I typed some text, added a sequential number and the filename.
Customize the Contact Sheet

The template contact sheets are a starting point but you do not need to strictly adhere to their design if you don’t want to and they can be easily customized.

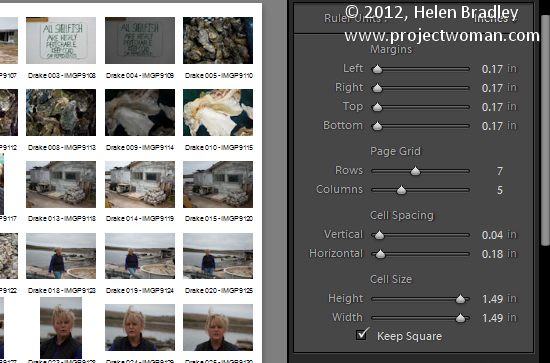
For example, from the layout panel if you click the Keep Square checkbox you will find that in some layouts your images may change orientation so the page will be a mix of portrait and landscape images.

You can adjust the maximum cell size and width using the Cell Size Height and Width sliders in the Layout panel. As you adjust the cell size, notice that the Cell Spacing values will change.

You can decrease the number of rows and/or columns using the Page Grid options. By decreasing the number of rows or columns, you can increase the cell size.
Adjusting margins

If you increase the Bottom or Top margin you can give yourself room to, for example, place an Identity Plate on the page.

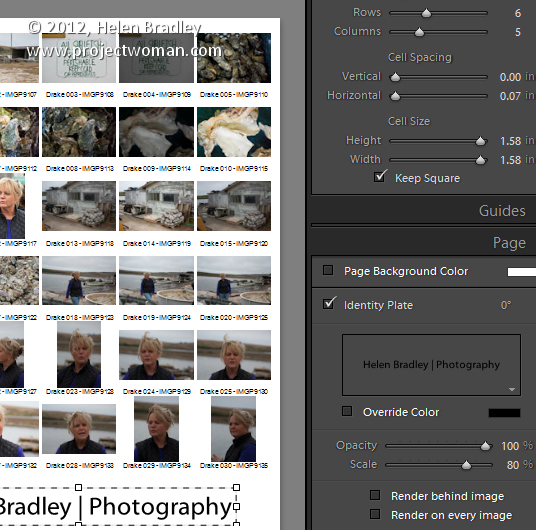
Here I’ve reduced the number of rows and increased the bottom margin and added an Identity Plate from the Page panel options. In the Page panel, select the Identity Plate checkbox and then select the Identity Plate to use.

The Identity Plate will appear, by default, in the middle of the page so drag it into position on the page. Adjust its scale by dragging on the Scale slider.

You can adjust its Opacity if desired and, if it is a text identity plate (rather than a graphic), you can also select Override Color to make it any color you like.
Print the result

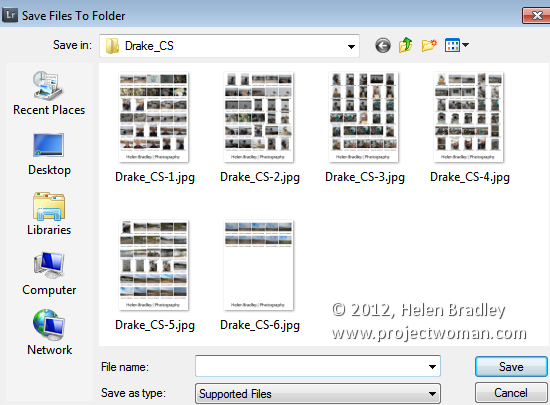
When you’re done, you’re ready to output the result. If you selected to print to a JPG file click Print to File and type a name for the file and select a location for them. The pages will be printed to a JPG file and if there are more than one they will be sequentially numbered.
Print to PDF

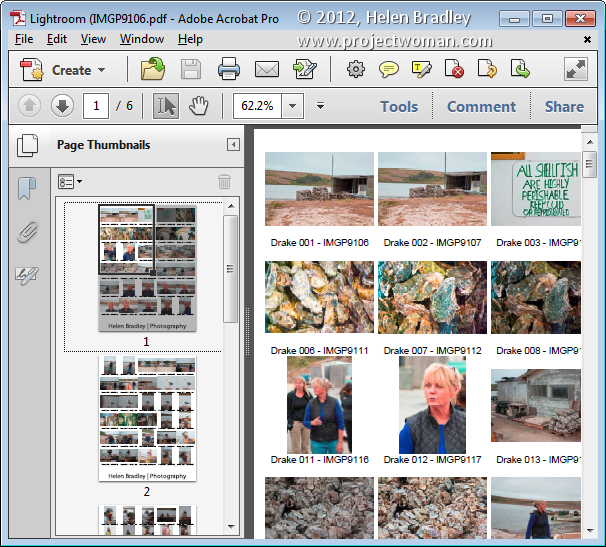
If you want to print to a PDF on a Windows machine you will need to have a PDF printer driver installed such as Adobe PDF or one you have downloaded from the web.

Select Page Setup, select the pdf printer driver and configure the page size so it matches the template size – such as letter paper portrait orientation. Then set the Print to: option in the Print Job panel to printer and click Print to print to a pdf.
Save the Template

If you have customized a template and want to be able to use it again in future, save the design as a new template.

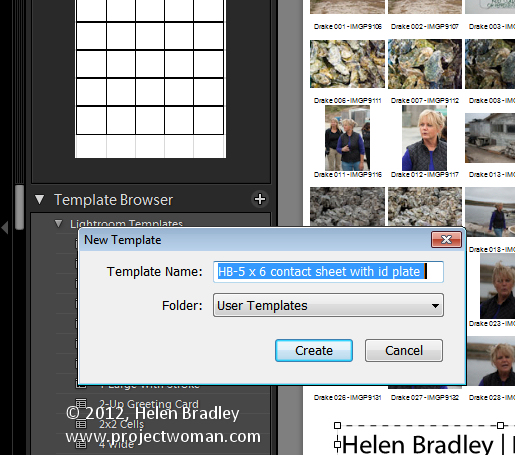
Click the plus symbol opposite the Template Browser panel header and type a name for your template. You can store it in User Templates or create a new folder for it. Click to create it.

In future you can save yourself the time setting up the template by starting with your customized version.
Helen Bradley

Sunday, March 25th, 2012

Use Lightroom Presets in Adobe Camera Raw

If you’re like me, you have some presets that you’ve created in Lightroom that you would like to use in Adobe Camera Raw. Unfortunately the format of the preset files in each program is different so you can’t just install a Lightroom preset in ACR. However you can make an ACR preset from a file that has had that same preset applied to in Lightroom. Here’s how:

Apply the Preset

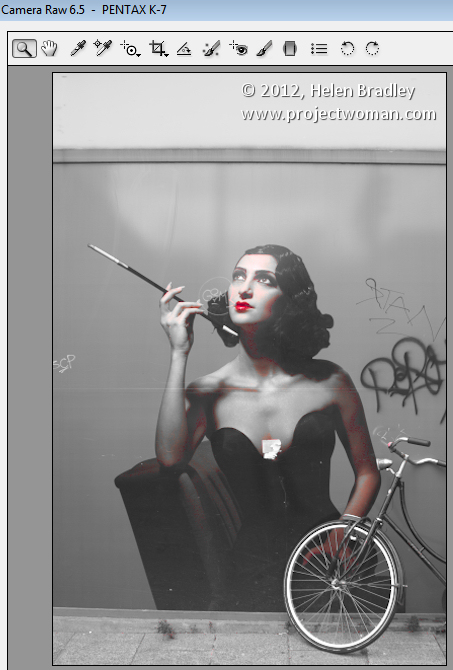
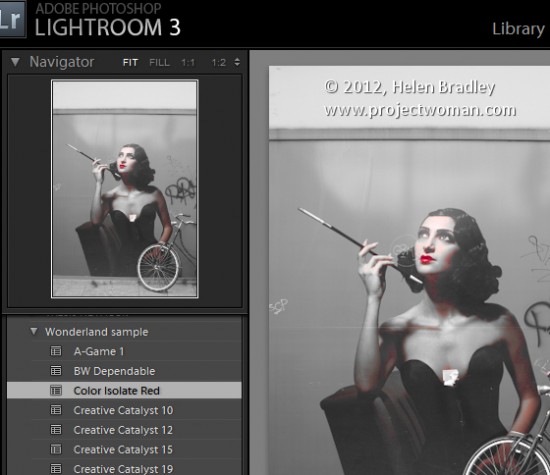
To begin, open an image in the Develop module in Lightroom. Without applying any other changes to the image, apply the Preset that you want to take to ACR. Here I have applied one of the free Wonderland presets from wonderlandpresets.com.

Export the Image

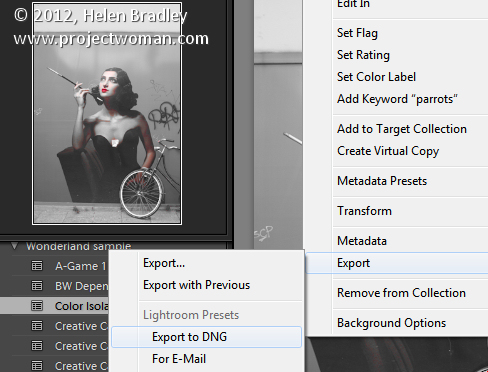
Now export the image as a DNG file so that the changes will be written to the file. To do this, right click the image and choose Export > Export to DNG and export the image to folder of your choice.

Open in ACR

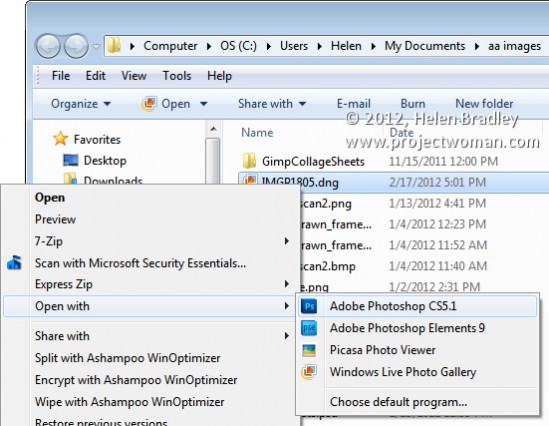
Launch Windows Explorer and locate the image on disk. Right click it and choose Open With > Photoshop CS5. Because it is a DNG file, it will open automatically in ACR.

Create the Preset

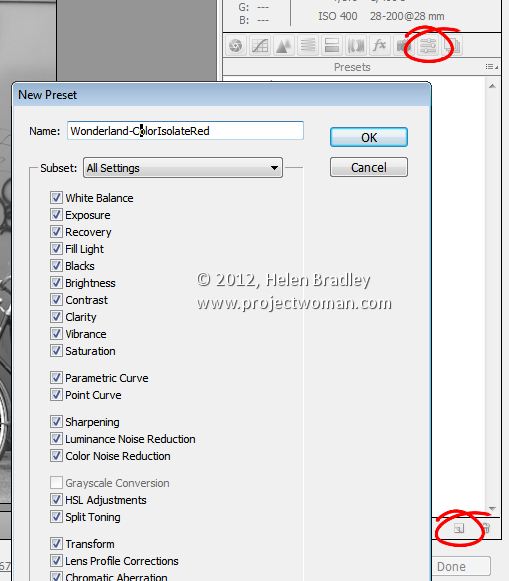
Click the Presets tab and click the Create New Preset option at the foot of the Presets panel. Type a name for your preset and then select the options that you want to include as part of the preset. Type a name for the preset and click Ok.

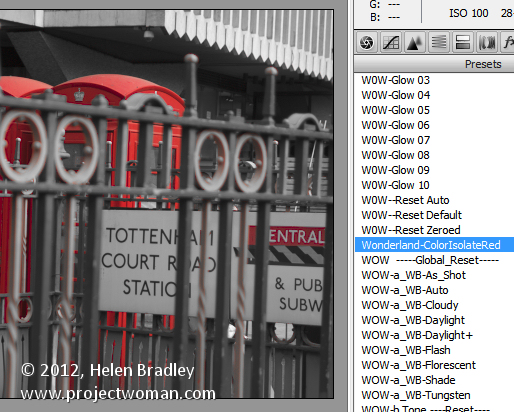
The preset will now be available from the Presets panel in ACR and will be able to be used to adjust any image.

Features not included

You should note that while most of the Lightroom adjustments that can be stored in a Lightroom Preset can also be saved as an ACR Preset, one exception is any Graduated Filter adjustment.

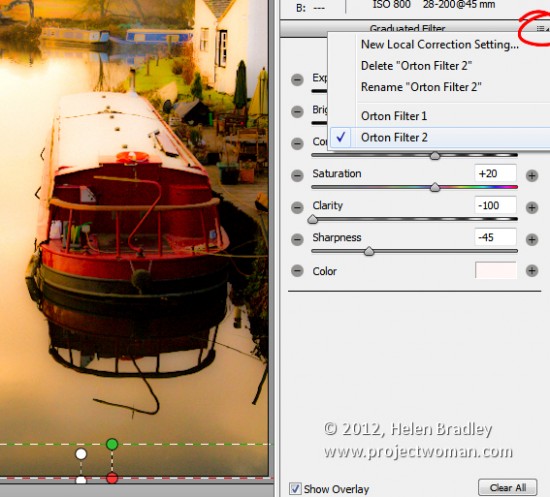
In Lightroom any adjustments you make using the Adjustment Brush cannot be saved in a Lightroom preset and in ACR those made using the Graduated Filter cannot be saved either. You will see the Graduated Filter adjustments that you made in Lightroom in ACR if there are any but you cannot save them in your preset as a Graduated Filter adjustment. What you can do however, is to save the settings for the Graduated Filter but not its placement as a separate setting. To do this, click the Graduated Filter icon in ACR to select the tool then click the Graduated Filter to save the settings for. Click the icon in the top right of the Graduated Filter panel and choose New Local Correction Setting and save it giving it a name.

You can apply this to an image in future using the Graduated Filter tool – just select the setting to use from this menu and drag to create the Graduated Filter for the image. The solution isn’t perfect but it can save you some work as shown here with the two Graduated Filters which are part of my Orton Preset for Lightroom. I can apply the preset then switch to the Graduated Filter and quickly apply the two Graduated Filter adjustments with their individual settings.

Advantages of taking Lightroom presets to ACR

One of the reasons you may want to take presets from Lightroom to ACR using this process is to take advantage of the free presets available for Lightroom. There are lots more of these than there are presets for ACR. If you use ACR as well as Lightroom then having your favorite presets available in both program will be useful.

Helen Bradley
Page 10 of 12« First89101112